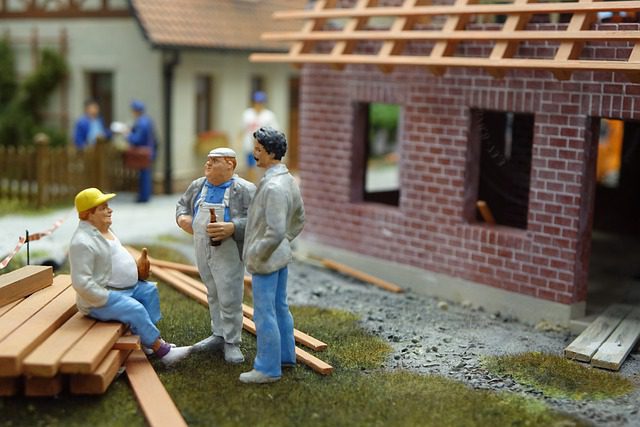
When it comes to roofing, one size certainly does not fit all. The distinctions between commercial vs. residential roofing stretch beyond mere scale and delve into intricacies like design, material choices, and purpose. Each type serves a unique set of requirements and faces its own challenges.
Whether you're a business owner deliberating on the best roofing solution for your enterprise or a homeowner pondering over shingle types, understanding these key differences is crucial. This article delves deep into the nuances of commercial and residential roofing, highlighting their disparities and considerations to help you make informed decisions for your structures.
Dive in to explore everything from design variations and material options to installation techniques and cost implications.
When it comes to the world of roofing, both residential and commercial structures have their unique design characteristics and structural requirements. These differences are not merely for aesthetic reasons; they also cater to specific functional needs and challenges that each type of building presents.
Let's explore the primary design and structural distinctions between the two:
In conclusion, while the fundamental objective of residential and commercial roofs is to protect the structure below, the design and structural challenges they each face are distinct. Understanding these differences is vital for making informed decisions about roofing materials, design choices, and maintenance strategies.
Both residential and commercial roofs have distinct requirements, resulting in varied material preferences. These choices reflect each roofing type's specific demands, design considerations, budget constraints, and longevity expectations. Here's a breakdown of the popular materials used in both sectors:
Factors like climate, building needs, structural capacity, and budget are crucial when choosing materials. The objective is to prioritize protection, durability, and value. Collaborating with roofing experts ensures decisions tailored to individual needs.
When embarking on a roofing project, understanding the expected duration and the techniques employed is essential. Both installation time and technique can vary significantly between residential and commercial roofing due to their distinct characteristics and requirements.
Let's break down the differences:

Residential roofing is simpler with faster completion, while commercial roofing demands a detailed approach due to its size and unique needs. Regardless of the project, partnering with expert roofers ensures top-quality installation, long-lasting effectiveness, and enduring performance.
Roofs’ exposure to varying conditions necessitates periodic maintenance and inevitable repairs. However, the approach and frequency differ between residential and commercial roofs due to their inherent design and material differences.
Here's a closer look at the maintenance and repair considerations for each:
In a nutshell, regular roof maintenance, whether for homes or businesses, can prevent costly repairs. Addressing small issues early and collaborating with expert roofers keeps the roof in top shape, ensuring the building and its occupants remain protected from the elements.
One of the most pivotal factors in any roofing decision is cost. Both initial installation and long-term expenses play a significant role in determining the roofing choice for residential and commercial structures.
Here’s a detailed look into the cost considerations for each:
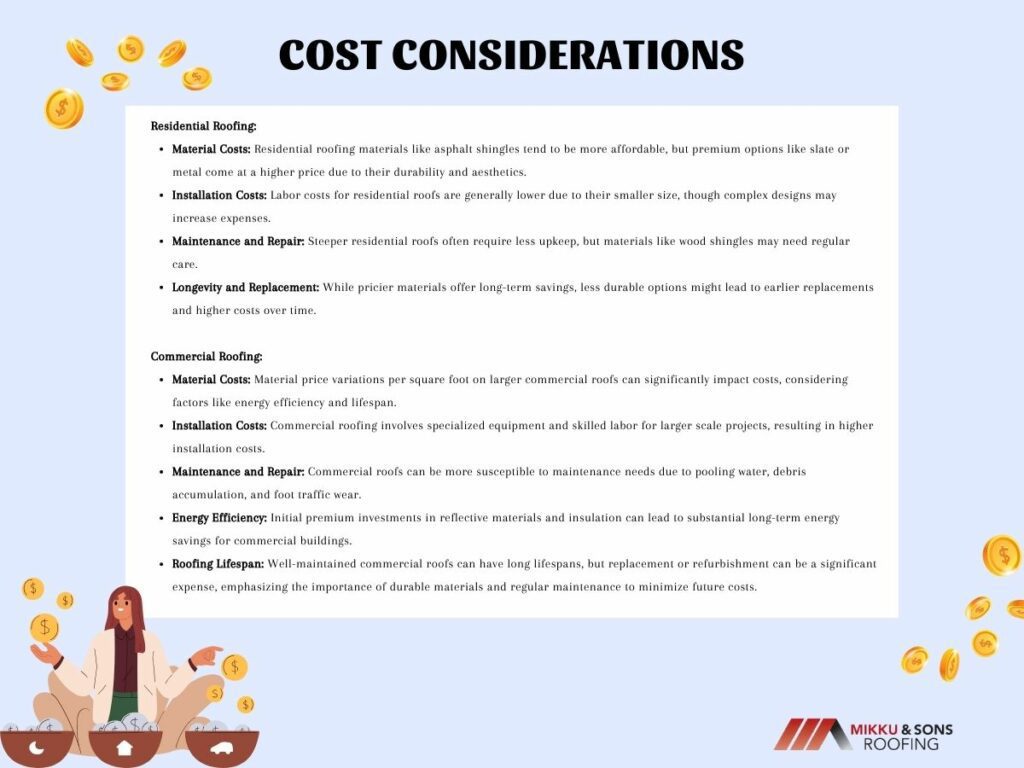
While the initial installation cost is a crucial factor in residential and commercial settings, it's essential to consider the bigger picture. Long-term costs related to maintenance, repairs, energy efficiency, and replacement intervals can influence the overall financial implications of a roofing choice.
It's always recommended to consult with roofing professionals to get detailed estimates and understand the cost-benefit analysis of different roofing options.
The world of roofing is vast and varied, with each type tailored to meet specific needs and challenges. Commercial and residential roofing, while sharing the core objective of protection, have marked differences in design, materials, installation, and maintenance.
Whether you're safeguarding a family home or a bustling business hub, being informed about these distinctions is essential. By understanding the unique considerations of each, property owners can ensure their roofing choices not only offer optimal protection but also provide value for money.
Collaborating with seasoned roofing professionals will guide you in making decisions that stand the test of time, weather, and wear.
When it comes to maintaining commercial roofs, the importance cannot be overstated. Not only does it protect your investment, but it can also save you a considerable amount of money in the long run. So, what are the best practices for maintaining commercial roofs?
In this blog, we'll explore the significance of commercial roof maintenance, the cost-saving benefits it offers, and how it can extend the lifespan of your roof. Additionally, we'll delve into essential practices such as inspection, cleaning, gutter maintenance, roof repairs, and more.
Commercial roofs are the unsung heroes of your business infrastructure. They shield your valuable assets, equipment, and employees from the elements day in and day out.
However, they are also constantly exposed to harsh weather conditions, UV rays, and wear and tear. Commercial roofs can quickly deteriorate without proper maintenance, leading to costly repairs and premature replacement.
Regular roof maintenance offers several crucial benefits:
Investing in regular commercial roof maintenance may seem like an additional expense, but it's a smart financial decision. Here's how it can save you money:
Commercial roofs are designed to last, but they need care to fulfill their potential lifespan. Here's how proper maintenance can help prolong the life of your roof:
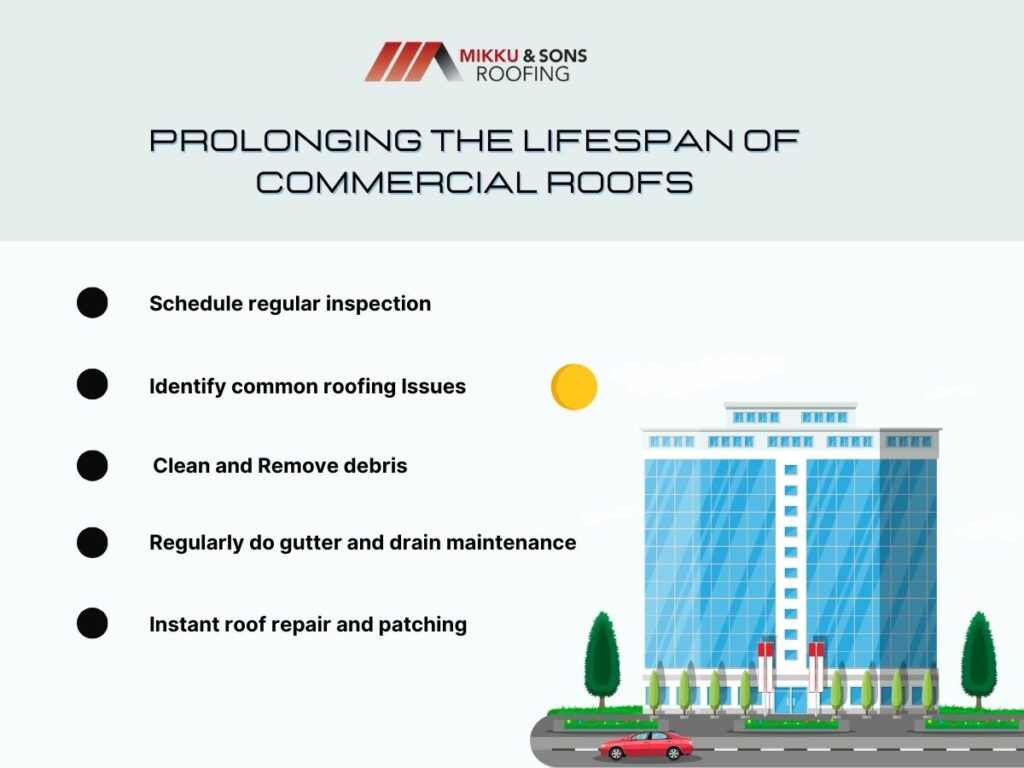
Scheduled inspections are the backbone of effective roof maintenance. By inspecting your roof at least twice a year, you can catch issues in their early stages, preventing them from becoming major problems.
Understanding the common problems that afflict commercial roofs is crucial. These include:
A clean roof is a healthy roof. Here's why cleaning and debris removal matter:
Proper drainage is essential for a healthy roof. Here's how to maintain gutters and drains:
Addressing issues promptly can prevent them from worsening. Here's how to tackle roof repairs:
Commercial roofs are a significant investment for any business, and their lifespan can vary depending on various factors.
The longevity of a commercial roof depends on the type of roofing material used, the quality of installation, the local climate, and the level of maintenance it receives. Here's a general overview of how long commercial roofs can last:
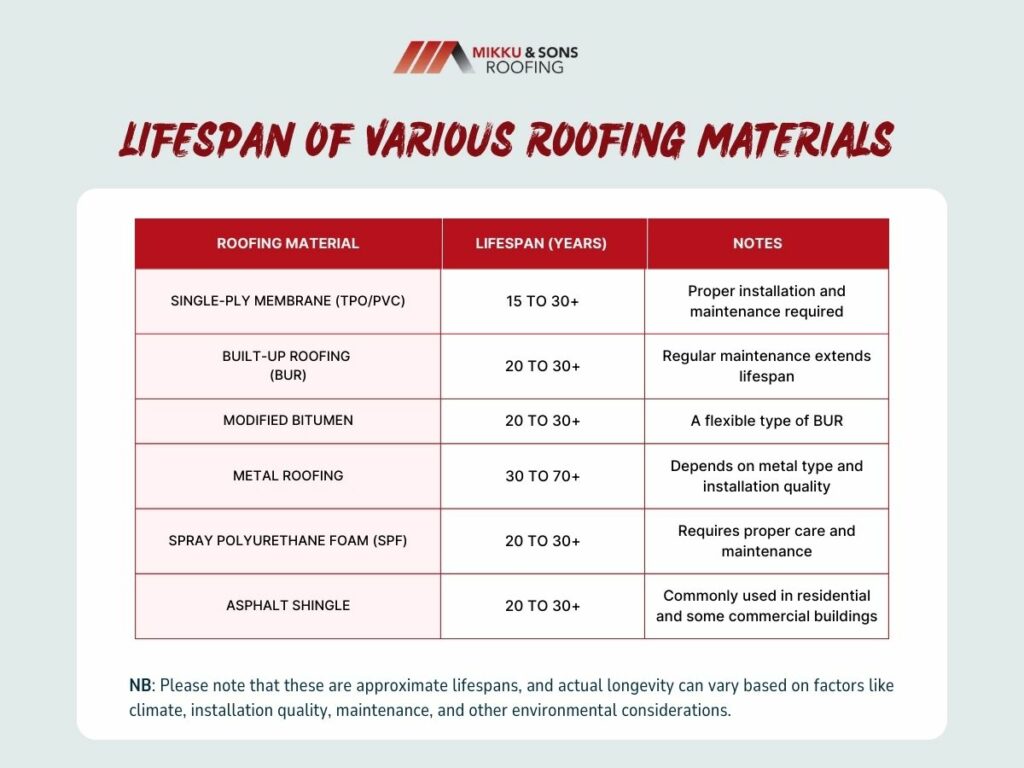
It's essential to note that environmental factors can significantly influence the lifespan of a commercial roof. Roofs may wear out more quickly in areas with extreme weather conditions, such as intense heat, heavy rainfall, or severe storms.
Additionally, proper maintenance plays a crucial role in extending the life of a commercial roof. Regular inspections, restorations, and cleaning can help identify and address issues before they become major problems.
The importance of maintaining your commercial roof cannot be overstated. It serves as a crucial shield protecting your investments and assets. By investing in regular maintenance, you not only save on costly repairs but also extend the lifespan of your roof, ensuring long-term durability and energy efficiency. From inspections to cleaning, gutter maintenance, and timely repairs, these best practices are your key to safeguarding your commercial space and financial well-being.
Roofing is a critical component of any home, as it provides protection from the elements and contributes to the overall aesthetic appeal. While there are various roofing materials to choose from, metal roofing has become increasingly popular among homeowners due to its numerous advantages.
However, like any material, metal roofing comes with its own set of drawbacks. This article will explore the pros and cons of metal roofs for your home.
Metal roofs have become an increasingly popular choice as they offer numerous benefits. In fact, metal roofs have emerged as an attractive alternative to traditional roofing materials.
Here are some advantages of metal roofs, providing homeowners with the information they need to make an informed decision.
One of the most significant benefits of metal roofing is its exceptional durability. Metal roofs are resistant to cracking, shrinking, and eroding, making them an excellent choice for long-term use. They can withstand harsh weather conditions, including heavy rain, hail, snow, and high winds.
With proper maintenance, a metal roof can last for 40 to 70 years or more, far outlasting traditional asphalt shingle roofs, which typically last for 20 to 30 years.
Metal roofs are highly energy-efficient due to their reflective properties. They reflect solar radiant heat, reducing the amount of heat absorbed by your home. This can decrease cooling costs during hot summer months by up to 25%, saving you money on your energy bills.
Metal roofs also provide better insulation during colder months, helping to maintain a comfortable indoor temperature and reducing heating costs.
Metal roofs are eco-friendly, made from recyclable materials, and can be recycled at the end of their life cycle. This helps reduce the environmental impact of roofing waste in landfills. Additionally, the energy efficiency of metal roofs can contribute to a smaller carbon footprint for your home.
Compared to other roofing materials, metal roofs require minimal maintenance. They are resistant to mold, mildew, and pests, reducing the need for frequent repairs or replacements. Occasional inspections and cleaning are generally all needed to maintain a metal roof's longevity and performance. This low maintenance aspect can save homeowners both time and money in the long run.
Metal roofs come in a wide range of colors, styles, and finishes, allowing homeowners to select a design that complements their home's architecture and personal taste. Modern metal roofing materials can mimic the appearance of other materials, such as wood shakes, clay tiles, or slate, providing a sleek and sophisticated look. Metal roofing can enhance the overall aesthetic of a home, potentially increasing its resale value.
Metal roofs are non-combustible, making them an excellent choice for fire-prone areas. They have a Class A fire rating, the highest rating available for roofing materials, which can provide homeowners with peace of mind and potentially lower insurance premiums.
Metal roofing materials are relatively lightweight compared to other options like tile or slate. This reduced weight puts less stress on your home's structure, making metal roofs an ideal choice for both new construction and re-roofing projects.
While metal roofs have gained popularity due to their numerous benefits, it's essential to be aware of the potential drawbacks associated with this type of roofing material. With that, here are some disadvantages of metal roofs, providing homeowners with a comprehensive understanding of the potential challenges they may face when choosing this roofing option.
One of the primary drawbacks of metal roofing is the higher upfront cost compared to other materials like asphalt shingles. The investment can be substantial, but it's important to consider the long-term benefits, such as durability, energy efficiency, and low maintenance.
In many cases, the overall cost of ownership may be lower over time, but homeowners must be prepared for the initial expense.
"Our real estate company buys houses in Mishawaka, IN and metal roofs are popluar style there. We have noticed a lot of real estate compnanies that fix and flip properties will install shingle over metal roofs in most cases because of the economics. However, if its your home and you want it to stand out then metal roofs are great in boosting your curb appeal!"
Matt Vukovich | Real Estate Investor in Mishawaka, IN

During heavy rain or hailstorms, metal roofs can be noisier than other roofing materials. The sound of raindrops or hail hitting the metal surface may be distracting or disruptive for some homeowners. However, this issue can be mitigated by installing proper insulation or noise-reducing underlayment during installation.
Metal roofing installation requires skilled professionals with experience in handling the material. Choosing a reputable and experienced contractor for the installation is essential to avoid any potential issues down the line. Improper installation can lead to leaks, poor performance, and reduced lifespan.
Additionally, finding a qualified installer in your area may be more challenging compared to finding an installer for more common roofing materials.
Metal roofs can expand and contract as the temperature changes, which may cause some panels to become loose or warp over time. However, modern metal roofing systems are designed to accommodate these changes, and proper installation can minimize potential issues.
Nevertheless, the expansion and contraction in extreme temperature fluctuations may lead to more significant problems that require repairs or roof replacement.
In the event of damage to a metal roof, repairs can be more complicated and costly than with other materials. In some cases, it may be necessary to replace entire panels rather than repairing small sections. This can make repairs more expensive and time-consuming.
Additionally, finding a contractor skilled in metal roof repair may be more challenging, as it requires specialized knowledge and expertise.
While metal roofs are highly durable, they are not entirely immune to damage. Metal roofs can become dented in extreme cases, such as severe hailstorms or falling debris.
Some types of metal roofing, like aluminum and copper, are more prone to denting than others, like steel. While dents do not necessarily compromise the roof's performance, they can be unsightly and may require professional repair to restore the roof's appearance.
While metal roofs are available in various styles and colors, they may not fit every home's aesthetic best. Some architectural styles, like traditional or historic homes, may not be compatible with the modern look of a metal roof. In these cases, alternative roofing materials may be more appropriate to maintain the home's overall aesthetic.
Metal roofs are an increasingly popular choice for homeowners seeking a durable, energy-efficient, and environmentally friendly roofing option. While the initial cost may be higher than other roofing materials, the long-term savings in maintenance and energy costs can make it a wise investment.
However, it is essential to consider the potential drawbacks, such as noise, installation challenges, and limited repair options. By carefully weighing the pros and cons of metal roofs, homeowners can decide on the best roofing material for their unique needs and preferences. Ultimately, a well-installed and maintained metal roof can provide lasting protection and curb appeal for your home.
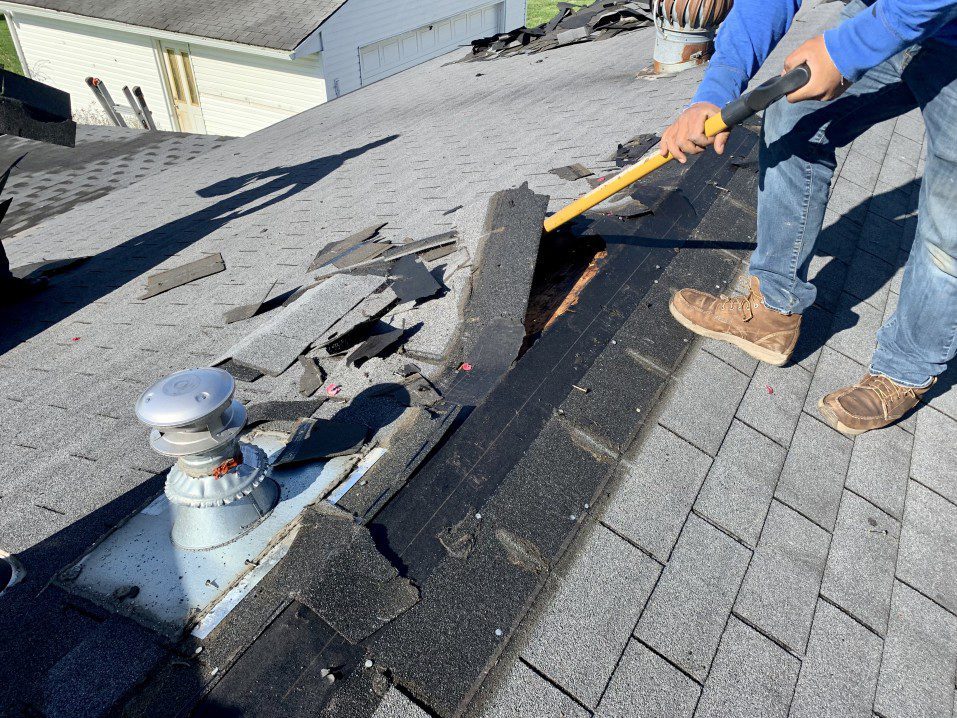
It is anticipated that tile roofing should endure a lifetime. Nevertheless, there are situations when it needs to be fixed owing due to leaks caused by slipping, cracking, or sagging, defective flashing, or a worn-out underlayment. Making repairs as quickly as feasible is critical.
Damage gets gradually worse if not corrected. The repair prices and considerations for these materials are distinct from those for other types; if they need to be serviced or repaired, it is essential to have a good hold on them.
Damage could arise from a range of different sources. Wind, ice, debris, hail, and even the sun's heat all cause damage to a roof over time.
When a roof of this type is damaged, it usually only affects a single tile at a time. In most circumstances, you will not have to replace all of the tiles on the roof. Only damaged ones will need to be replaced, but it's always advisable to get an expert opinion to see how bad the damage really is.
In other circumstances, the repair might not even require new tiles. Alternatively, you might have the current tiles repaired. When the tiles are damaged, they can potentially cause leaks, which can, in turn, generate additional damage to the roof. Damage to the building's interior from leaks is also possible and can be expensive to repair.
| Repair cost | Price |
| Material | Composite tiling: $10 and $20.50 per sq ft Plain tile: $8 to $9 per sq. ft Terracotta tile: $11 to $23 per sq ft Slate: $12 and $14 per sq ft |
| Style | Plain tile: $8 to $9 per sq. ft Pantile tiling: $8 to $10 per sq ft Mission tile: $9 to $11 per sq. ft Roman tile: $9 to $11 per sq ft Spanish/ Mediterranean tile: $8.50 to $11 per sq ft French tiling: $9 and $11 per sq ft Interlocking tiling: $9 to $11 per sq ft Tile repair: $9 to $11 per sq ft Scandinavian tiling: $12-$14 per sq ft |
| Problem | Slipped tiling: $8 - $13 per sq ft Sagging: $15 to $25 per sq ft Flashing costs: $25 to $30 Repairing a crack: $25 to $50 per tile Leak repair: anywhere from $150 to $500. |
Repairing a tile roof can cost anything from $900 to $2,300 across the country. Steel tiles damaged by area damage on a 1,500 square foot roof typically cost roughly $1,800 to repair. The least expensive option available is approximately $500 to repair metal flashing that is damaged or missing. Repairs of deteriorated underlayment and replacing the roof at the high end could cost up to $8,000.
How much does it cost to repair a tile roof in Arizona? Many factors can affect the cost, e.g., the type of material and quantity of tiles that need to be replaced or repaired. Concrete, lightweight concrete, metal, and clay are all possibilities.
Tile Roof Repair Cost by Material
The cost of repairing a tiled roof ranges from $8 to $23. The material has an impact on it. Prices for various types of materials might differ significantly. When compared to other types, some demand more in the way of materials and labor. Concrete is the cheapest option, while clay or composite is in the middle of the cost spectrum. The table below includes the most popular types of materials available and their repair costs per square foot.
Cost of Tile Roof Repair by Style
The style impacts the repair expense, ranging from $8 to $14 per sq. ft., depending on the style of tiling. When completing your study, you will notice the many styles available on the market. All styles differ in appearance, texture, and cost. Style is a component that also affects the price you pay. A flat style is less expensive than a Roman style since it is more straightforward. Below you'll find a table that illustrates the relative costs of repairing various cost styles.
Tile Roof Repair Cost by Problem
Your structure is a considerable investment that carries out the crucial duty of protecting you and all of your assets. Ignoring any tiny problem now can lead to significant problems later on. Some typical issues include leaks, sagging, slid tile, cracked tiling, and damaged flashing. The price of tile repair by problem ranges from $8 to $25 per sq. ft. and $25 to $500 per problem.
Sixty percent of the overall repair costs range from $900 to $2,300. $540 to $1,380 will be spent on labor, with materials accounting for the remaining 40 percent. A professional might be engaged to complete repairs at $45 to $75 per hour for labor.
If your style is out of the ordinary or the slope is steeper than average, your labor costs will rise. The repair process starts with visually inspecting the structure to establish the issue and the necessary repairs.
Then, they will negotiate a repair strategy, which may involve removing and replacing damaged components. Repairs aren't always necessary for the entire piece. The repair needed directly influences the project's cost and duration. Even the tiniest of repairs require at least two hours to accomplish.
| Project | Cost |
| Tile restoration | $300 to $600 and up to $6,000 to $11,000 |
| Tile replacement | $5.50 to $36 per square foot |
| Underlayment replacement | $0.50 and $2 per square foot |
| Roofing felt replacement | $0.50 and $1 per square foot |
| Synthetic roof underlayment | $0.75 and $2 per square foot |
Minor restoration projects, such as cleaning the gutters, might average between $300 and $600, depending on the size of your structure. However, a thorough restoration costs around $2,500 for an average property.
Prices might range from $6,000 to $11,000, depending on the scope of the work. Restoration is the process of extending your structure's longevity, offering you a cheaper option than a complete replacement.
Over time, tiles can be damaged by several factors, including extreme weather, infestation, or falling debris. This technique entails cleaning, repairing, or replacing any broken, damaged, or cracked surface. Protecting the surface with a clear coat prevents any further damage.
If the materials need to be replaced, you may spend roughly $5.50 to $36 per sq. ft. The replacement cost includes removing the current materials and discarding the old ones, underlayment, materials, and installation.
Although it can appear expensive to replace tiles, it is occasionally a more practical alternative than repair. If your anticipated price to repair is more than half the replacement price, you may want to consider a total replacement instead. Several positives to consider regarding a replacement, including having all concerns repaired at once.
If you opt to repair one area of your structure, another area might need repair later. Long-term savings are realized by having your structure repaired instead of replacing the existing one.
Depending on the material, replacing an underlayment costs between $0.50 and $2 per square foot. The underlayment between the tiles and the deck acts as a protective barrier, keeping the surface dry and free of leaks and damage caused by the elements.
Repairing or replacing a structure often necessitates replacing the old underlayment, especially if the structure is more aged. A robust underlayment protects your structure if damaged and can prevent many severe problems from developing, including leaks.
Underlayment is typically included in the project cost, but it never hurts to double-check.
Felt, commonly known as asphalt-saturated felt, has been a standard underlayment material for construction types for decades. The material is comparable to tar paper but combines polyester, cellulose, bitumen, and asphalt soaked in a waterproofing agent.
It costs between $0.50 and $1 per square foot to replace the felt underlayment, including the materials and labor. It's available in two weights: 15 lbs. and 30 lbs.
Compared to the 15-pound type, the 30-pound class is significantly thicker and more rigid. As a result, the 30-pound felt is an excellent option due to its resistance to damage from the elements.
It costs between $0.75 and $2 per square foot to replace synthetic underlayment, including supplies and labor. Underlayment should be replaced if damaged or exposed for an extended time. Professionals currently employ synthetic underlayment as their primary underlayment.
Compared to paper or asphalt, durable plastics like polyethylene and polypropylene are commonly used in synthetic underlayment. Exceptional strength, flexibility, and waterproofing characterize this underlayment, making it resistant to mold and other fungi.
This tear-resistant substance stays smooth and rarely tears around fasteners. It holds up nicely against UV damage and light.
As a result of its sturdiness and endurance to the harshest conditions, tile is a popular flooring choice for many homes. Maintaining and giving reasonable care to your structure is a must.
It should be checked at least twice or thrice a year or after a large storm or other weather events that could have caused harm. During the examination, clear the area of any debris and inspect the tiles, fasteners, and sealant. If there are any damaged sections, suitable measures should be taken quickly to reduce further concerns.
You should clean it any time you spot stains, mold, or mildew. Hand cleaning with a trowel and wire brush is the preferred method. Consult a professional if you aren't sure if you can handle it on your own. Avoid using high pressure on the structure.
This has devastating damage. Once your surface has been thoroughly cleaned, you can take additional steps to protect your building, such as polishing, priming, painting, or resealing to keep it in good condition.
| Project | Estimate cost |
| Removal of a Roof | $0.50 to $1.5 per square foot |
| Tile painting | $2,550 to $4,250 |
| Roof support | $300 to $5,000, $500 to $5,000 (Truss replacement) |
| Roof Inspection | $100 to $600 |
| Tile cleaning | $0.30 to $0.75 per square foot |
Removing a roof might cost anything from 50 cents and 1.5 cents per square foot. You can anticipate paying double this cost for structures with more than one layer of tiles.
2. Roof Tiles Paint Prices
Typically, painters charge from $2,550 to $4,250 for painting. The amount varies depending on the region, the materials, the type of structure, and the materials' condition.
3. Roof support
Supports are a vital feature of any structure that maintains the structure stable and prevents it from collapsing or warping over time. A support problem can cost $300 to $5,000 in repair costs, depending on the nature and extent of the problem. If you need complete trusses replaced, those range from $500 to $5,000 to be installed.
4. Inspection of the Roof
The average fee for an inspection is between $100 and $600. Size, material, pitch, and present condition all influence this pricing. An inspection assesses the structure's condition and lifespan and any necessary repairs or replacements. An assessment is vital in finding potential problems and solutions to concerns.
5. Tile Roof Cleaning Cost
Roofing is exposed to several elements and severe weather. It is inevitable that debris, staining from food or drink, mold, and algae may accumulate over time. This can cause long-term damage and issues if it isn't cleaned. Cleaning services cost, on average, $0.30 to $0.75 per square foot across the country.
6. Additional considerations and expenditures
Purchasing new tiles is more expensive than repairing existing ones, but this is not always the best option. The labor cost will depend on the amount of damage and work.
The cost of cleaning up and removing any old tiles and materials should be factored in. If the problem isn't fixed, the roof and the house's contents risk further harm. Taxes and permit fees are not included.
Most of the time, residents in Arizona may be oblivious to the areas that are prone to roof leaks when designing and building a roof. Changing roof slopes meet in a roof valley with a name that stems from the roof's valley-like appearance, preventing water buildup on the roof.
The roof valley helps the roof slope drain water and reduces snow and ice accumulation on roof liners while at the same time improving the home's appearance. Complex roofs with multiple pitches will have dead valleys that must be protected and maintained.
A dead valley is a place on a roof where water cannot easily run down because of two slopes or a slope and a wall. Dead valleys can cause leaks and other roof damage if not properly maintained.
Good home designers who understand roofing and water movement avoid dead valleys in their blueprints, but when this is neglected, a roofing company must find and safeguard vulnerable areas. Where two roof slopes meet, a trough allows water to flow readily down the roof, but if the configuration is not designed well, water flows directly into these pitch regions, which have inadequate or no drainage.
When opposing roof slopes meet in a dead valley, there is little or no fall, leading to water and debris collection. Water generally drains fast, but in a dead valley, it can't because of the valley's flatness.
It can also occur when a roof section meets a lower outside wall. First, a regular valley runs into a flat wall corner instead of off the roof. Second, two or more slopes merge into one.
Low-sloped roofs should use materials that can endure water runoff without early deterioration. Roofing contractors often shingle over these sections without the proper underlayment, costing homeowners hundreds in repairs.
Debris and water can deteriorate wood and shingles, causing costly repairs. Dead valleys on roofs collect rainwater, snow, leaves, and other detritus, and as the roof ages or disintegrates, debris and water will leak through the shingles.
Dead valleys become an issue for roofers as leaking spreads, and the roof structure decays. When serious damage is long-lasting, the roof and adjacent structural components may need to be replaced.
Even if you can remedy a dead valley, it will limit your roof's lifespan if you do it too late or with the wrong method. Builders and roofers often "solve" a flat area by laying shingles and felt paper.
Despite their thoughts, a bad solution like this will leak in three to five years. It may lead to:
Leaks:
More roof leaks may indicate an unknown dead valley. Most homeowners don't know they have a dead valley roof until a leak is discovered, but that doesn't imply the situation is irreparable.
During roof repairs, membranes and other solutions can avoid water pooling and damage.
Roof water and debris collection:
Stagnant water is a common cause of leaking roofs, but it's not the only problem. Pooling water causes issues and can attract bugs.
Rooftop puddles attract mosquitoes because they provide ideal nesting conditions. Water seeping through the roof also attracts cockroaches and termites.
Standing water can cause expensive repairs and create ecosystems that should be avoided.
Ice dams:
Ice dams can cause substantial damage and leaks even when water appears to be flowing. Ice dams can create dead valleys where none existed previously.
A roof ice dam prevents melted snow from draining off the side. This can promote mold and mildew growth. Repeated freezing and ice thawing can cause considerable roof cracking and paint blistering and peeling.
Rot and moss:
Vegetation can develop in even the slightest roof breaches, creating a concern. Roofs with moss, algae, or weeds are less water-resistant, making them more vulnerable.
Roots can break roof membranes, enabling water to accumulate and attracting more pests.
Roofs protect a structure as well as its contents from the elements. They are installed with materials that have estimated lifespans which can be compromised at any given time without proper care and maintenance.
Commercial roof inspections require extensive skill and understanding. Commercial roofs are often larger and have a lower slope or are completely flat and are therefore more difficult to maintain.
When inspecting your roof, it's not enough to look for rust or water spots or take a walk around the perimeter of your building. Routine inspections and minimal maintenance can help building owners prevent costly problems due to the changing seasons and temperatures.
This article details 10 tips on how to inspect a commercial roof.
Roof inspections save money by preventing costly repairs and identifying problems early before they develop. Property owners utilize inspection data to allocate maintenance funds.
Maintaining the roof helps reduce the risk of lawsuits because when it comes to your health and your wallet, a poorly maintained roof can be dangerous. Maintaining your roof might save you money because roof maintenance typically reveals minor concerns that can be fixed before they become huge, costly problems.
Roofs should be inspected often to prevent damage to sensitive equipment. Building inspections discover flaws and protect staff and others safe. It helps property owners with preventative maintenance.
To avoid major problems, commercial building owners need to keep their roofs in good condition. Without regular inspections, your building could be closed as regular roof, and facade inspections keep buildings safe, efficient, and in good shape.
Commercial roofs may need more frequent inspections than the twice-yearly spring and fall checks. Roof inspections may discover repair opportunities and sites for telecom towers or solar panels, allowing you to monetize your roof.
| Tip | Importance |
| Detailed roof inspection | Shows areas that need attention |
| Clean debris | Reveals any damage and prevents roof damage |
| Inspect for ponding water | Prevents roof failure |
| Look at the flashing | Ensures no developing roof damage through leaks |
| Check the roof for cracks or tears | Prevents any damage to the roof interior through leaks |
| Inspect the parapet walls, if any | They are areas at risk of water damage |
| Check the drip edges | They prevent interior roof damage |
| Inspect the roof surface | Reveals any developing damage |
| Inspect the gutters | Clogged gutters may promote pooling on the roof |
| Check the downspouts | Downspouts direct water away from the gutters |
An assessment of a building's roof is a serious matter that should be handled by a roofing professional. Commercial building owners should get an industrial roof inspection at least twice a year to ensure that their roofs are in good condition and safe.
Inexperienced roofers may cause costly repairs that may have been avoided if a competent business roof contractor had conducted the checks. There are many issues that could befall your roof at any time during the year.
Many issues might arise during commercial building inspections, but only if you hire a qualified inspector who knows how to do each of these processes correctly. That way, you can avoid the need for costly roof repairs when the damages become worse.
1. Conduct a detailed roof inspection
In order to guarantee that your commercial roof remains in good condition, you must do a thorough examination.
You can only address a problem if you are aware of it, and you can do so by knowing the problems. The following are some of the problems that a professional inspection will illuminate for you:
Commercial roof inspections allow you to catch problems before they become a big problem. Before the cold weather sets in, inspect the roof for any damaged flashing, buckling, or split seams.
Problems like wind-related cracks and clogged gutters can be identified in an inspection before they become costly damages that require repair. Summertime breezes can develop little cracks that can grow during the winter.
Make sure you get in touch with a reputable commercial roofing contractor who can identify any potential issues. Check the commercial roofing checklist with your inspector to see if there are any obstacles or clogs.
2. Clean Debris
Keeping your roof clean and clear of snow, ice, debris, and other natural elements can ensure its longevity and reduce property damage.
Algae and moss can damage your roof through shingle disintegration and wood rot. They can cause costly repairs, but this is eliminated through regular roof cleaning.
Regular roof cleaning prevents decay from the accumulation of dirt, moss, and algae. Cleaning your roof regularly is important for its structural integrity and the safety of your home and goods in any conditions.
Remove anything from your roof but consult a professional because as much as roof cleaning is possible, conducting it yourself can be dangerous. Debris on your commercial roof should be a priority as bird nests, or other animals can cause future difficulties.
A commercial roof's drainage system may be damaged by tree debris. Branches and leaves must be removed from drains and roof corners for water to flow freely.
3. Inspect for ponding water
Ponding occurs when water pools on a flat roof, forming ponds usually after a downpour. Most pools leak or evaporate, but a roof that doesn't drain rainwater for two days or longer, even while other parts of the roof are dry, is prone to pooling.
Water near roof drains can create color changes and stains. Check slow-draining lines and occluded areas for ponding.
An expert evaluation may reveal concealed water damage and determine the underlying damage. Before your roof inspection, remove any standing water but take photos of the damage before and try to determine how long it's been there.
Water ponding can damage your roof. Ponding water might cause roof leaks creating a habitat for termites, roaches, and beetles, which infest your roof and do considerable damage.
4. Look at the flashing
Flashing protects flat and slanted roofs against flooding. Stacks, walls, and curbs should be inspected for flashing. Check for cracks or breaches that could let water in before the rainy seasons.
Look for fractures that let water in, especially at the flat-to-vertical transition. Changeover points have more cracks, and other issues and leakages are more common, typical where the flashing connects to the roof.
Flashing surrounds skylights, chimneys, and vents on commercial roofs, and they keep water from damaging areas of the roof. Flashing stops rainwater from leaking into the roof deck, which manifests as peeling or splitting at the caulking.
Flashing protects a roof's most vulnerable parts. Thus, anyone evaluating the roof should pay careful attention to it. By maintaining your flashing, you may prevent roof leaks.
5. Check the roof for cracks or tears
A commercial roofing inspection is needed to determine whether the roof has structural damage from tears or cracks. A fractured roof surface can have serious repercussions if ignored, as your roof provides insulation, shelter, and energy efficiency.
The sooner you fix a roof tile crack, the better. Foot traffic, protruding nails, and intense storms produce roof cracks. Full horizontal or vertical breaks should not be repaired using adhesive. Valleys and penetrations are vulnerable to tears or cracks.
You may likely have to replace the roof if the damage is significant. You can conduct a flood test to check if the roof has tears or cracks. Flashing problems are easy to address if identified before the major water damage. Annual inspections ensure your roof's flashing remains watertight.
6. Inspect the parapet walls, if any
A parapet wall is simply a vertical extension of the wall. The walls protect the roof from water, air, and vapor and also aid in temperature regulation.
Corrosion and degradation of the roof or another pre-built nearby structure can be prevented by controlling these variables. Your roof's edge can be lifted and damaged by strong wind as a result of elevated wind pressures.
In order to determine if the wall is structurally sound, your expert inspector should check and address any concerns as soon as possible.
7. Check the drip edges
The edge of the roof's perimeter is covered in drip edge, which creates a watertight seal by keeping the underlayment in place. It is positioned exactly under the shingles and just above the facia.
A compromised drip edge allows water to seep into the roof under the underlayment. This is worse for the eave side of a roof that has clogged gutters.
It is imperative that all of these drip edges be anchored firmly and properly. Doing so will ensure that there are no openings in the structure that allow water, dirt, and other elements to get in.
8. Inspect the roof surface
The surface of the roof is the visible covering on the roof. The materials used on the roof covering vary in durability and how much maintenance they need.
Inspecting the edges of the roof is critical, especially along the windward edges, where storms are most likely to cause the roof covering to get lifted. During an inspection, look for any damage caused by the wind, which includes rips and tears.
The roof could also be damaged if it blisters in many parts of the roof. Blistering occurs when there are many air or moisture pockets that expand during hot weather to further damage the roof.
Everything on your roof that isn't part of the perimeter or flashing is referred to as the roof field. The deck of commercial roofing systems may reveal evidence of ripping in the membrane of the roofing system.
Any small invisible cuts on a roof may cause leaks. These can be identified through flooding, which is the method of testing the waterproofing system by allowing a regulated amount of water to remain on a horizontal surface for a predetermined period of time.
9. Inspect the gutters
Gutters play a role in directing rainwater from a roof down downspouts or water harvesting systems. Gutters on a commercial roof are important as the roofs are large and flat, therefore prone to pooling.
If the gutters are clogged, there is a high chance that water will pool on your roof. If the gutters sag or overflow during rainstorms, there is a high chance that the gutters aren't fully functioning.
PVC roof membranes on roofs don't quickly give way as a result of ponding, but other roof types, such as asphalt-based roofs, are more likely to fail. Remove any debris that has accumulated in the gutters to avoid this.
10. Check the downspouts
For your gutter system, the downspout serves as the outlet for the rainwater that falls from your gutters. Ground to roof inspection of your downspouts is important to assess whether the downspouts have been damaged or clogged.
Mechanical damage to the downspouts can occur when mowing grass or being crushed by an automobile like a forklift or something the sort. If there is mechanical damage to the downspouts, they will have to be fixed or, better, replaced.
Make sure your downspout water is directed away from your house so that it doesn't collect there. Pooling water at the base of a house damages the foundation as well as floods the basement if there are any open crevices.
Clogged gutters often direct some of the debris into the downspouts, and this can manifest as overflowing or sagging gutters during heavy rain. You can check if the downspouts are clogged by tossing a coin into it and checking if the coin will emerge from the bottom.

You can profit from employing an assessment checklist for commercial roofing projects, no matter how large or little they are. Controlling your company's operations is easier when everyone on your team is following a well-defined checklist.
A roof assessment checklist:
-Maximizes output and efficiency
-Minimizes errors and omissions
-Increases the effectiveness of roof inspections
-Cuts down on inspection times
-Customer satisfaction is improved.
-Facilitates the planning of tasks and managing staff
During the rainy or snowy days, roof leaks, frozen gutter drains, and an accumulation of snow might occur. A compromised roof will get damaged when this happens, and the best method to avoid these issues is to prevent them in the first place.
Roof damage may occur when it caves in if it's exposed to extremely windy or rainy circumstances and when cracks in your roof develop as a result of the expansion and contraction that temperature variations cause. These damages are all a result of thermal shock and roof structural failure.
Rainwater can also freeze in small fractures in the roof, posing a problem. As the temperature rises, the ice melts and expands the fissure and widens even further as the water freezes again.
Commercial buildings are the places where business is done. Commercial buildings include office buildings, retail spaces, warehouses, and other types of structures.
Sometimes the building owners don't feel the need for commercial roof restorations even with the advice of the building manager or facility manager due to the expense or mess of commercial roof restoration. This article explains the benefits of commercial roof restorations when you go out of pocket to do them.
Repairing a tiny section of the roof is not the same as restoring the entire roof. A complete roof replacement is much more expensive and time-consuming, while a roof restoration is much cheaper and done on a smaller scale.
Commercial and industrial buildings have low-slope, single-ply or steep-slope metal roof systems. They can benefit from the building roof restoration process where liquid coatings are applied to the roof, and roofing surfaces are completely encased in a watertight, reflective and seamless coating system.
Commercial roof restoration involves more labor and calculative steps compared to a residential roof. The roofs are often huge, and therefore the restoration is carefully done on a small scale over a large area to ensure that the huge roof is completely restored.
These are some of the steps taken during a roof restoration:
1. Inspection
Restoration all begins with a professional commercial roofing company performing an assessment of your roof. They search for evidence of leaks, such as wet insulation, mold development, and stains.
After the inspection, the roofing professional then puts together all the items and labor input and specialty required for the restoration. This is done from the inspection report to establish the extent of damage, the certain area's specialty required and the materials needed.
2. Cleaning
The cleaning comes first to start the work. The buildup of dirt and debris on the roof is removed using pressure washing, which creates a clean surface for optimal adhesion of the coating.
Cleaning up also exposes any damaged parts of the roof covered by the debris that doesn't show as damaged areas on the report.
3. Repair
Leaks and structural problems can be addressed after cleaning. Repair entails re-bedding loose layers and filling in any gaps on the roof, including repairing or replacing damaged roof cladding (damaged metal sheets, tiles or shingles)
The restorative membrane will not stick to the roof like paint, and primer is therefore sprayed on first, then the surface is prepared for sealing. The membrane coating is put on the surface, which protects your existing roof by sealing the surface.
The restoration of a commercial roof has several advantages over a complete roof replacement or none at all. It can be a great way to extend the life of your roofing system.
Despite the fact that many roofing systems are built to last for decades while still providing outstanding performance, it is possible that roof restoration will be required in the future. Roof restoration might not seem appropriate at the moment, but in most circumstances, a roof restoration is a more cost-effective alternative to a complete roof replacement.
There are plenty of things to worry about while running a business or owning a commercial building, and a faulty roof shouldn't be one of them. If you let a leaky or otherwise deteriorating roof go long without fixing it, it could mean catastrophic problems down the road, including water damage, mold, rot, and more.
To understand more about commercial roof restoration and the benefits it can provide your business take a look at the following benefits for the most economical solution for your building.
1. Less expensive than a full roof replacement
When compared to a roof repair, a roof restoration might be equally as successful in solving your concerns. Roof replacement could cost up to $26 per square foot, while roof restoration could only cost up to $9 per square foot.
Regardless of the circumstances, the expense of repairing a roof is going to be high. Commercial building owners can save more than half of the cost of roof replacement by fixing their roof instead of replacing it.
Restoring a roof requires a lot less work and resources; thus, there are no additional costs. The cost of roof restorations is substantially less than the cost of replacing the entire roof.
Many of the benefits of a new roof can be achieved at a fraction of the expense through restoration. Because the existing roof isn't torn down, this technique involves less time and effort.
A roof restoration can not only save you money and effort, but it will also help you avoid a large loss in the future. To avoid the need for a complete roof replacement, get your roof fixed sooner rather than later.
2. Saves time as it is non-disruptive and quick
A full roof replacement necessitates more effort and may disrupt the building's daily routines. Some roof restoration can even be done as other activities take place since it is done in parts.
Since the tear-off process is omitted, it minimizes the impact on your business operations below the surface. Business shutdowns are more common in tear-offs than in restoration.
A roof replacement can take more than a month, while a roof restoration can be completed up to three times faster. There is, therefore, less interruption of the commercial activities and consequently fewer losses.
3. It is an environmentally friendly solution
Installing a new roof necessitates tearing off all of the old roofing materials, and enormous quantities of materials are thrown away or wasted, resulting in a large amount of landfill debris. Roof restorations use far fewer materials than new construction because rather than taking off old materials and replacing them with new ones, the existing roof is used as much as possible.
Since this roof system extends the life of your roof, it will be years before the debris from a full replacement needs to be deposited in the landfill.
A new roof generates a large amount of waste material that must be disposed of in a landfill. When a business roof is restored, its quality and sustainability are greatly improved, and less trash goes into landfills.
This is an environmentally friendly solution. It is also significantly easier to recycle the small debris that results from roof restorations.
4. An extended roof life
When a roof is constructed, it is done so with materials and workmanship that give it a certain lifespan. You may extend the life of your roof by 10 to 15 years if you are proactive and choose roof restoration before it deteriorates beyond repair.
When a roof is restored, it is coated with a protective layer to help it withstand the environment better. Under normal ponding water and the most extreme weather conditions like rain, snow, ice, sleet, or hail, the restoration systems remain adherent to the roof surface.
Due to the advantages of the entire restoration method, the expenses of maintenance are also cheap. You'll have enough time to save up and prepare for a roof replacement in the far future if you do this.
The normal lifespan of a commercial roof is between 15 and 20 years, but a restoration job can prolong the life of your roof by up to ten years if you deal with a reputable provider and maintain the coating properly.
5. An improved building safety
The success of a business not only depends on the merchandise or services but also on the conditions in which they are provided. The aging or damaged roof on a structure might pose a serious threat to the workers, clients and any commodities.
When moisture from a little leak builds up over time, it can swiftly cause mold and structural damage.
Mold can cause serious health issues to the workers and clients, while moisture can damage the wiring system in the sublayer and induce rot in wooden structures, which compromises a building's structural stability.
In addition to putting your business in jeopardy, a structurally deficient structure can also put your customers and staff at risk and should therefore be given immediate attention.
6. Reduced energy bills
A roof is constantly exposed to adverse weather conditions, such as UV radiation and freezing temperatures, because of its huge surface area. Running their air conditioning or heating systems may be a regular occurrence in an area that experiences frequent shifts in temperature.
A damaged part of the roof might be introducing cold or hot air from the environment, reducing the efficiency of the air conditioning and, therefore, higher energy bills to counter the effect. This is the same for a roof with compromised insulation which is critical to decreasing heating and cooling costs in commercial properties.
Solar reflectivity and emissivity are two properties that roofing systems commonly have, which can help your building become more energy efficient. You've probably noticed a lot of white top-coatings on flat roofs, which is an energy-saving measure.
The highly reflecting surface of the roof may help improve the life of your heating and air-conditioning systems because it minimizes the amount of heat in the building. In the summer, the reflective white coating keeps the structure cooler by reflecting sunlight saving you a lot of money over time.
The structure can be made more energy efficient by a roof restoration which has a greater impact on energy costs than you might believe.
7. Improved Resistance from the Elements
Commercial buildings may be subjected to harsh weather conditions depending on where they are located. A damaged roof is subject to leaks which cause mold and rot formation in its structures.
The damage will progressively get worse as time goes on if your roof is already in a state of degradation. Repairing a roof's weak spots will assist prevent future damage from the weather, especially extreme weather conditions like hurricanes and thunderstorms.
You will get a highly effective roof surface like the roof's surface will be protected by a watertight membrane that can halt leaks and lessen the need for roof repairs. If any further repairs are needed, the workers will have the opportunity to make them.
A well-maintained roof will, regardless, need to be replaced eventually due to the high expense of repairs. Some of these situations require a new roof instead of repairs.
Roof restoration is the extension of a roof's lifespan by fixing any damaged parts, while roof replacement involves tearing away the old roof and putting up a new one.
Repairing your roof is important before it becomes a real problem. As your roof deteriorates on a daily basis, it is always best to take a proactive strategy.
Each roofing situation is unique, and an earlier date of restoration increases the long-term success of the roof.
Most commercial roofs come with a warranty of 10, 15, or 20 years, depending on the manufacturer. A roof that is property restored might last up to 10 more years after it is restored.
Are you looking for a roofing business in your area? Make a call to Mikku and Sons Roofing to discuss your options.
The type of roofing system you have doesn't matter; we've worked on it all: single-ply, metal, modified bitumen, and built-up. Schedule a commercial building inspection with our company today!
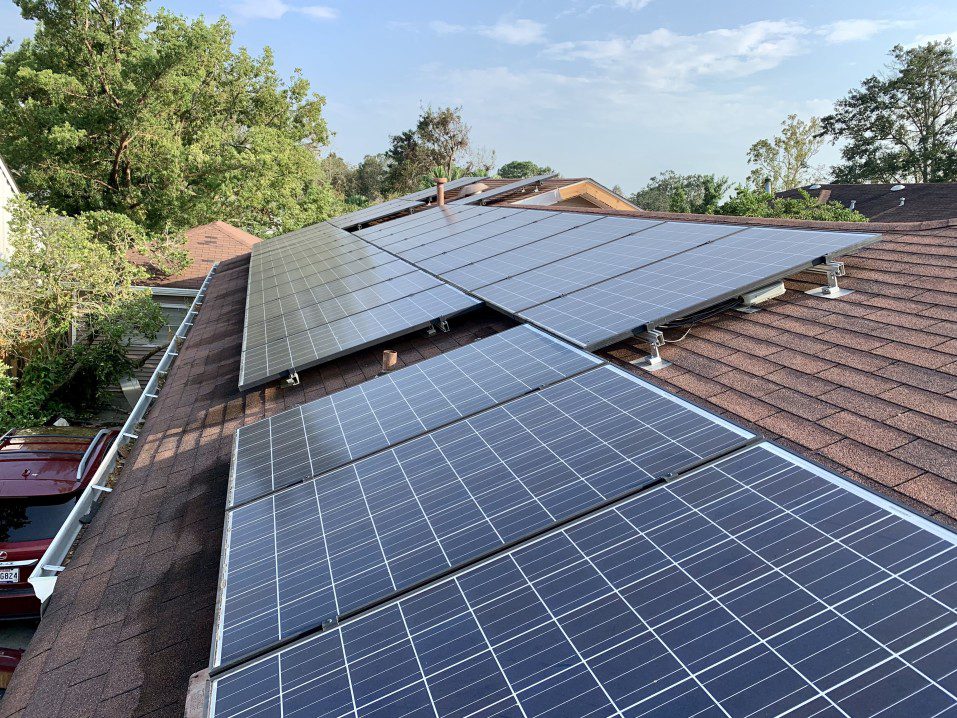
With the added complexity of installing a roof, replacing your home's roof is already a significant undertaking. Solar panels on the roof necessitate two additional steps in the roof replacement process.
Many people with solar panels installed on their roofs are baffled by this. Is it necessary to remove your roof's panels to install a new one? Are the solar panels going to be removed by the roofers, or will you have to contact your solar installer?
Is it possible to incorporate solar panels into the design of your new roof? Roofs and solar panels are inseparable. For some people, replacing their roofs before installing solar panels is recommended, but this isn't always possible.
Trying to figure out how to put solar panels on a roof? Continue reading our guide 'Roof Replacement with Solar Panels' for a few pointers to start your solar and roof journey.
Getting in touch with everyone involved in the removal and installation of solar panels is essential once you've worked out a strategy. Summer and peak roofing season can make this difficult.
As many solar installation companies are very busy, it is essential to get in touch with the company first to ensure that they charge you a reasonable price and secure your spot. Removing the panels can take up to six months on average.
Maintaining regular contact with the roofing contractor while working around the solar panel company's schedule is important. This way, the roofing company can order the necessary materials, schedule their delivery, and have their crew come out and install your roof on time.
After the solar company has reinstalled the solar panel system on the roof, it is critical to have the roofing company inspect the roof for any damage that may have occurred during the installation process. Some of the damages include:
This can lead to increased water leakage and fire hazards, as the structure of the roof and its ability to withstand the elements are jeopardized. Roofing warranties can be voided if solar panels damage or compromise a roof.
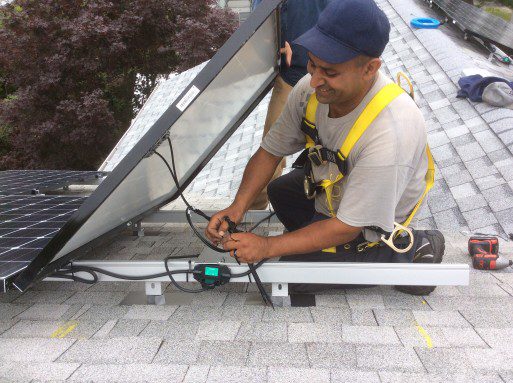
Drilling holes into the roof is the most common, efficient, and cost-effective method for installing solar panels on a home's roof.
These holes need to be appropriately drilled and filled by licensed solar panel installers who know how to avoid damaging the roof during installation. If damage does occur, it is frequently the result of a previously unresolved roof issue.
Rather than caulk the hole or use an extra shingle, people with no extras on hand will sometimes place a piece of aluminum underneath the shingle, which almost always results in a leak. Roofing shingles can be ripped or torn when installing solar panels.
So, to ensure that the shingle seals properly and is watertight, the shingle must be replaced or caulked/repaired.
In theory, solar panels can be placed on top of an existing roof, but this isn't feasible because your roof comprises more than just the visible portion. Solar shingles can be used as a part of the roof, while solar panels can be used on top of the roof to generate power.
Compared to the installation of a complete solar roof made of shingles, solar panels are much faster. However, this does not necessarily make them the best option, as they will cost less upfront, which appeals to many people.
It would be best to familiarize yourself with the available solar panels before deciding which to use and how much they will cost.
It's important to weigh all of your options before deciding on whether or not to replace your roof with solar panels.
Besides, you may have a roof that needs replacing; solar shingles may be within your financial reach!
If your roof is nearing the end of its useful life, it may be a good idea to have it evaluated before installing solar panels. You should get an expert to inspect your roof if it's between five and ten years from needing to be replaced.
Solar companies don't typically offer roofing services, but a few exceptions exist. Your solar contractor is likely to have good recommendations for local roofers, and they may even be able to get you a discount on the cost of your roof replacement with solar panels.
In comparison to most roofing materials, solar panels are far more durable. With a roof replacement with solar panels, the new roof will last longer because of the panels' impact on the life of the old roof.
Additionally, if you're installing a new roof, it's unlikely you'll need to re-roof during the solar system's life, which is another benefit. You'll save money in the long run by not having to pay for the solar panels on your roof to be removed and reinstalled.
Before installing solar panels, replacing your roof is a good idea. Solar panels have a basic life expectancy of 20-25 years.
Because of this, solar panels can outlive their original roofs for many decades. Quite a few people have even relocated and taken their solar panels to their new location.
Regardless of your circumstances, learning how to replace a roof with solar panels is a valuable skill with an answer that's more straightforward than you might expect.
If you bought your solar panel system from a company or store that sells solar panels, you wouldn't have to figure out how to replace your roof. Contact your Solar Energy Specialist, and they'll help you out.

Ideally, your solar panels should be serviced by the company that installed them. As a result, you won't risk damaging them or voiding warranty claims. Your Solar Energy Specialist will handle the removal once you've contacted us.
When completing a roof replacement with solar panels, it's important to store your solar panels safely after they've been taken down. A safe distance from your roof replacement would be ideal for this new location.
Generally speaking, a garage or a shed will do just fine. Keep them away from your porch or front lawn at all times.
After installing the solar panels, your trusted roofers will begin removing your old roof. Removing the roof leaves a lot of debris, so maintain a reasonable distance away!
Installers will begin re-roofing your home once the old one has been removed. Dependent on the size of your roof and the roofing materials used, the time it takes to complete the job will vary.
Your solar installers will complete the re-installation on your new roof once the replacement work has been completed. If you have solar panels and batteries, this service also includes re-connecting them to the utility grid.
A new roof material may be considered when it comes time to replace your old one. Not all roofing materials use the same solar mounting brackets, whether they are more energy-efficient, durable, or affordable.
Changing materials may necessitate purchasing new mounting hardware, which can cost thousands of dollars.
To ensure that your new roofing material will work with your current mounting hardware, you should speak with the solar installers before the roof replacement is complete. As a result, your solar energy system installation won't be delayed by the need to wait for a new delivery.
As a liaison between your roofers and your solar, you'll likely have to do some work. Keep in mind that you are in charge of your project, and you should be able to dictate exactly what gets done, how it gets done, and when it gets done.
Choosing a roofer willing to work directly with your solar installation company can make your replacement a lot easier. A more efficient and less stressful project will be achieved if you provide your solar installers with the contact information of your roofing company.
Have you given any thought to making the switch to solar power? Before beginning your project, many solar installers will inquire as to whether or not you've recently had your roof inspected for general health and quality.
A simple explanation for this is that you'll likely be told by your solar installer that you're better off replacing your roof before installing solar if yours has less than five years left of useful life.
Installing your solar panels and replacing your roof later will cost you thousands of dollars more than simply removing them and replacing them later, even if it is only for a short time.
Since most roofers lack the knowledge and experience to remove solar panels safely, it's best to contact your installers ahead of time and arrange for them to do so.
1. Cost: The initial investment in a solar power system is substantial
2. Weather-Dependent: Although solar energy may still be harvested on overcast and rainy days, the system's efficiency decreases.
3. Solar energy storage is pricey.
4. It uses a lot of space
Your house insurance may pay for your solar panels; as long as they are permanently attached to your house, they are covered by your homeowners' insurance policy's dwelling coverage.
However, if a covered risk damages your panels, you will receive compensation.
Shingles provide both protection for the roof and a cooling effect in the attic. I don't think solar makes replacing your roof more difficult. It would be more appropriate to use the term pricey. Finally, solar panels should only be installed on recent roofs.
Installing solar panels on a roof on the verge of needing replacement is a no-no for reputable solar contractors usually, they want it to be less than five years old.
The roof is protected by shingles, although this has little practical use. The advantage of lowering the temperature in the attic is likely more significant. Even though a partial roof replacement isn't ideal, it's necessary when it comes time. As a result, having solar-preserved shingles isn't all that important.
Slate is an enormously common material with a range of applications, most famously in roofing and flooring, where slate roof tiles are becoming increasingly popular.
But as time has gone by, our applications for slate have only grown more. From snooker tables to the basic domestic cheeseboard, slate is gaining popularity for increasingly more uses.
In today's world, we are becoming more mindful of our environmental effects, and we are starting to recycle and reuse everything feasible.
People are repurposing their usually worthless goods and damaged materials into fresh and revived pieces of utility and art, including slate roof tiles.
Here are some fascinating ideas that you may utilize if you have some old slate roof tiles.

Any material can be a canvas, as an artist or creative person knows, but slate allows you to go extra creative.
Slate may serve as a plethora of creative avenues if you allow your imagination to run wild. Creating a painting on a piece of slate is just one of the many ways you can use the material to decorate your home.
If you still have some leftover slate roof tiles leftover, here are some additional ideas for creative projects:
Make a rustic, oblong candle holder out of four pieces of slate, then sit back and enjoy with a few tealights.
This is a great way to prevent water from seeping out of your pots, such as a planter or a terrarium.
However, you may use a slate panel as a drain or gutter cover. You can prevent your drains from being blocked up with leaves and other debris, particularly in the fall.
It can also operate as a divider for herbs in the garden. Using slate to divide your herbs in a garden bed will ensure that they get all the water and nutrients they need while also keeping everything in order.
Typically, slate roof tiles are of dark color and store heat from the sun throughout the day and then return it to the plants at night.
Make a walkway, drive, or a separate section of your garden out of your leftover slate by recycling it into smaller pieces.
You can use this material to construct whatever you want in your garden, from an additional seat and planting area to an area suited for a water feature.
You could even leave your slates bigger and push them into the concrete yourself to have a distinct look. Ideas for repurposing outdoor materials include:
Pond liners are impermeable geomembranes used to retain liquids, such as reservoirs lining, retention basins, surface impoundments for hazardous and nonhazardous materials, and garden ponds and artificial streams in parks and gardens.
The pond liner is hidden by stone pond borders, giving the illusion of a natural pond in your yard.
The slate stone is an excellent choice for burying pond liners around the perimeter because it is hard and won't wash silt into the pond like softer stones like sandstone.
Slate is a flat stone, but it wobbles as you walk on it, so, if possible, use mortar to keep the stones secured.
Get rid of the wrinkles by laying each edge of your pond liner out evenly on the ground.
Both narrow and broad borders are available, allowing many rows of stones to be placed on the edge. Wait until the conclusion of the process to remove the surplus liner.
Using a 5′′ by 5′′ sheet of paper, the students begin by sketching their favorite California fruit. Next, they pull, connect, mold, and texture the one-dimensional design into a 3-dimensional tile.
This tactile art activity was a big hit with most youngsters, and they made gorgeous, realistic avocados, corn husks, bunches of grapes, cherries, artichokes, Meyer lemons, and navel oranges!
Our on-site kiln was used to heat the tiles after drying for around two weeks. Kids painted their tiles with underglaze and dipped them in the purple glaze after the first fire. The pupils were thrilled with the outcomes.
Simple floor tile mosaics may be made using slate tiles and a thin neutral grout line. Rather than purchasing just one color of the tile, use a variety of hues. Lay arrange your tiles in a mosaic before gluing them in place – and only then, when you're satisfied, cement them in place.
It is possible to get a slate floor tile in about any color or design that you like. Pure grey/black tiles are the most prevalent.
Those identical tiles may also be found with various color splashes, ranging from cream to brown to red and orange, ranging from little to significant splashes.
You may start with a base color (or color combination) and then add additional colors at random. Alternatively, you may be fully arbitrary, with no one hue taking center stage.
Speak with a professional tile installer about your mosaic tile design. Ensure that the quality, thickness, and size of all of your varied colored slate tiles are consistent.
There is nothing more demanding for Éco Dépôt's tile professionals than helping a customer create their own floor tile mosaic.
Mosaics are a fantastic way to express your individuality, and seeing the result is the icing on the cake.
The way you divide up your outdoor space is almost as crucial as what you put in it when designing it. Garden edging ideas might help with that.
Finding the perfect edging may make a difference in creating a clean garden. They not only enhance the visual aesthetic of your garden, but they also serve a useful purpose by separating flower beds from lawns and mulch from the latter.
It provides a crisp line to make mowing and trimming even more effective.
One neat idea is to use cap your pre-existing retaining walls bricks with old slate roof tiles. This can also be done on the bricks that edge your lawn. You just cut the slate tile to be even with the bricks and then use a mortar or stong adhesive to secure the slate. Use different colors to add more dimesion.
Jordan Woolf | Roofer in Madison Al
The ceiling of your tool shed may be covered with skates. Slating has been going on for hundreds of years.
As long as the conditions are right, this system will keep your roof safe from the elements. Slate roof tiles are becoming increasingly common due to the protection they provide, despite being inexpensive and requiring little time to make.
Slate roof tiles may be used in various ways, including recycling! If you don't plan to utilize your slates, give them away to someone who can benefit from their adaptability.
A local school, an artist, a handyperson, or a builder might benefit from the materials. There should be a variety of methods to ensure that the materials are put to good use.
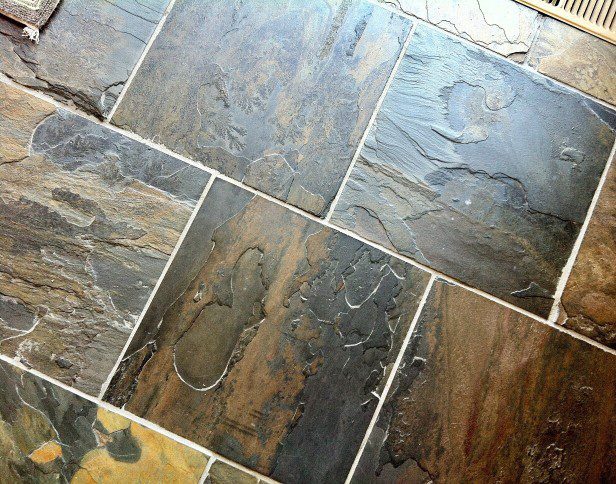
Slate tile flooring is a popular option because of its natural beauty and durability.
While more effort and attention to detail are required to keep natural stone looking its best, it will survive for many years if you take the time to care for your slate tile floor properly.
Daily sweeping is recommended for slate flooring. There may be some "spalling" in the first few months following installation, in which tiny portions of the surface may flake off.
This is particularly true during this period. Once the slate tile has been firmly embedded, this should cease to be an issue.
Reclaimed slate tile flooring will alot of time outlast the other flooring options on the market such as vinyl or LVP flooring. Consider it free material if you are able to reuse the material!
Tyler Hull | Bubble Gum Flooring | Floor Installation Company in Milwaukee
Use a mild cleanser to clean the slate tile on your floor. Let it air dry, or use a soft towel to wipe it dry after rinsing with clean water. It's possible to clean natural stone using any other cleaning solution that doesn't include lemon or vinegar - ideally one that's pH neutral.
If a stain appears on an adequately sealed slate, you may use a stain-removal poultice for stone flooring. Indeed, slate scratches more readily than other types of flooring. Mineral oil may be able to disguise a scrape if it happens.
Make your own poultice by mixing flour and hydrogen peroxide into a paste. Using a plastic wrap, cover the stain and leave it on for approximately six hours or overnight.
With a moist cloth or scraper, you may then remove the residue. More than one application may be required.
Here are some general guidelines:
| DO👍 | DO NOT👎 |
| Protect the floor from high foot traffic with rugs or mats, seal it annually, wipe up spills quickly, and use a pH-neutral mop or one designed for natural stone. | Make use of abrasive cleansers or vinegar-based cleaners, or use a vacuum cleaner with a beater bar to sweep your slate floor |
| When moving across the room, don't slide the furniture. Instead, carry it. | |
| Slate floor care recommendations are straightforward, and you'll have no issue adapting to them. |
Terracotta and slate are commonly used to make roof tiles since they are readily accessible. It's not only old-fashioned clay tiles that are waterproof; modern materials like concrete and metal may also be used.
State flooring needs regular sweeping. When installed initially, they may go through a process known as "spalling," which means that little portions of the surface may come loose. Once the slate tile has had time to settle, this should cease.
WL350, a "silicone/acrylic sealer," will encase and seal the stone, reducing slate flaking. Use a moist towel or a hand sweeper to remove the chipped area. Create an epoxy filler that matches your slate by mixing it with epoxy. Use your epoxy filler to fill up the chipped portion of the surface.
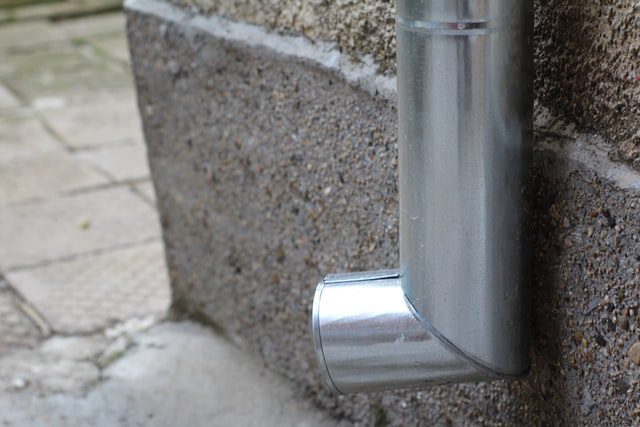
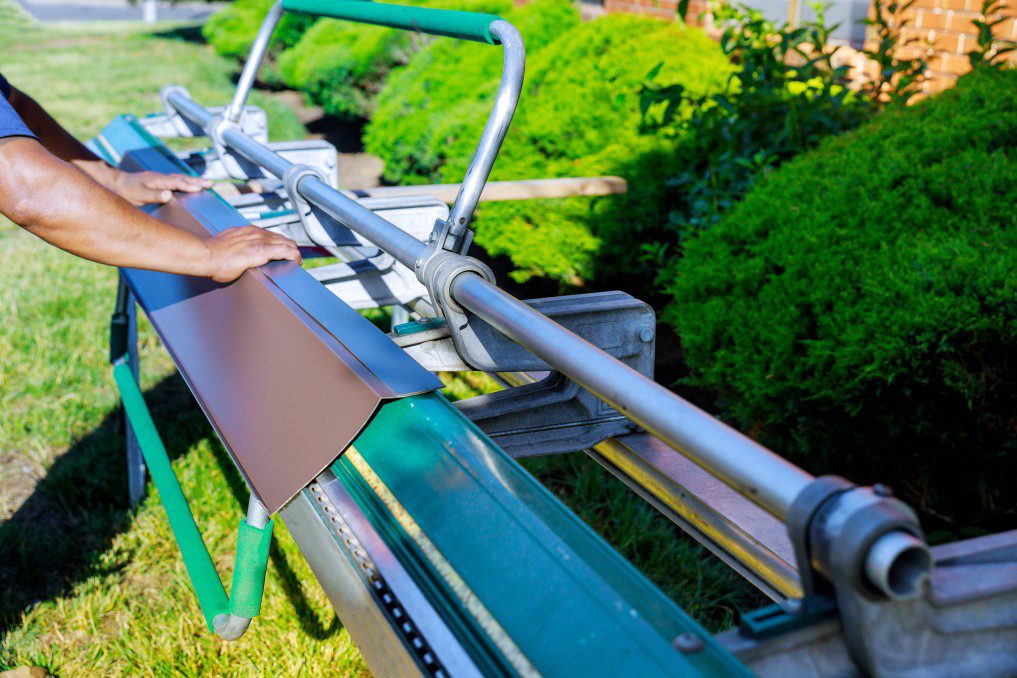
Roofing contractors use a thin metal sheet known as flashing to keep water away from your home’s walls, chimneys, and valleys. For every roof, it is essential to have this material.
Certain parts of your roof require flashing, such as the sidewalls and front walls where the roof meets a wall, the valleys where two roof slopes meet roof protrusions (such as bathroom or kitchen vents), and the roof’s edges (rakes and eaves).
Roof flashing protects the roof’s features, such as chimneys, vents, and skylights, against water penetration. After installing the roof flashing, the water should flow down the and into the shingles rather than the roof deck, where it would otherwise have found its way.
If there is no roof flashing, the water would slowly seep into the gap between the roof and the walls, causing potential floods.
Then, what should you do if you require roof flashing? Having a basic understanding of the various sorts and the best ways to use them might be beneficial.
Protect your property from water and the elements by installing aluminum roof flashing. A variety of weather-resistant flashing tasks can be completed with aluminum flashing.
Aluminum flashing can be molded to meet various requirements, including drip edges.
Aluminum flashing is popular among roofers because of its manufacturing simplicity and lightweight. Because plain aluminum reacts with and degrades when exposed to alkaline surfaces, it must be protected with a protective coating if it is to be utilized in combination with masonry or concrete.
Copper roof flashing is solderable and pliable, making it an ideal roofing material.
In addition, it is extremely robust and tends to last for an extended time. On the other hand, the homeowner’s choice of patina can affect the degree of discoloration. Chimneys are often surrounded by copper flashing.
Soft and cold-rolled varieties are available. Soft copper is an excellent material for this work because of its malleability and ease of shaping.
Cold-rolled material is a better option for most uses due to its increased strength and durability.
Steel flashing is the most often used form of flashing. When galvanized, it is not only aesthetically beautiful and flexible, but it is also corrosion-resistant.
It is sometimes known as “apron flashing” because it acts like an apron. A long, single piece of metal enables the water to run to the shingles.
When the house expands and contracts with the seasons, long lengths of continuous flashing will be challenging to flex with.
The base flashing is the portion of a flashing connected to or laying on the deck and is responsible for directing water flow onto the roof covering.
When the roof membrane meets a wall or curb, there are various points where base flashing must be applied to protect water from entering the roof space.
It is necessary to use two flashing pieces when a chimney is present. This is required to ensure that the rain is consistently in touch with a quickly moving surface.
Furthermore, placing flashing around a chimney is a notoriously tricky undertaking.
Covers and shields the top edge of a base flashing and the accompanying fasteners with formed metal or elastomeric sheeting affixed to or integrated into a wall, curb pipe, rooftop unit, or other surfaces.
Step flashing is generally used to protect the sides of walls and chimneys against water penetration.
A piece of metal is placed under each shingle laid right up against the wall’s side to prevent water from flowing through the wall. Because of this, the term “step” is employed in step-flashing.
Some skylight manufacturers provide flashing with their products, but others need you to build or buy it separately from the manufacturer’s website. It is beneficial to be aware of your alternatives ahead of time.
Metal flashing is used to safeguard open valleys on your roof, a crucial part of the roof.
To connect the end of the step flashing to the beginning of the gutter, roofers typically use a bridging material. In order to prevent water from accumulating on the wall, this type of flashing is installed at the top.
A drip edge is a metal flashing inserted at the roof’s margins to keep water away from your fascia and from going under your roofing components.
Water can seep behind your gutters without a drip edge and rot your fascia board and roof decking.
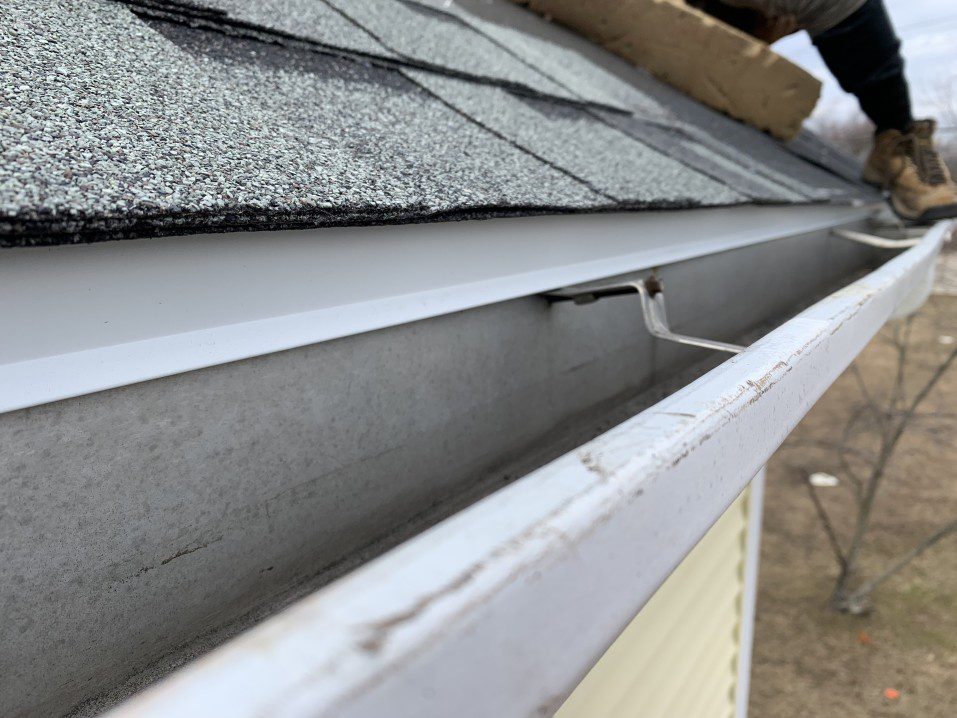
Roof flashing comes in a wide variety of forms, nearly as many as the roof’s components. There are several types of roof flashing since each one is needed to protect a distinct roof feature.
Continuous flashing that is more than a few feet long has difficulty bending with the seasonal temperature changes. It may distort or shatter if left alone, allowing water to seep through. In order to move with the house, lengthier sections should have expansion joints put in.
Two-part flashing also allows for expansion and contraction of the roofing materials, which keeps the system stable.
When it comes to roof flashing, how do you do it correctly? Here are a few tips that may be of use.
It is essential that you comprehend the three basic methods of installing roof flashing before you begin. Since the different types of roof flashing are unique, they may be used in various parts of the roof. Their installation may also be associated with a particular approach.
To keep water away from the wall and into the gutter, you need to use step flashing. As the name insists, step flashing is installed in separate steps.
Each step has a layer of shingles, allowing water to flow from the top to the bottom.
Step flashing is most appropriate for areas where the roof meets the wall. Water may be able to leak down the wall and into the building below if the flashing isn’t placed correctly such that the shingles are not adequately protected. The dormer or roof porch, for example, is a good illustration of this concept.
It is a form of flashing consisting of a single piece of cylindrical flashing in shape. Using this piece of flashing, you can protect the vent from the elements.
It is customary to install roofing shingles on top of or at the base of the boot. Because of the boot’s height, it is expected that water will flow around the vent.
The most typical application of counter-flashing is to protect chimneys against water infiltration. To protect the chimney’s foundation, the base flashing is installed initially.
Counter-flashing, the second component, is firmly entrenched in the chimney’s masonry. This component covers the base flashing. It is designed to prevent water from leaking beneath the base flashing.
Professional contractors can use counter-flashing for various additional purposes. However, it consists of a second piece of flashing that is offset from the first in most cases.
Sealant is the most critical item when it comes to putting roof flashing. Some roofers use nails to flash their roofs, primarily those from the old school of thought.
While this technique is effective, a roofer must still determine whether to attach it to the roof or to the vertical wall to keep it in place.
The flashing may distort due to moving wood or brick if the contractor decides to nail it to both. To keep the flashing in place when other materials are used in the construction contract and expand as the weather changes, use nails and fasten them to the roof or vertical wall.
Extreme changes in weather conditions contribute to the expansion and contraction of your flashing, causing fragile materials to get bent and warped until they ultimately shatter if unsuitable materials or installation methods are used.
Due to the complications mentioned above, roofing cement is often considered the most popular sealer for roofs. Roofing cement is designed to form a watertight seal. Roofers may use a trowel to apply it uniformly and ensure that it adheres well.
Protecting your roof and problem areas is the ultimate goal of installing flashing and applying an appropriate sealant to your roof. To improve your roof’s longevity, you must install flashing that can expand and contract with the weather and channel water away from the roof in those hard-to-reach places.
Professional roofers have the training and experience to find the hard-to-reach sections of your roof. To avoid further deterioration of these problem areas, hiring a qualified roofing contractor is necessary.
If water is not correctly managed around vents and chimneys, it may build up and cause flooding. Water damage may cause discoloration and even leaks due to the presence of moisture.
Locating and discovering leaks can take some time and represent a significant hazard to the construction of a building.
When it comes to safeguarding your roof from water damage and excessive wear and strain, effective roof flashing may do wonders.
Roof flashing has a lifespan of about ten years on average, depending on the climate. Properly built chimneys and roof flashing can survive for up to 30 years.
The materials used to construct your chimney and its size and shape all have an impact on how long it will last. Knowing when your home was built helps you keep track of the chimney’s lifespan.
Flashing made of aluminum is both long-lasting and straightforward to work with. Galvanized steel is one of the less-durable flashing options. Corrosion may begin within 15 years in hostile settings; this means that long-lasting roofs like slate or tile are not cost-effective when using galvanized flashing on their roof.
Soldering aluminum is not possible. As a result, projects involving aluminum flashing are constrained in their complexity and scope.
However, copper flashing can be a worthwhile investment, even if it is a little pricey. Copper, particularly cold-rolled copper, is a more durable material.
Step flashing and flashing are two very distinct approaches that should not be confused.
This kind of flashing is the most often used when it comes to chimneys and walls. Flashing is installed under each shingle fastened to the wall’s side to prevent water from entering the wall cavity below.
Roof flashings may be built from various materials, including thin metal, rubber, and others. Caulk and roofing cement might be the last option to patch a leak temporarily, but don’t let a roofer persuade you that they’ll be a long-term solution.
In addition to being inconvenient and frustrating to deal with, roof leaks can also have a negative impact on the structural integrity of your home. A leaking roof can lead to the growth of mold in your home, which can pose a health hazard.
If the weather is too terrible or you don’t have the money to hire a professional residential roofer, you need a quick and easy remedy to stop the leak.
Before you get started, take a look at our article which will help you determine if you need to patch or replace a leaking roof.
Also, did you know that roofing tar is a brilliant way to patch and stop leaks? Check out our article for more guidance!
So, continue reading our simple step-by-step guide on How To Fix a Leaking Roof.
As mentioned, there may be times when you need to fix and stop a leak quickly before you gather the money to hire a professional.
So, what are your options for repairing a leaking roof in a hurry? Below we have listed eight fast fixes that can get you started on learning How to Fix a Leaking Roof:
A tarp is a simple and effective temporary solution for repairing a leaking roof in an emergency. Once you’ve discovered where the leak is coming from, climb up on top of the roof and put a tarp over it.
Cracks in your roof may be repaired with roofing cement. It can also be used to mend holes in your roof. When using this method, make sure your roof is completely dry before applying the roof cement.
Putting roofing cement is a straightforward task as it involves removing any debris from the hole or crack then using roofing cement to fill in the rest of the gap. Overlaying a roofing mesh on top of the cement is a common recommendation from roofers.
Although this isn’t a long-term solution, it can serve as an effective short-term remedy. Fixing a minor shingle, flashing, or soffit hole is simple with this method.
Some roofers apply silicone around chimneys. However, this can become brittle and damaged over time. Using a new program in these trouble spots can help halt a leak.
While many roof leak repair kits are on the market, selecting one that can fix the leak can be a challenge. This isn’t a long-term solution like silicone, but it’s helpful in an emergency.
The product may be used in both wet and dry circumstances. More minor leaks can be fixed by applying them directly to the spot where the leak occurs. A mix of procedures may be required to halt leaks in more prominent regions.
Using a tarp and then sealing the edges with rubber is one option. Keep in mind that the color of the material it’s sprayed on will change due to this.
Don’t overspray or apply it to sections you don’t intend to replace. As a result, large splotches of color might be left on your roof due to my actions.
If your roof leaks, you can use roof flashing as an alternative solution. It allows water to flow over the region without entering the building.
It’s as simple as applying caulk around the leak, tucking the flashing under the shingles, and pressing it against the caulk, which will keep it from leaking.
In areas of the roof where the most water is likely to drain, flashing may be a very efficient method of preventing leaks. Professional contractors typically apply flashing when the roof is first installed to ensure the roof’s long-term viability.
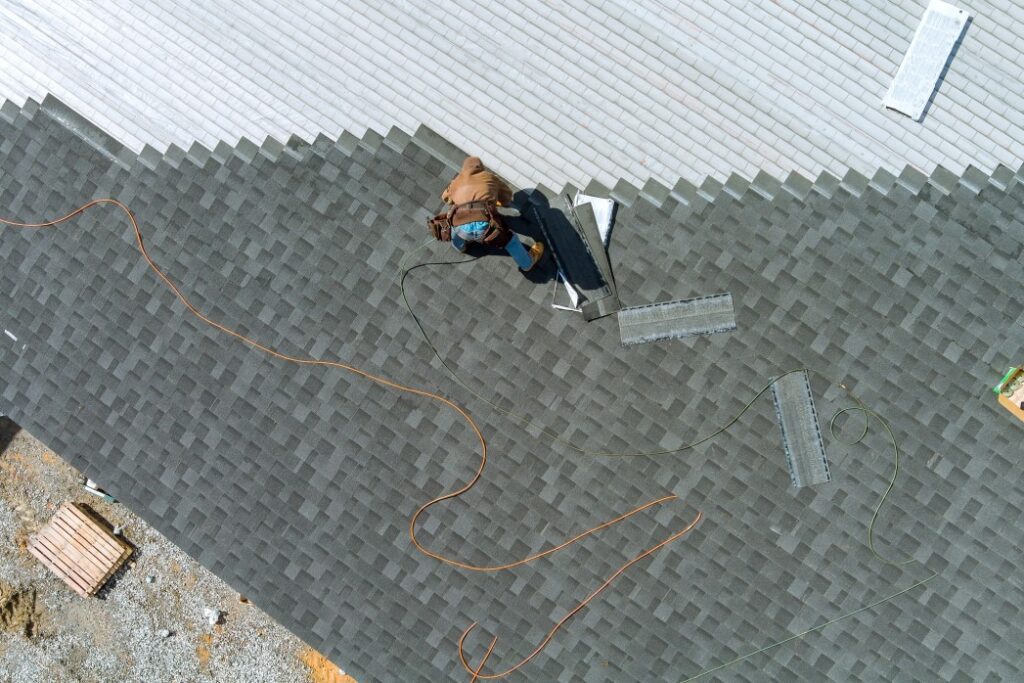
Commonly, roof leaks are caused by buckling, curling, or damaged shingles. If you consider yourself more of a handyman, you might be able to take on the task of changing the shingles on your own.
To begin, you’ll need to remove the shattered shingles from the roof. Slide a flat pry bar into place beneath each of your roof shingles to remove the nails. A new shingle can then be nailed into place after this procedure.
In order to keep a shingle in place, you can apply roofing cement on the shingle’s underside. If your emergency roof repair appears to have been successful, you should still contact a professional roofing contractor to ensure that the roof leak was fixed appropriately.
Even if you don’t have extra roofing materials on hand, a sheet metal shingle may be used to cover your roof while you get new ones temporarily.
To replace an average shingle, just cut a piece of sheet metal to the proper size and form. Then proceed as if you were replacing an ordinary shingle. For best results, use roofing cement to conceal any nails that could protrude from your sheet metal shingle.
The pipe flashing boot may have been damaged if your leak comes from around the pipes. The ancient pipe flashings may be vulnerable to this. You may need to purchase and replace this inexpensively to stop the leak. To ensure a proper fit, measure and select the appropriate pipe size. Sizes and colors range from little to enormous.
Leaking roofs can be a huge hindrance and cause damage to your home's structure. So we've set out some simples steps below to help repair the roof until you can hire a professional!

It’s best to start with a ceiling stain and work your way up to the leak. Using a ladder and flashlight, climb into the attic closely following a vertical line up to the top of the roof.
You could check your roof ridge if the leak is coming from a few feet higher up there. Black or white stains, mold, or mildew might indicate the leak is coming from the underside of the roof deck.
Roof vents commonly cause roof leaks. Roof vents might include attic fans, turbines, plumbing soil stack pipes, and other metal flashing extending over the roofline. Damaged plywood on the roof decking might be the cause of the leak.
Repair any damaged vents if the leak is coming from the roof itself. The housings or boots may have developed cracks. Dislodged vents might be to blame for this.
Ensure that the vents are not loose or missing any nails that secure them to the roof.
Remove the damaged roof vent from the top of the roof. First, remove the shingles from the vent by prying out the nails with the pry bar. Pull back the shingles covering the vent’s base with the pry bar next.
It’s a good idea to have a helper hold the shingles as you work. The shingles should not be removed. Detach any nails that are fastening a roof vent to its deck. After that, remove the exhaust vent.
Fill up any gaps around the vent with a generous layer of roofing cement or outside sealer. Have an assistant gently roll back and separate the shingles as you insert the vent.
Leak prevention calls for the lower piece of the vent flashing to be placed over the shingles on the roof. At every 4 inches, fasten the vent with nails in the four corners. Sealant or cement can be used to cover the nails.
It may be necessary to remove shingles to access the damaged part of the roof deck if the leak results from damage to the roof deck.
Start around two rows of shingles above where you wish to fix the roof. Using a pry bar, work your way from the bottom up, beneath the shingles- toward the roof ridge. Then, work your way down the rows, removing nails and shingles as you go.
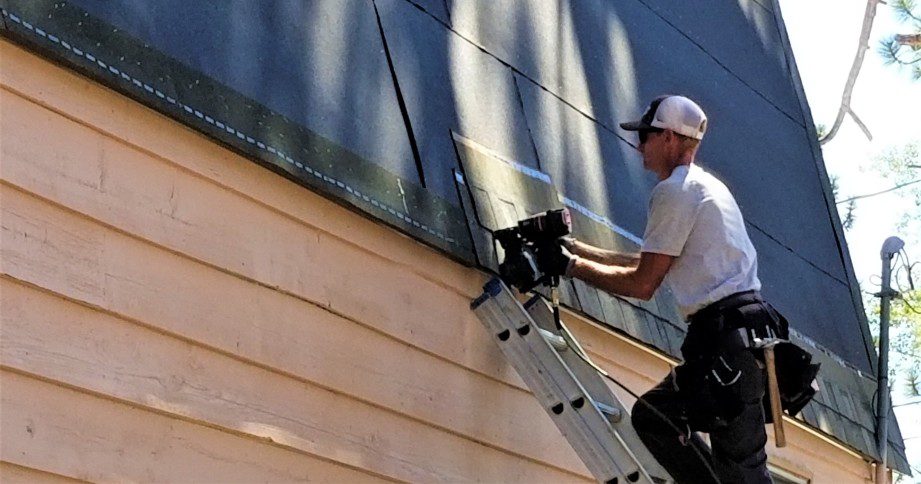
Maintain as much of the original structure as possible. The shingles will be separated from the roof deck by a layer of roofing paper or synthetic underlayment. Use a utility knife to cut away the paper or underlayment.
Draw a chalk line from the damaged area of the roof deck to the rafters on the left and right sides. Make sure that the line is snapped in the middle of the rafters. To find the rafter’s center, use the existing nails as a reference.
Afterward, draw a chalk line parallel to the rafters, or at an angle, above and below the damaged area.
Add 1/16-inch to the circular saw blade depth to match the thickness of the roofing deck. To remove the portion of the roof deck that has been damaged, use the chalk lines as a guide. When cutting, be careful to do it outside the marked-off area.
Pull nails out of the cut-out part of the roof deck with a pry bar. Then, use a pry bar to remove the plywood, but don’t throw it away just yet.
Mark out the new roof deck repair proportions using the damaged part as a guide. Make a slit in the earth here for your protection.
Install the roof deck patch and fasten it to the rafters using 8-diameter common nails.
Use roofing nails to secure the roofing paper or underlayment, working your way up from the bottom. A minimum of 4 inches between each row is recommended.
Lay the first row of new shingles from the bottom up. Place the new shingles on top of the existing shingles from left to right to maintain the established rows.
Apply a bead of roofing cement around the shingles’ bottoms. As you work your way up to the shingles, be sure to nail them in place.
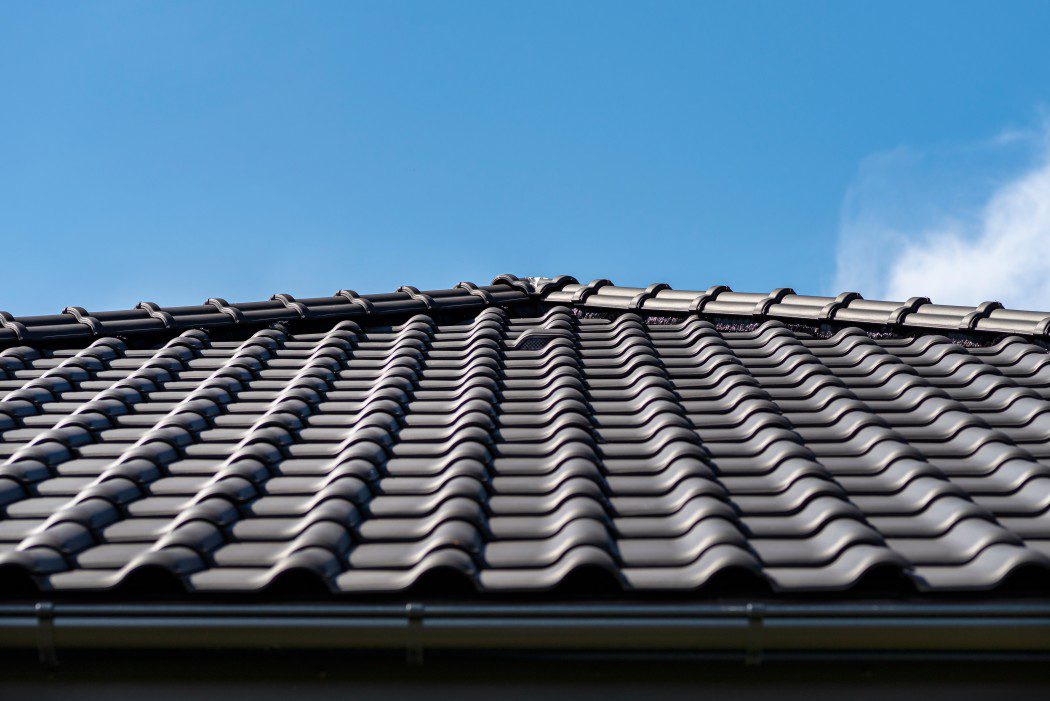
Start from the bottom and work your way up. Slide the new shingles beneath the top row of the current tiles to create a seamless transition.
Supply:
Tools:
Materials: Roof cement Exterior sealent Chalk line 7/16-inch exterior-grade plywood or OSB board Roof vent Roofing paper or synthetic underlayment Roofing nails 8d common nails
While leaking roofs can be a nightmare and can cause a wide range of inconveniences, there are some areas that are best left for the experts.
It may seem like a good idea to do DIY repair your roof yourself and save on labor costs, there are too many pitfalls that can result in failure or injury.
So why not hire a professional such as Mikku & Sons to handle it for you? In business and serving the valley for over 20 years, we run a full roof inspection and devise a detailed plan based on the specific needs of your roof. Call us today or fill out our online form!
Wanting to spend time outdoors in front of your house? Have you ever considered adding a porch roof? They have a huge range of advantages such as shielding you from heavy rain, take a look at our article to learn more!
Both the internal and external methods of leak repair provide only temporary relief. It’s just a stall tactic that won’t result in a full roof replacement. Meanwhile, you may use this temporary solution to repair your roof from the inside before calling a professional.
Corrosion on metals- water leaks may be caused by fastener corrosion and metal cracks. The seams of a metal roof may become loose over time due to expansion and contraction. Rain-induced roof leaks may indicate that the shingles are nearing the end of their service life.
Roofing leaks may be prevented with the use of a flexible sealant. Using a sealant on a leaky roof is a good way to fix the issue. Flex Seal comes in a liquid form to simplify the application. It remains flexible and non-cracking. Weather conditions do not affect Flex Seal.
It’s impossible to say just how long a leaky roof may be ignored before it starts to create problems. It’s usually a good idea to have your roof leak addressed as soon as possible since so many implications can arise. Remember the quicker you spot the problem the longer your roof will last!
An old roof, damaged or missing shingles, blocked gutters, and chimney damage are the most prevalent sources of leaks. Your home’s structural integrity might be in jeopardy if these issues are ignored.
