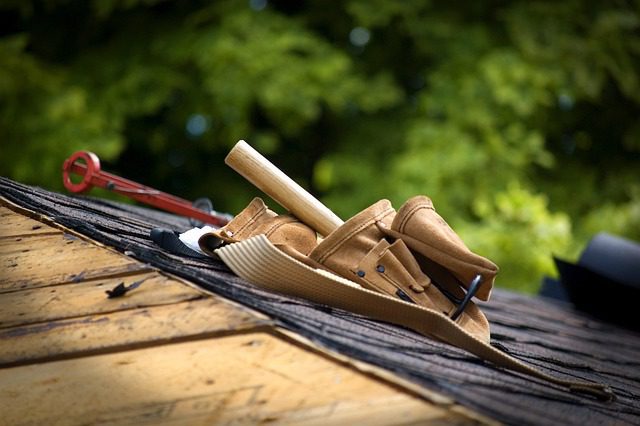
As a homeowner, few things are more important than protecting your investment from the elements. One of the key ways to do this is by ensuring that your roof is properly waterproofed. Not only can water damage cause significant structural problems, but it can also lead to mold growth, mildew, and pest infestations.
In this blog, we'll take a closer look at why waterproofing your roof is a must-do for every homeowner and provide tips and advice on how to get started. From identifying potential leaks to choosing the right products, we have everything you need to protect and secure your roof.
So, whether you're a seasoned DIY enthusiast or just looking for expert advice, read on to learn more about the importance of waterproofing your roof.
A well-maintained roof is the unsung hero of your home's structural integrity. One crucial aspect of roof care that often goes overlooked is waterproofing.
Roof waterproofing is applying specialized materials and techniques to create a barrier that prevents water from infiltrating your roof and causing damage to your home's interior. Essentially, it's your roof's armor against the elements.
Some common roofing materials and their susceptibilities to water damage help you make informed choices for your roofing needs and understand the importance of regular maintenance.
Roof leaks are more than just a nuisance; they can cause significant damage to your home's structure and interior. Waterproofing serves as your roof's first line of defense against water intrusion. It creates a barrier that prevents water from seeping through the roofing materials and into your home.
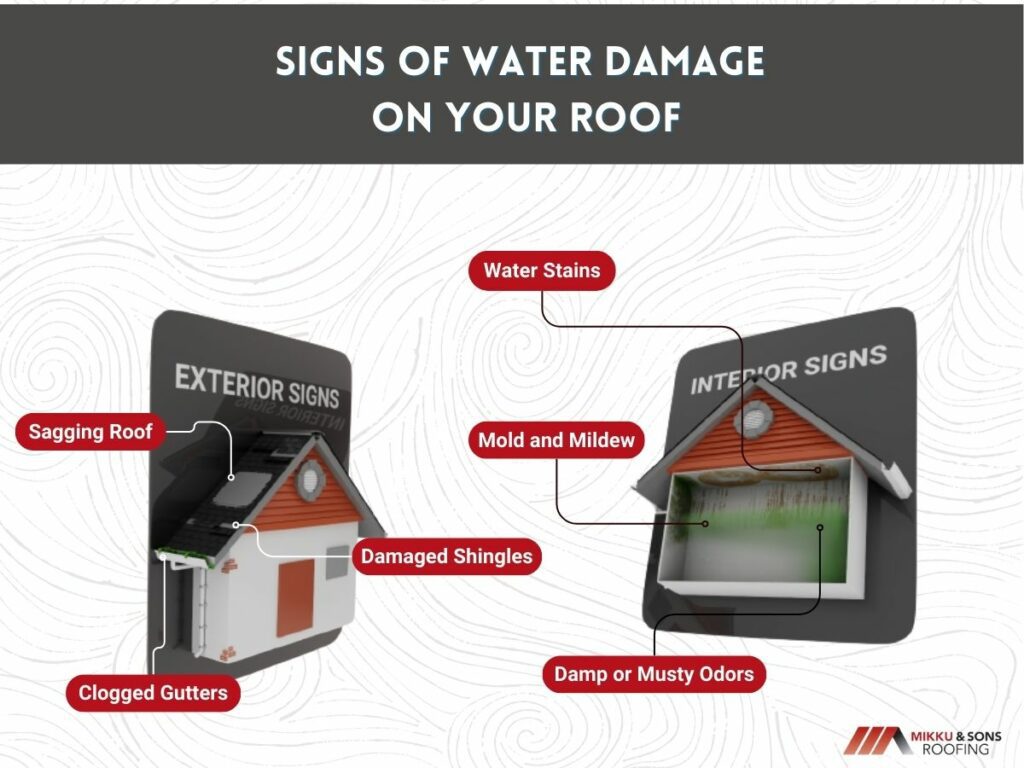
A well-maintained roof is essential for protecting your home from the elements, but over time, it can succumb to wear and tear, resulting in water damage. Below are key interior and exterior signs that indicate potential water damage on your roof, helping you identify issues before they escalate into costly problems.
Your roof stands as the fortress protecting your home from the elements. When safeguarding your investment, roof waterproofing is an indispensable measure.
Not only does it prevent costly repairs, but it also fortifies your home's structural integrity, enhances energy efficiency, and extends the lifespan of your roof.
One of the foremost advantages of roof waterproofing is its ability to avert the financial burden of extensive repairs. Without proper waterproofing, your roof becomes susceptible to water damage, leading to leaks, rot, and structural deterioration.
Addressing these issues after they occur can be significantly more expensive than implementing preventive measures. Roof waterproofing is a proactive shield, saving you money in the long run.
Water damage can wreak havoc on your home's structural components. It can weaken the foundation, compromise the integrity of walls and ceilings, and lead to mold and mildew development.
Roof waterproofing forms a robust defense against these threats. Keeping moisture out helps maintain the strength and stability of your home's structure, ensuring a safe and secure living environment.
Roof waterproofing also contributes to increased energy efficiency. When your roof is watertight, it prevents air leaks and heat loss.
This means your heating and cooling systems can operate more efficiently, reducing energy consumption and lowering utility bills. Maintaining a consistent indoor temperature enhances overall comfort and minimizes temperature fluctuations.
Your roof is exposed to a barrage of weather-related stressors year-round. Sunlight, rain, snow, and temperature fluctuations can impact roofing materials. Without proper waterproofing, these materials can deteriorate more quickly.
Roof waterproofing helps prolong the lifespan of your roof by providing an extra layer of protection against the elements. This means you won't have to replace your roof as frequently, saving you both time and money.
When safeguarding your property from the elements, one of the most critical aspects is ensuring your roof is effectively waterproofed. Various methods are available to achieve this goal, each with unique advantages and suitability for different types of roofs and applications.
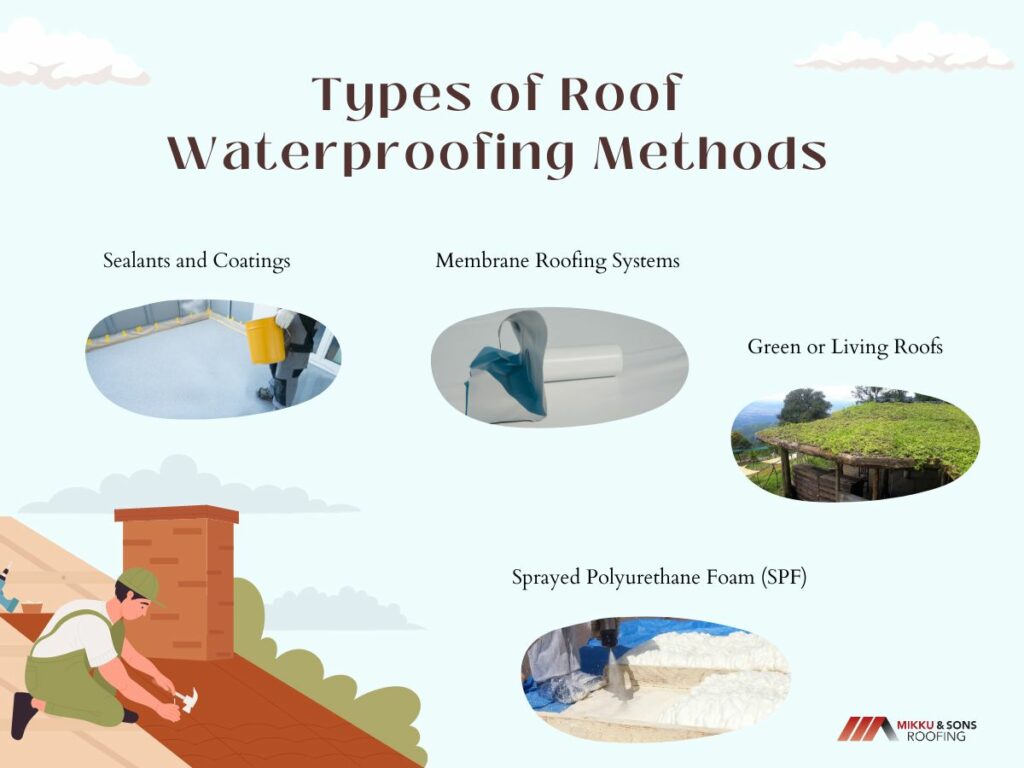
Sealants and coatings are among the most common and cost-effective roof waterproofing methods. They involve applying a waterproof coating directly onto the existing roofing material.
These coatings create a seamless barrier that prevents water infiltration. They are especially useful for flat or low-slope roofs. Silicone, acrylic, and elastomeric coatings are popular choices, offering specific advantages such as UV resistance and flexibility.
Membrane roofing systems are widely recognized for their durability and effectiveness in waterproofing. These systems involve the installation of a waterproof membrane, often made of materials like modified bitumen, EPDM, or TPO, over the existing roofing structure.
Membrane roofs are known for their resistance to water and UV radiation, making them a preferred choice for commercial and residential properties.
Sprayed polyurethane foam (SPF) is a versatile and highly effective roof waterproofing method. It involves the application of a foam material directly onto the roof's surface. The foam expands and forms a seamless, watertight barrier.
SPF is known for its exceptional insulation properties, making it a popular choice for energy-efficient roofing systems. It also provides excellent protection against water infiltration.
Green or living roofs are a unique and eco-friendly approach to roof waterproofing. These roofs feature a layer of vegetation, such as grass, plants, or even small trees, planted on top of a waterproofing membrane.
The vegetation acts as a natural barrier, absorbing rainwater and reducing runoff. Green roofs provide effective waterproofing, offer insulation benefits, and promote environmental sustainability.
Roof waterproofing is a crucial step in ensuring the longevity and durability of your home's roof. It protects your investment from costly repairs and potential structural damage. However, deciding to undertake waterproofing as a DIY project or hire a professional comes with its own considerations.
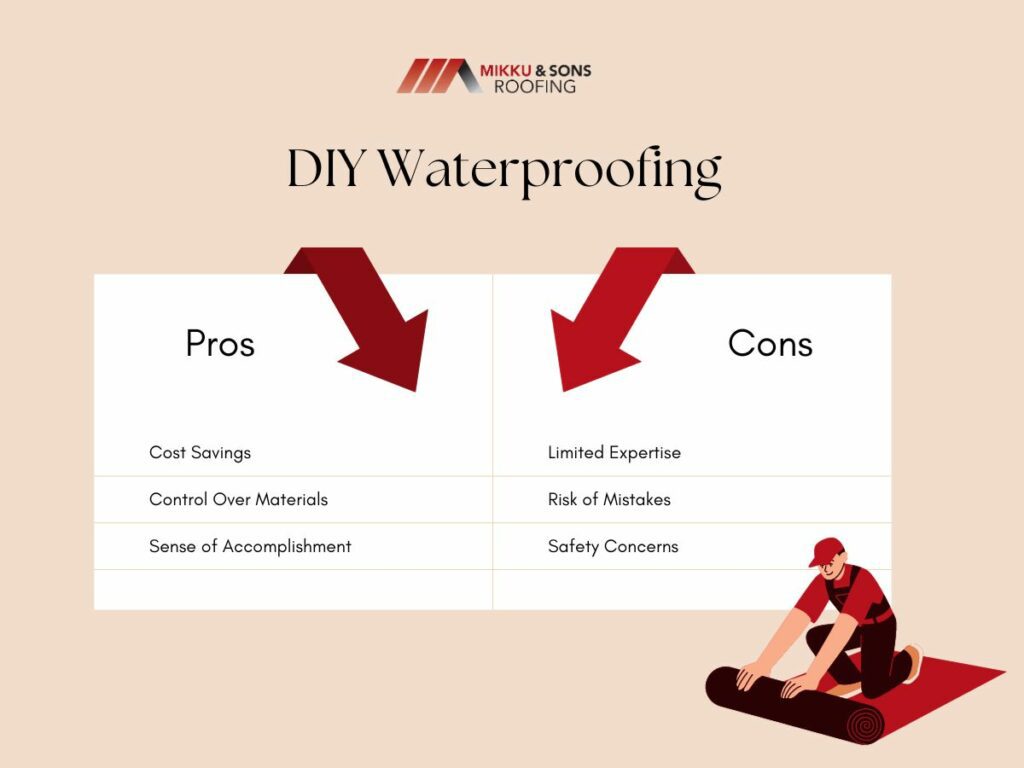
While DIY waterproofing can be cost-effective, certain situations warrant hiring a professional:
The cost of waterproofing can vary widely depending on several factors:
Protecting your home from the elements begins with safeguarding its first line of defense: the roof. Whether you're dealing with a new construction project or looking to enhance your existing roof's resilience, understanding the essential steps to waterproof your roof is crucial.
Achieving a waterproof roof is the beginning of safeguarding your home against the elements. Long-term maintenance is crucial in preserving your roof's integrity and preventing water damage.
The decision to undertake DIY waterproofing or hire professionals involves considering the complexity of your roof, your level of expertise, and safety concerns. While DIY projects can save costs, professional assistance may be necessary for intricate or high-risk situations.
Taking a proactive approach to roof waterproofing, along with regular inspections and maintenance, will help prolong the life of your roof, protect your home's structural integrity, and provide peace of mind during rainy seasons.
Whether you choose the DIY route or opt for professional help, the goal remains: ensuring a dry and secure home through effective roof waterproofing and maintenance.
It is anticipated that tile roofing should endure a lifetime. Nevertheless, there are situations when it needs to be fixed owing due to leaks caused by slipping, cracking, or sagging, defective flashing, or a worn-out underlayment. Making repairs as quickly as feasible is critical.
Damage gets gradually worse if not corrected. The repair prices and considerations for these materials are distinct from those for other types; if they need to be serviced or repaired, it is essential to have a good hold on them.
Damage could arise from a range of different sources. Wind, ice, debris, hail, and even the sun's heat all cause damage to a roof over time.
When a roof of this type is damaged, it usually only affects a single tile at a time. In most circumstances, you will not have to replace all of the tiles on the roof. Only damaged ones will need to be replaced, but it's always advisable to get an expert opinion to see how bad the damage really is.
In other circumstances, the repair might not even require new tiles. Alternatively, you might have the current tiles repaired. When the tiles are damaged, they can potentially cause leaks, which can, in turn, generate additional damage to the roof. Damage to the building's interior from leaks is also possible and can be expensive to repair.
| Repair cost | Price |
| Material | Composite tiling: $10 and $20.50 per sq ft Plain tile: $8 to $9 per sq. ft Terracotta tile: $11 to $23 per sq ft Slate: $12 and $14 per sq ft |
| Style | Plain tile: $8 to $9 per sq. ft Pantile tiling: $8 to $10 per sq ft Mission tile: $9 to $11 per sq. ft Roman tile: $9 to $11 per sq ft Spanish/ Mediterranean tile: $8.50 to $11 per sq ft French tiling: $9 and $11 per sq ft Interlocking tiling: $9 to $11 per sq ft Tile repair: $9 to $11 per sq ft Scandinavian tiling: $12-$14 per sq ft |
| Problem | Slipped tiling: $8 - $13 per sq ft Sagging: $15 to $25 per sq ft Flashing costs: $25 to $30 Repairing a crack: $25 to $50 per tile Leak repair: anywhere from $150 to $500. |
Repairing a tile roof can cost anything from $900 to $2,300 across the country. Steel tiles damaged by area damage on a 1,500 square foot roof typically cost roughly $1,800 to repair. The least expensive option available is approximately $500 to repair metal flashing that is damaged or missing. Repairs of deteriorated underlayment and replacing the roof at the high end could cost up to $8,000.
How much does it cost to repair a tile roof in Arizona? Many factors can affect the cost, e.g., the type of material and quantity of tiles that need to be replaced or repaired. Concrete, lightweight concrete, metal, and clay are all possibilities.
Tile Roof Repair Cost by Material
The cost of repairing a tiled roof ranges from $8 to $23. The material has an impact on it. Prices for various types of materials might differ significantly. When compared to other types, some demand more in the way of materials and labor. Concrete is the cheapest option, while clay or composite is in the middle of the cost spectrum. The table below includes the most popular types of materials available and their repair costs per square foot.
Cost of Tile Roof Repair by Style
The style impacts the repair expense, ranging from $8 to $14 per sq. ft., depending on the style of tiling. When completing your study, you will notice the many styles available on the market. All styles differ in appearance, texture, and cost. Style is a component that also affects the price you pay. A flat style is less expensive than a Roman style since it is more straightforward. Below you'll find a table that illustrates the relative costs of repairing various cost styles.
Tile Roof Repair Cost by Problem
Your structure is a considerable investment that carries out the crucial duty of protecting you and all of your assets. Ignoring any tiny problem now can lead to significant problems later on. Some typical issues include leaks, sagging, slid tile, cracked tiling, and damaged flashing. The price of tile repair by problem ranges from $8 to $25 per sq. ft. and $25 to $500 per problem.
Sixty percent of the overall repair costs range from $900 to $2,300. $540 to $1,380 will be spent on labor, with materials accounting for the remaining 40 percent. A professional might be engaged to complete repairs at $45 to $75 per hour for labor.
If your style is out of the ordinary or the slope is steeper than average, your labor costs will rise. The repair process starts with visually inspecting the structure to establish the issue and the necessary repairs.
Then, they will negotiate a repair strategy, which may involve removing and replacing damaged components. Repairs aren't always necessary for the entire piece. The repair needed directly influences the project's cost and duration. Even the tiniest of repairs require at least two hours to accomplish.
| Project | Cost |
| Tile restoration | $300 to $600 and up to $6,000 to $11,000 |
| Tile replacement | $5.50 to $36 per square foot |
| Underlayment replacement | $0.50 and $2 per square foot |
| Roofing felt replacement | $0.50 and $1 per square foot |
| Synthetic roof underlayment | $0.75 and $2 per square foot |
Minor restoration projects, such as cleaning the gutters, might average between $300 and $600, depending on the size of your structure. However, a thorough restoration costs around $2,500 for an average property.
Prices might range from $6,000 to $11,000, depending on the scope of the work. Restoration is the process of extending your structure's longevity, offering you a cheaper option than a complete replacement.
Over time, tiles can be damaged by several factors, including extreme weather, infestation, or falling debris. This technique entails cleaning, repairing, or replacing any broken, damaged, or cracked surface. Protecting the surface with a clear coat prevents any further damage.
If the materials need to be replaced, you may spend roughly $5.50 to $36 per sq. ft. The replacement cost includes removing the current materials and discarding the old ones, underlayment, materials, and installation.
Although it can appear expensive to replace tiles, it is occasionally a more practical alternative than repair. If your anticipated price to repair is more than half the replacement price, you may want to consider a total replacement instead. Several positives to consider regarding a replacement, including having all concerns repaired at once.
If you opt to repair one area of your structure, another area might need repair later. Long-term savings are realized by having your structure repaired instead of replacing the existing one.
Depending on the material, replacing an underlayment costs between $0.50 and $2 per square foot. The underlayment between the tiles and the deck acts as a protective barrier, keeping the surface dry and free of leaks and damage caused by the elements.
Repairing or replacing a structure often necessitates replacing the old underlayment, especially if the structure is more aged. A robust underlayment protects your structure if damaged and can prevent many severe problems from developing, including leaks.
Underlayment is typically included in the project cost, but it never hurts to double-check.
Felt, commonly known as asphalt-saturated felt, has been a standard underlayment material for construction types for decades. The material is comparable to tar paper but combines polyester, cellulose, bitumen, and asphalt soaked in a waterproofing agent.
It costs between $0.50 and $1 per square foot to replace the felt underlayment, including the materials and labor. It's available in two weights: 15 lbs. and 30 lbs.
Compared to the 15-pound type, the 30-pound class is significantly thicker and more rigid. As a result, the 30-pound felt is an excellent option due to its resistance to damage from the elements.
It costs between $0.75 and $2 per square foot to replace synthetic underlayment, including supplies and labor. Underlayment should be replaced if damaged or exposed for an extended time. Professionals currently employ synthetic underlayment as their primary underlayment.
Compared to paper or asphalt, durable plastics like polyethylene and polypropylene are commonly used in synthetic underlayment. Exceptional strength, flexibility, and waterproofing characterize this underlayment, making it resistant to mold and other fungi.
This tear-resistant substance stays smooth and rarely tears around fasteners. It holds up nicely against UV damage and light.
As a result of its sturdiness and endurance to the harshest conditions, tile is a popular flooring choice for many homes. Maintaining and giving reasonable care to your structure is a must.
It should be checked at least twice or thrice a year or after a large storm or other weather events that could have caused harm. During the examination, clear the area of any debris and inspect the tiles, fasteners, and sealant. If there are any damaged sections, suitable measures should be taken quickly to reduce further concerns.
You should clean it any time you spot stains, mold, or mildew. Hand cleaning with a trowel and wire brush is the preferred method. Consult a professional if you aren't sure if you can handle it on your own. Avoid using high pressure on the structure.
This has devastating damage. Once your surface has been thoroughly cleaned, you can take additional steps to protect your building, such as polishing, priming, painting, or resealing to keep it in good condition.
| Project | Estimate cost |
| Removal of a Roof | $0.50 to $1.5 per square foot |
| Tile painting | $2,550 to $4,250 |
| Roof support | $300 to $5,000, $500 to $5,000 (Truss replacement) |
| Roof Inspection | $100 to $600 |
| Tile cleaning | $0.30 to $0.75 per square foot |
Removing a roof might cost anything from 50 cents and 1.5 cents per square foot. You can anticipate paying double this cost for structures with more than one layer of tiles.
2. Roof Tiles Paint Prices
Typically, painters charge from $2,550 to $4,250 for painting. The amount varies depending on the region, the materials, the type of structure, and the materials' condition.
3. Roof support
Supports are a vital feature of any structure that maintains the structure stable and prevents it from collapsing or warping over time. A support problem can cost $300 to $5,000 in repair costs, depending on the nature and extent of the problem. If you need complete trusses replaced, those range from $500 to $5,000 to be installed.
4. Inspection of the Roof
The average fee for an inspection is between $100 and $600. Size, material, pitch, and present condition all influence this pricing. An inspection assesses the structure's condition and lifespan and any necessary repairs or replacements. An assessment is vital in finding potential problems and solutions to concerns.
5. Tile Roof Cleaning Cost
Roofing is exposed to several elements and severe weather. It is inevitable that debris, staining from food or drink, mold, and algae may accumulate over time. This can cause long-term damage and issues if it isn't cleaned. Cleaning services cost, on average, $0.30 to $0.75 per square foot across the country.
6. Additional considerations and expenditures
Purchasing new tiles is more expensive than repairing existing ones, but this is not always the best option. The labor cost will depend on the amount of damage and work.
The cost of cleaning up and removing any old tiles and materials should be factored in. If the problem isn't fixed, the roof and the house's contents risk further harm. Taxes and permit fees are not included.
Most of the time, residents in Arizona may be oblivious to the areas that are prone to roof leaks when designing and building a roof. Changing roof slopes meet in a roof valley with a name that stems from the roof's valley-like appearance, preventing water buildup on the roof.
The roof valley helps the roof slope drain water and reduces snow and ice accumulation on roof liners while at the same time improving the home's appearance. Complex roofs with multiple pitches will have dead valleys that must be protected and maintained.
A dead valley is a place on a roof where water cannot easily run down because of two slopes or a slope and a wall. Dead valleys can cause leaks and other roof damage if not properly maintained.
Good home designers who understand roofing and water movement avoid dead valleys in their blueprints, but when this is neglected, a roofing company must find and safeguard vulnerable areas. Where two roof slopes meet, a trough allows water to flow readily down the roof, but if the configuration is not designed well, water flows directly into these pitch regions, which have inadequate or no drainage.
When opposing roof slopes meet in a dead valley, there is little or no fall, leading to water and debris collection. Water generally drains fast, but in a dead valley, it can't because of the valley's flatness.
It can also occur when a roof section meets a lower outside wall. First, a regular valley runs into a flat wall corner instead of off the roof. Second, two or more slopes merge into one.
Low-sloped roofs should use materials that can endure water runoff without early deterioration. Roofing contractors often shingle over these sections without the proper underlayment, costing homeowners hundreds in repairs.
Debris and water can deteriorate wood and shingles, causing costly repairs. Dead valleys on roofs collect rainwater, snow, leaves, and other detritus, and as the roof ages or disintegrates, debris and water will leak through the shingles.
Dead valleys become an issue for roofers as leaking spreads, and the roof structure decays. When serious damage is long-lasting, the roof and adjacent structural components may need to be replaced.
Even if you can remedy a dead valley, it will limit your roof's lifespan if you do it too late or with the wrong method. Builders and roofers often "solve" a flat area by laying shingles and felt paper.
Despite their thoughts, a bad solution like this will leak in three to five years. It may lead to:
Leaks:
More roof leaks may indicate an unknown dead valley. Most homeowners don't know they have a dead valley roof until a leak is discovered, but that doesn't imply the situation is irreparable.
During roof repairs, membranes and other solutions can avoid water pooling and damage.
Roof water and debris collection:
Stagnant water is a common cause of leaking roofs, but it's not the only problem. Pooling water causes issues and can attract bugs.
Rooftop puddles attract mosquitoes because they provide ideal nesting conditions. Water seeping through the roof also attracts cockroaches and termites.
Standing water can cause expensive repairs and create ecosystems that should be avoided.
Ice dams:
Ice dams can cause substantial damage and leaks even when water appears to be flowing. Ice dams can create dead valleys where none existed previously.
A roof ice dam prevents melted snow from draining off the side. This can promote mold and mildew growth. Repeated freezing and ice thawing can cause considerable roof cracking and paint blistering and peeling.
Rot and moss:
Vegetation can develop in even the slightest roof breaches, creating a concern. Roofs with moss, algae, or weeds are less water-resistant, making them more vulnerable.
Roots can break roof membranes, enabling water to accumulate and attracting more pests.
Roof shingles are flat rectangular elements laid from the bottom up, and they successively overlap to work as a roof for a structure. They come in different types and colors, and ceramic shingles are popularly known as tiles.
The most common type is asphalt shingles, and they are easy to install, relatively affordable, and durable.
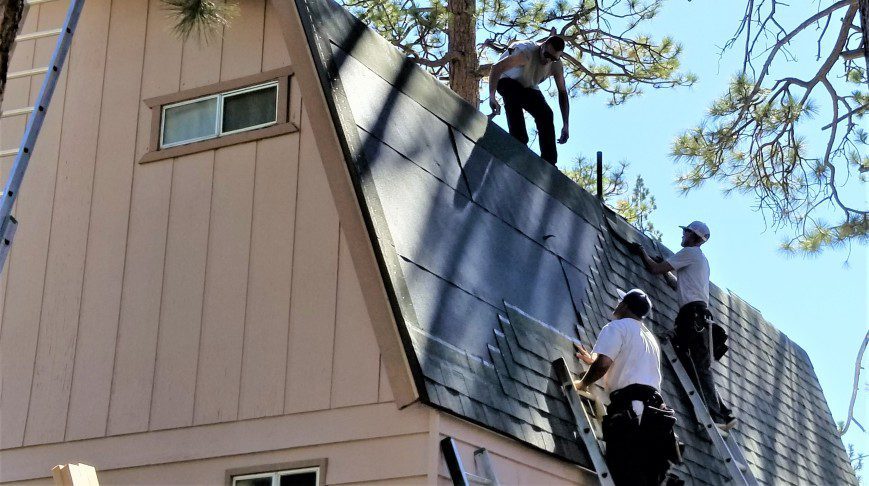
Roofing your house is a big task; without the right steps, you may end up with a damaged roof over time. This guide brings light to this task-full activity, so continue reading below, where we delve into How to Shingle a Roof.
If you're unsure whether you should shingle your roof, look at our article, where we weigh out the pros and cons. Or if you're an outdoor person and want to sit outside despite the weather, you should consider adding a porch roof.
Before you decide to take on the project yourself, you need to determine whether you'll be able to perform the task without professional help.
Many concerns come with roofing a house, including the fear of heights. If you can walk on your home's roof comfortably, you can complete the DIY roofing task.
You'll need to have the energy to do all the manual jobs, such as carrying the shingles up a ladder to your roof and installing them.
To shingle a roof, a few terms you will have to have at your fingertips are described throughout this article.
This is installing metal material on a roof to direct water away. It may have to be replaced if rusted or worn out (curled up or torn).
This is metal flashing interwoven with the adjacent shingles. They are nailed and held in place along the adjacent shingles and sealed with roofing cement to prevent water from seeping through.
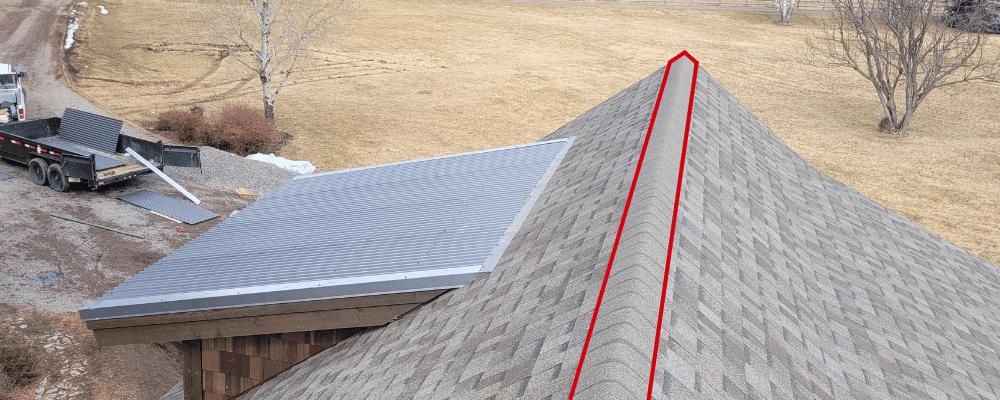
The valleys are where two roof parts with different pitches or angles meet. This place is vulnerable to water penetration and is protected through valley flashing.
They may be installed along with the roof underlayment or deck before the shingles are installed. They should last as long as the shingles because replacing them involves removing them.
This is flashing around the vent piping. It is sealed with roofing cement to prevent run-off water from seeping through.
This is ice and water dam protection that prevents damming on a roof. This could cause the roof to collapse due to increased point load on the roof frame.
The roof deck is the material placed on the rafters and onto which the roof cladding will be installed.
This is a secondary protective layer installed on the roof deck. It protects the roof from water that may seep through the nail holes of the shingles.
There are synthetic and felt underlayments, and they each have advantages and disadvantages. The type of underlayment you use depends on the location, type of roofing material, and budget, among other factors.
Synthetic underlayment is more durable and offers better protection than felt underlayment. It is tough, easy to install, safe, and water repellent.
Some are slip-resistant and offer a workable surface once installed. They are also not damaged by prolonged UV or moisture exposure when it takes a while to add the shingles.
When thinking about how to shingle a roof, I can tell you many nails are involved! The prospect of hand-nailing more than 2000 nails is extreme, and that's where an air gun can come in handy. However, both methods have advantages and disadvantages.
The main difference between the two methods is the accuracy and precision of hand nailing. The placement of nails is important because of the limited area they go on a shingle.
The head of the nail stops flush with the top of the shingles, and it is necessary to maintain the nail line.
Under-driven nails also make for an uneven shingled roof and make the shingle susceptible to wind damage. The wind may also pop the shingle off the nail, causing a leak.
The air compressor for the nail gun has to be at good pressure to drive the nails in correctly. Hand nailing offers more precision but requires more time and energy.
To shingle a roof safely, you must adhere to a few precautions.
Safety is the most important concern when installing a roof. Falling is one of the most common causes of injury, and you must pay attention to safety.
| While Using a Ladder |
| ✅ Make sure it is properly installed. It should be tall enough to reach the roof and strong enough to support a significant weight in the middle without collapsing. |
| ✅ Position it well at the top and the bottom of the roof. If possible, tie it in place to prevent it from slipping or falling. |
| ❌ Don't use the ladder when your arms are full. You can use a bucket or anything suitable to get things onto the roof. |
| When Working on the Roof |
| ✅Walk with care because you never know which part of the roof may have been weakened over time. |
| ❌ Don't walk backward as the expectation you're used to is to step on a flat and not tilted surface. This may cause you to lose your balance and fall off the roof. |
Before you begin learning how to shingle a roof, you must remove all previous old shingles.
Next, you'll want to check that your deck is securely fastened to the roof truss, free of any holes or gaps, and completely dry and smooth. This will give you a flat, seamless shingle roof in the end. Your decking is crucial as it's responsible for holding the shingle, so it has to be prepped to handle the weight.
Once you have ensured you are completely safe while installing your roof, you can continue reading on to our step-by-step guide on How to Shingle a Roof!
Asphalt Shingles: 2 days
The underlayment is the most crucial part of discovering how to shingle a roof.
Your underlayment layer sits between the shingles and the roof deck and helps to offer secondary protection from the elements.
The underlayment comes in rolls and is installed overlapping toward the top of the roof.
If you have installed an eave or ice dam protection, overlap it at the edge by 4". A roof has open and closed valleys. However, it is necessary to overlap the underlayment by about 6" at the valley membrane flashing for protection from water that may go down the valley.
If you don't have eaves or ice and water protection, install the underlayment hanging between ¼"- ¾" from the edge.
Generally, ice and water protection is used on roofs in northern states. For example, roofing companies in Kalispell would install ice and water shield.
Install the second layer upwards, overlapping by about 2". When you reach the ridge of the roof, roll out some excess underlayment to each side of the roof to provide a better seal.
Two types of valleys are open and closed, which are prone to water penetration. Closed valleys are covered up when installing shingles.
Flashing an open valley is recommended to provide a waterway down the roof. Flashing is done by installing a metal valley, preferably 28-gauge metal, to withstand the elements.
When installing the flashing, caulk the edges to provide a watertight seal.
For areas like chimneys and roof vents, install flashing around the area and caulk the edges to provide a watertight seal.
Asphalt shingles are relatively easy to cut to size. Once the underlayment is laid out, installing the shingles is the next step toward completing your roof.
You can either get prepping material for starter shingles or fashion them from the shingles you already have. They provide a sealed adhesion point and water-shedding protection at the adjacent shingle joints.
The lower part of the roof is the most sensitive and can damage by wind or water. The starter shingles are installed below the first row of shingles and along the rake, edges to get you started on the shingle installation.
Use a chalk line to mark out the lines that will guide you in installing the shingles. This is good for aesthetic purposes because you don't want an uneven row of shingles.
This also helps determine the number of shingles you may need for your roof. Remove the tabs from the shingles to get them ready for installation.
Place the first shingle over the chalk line and secure it with a nail gun. Subsequently, install the rest of the pieces horizontally till the first row is covered.
Install the rest of the rows, overlapping the shingles as per the required length of the shingle manufacturer. Extend the shingle installation past the ridge to provide a watertight seal when you get to the ridge.
If you choose to have a closed valley installation, extend the shingles at least 12" past the valley centerline and add extra fastening to the end.
The final step of learning how to shingle a roof is to cover up the roof's ridge. If you choose not to overlap the shingles at the ridge, you can also place caps horizontally along the ridge to provide protection.
They are typically installed from one side to another, and the hips are installed vertically. Install them with the first ridge cap facing the opposite direction of the prevailing wind.
You will need longer nails when installing ridge caps, as they have to penetrate both the caps and the last shingles. To provide a watertight seal, you may seal the exposed nails with roofing cement.
The hip caps are installed from the bottom up to the ridge and are sloped ridges. Install the caps from both ends and connect them to a hip roof at the middle meeting point.
Supply:
Tools:
Materials: Roof flashing Underlayment Shingles Roofing cement
Asphalt roof shingles are made out of long-chain hydrocarbons. With time, the loss of oil makes the shingle fibers shrink.
This exposes the nail heads used to hold them in place during installation. Once exposed, water can seep into the house and cause damage.
If you can see the nail heads on your shingled roof, it's probably time to re-shingle it.
Using a shingle shovel, you can easily remove any existing shingles with one quick gesture.
The shovel has teeth that grab the shingle, and when the handle is pushed, it raises the other end. This is easier than prying the nails with a hammer and speeding up the process.
How you nail shingles on a roof determines the roof's overall look and durability. Nailing the shingles incorrectly could cause:
1. Raised shingles
2. Blown shingles
3. Curled shingle edges
4. Leaking roofs
The shingle nail pattern for most shingle companies should be no further than 1" from the shingle edges. A 4-nail pattern is commonly used, but in some roof types, like steep slope roofs, this may go up to 6.
To fix nailing mistakes:
1. Drive in under-driven nails with a hammer.
2. Remove crooked nails with a hammer and fill the holes with roofing cement.
3. Fix a new nail or install a new shingle.
Remember that shingles are installed in an overlapping pattern, and messing up an installation may be a severe problem.
It is metallic and is installed along the fascia boards to prevent water from running down them directly and prevent the shingles from curling over the edge.
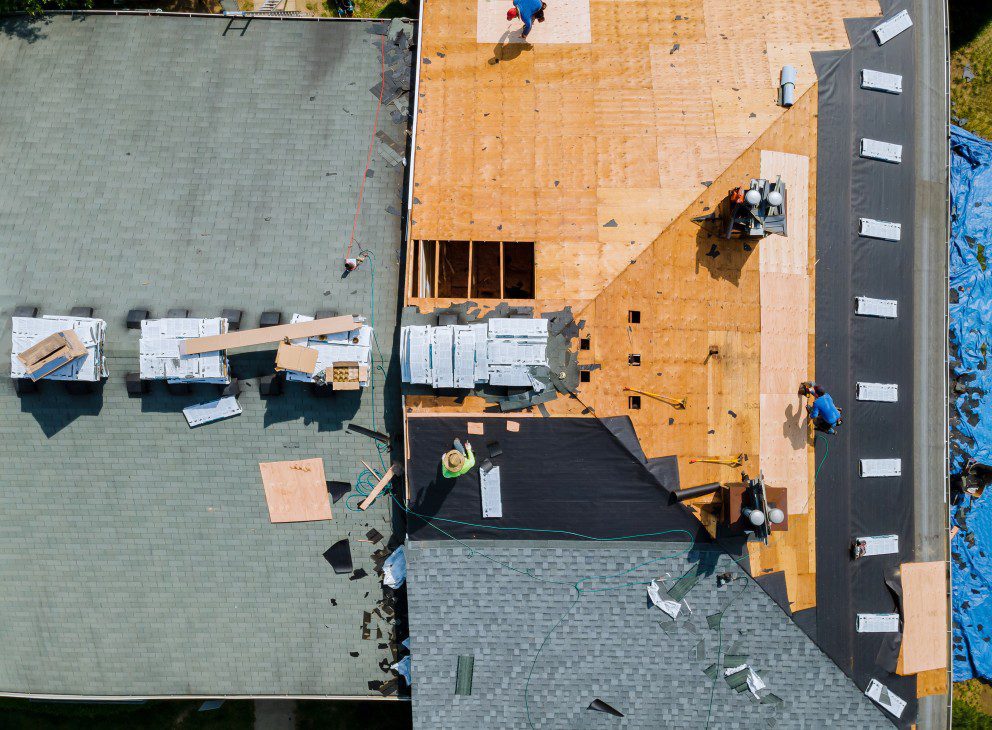
A roofing system is a big investment for property owners, and represents a big portion of construction costs.
It’s a roofing contractor’s job to help the owner protect their investment. They should provide professional, careful maintenance on the roof on a regularly. This will make sure its properly protected.
Here are some tips that will help your roofing contractor ensure they won’t miss any essentials during services. If you’re a homeowner, these tips will guide you on what to expect when you hire a professional roofing company to perform routine shingle roof maintenance.
A roofer should perform 4 basic services twice per year to help a homeowner properly maintain their asphalt shingled roof. Also, you’ll want to do this after major storms. Here’s your roofing maintenance checklist:
A critical part of roof maintenance is routine cleaning and clearing of the roof and its related systems. Pay attention not only to shingles and flashing but other key elements, like eaves, troughs, down spouts, installations (such as skylights, vents, chimneys, solar panels), and ventilation.
Here’s what we recommend:
Property owners should regularly clear debris from the roof, including leaves, branches, and other items that might clutter the surface. Your roofing contractor might use a leaf blower, being sure to blow the air down the roof. This will ensure that debris won’t be blowing up and underneath the shingles. To lower the debris that accumulates, clear away vegetation and branches that hang over the roof. Hire a professional tree service to cut away difficult or hard to reach areas.
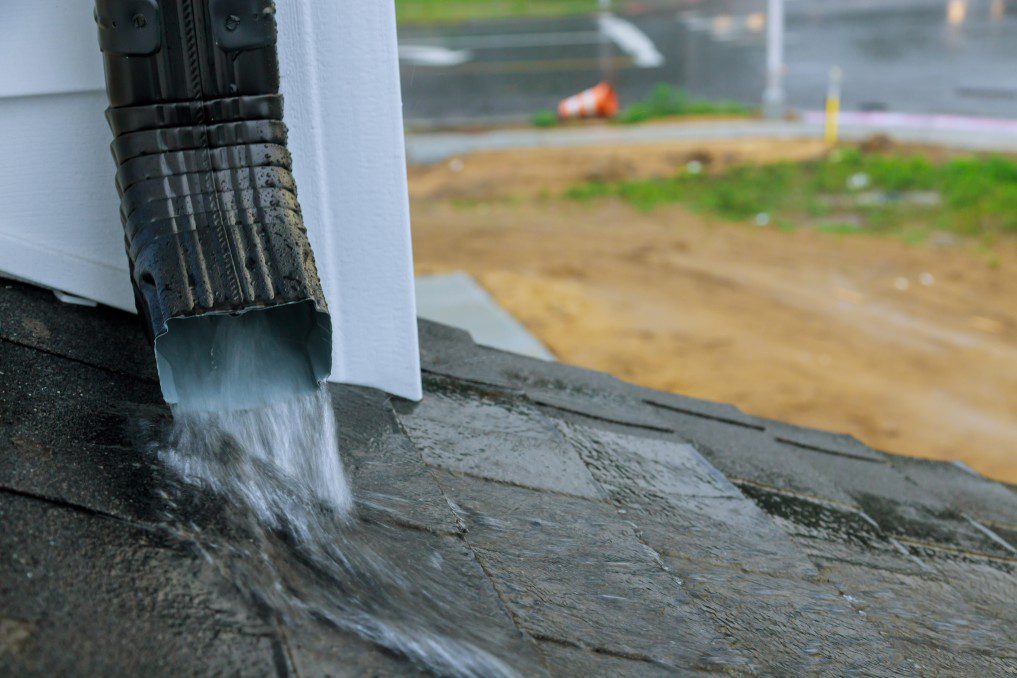
Dig out leaves and organic material from all gutters. This will ensure water drains without obstruction through to the downspouts. Homeowners could install eave protectors, metal meshed grates that prevent buildup of debris and make cleanup easier.
Be sure the downspouts are clear and unobstructed so water drains properly from the roof and away from the foundation. A homeowner should take notes of any leaks or drips that occur during or right after a rain storm. Report any issues to the contractor during inspection time.
Once cleared of debris, your roofing contractor should inspect it for any red flags that could indicate potential trouble.
They should complete this inspection twice a year – recommended in the spring and fall. This will allow them to make note of anything suspicious, as well as complete small fixes or minor repairs before they become bigger issues. Also, they’ll see if there’s any evidence the ventilation system is malfunctioning or might need maintenance or cleaning.
An experienced roofer should immediately complete any asphalt shingle roof repairs to maintain the integrity of the roof’s materials and related systems, such as drainage and ventilation. Little fixes performed properly will prevent bigger issues, or more costly repairs, over time. They could:
Replace or repair missing, broken or buckled shingles: A roofing contractor could use roofing cement or nails to repair shingles that have become cracked or loose. They could also replace any shingles that have broken free or blown away.
Replace or install valley flashing: They may also consider replacing the existing valley flashing if its become corroded, cracked or is no longer secure – which would threaten its waterproofing abilities.
Replace other flashing: Your roofer could use roofing cement and nails to replace metal flashing around chimneys, roof vents or other installations if the flashing has become loose or rotten. If they’re installing the flashing against a brick structure, it’s advisable to use copper or galvanized steel, because the lime in brick mortar could corrode aluminum materials.
Repair gutters or downspouts: Your roofing company might use gutter caulking, a gutter patching kit or roofing cement and patches to fix leaky or corroded sections of the eavestroughs or downspouts. If they are sagging, they should use a level to determine the proper pitch, then rehang them so they drain properly.
Whether you’re a homeowner looking to maintain the life of your roofing system, or a roofing professional educating your customer on the benefits of regular inspection, maintenance and repair, sticking to a consistent, regular schedule is well worth the investment.
A lot of homeowners take their ceilings for granted and don’t check them often, but we recommend you inspect them regularly for signs of moisture seeping through. Even if you see something that looks minor, you need to get on it and check it out. This article will discuss tips for taking care of water stains quickly and effectively.
When you spot moisture, the first thing you need to do is find out the source of where its coming from. Most of the time, the area directly above the stain is the best place to start. If you can’t see anything on your roof that looks like a problem, you could have a pipe thats leaking. There could also be moisture running along some pipes or trusses that will come from a source somewhere else and drop onto your ceiling.
Are they water stains? There are other causes for stained ceilings including:
If the leak is coming from your roof, it could be that there are other sources of moisture other than obvious leaks. If you need a professional, experienced roofing company to inspect your roof for leaks and determine where any moisture spots may be coming from, give us a call at (623) 465-1068.
You don’t want to repair any moisture stains, no matter how bad they look, until you know the source and have it repaired. If you fix it first then find the source, chances are you’re going to be repairing another moisture stain. If there’s permanent damage, you might have to take out part of your ceiling or wall to fix the issue. So the stain doesn’t seep through, when you’re dealing with a cosmetic stain, you should use a stain covering primer before painting over the spot. Depending on how much damage there is and the stain itself, you may need to contact a professional to help fix the issue.
Make sure you don’t let moisture stains and their source go unchecked. Always take care of the issue as soon as possible, or what could be a minor cosmetic and roof repair could turn into something major and much more expensive. Here at Mikku and Sons Roofing, we can put you in touch with financing options, if the need for it arises.
Understanding information on roof warranties is extremely important. Does the purchase of a new roof mean you get to sit back and enjoy the next 20 years with no worries? The best answer is that it depends on what you just purchased.
Most property owners tend to focus on the length of the warranty and don’t fully understand what is and what is not covered, leaving you open to some surprises later.
Understanding the information on roof warranties can help you get the most out of your coverage.
It probably isn’t a surprise to learn that information on roof warranties is usually more geared toward protecting the manufacturer than the property owner.
Roofing manufacturers spend big money to compose lots of fine print that tries to limit their own liability if something goes wrong with their roofing products.
That’s why it’s so critical that you understand the information on roof warranties before signing off on your project. Here are some good questions to ask before making the purchase:
If you haven’t purchased your new roof yet, ask for a sample of the roof warranty template and read through it, and ask for clarifications from your roofing contractor.
What are the differences between a contractor roof warranty and a manufacturer roof warranty?
This one is pretty simple. One comes from the roofing company that installed the roof and one comes from the manufacturer of the roofing materials.
Manufacturer warranties differ – some cover only the material while others cover the whole system. Most manufacturer warranties also require the contractor to perform warranted repairs for the first few years after they install the roof.
Contractor roof warranties usually don’t cover materials and only cover the actual workmanship.
Material Only Warranties typically have a lower cost than a full system warranty but will only cover manufacturing defects and premature deterioration for the term of the warranty. Material-only warranties cover the roof membrane and not other accessories such as flashings, adhesives, metal edge, etc.
It only covers the cost of materials to repair or offers credit toward buying a new membrane. These warranties don’t cover or include any labor or coverage for installation issues. They also don’t provide coverage for fixing leak repairs.
Labor Only Warranties cover only the labor required to fix a roof defect and doesn’t cover the cost of materials. They are usually offered by the roof installation contractor. This type of warranty isn’t a roof workmanship warranty and probably won’t cover repairs for installation errors.
Full System Warranties usually cover not only the material but also manufacturer-approved flashings, accessories, and metalwork used in the original installation. They typically cover the full cost, labor included, for any roof leak repairs within the warranty terms and conditions. Again, this type of warranty might not cover installation errors.
Labor Warranties cover the costs associated with repairing a defective roof within the terms of the roof system coverage. Most full system warranties include labor.
However, they don’t cover the cost of repairs associated with installation failures. That’s why the most critical step of your roof system is a good, solid, professional installation.
There isn’t much that can protect you against installation issues besides a roof workmanship warranty from the roof installer.
Also, remember that a warranty is only as good as the roofing company backing it. Make sure you have a professional, long-standing roofing contractor install your roof.
Roof Workmanship Warranties cover you against costs related to actual installation problems and errors which a labor-only warranty might not cover. However, some system warranties do cover workmanship. If your warranty doesn’t include workmanship coverage you might be able to get it directly from the installer.
A roof warranty is only as good as the company backing it. Looking for a professional, experienced roofing contractor to install your roof? Contact Mikku and Sons Roofing today, at 623-465-1068.
Again, this depends on the actual type of warranty you have. You could be surprised by what you are or are not covered for. That’s why it’s so critical to know what the roof warranty will cover before you invest in a new roof system. Always read the fine print and exceptions.
Be aware that certain warranty coverage extras such as puncture coverage or high wind coverage require certain roof materials or installation methods which may impact the cost of the roof installation itself.
Hiring the right roofing company can make a world of difference for your home or business. Knowing the worst enemies of your roof will help when you need to hire the right professional roofing company.
Trees are beautiful and must-have additions to your homes landscaping for their aesthetics and shading possibilities. They will give your home fantastic curb appeal and possibly help you lower your cooling bills, but, they can also be a major problem for your roof if they’re in the wrong location. If they’re too close to your home, a branch being knocked down or even being scraped across your roofing material in a storm can inflict serious, expensive damage. In severe storms, the entire tree could fall on top of your roof.
They also drop a lot of organic material, like leaves, pods and small branches, that can cause problems by clogging gutters and causing standing water after rains. If you don’t clear the material on a regular basis, the materials can decompose and break down the roofing materials, leading to leaks.
A leak itself is, of course, one of, if not the biggest problem. There’s a lot of reasons leaks can happen including poor installation, standing water, busted tiles and cracked shingles, failing underlayment, flashing problems and more. There’s no limit to the areas of your roof that these issues can occur.
Water can flow from one location to another, making it difficult to pinpoint where a roof leak is originating. The best thing you can do is hire a professional roofing contractor Like Mikku and Sons Roofing and Repair to discover the source. They can find the leak’s source and make the necessary repairs to stop it and prevent it from happening again.
Air needs to flow through your roof freely to prevent heat, pressure and humidity from building up. A lack of air flow can cause stress to the materials. You should never completely block the air flow into your home through your roof. During installation, sofits, vents and other means need to be installed in the proper locations to ensure that your roof will always have proper air flow through your attic.
During installation, a certain pitch or slope needs to be used to make sure water flows off and away from your roof to avoid any pooling or standing water issues. Standing water, whether caused by poor installation or some sort of obstruction, like tree debris, can be a major issue for your roof. Water is heavy. If there’s a lot of it pooling on your roof, it can put a lot of stress on the support structure, along with, if its not removed, helping to decompose the construction materials and making its way into existing cracks, creating leaks.
Your roof needs to get off to its best start by being installed correctly. If not, you’ll soon see loose shingles, broken tiles, decaying underlayment and other items that will start causing leaks. Choosing the right roofing installation company is one of the most important decisions you’ll make for your home or business.
Make sure you do your homework before hiring someone. Check the company’s reputation online and check their standing with the Better Business Bureau and Registrar of Contractors. you’ll have the peace of mind knowing that a quality, professional contractor has installed your roof.
Do-it-yourself projects are currently very popular, but you should know when you need a phoenix roofer. Learn when it’s time to bring in the experts for the benefit of your home and your finances. A professional roofing company will help your roof look and perform at its very best, but they can’t make that happen unless you let them know when you need help.
Routine maintenance is an extremely important part of properly maintaining your roof. It will prevent avoidable problems down the road. No matter how simple the maintenance task might seem, you should leave the job to a professional who has the training, knowledge and experience necessary to do the job adequately. Your roof is your home’s strongest and most important line of protection. It only makes sense to do everything possible to protect it.
Getting Ready for a Move? If you’re planning on putting your home on the market in the near future, you can definitely increase its market value and curb appeal by tearing off your current worn out roof and replacing it with a new one. By investing in the repairs upfront, you can sell your property for more than you probably thought. Even if you’re planning on staying for some time, a new roof is a great way to improve your home’s exterior look for the better.
Visually inspect your roof several times a year, but a professional can do a much more thorough job. If you see any streaking, stains, buckling, curling or missing tiles or shingles, make sure to let your roofing contractor know as early as possible. Even if you don’t go up on your roof, you probably have problems with the materials if you ever see water stains in your attic, ceilings or walls on the interior of your home.
