
Roof flashing might look like a thin strip of metal tucked between shingles and walls, but it is one of the most important barriers protecting your home from water damage. When roof flashing is installed incorrectly, it fails to guide rainwater away from joints and seams, allowing leaks to develop in hidden spots. Over time, these leaks can rot wood, weaken ceilings, and invite mold into the attic. In short, poor flashing installation often leads to expensive and preventable repairs.
What happens when roof flashing is installed incorrectly? This blog explains what roof flashing does, the most common installation mistakes, how to recognize early warning signs, and what steps you can take to repair or prevent roof flashing issues before they spiral into major structural problems.
Roof flashing is a thin, waterproof barrier usually made of metal such as aluminum, galvanized steel, or copper. Its job is simple but vital to direct water away from joints and intersections where the roof meets other structures. These include chimneys, skylights, vents, dormers, roof valleys, and the point where the roof connects to a wall.
Without flashing, rainwater would easily seep through small openings, damaging roofing materials and the layers beneath. Flashing works as a channel, redirecting water to the gutters or roof edge, protecting vulnerable seams from moisture.
Properly installed flashing is one of the strongest defenses against leaks and interior water damage. It bridges gaps that shingles or tiles alone cannot seal, especially where materials overlap or change direction. Even the highest-quality roof can fail if the flashing is poorly installed or maintained.
Flashing types vary depending on placement. Step flashing, for example, is used along sidewalls and layered between shingles to prevent water from sliding under. Counter flashing is installed over step flashing to lock out water around chimneys or masonry walls. Valley flashing protects roof valleys where water runoff is heaviest. Understanding each type helps you spot where problems are most likely to occur.
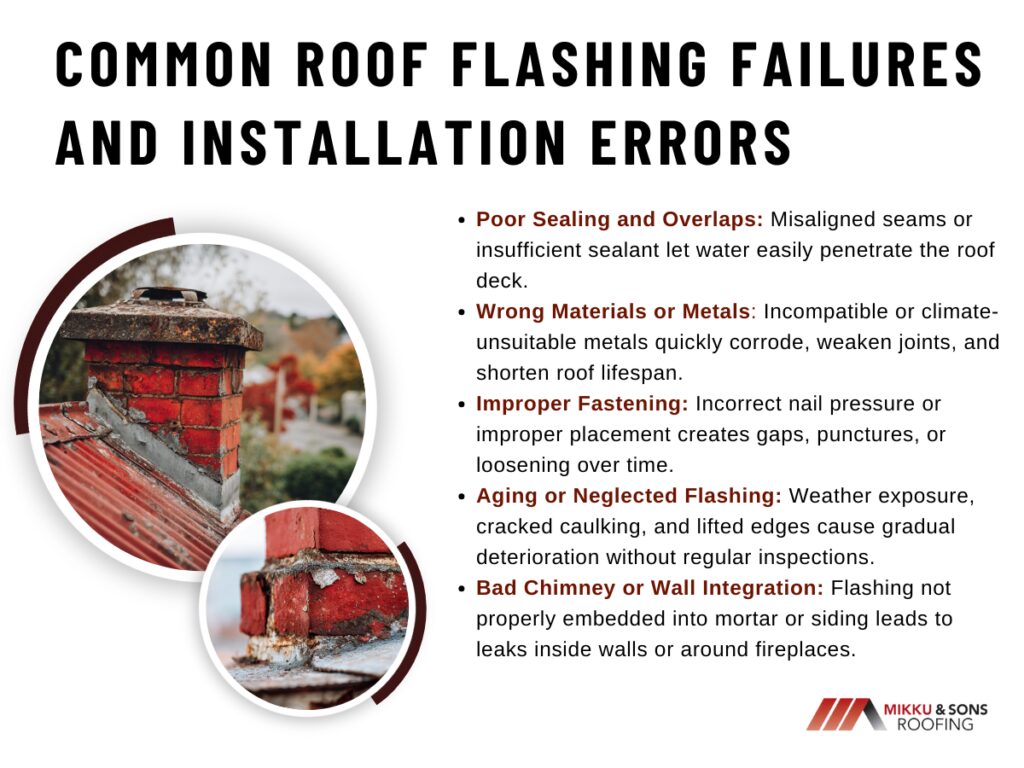
Improper flashing installation can occur for several reasons, from cutting corners during construction to using the wrong materials for the climate. Once moisture finds a weak point, it rarely stays contained. Below are the most frequent causes of roof flashing issues and why they matter.
Flashing pieces must overlap correctly and be sealed with compatible materials to create a watertight barrier. If seams are misaligned or not sealed properly, water can sneak behind the flashing and soak the roof deck. This often happens when installers use too little sealant or apply it to dirty or wet surfaces.
Not all flashing materials perform equally in every environment. Using thin aluminum in coastal regions, for example, can lead to premature corrosion from salt exposure. Mixing metals like copper and steel can also cause galvanic corrosion, weakening joints and creating pinholes where leaks form.
Using the wrong flashing material can reduce your roof’s lifespan by years and void manufacturer warranties. Always match materials to your local climate and roofing type.
Nails driven too tightly or too loosely can warp the metal, creating gaps for water to slip through. Overdriven nails may puncture the flashing, while underdriven ones loosen over time with expansion and contraction. Skilled roofers use specific fasteners and secure them at proper intervals to ensure a tight, flexible seal.
Even well-installed flashing wears out eventually. Sun exposure, temperature swings, and oxidation cause metal to expand, contract, and weaken. Caulking around chimneys and vents can crack or dry out, and flashing edges may lift during strong winds. Regular roof inspections help catch these signs before they cause major damage.
When flashing is poorly embedded into brick mortar or not tucked under siding, it allows rainwater to seep into the walls. Many homeowners notice leaks near the fireplace or along interior walls and assume the roof is to blame, when in fact the problem lies in flashing that wasn’t integrated correctly.
Roof flashing problems often start small but can quickly escalate. Since flashing is hidden beneath layers of roofing, leaks may go unnoticed until they cause visible interior damage. Knowing what to look for can save thousands in repairs.
Brown or yellow stains on ceilings near chimneys, skylights, or walls are common indicators of flashing leaks. Even minor discoloration suggests moisture infiltration that needs immediate attention.
Inspect your attic after heavy rain. Damp rafters, wet insulation, or mold growth near roof joints often point to compromised flashing rather than damaged shingles.
Sealant around roof penetrations can dry out over time. Once cracks appear, water seeps beneath the flashing and spreads across the underlayment.
Wind or temperature shifts can loosen flashing edges. Rust or corrosion indicates long-term exposure to moisture and metal fatigue.
Early detection of roof flashing issues prevents costly structural repairs and protects your home’s interior from further damage. A quick inspection after each season, especially after storms, can reveal these problems before they worsen.
Poor flashing installation can affect more than just your roof. Once water finds a way in, it travels along beams, insulation, and drywall. The longer it’s left unaddressed, the more severe the consequences become.
Below is a quick comparison of what happens when flashing is installed correctly versus incorrectly.
| Installation Quality | Resulting Condition | Typical Outcome |
| Properly installed flashing | Water directed safely to gutters | Dry roof deck, no leaks |
| Incorrectly installed flashing | Water seeps behind joints | Ceiling stains, structural damage |
| Regular maintenance and inspection | Early detection of wear | Low repair costs |
| No maintenance or inspection | Corrosion and separation | Costly roof replacement |
Ignoring flashing defects turns a minor maintenance issue into a full-scale roofing emergency. Regular inspection and timely repairs keep small problems from escalating into widespread damage.

Correcting roof flashing issues starts with identifying the source of the leak. Because water follows complex paths, what looks like a ceiling stain near a chimney may originate several feet away. For this reason, professional roof inspection is often the safest route. Still, homeowners can take a few important steps to minimize risk and ensure long-term protection.
A licensed roofing contractor can pinpoint the exact source of flashing leaks using moisture meters and visual inspection. They will assess whether the flashing can be resealed or if sections need replacement.
Repair methods vary depending on the material. Steel flashing may require patching with compatible metal, while corroded sections often need full replacement. The roofer will reseal seams with roofing cement or specialized sealants and ensure overlaps follow correct direction and slope.
Hiring a professional ensures the flashing is not only repaired but also properly integrated with surrounding shingles, siding, or chimney mortar. This creates a lasting, watertight seal that holds up against seasonal changes.
Choose corrosion-resistant metals such as copper or galvanized steel for longevity. In areas with high humidity or salt exposure, stainless steel or coated aluminum provides extra durability. Avoid thin or mismatched metals that can corrode when exposed to each other.
Flashing must always be installed beneath or between shingles, not on top. Overlapping layers allow water to flow downward naturally. Each piece should overlap the next by at least two inches to ensure water cannot back up underneath.
Clogged gutters cause water to back up and overflow onto flashing areas, increasing the risk of leaks. Cleaning gutters at least twice a year allows rainwater to flow freely, reducing stress on the flashing and shingles.
Sealant and caulk around vents or chimneys dry out with sun exposure. Inspect these areas annually and replace deteriorated caulking before cracks widen. This simple task can add years to your roof’s life.
While small patch repairs may seem manageable, most flashing issues are best left to certified roofers. Working on a roof is physically demanding and risky, especially when steep slopes or fragile materials are involved.
Call a professional roofer if you notice any of the following:
Professional assessment ensures that repairs address the real problem rather than surface symptoms. Roofers can also check other weak points like skylight flashing, vent boots, and valleys to ensure your entire roofing system remains watertight.
Even high-quality flashing needs attention to stay effective. Integrate these habits into your seasonal maintenance routine:
Routine maintenance extends the life of both flashing and roofing materials. If your roof is over 15 years old, ask your roofer to inspect flashing during any scheduled maintenance or gutter cleaning.
Flashing is often the first component to fail when a roof begins to age, yet it is also one of the easiest to maintain. By keeping your flashing in good condition, you safeguard your entire roof system.
Roof flashing issues are a sign that water management on your roof is compromised. Addressing them early can prevent damage to shingles, underlayment, and even your home’s structure.
Healthy flashing equals a healthy roof. Each piece plays a small part in protecting your home from wind-driven rain, snow, and ice. Combined with proper ventilation, insulation, and gutter care, well-maintained flashing ensures that water flows where it should safely off your roof.
For older homes, consider scheduling a full roof inspection every two to three years. This allows contractors to reseal or replace worn flashing before problems develop.
Roof flashing may seem like a small detail, but it plays one of the biggest roles in keeping your home watertight. When installed correctly, it directs rainwater away from vulnerable joints around chimneys, vents, and valleys, protecting your roof’s structure and interior.
Most roof flashing issues start with poor workmanship or neglected maintenance, leading to leaks that spread silently over time. Regular inspections, prompt repairs, and choosing the right materials are your best defenses against moisture intrusion. Investing in proper flashing isn’t just maintenance, it's long-term protection for your roof, walls, and insulation. Next, explore how different roof flashing materials compare in durability and performance for lasting leak prevention.