Replacing a skylight involves removing the old unit, assessing the roof opening, and installing a new skylight with proper flashing and waterproofing to prevent leaks. Whether you're dealing with damage, age, or an upgrade for energy efficiency, knowing when and how to replace your skylight ensures your home stays bright, comfortable, and protected from the elements.
This complete guide covers everything from recognizing signs it’s time for a replacement to selecting the right skylight type for your space. You’ll also find step-by-step instructions for installation, tips for post-installation care, cost breakdowns, and advice on whether to go DIY or hire a professional. Below is a complete guide to replacing a skylight.

Skylights bring light and life into your home, but they don’t last forever. Recognizing the signs that it’s time for a replacement can save you from costly repairs and help maintain your home's energy efficiency and comfort.
Water stains, mold, or peeling paint around your skylight often signal a leak. These issues typically arise from failing seals or flashing and can lead to serious structural damage if not addressed promptly.
Visible cracks or chips compromise the skylight’s insulation and safety. Even small fractures can worsen over time, allowing water and air infiltration.
Condensation between panes indicates a broken seal, reducing visibility and insulation. This often occurs in older, double- or triple-pane units.
Older skylights lack modern glazing and insulation, leading to heat loss in winter and overheating in summer. Newer models offer improved thermal performance and UV protection.
If you’re replacing your roof, it’s an ideal time to update your skylight. Doing both at once ensures a proper seal and eliminates the need to disturb new roofing later.
Knowing when and why to replace your skylight helps protect your home and improve its performance. Timely replacement not only prevents damage but can also enhance natural lighting and energy savings.
Choosing the right type of skylight is essential for meeting your lighting, ventilation, and energy efficiency needs. Different designs offer unique benefits and are best suited for specific spaces and purposes.
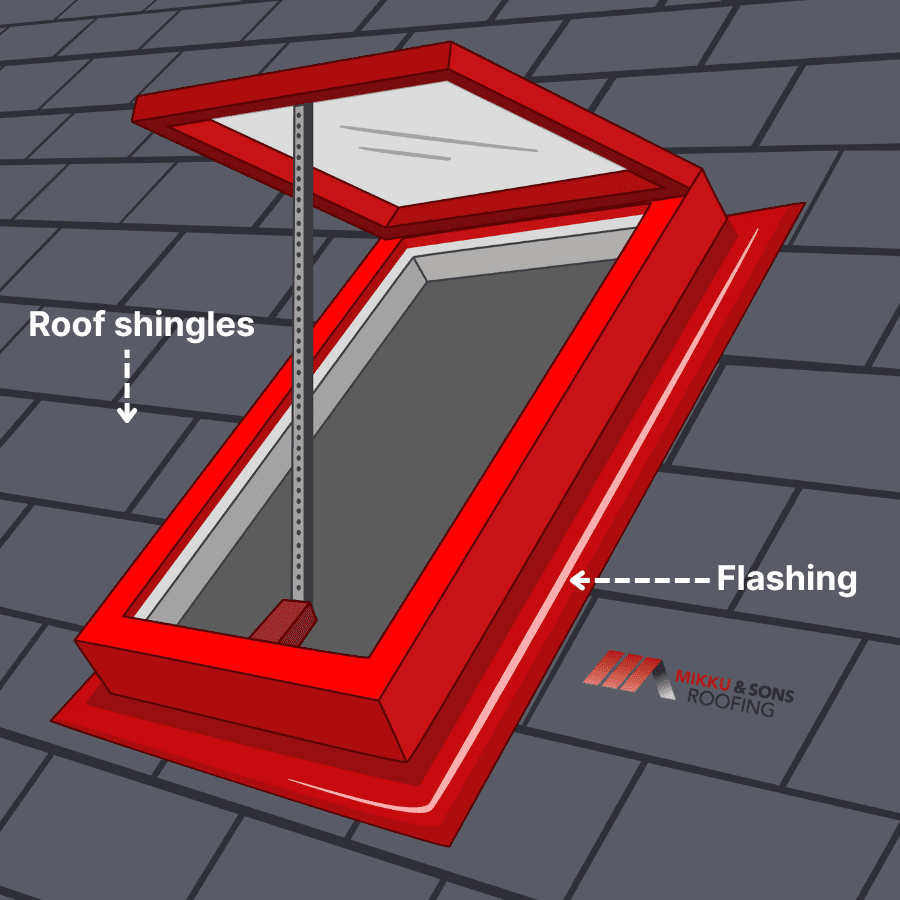
Fixed skylights are non-operable and designed solely to provide natural light. They’re ideal for areas that don’t require ventilation, such as hallways or living rooms, and typically offer the best insulation and lower maintenance.
These skylights can be opened manually or automatically to allow fresh air into the room. They’re perfect for moisture-prone areas like kitchens and bathrooms, helping to reduce humidity and improve air circulation.
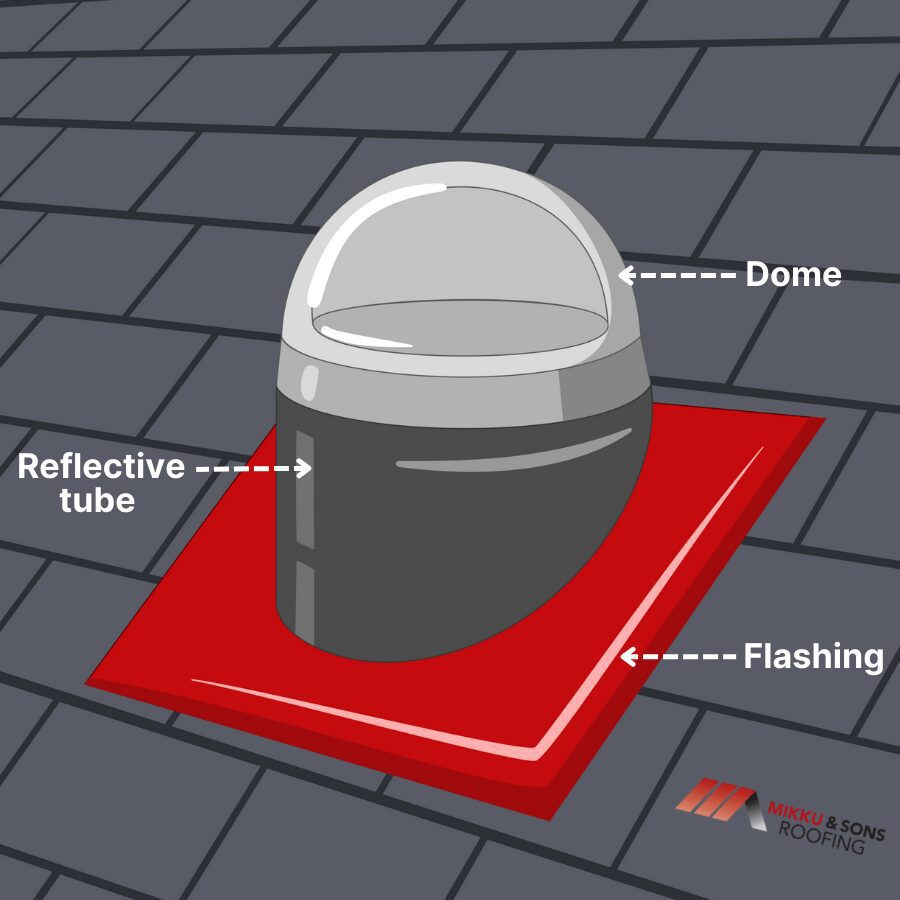
Tubular skylights use a reflective tube to direct sunlight into smaller or enclosed spaces. They’re energy-efficient, cost-effective, and great for hallways, closets, or bathrooms where traditional skylights may not fit.
These advanced skylights open and close via remote or wall switch, often equipped with rain sensors and built-in blinds. They’re convenient for hard-to-reach areas and enhance comfort with added automation and energy-saving features.
Understanding the different types of skylights allows you to choose one that fits both your space and lifestyle. Whether you need simple daylighting or high-tech ventilation, there’s a skylight designed to meet your needs.
Proper preparation is key to a successful skylight replacement. Taking time to plan, measure accurately, and gather the right tools ensures a smooth installation and long-lasting results.
Before starting, verify your local building codes and permit requirements. This step ensures your replacement meets safety standards and may be necessary for inspections or insurance.
Accurate measurements of the existing skylight and roof opening are crucial. Be sure to measure the width, height, and roof pitch to ensure a proper fit and compatibility with your chosen skylight model.
Having the right tools on hand—such as a pry bar, circular saw, screws, waterproof membrane, and flashing kit—can save time and reduce errors during installation. Make sure all materials meet the manufacturer’s specifications for your new skylight.
Preparing thoroughly helps prevent costly mistakes and delays. With everything in place, you're ready to move forward with a confident and efficient skylight replacement.
Replacing a skylight requires careful execution to ensure a watertight, energy-efficient installation. Each step is important for both functionality and the long-term durability of the skylight and roof.
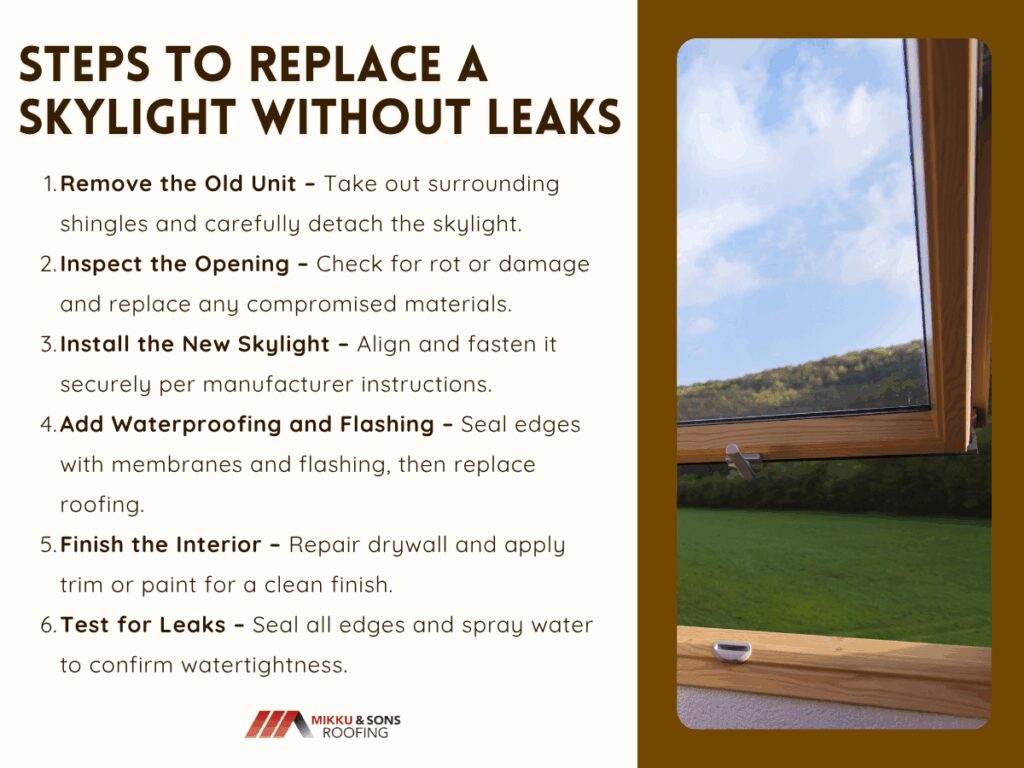
Start by clearing away shingles or roofing materials surrounding the skylight. Carefully unscrew and lift out the old unit, being mindful of any damage to the surrounding roof structure.
Check the opening for signs of water damage, mold, or rot. Replace any compromised wood or underlayment to create a solid, clean base for the new skylight.
Position the new skylight according to the manufacturer’s instructions. Secure it with the appropriate fasteners, ensuring it’s properly aligned and flush with the roof surface.
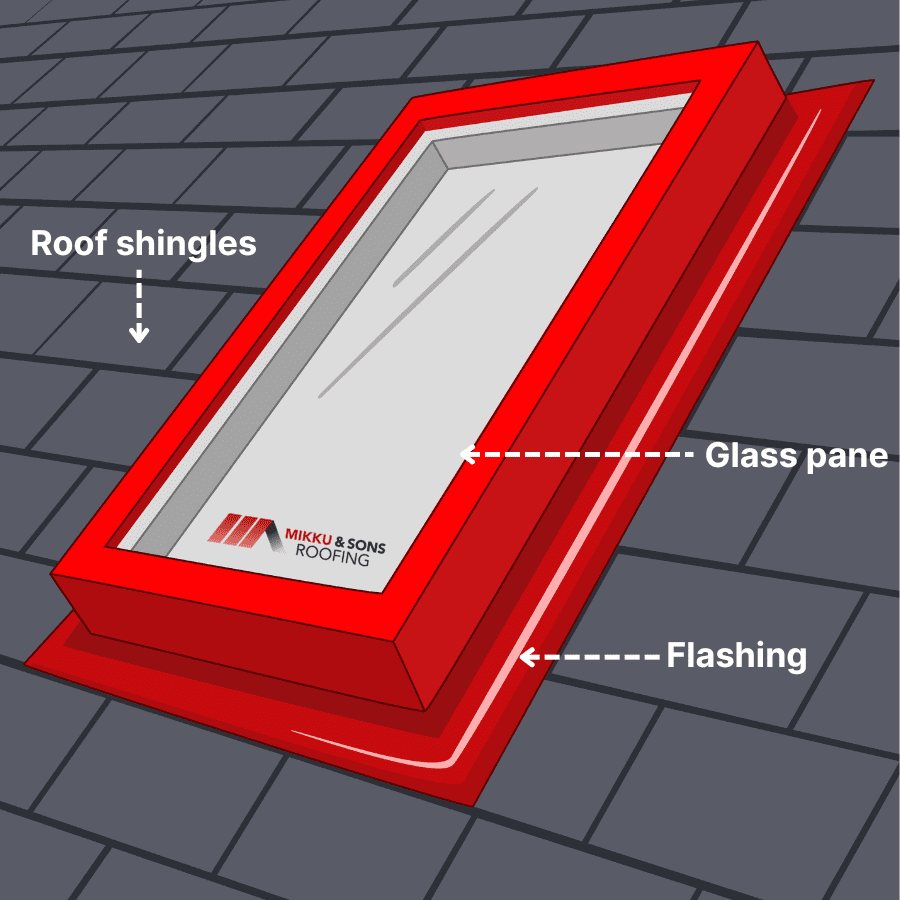
Apply a waterproof membrane around the skylight frame, followed by the flashing kit to seal all edges. Reinstall shingles or roofing materials around the skylight to blend with the rest of the roof.
Inside the home, patch or replace drywall around the skylight as needed. Finish with trim or paint to restore a clean, polished look.
Once your skylight is installed, inspect all seams and edges for a tight seal, applying roofing cement or high-quality exterior caulk as needed. Consider testing for leaks by spraying water over the skylight to simulate rain before finishing the project.
By following each of these steps with care, you’ll ensure a leak-free and energy-efficient installation. A properly replaced skylight enhances your home’s comfort, lighting, and overall value.
After replacing your skylight, a few key steps can help ensure it performs well for years to come. Proper care and routine checks will protect your investment and prevent avoidable issues like leaks or wear.
After installation, monitor the area around your skylight during and after the first few rainfalls. Look for water stains, drips, or condensation, which could indicate an issue with sealing or flashing. Addressing problems early helps avoid costly water damage.
Regularly clean the skylight glass with a non-abrasive cleaner to maintain clarity and light quality. Check the seals, flashing, and frame at least twice a year for signs of deterioration, and clear away debris like leaves or branches that can trap moisture.
If your skylight is operable, open and close it a few times to ensure smooth operation. Test any built-in features like blinds, sensors, or remote controls to make sure they’re functioning correctly.
Repaint or touch up the interior shaft and trim if needed to restore a clean, polished look. You might also consider adding blinds or shades to improve temperature control and light filtering.
Make a habit of inspecting your skylight as part of seasonal home maintenance. Look for cracked glass, worn seals, or any signs of structural movement that could affect the installation over time.
Caring for your new skylight doesn’t take much effort but goes a long way in preserving its performance and appearance. With simple, routine maintenance and quick attention to any issues, your skylight will continue to brighten your space and protect your home for years to come.
Understanding the costs and factors involved in replacing a skylight can help you budget effectively and choose the best option for your home. Various elements influence the final price, so it’s important to weigh both material and labor expenses along with any additional needs.
The price of skylights varies widely based on size, type, and features. Basic fixed models can start around $200, while larger, ventilated, or electrically operated skylights can cost $1,000 or more.
Professional installation typically ranges from $500 to $1,500 depending on roof complexity, skylight size, and location accessibility. Skilled labor ensures proper sealing and flashing, which can prevent costly repairs down the road.
Replacing or repairing roof materials around the skylight adds to the overall expense. Proper flashing installation is critical for waterproofing, often costing an additional few hundred dollars.
Extras like built-in blinds, remote controls, rain sensors, or energy-efficient coatings can increase upfront costs but may save money long-term. Consider the balance between initial investment and future energy savings or convenience.
While DIY installation can reduce labor costs, it carries risks such as improper sealing or safety hazards. Hiring a professional usually ensures quality workmanship, warranty protection, and compliance with local codes.
Replacing a skylight is an investment that varies based on your choices and circumstances. Carefully considering all costs and benefits will help you make an informed decision that enhances your home’s value, comfort, and energy efficiency.
When it comes to replacing a skylight, deciding whether to tackle the job yourself or hire a professional is an important choice that impacts cost, safety, and quality. Both methods have clear advantages and potential drawbacks depending on your experience and resources.
Replacing a skylight yourself can save money and give you control over the project timeline, especially if you have some experience with roofing or construction. However, it requires careful attention to detail to avoid leaks and safety risks, making it potentially challenging for those without the right skills or tools.
Hiring a professional ensures the skylight is installed correctly, safely, and in compliance with local codes. While it costs more and requires scheduling, professionals bring the expertise, proper tools, and warranties that help prevent costly mistakes and provide peace of mind.
Choosing between DIY and professional installation depends on your skill level, budget, and comfort with roofing tasks. While DIY might appeal to experienced handymen looking to save money, most homeowners benefit from the reliability and security of professional installation.
Replacing a skylight requires careful planning, accurate measurement, and proper installation to ensure a leak-free, energy-efficient outcome. Whether fixing damage, upgrading, or refreshing an old fixture, choosing the right skylight and following clear installation steps is key to lasting success.
Regular maintenance and inspections protect your investment and keep the skylight functioning well. Considering costs, complexity, and your skill level will help you decide between DIY or professional installation—each with its pros and cons. Done right, a new skylight can brighten your home and add lasting value.