
In addition to being inconvenient and frustrating to deal with, roof leaks can also have a negative impact on the structural integrity of your home. A leaking roof can lead to the growth of mold in your home, which can pose a health hazard.
If the weather is too terrible or you don’t have the money to hire a professional residential roofer, you need a quick and easy remedy to stop the leak.
Before you get started, take a look at our article which will help you determine if you need to patch or replace a leaking roof.
Also, did you know that roofing tar is a brilliant way to patch and stop leaks? Check out our article for more guidance!
So, continue reading our simple step-by-step guide on How To Fix a Leaking Roof.
As mentioned, there may be times when you need to fix and stop a leak quickly before you gather the money to hire a professional.
So, what are your options for repairing a leaking roof in a hurry? Below we have listed eight fast fixes that can get you started on learning How to Fix a Leaking Roof:
A tarp is a simple and effective temporary solution for repairing a leaking roof in an emergency. Once you’ve discovered where the leak is coming from, climb up on top of the roof and put a tarp over it.
Cracks in your roof may be repaired with roofing cement. It can also be used to mend holes in your roof. When using this method, make sure your roof is completely dry before applying the roof cement.
Putting roofing cement is a straightforward task as it involves removing any debris from the hole or crack then using roofing cement to fill in the rest of the gap. Overlaying a roofing mesh on top of the cement is a common recommendation from roofers.
Although this isn’t a long-term solution, it can serve as an effective short-term remedy. Fixing a minor shingle, flashing, or soffit hole is simple with this method.
Some roofers apply silicone around chimneys. However, this can become brittle and damaged over time. Using a new program in these trouble spots can help halt a leak.
While many roof leak repair kits are on the market, selecting one that can fix the leak can be a challenge. This isn’t a long-term solution like silicone, but it’s helpful in an emergency.
The product may be used in both wet and dry circumstances. More minor leaks can be fixed by applying them directly to the spot where the leak occurs. A mix of procedures may be required to halt leaks in more prominent regions.
Using a tarp and then sealing the edges with rubber is one option. Keep in mind that the color of the material it’s sprayed on will change due to this.
Don’t overspray or apply it to sections you don’t intend to replace. As a result, large splotches of color might be left on your roof due to my actions.
If your roof leaks, you can use roof flashing as an alternative solution. It allows water to flow over the region without entering the building.
It’s as simple as applying caulk around the leak, tucking the flashing under the shingles, and pressing it against the caulk, which will keep it from leaking.
In areas of the roof where the most water is likely to drain, flashing may be a very efficient method of preventing leaks. Professional contractors typically apply flashing when the roof is first installed to ensure the roof’s long-term viability.
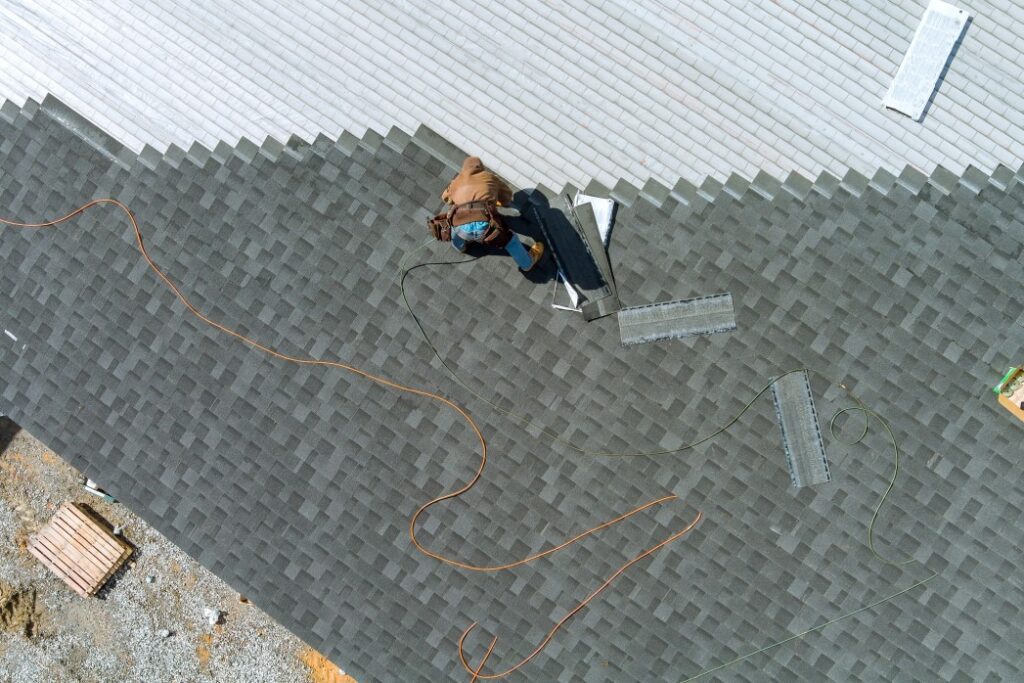
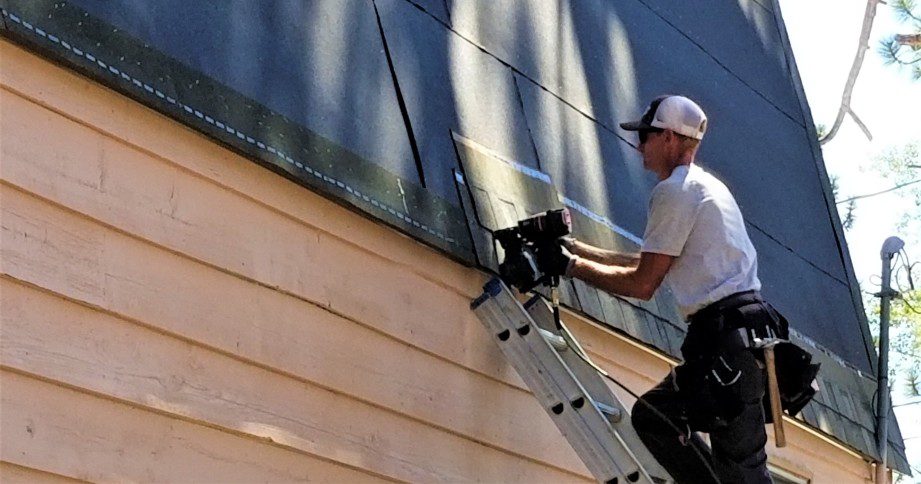
Commonly, roof leaks are caused by buckling, curling, or damaged shingles. If you consider yourself more of a handyman, you might be able to take on the task of changing the shingles on your own.
To begin, you’ll need to remove the shattered shingles from the roof. Slide a flat pry bar into place beneath each of your roof shingles to remove the nails. A new shingle can then be nailed into place after this procedure.
In order to keep a shingle in place, you can apply roofing cement on the shingle’s underside. If your emergency roof repair appears to have been successful, you should still contact a professional roofing contractor to ensure that the roof leak was fixed appropriately.
Even if you don’t have extra roofing materials on hand, a sheet metal shingle may be used to cover your roof while you get new ones temporarily.
To replace an average shingle, just cut a piece of sheet metal to the proper size and form. Then proceed as if you were replacing an ordinary shingle. For best results, use roofing cement to conceal any nails that could protrude from your sheet metal shingle.
The pipe flashing boot may have been damaged if your leak comes from around the pipes. The ancient pipe flashings may be vulnerable to this. You may need to purchase and replace this inexpensively to stop the leak. To ensure a proper fit, measure and select the appropriate pipe size. Sizes and colors range from little to enormous.
Leaking roofs can be a huge hindrance and cause damage to your home's structure. So we've set out some simples steps below to help repair the roof until you can hire a professional!

It’s best to start with a ceiling stain and work your way up to the leak. Using a ladder and flashlight, climb into the attic closely following a vertical line up to the top of the roof.
You could check your roof ridge if the leak is coming from a few feet higher up there. Black or white stains, mold, or mildew might indicate the leak is coming from the underside of the roof deck.
Roof vents commonly cause roof leaks. Roof vents might include attic fans, turbines, plumbing soil stack pipes, and other metal flashing extending over the roofline. Damaged plywood on the roof decking might be the cause of the leak.
Repair any damaged vents if the leak is coming from the roof itself. The housings or boots may have developed cracks. Dislodged vents might be to blame for this.
Ensure that the vents are not loose or missing any nails that secure them to the roof.
Remove the damaged roof vent from the top of the roof. First, remove the shingles from the vent by prying out the nails with the pry bar. Pull back the shingles covering the vent’s base with the pry bar next.
It’s a good idea to have a helper hold the shingles as you work. The shingles should not be removed. Detach any nails that are fastening a roof vent to its deck. After that, remove the exhaust vent.
Fill up any gaps around the vent with a generous layer of roofing cement or outside sealer. Have an assistant gently roll back and separate the shingles as you insert the vent.
Leak prevention calls for the lower piece of the vent flashing to be placed over the shingles on the roof. At every 4 inches, fasten the vent with nails in the four corners. Sealant or cement can be used to cover the nails.
It may be necessary to remove shingles to access the damaged part of the roof deck if the leak results from damage to the roof deck.
Start around two rows of shingles above where you wish to fix the roof. Using a pry bar, work your way from the bottom up, beneath the shingles- toward the roof ridge. Then, work your way down the rows, removing nails and shingles as you go.
Maintain as much of the original structure as possible. The shingles will be separated from the roof deck by a layer of roofing paper or synthetic underlayment. Use a utility knife to cut away the paper or underlayment.
Draw a chalk line from the damaged area of the roof deck to the rafters on the left and right sides. Make sure that the line is snapped in the middle of the rafters. To find the rafter’s center, use the existing nails as a reference.
Afterward, draw a chalk line parallel to the rafters, or at an angle, above and below the damaged area.
Add 1/16-inch to the circular saw blade depth to match the thickness of the roofing deck. To remove the portion of the roof deck that has been damaged, use the chalk lines as a guide. When cutting, be careful to do it outside the marked-off area.
Pull nails out of the cut-out part of the roof deck with a pry bar. Then, use a pry bar to remove the plywood, but don’t throw it away just yet.
Mark out the new roof deck repair proportions using the damaged part as a guide. Make a slit in the earth here for your protection.
Install the roof deck patch and fasten it to the rafters using 8-diameter common nails.
Use roofing nails to secure the roofing paper or underlayment, working your way up from the bottom. A minimum of 4 inches between each row is recommended.
Lay the first row of new shingles from the bottom up. Place the new shingles on top of the existing shingles from left to right to maintain the established rows.
Apply a bead of roofing cement around the shingles’ bottoms. As you work your way up to the shingles, be sure to nail them in place.
Start from the bottom and work your way up. Slide the new shingles beneath the top row of the current tiles to create a seamless transition.
Supply:
Tools:
Materials: Roof cement Exterior sealent Chalk line 7/16-inch exterior-grade plywood or OSB board Roof vent Roofing paper or synthetic underlayment Roofing nails 8d common nails
While leaking roofs can be a nightmare and can cause a wide range of inconveniences, there are some areas that are best left for the experts.
It may seem like a good idea to do DIY repair your roof yourself and save on labor costs, there are too many pitfalls that can result in failure or injury.
So why not hire a professional such as Mikku & Sons to handle it for you? In business and serving the valley for over 20 years, we run a full roof inspection and devise a detailed plan based on the specific needs of your roof. Call us today or fill out our online form!
Wanting to spend time outdoors in front of your house? Have you ever considered adding a porch roof? They have a huge range of advantages such as shielding you from heavy rain, take a look at our article to learn more!
Both the internal and external methods of leak repair provide only temporary relief. It’s just a stall tactic that won’t result in a full roof replacement. Meanwhile, you may use this temporary solution to repair your roof from the inside before calling a professional.
Corrosion on metals- water leaks may be caused by fastener corrosion and metal cracks. The seams of a metal roof may become loose over time due to expansion and contraction. Rain-induced roof leaks may indicate that the shingles are nearing the end of their service life.
Roofing leaks may be prevented with the use of a flexible sealant. Using a sealant on a leaky roof is a good way to fix the issue. Flex Seal comes in a liquid form to simplify the application. It remains flexible and non-cracking. Weather conditions do not affect Flex Seal.
It’s impossible to say just how long a leaky roof may be ignored before it starts to create problems. It’s usually a good idea to have your roof leak addressed as soon as possible since so many implications can arise. Remember the quicker you spot the problem the longer your roof will last!
An old roof, damaged or missing shingles, blocked gutters, and chimney damage are the most prevalent sources of leaks. Your home’s structural integrity might be in jeopardy if these issues are ignored.