Built-up roofing is one of the oldest and most trusted flat roofing options out there. You have probably seen it on commercial buildings, industrial warehouses, and even some residential properties.
It’s been around for over a century, and there’s a reason it’s still widely used today. Instead of relying on a single layer, BUR uses multiple layers of bitumen and fabric to create a strong and watertight surface.
This method makes it a solid choice for buildings that face harsh weather, heavy foot traffic, or the risk of fire. But is it right for you? There are several factors you need to consider before choosing it for your roof.
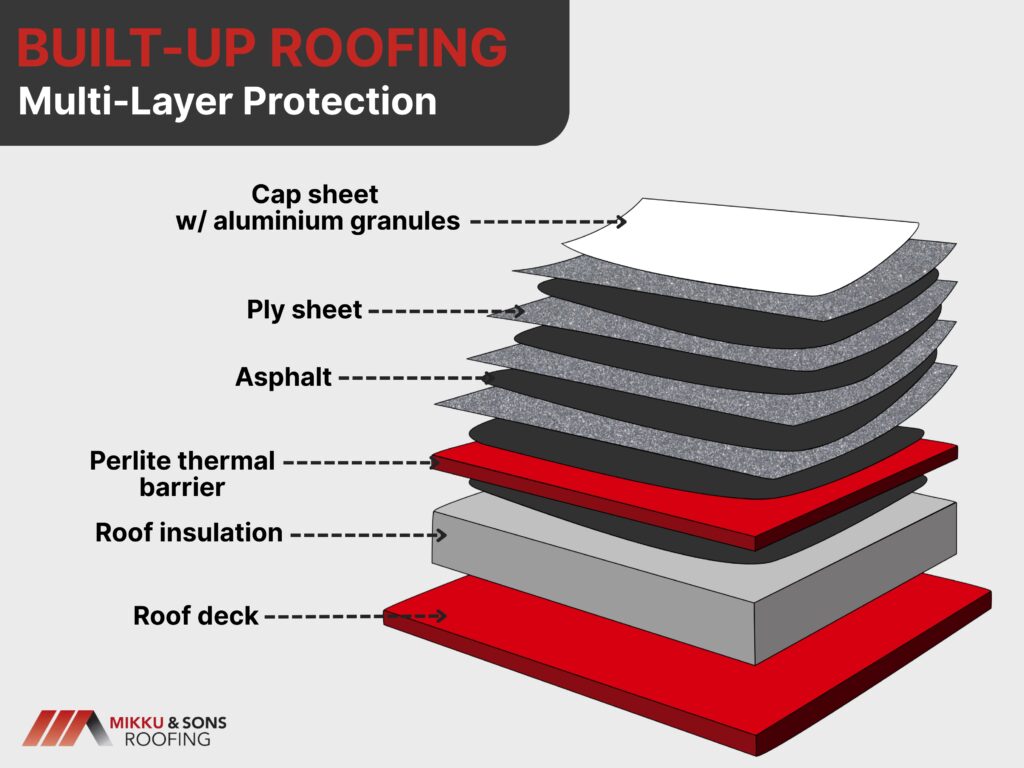
Built-up roofing (BUR) is created by layering multiple materials to form a thick, protective barrier over a building. This process involves alternating layers of bitumen (asphalt, coal tar, or cold-applied adhesive) and reinforcing fabric, such as fiberglass or organic mats.
These layers are then topped with a final protective surface, which can be gravel, mineral granules, or a reflective coating. The process typically follows these steps:
The number of layers in a BUR system can vary. Some roofs use three layers (a three-ply system), while others use four or more for increased durability and weather resistance.
There are different types of BUR systems, mainly categorized by the type of bitumen used and the finishing surface. Each type of BUR has its advantages and is chosen based on the building's needs, climate, and budget.
| Roof Type | Lifespan | Installation Complexity | Weight | Weather Resistance | Maintenance Needs | Cost Range (per sq. ft.) |
| Built-Up Roofing (BUR) | 20-30 years | High | Heavy | Excellent | Low to Medium | $5 - $10 |
| Single-Ply (TPO, EPDM, PVC) | 15-25 years | Medium | Light | Good | Medium | $4 - $8 |
| Modified Bitumen | 20-25 years | Medium | Medium | Very Good | Medium | $4 - $9 |
| Metal Roofing | 40-70 years | High | Heavy | Excellent | Low | $7 - $15 |
Some buildings benefit from the added fire protection of gravel, while others may prioritize energy efficiency with a smooth, reflective surface. Here are the most common variations:
A strong roof protects everything inside, stands up to the weather, and reduces the need for frequent repairs. Built-up roofing (BUR) has been a trusted option for decades because of the way it handles these challenges.
These strengths make BUR a smart option for buildings that need a roof that does more than just sit there.
A roof that wears down too fast can lead to costly replacements and constant repairs. BUR is designed to last longer than many other roofing systems because of its layered structure.
Each layer adds protection, preventing common roofing issues like leaks, cracks, and early deterioration. BUR can handle foot traffic and daily exposure to harsh elements without losing its strength.
Many BUR systems can last 20 to 30 years or more with proper installation and maintenance, making them a long-term solution for those who want fewer roofing headaches.
Roofs that fail under extreme weather can leave a building vulnerable to leaks, mold, and structural damage. BUR’s thick, multi-layered design provides excellent protection against heavy rain, strong winds, and intense sunlight.
Each layer works together to create a strong barrier that prevents water from seeping through and causing internal damage. Even in areas where temperature swings are common, BUR holds up well.
It can expand and contract without cracking, reducing the risk of sudden failures.
Fire safety is a major concern for any building, and some roofing materials can increase the risk of flames spreading. BUR is naturally fire-resistant, especially when topped with a layer of gravel or a reflective coating.
These materials help slow down the spread of fire, giving occupants more time to respond and emergency crews a better chance of controlling the situation. Some insurance providers even offer lower premiums for buildings with fire-resistant roofing.
This makes BUR a practical choice for businesses and homeowners looking to reduce fire risks while potentially lowering long-term costs.
A roof that constantly needs repairs can drain your budget fast. BUR installation costs can be higher upfront, but its long lifespan and low maintenance needs can make it a more affordable option over time.
The layered design helps prevent common roofing problems, reducing the need for frequent fixes. Because BUR can last for decades without major issues, property owners save money by avoiding early replacements.
When you factor in fewer repair costs and lower long-term maintenance expenses, BUR often proves to be a cost-effective investment.
Leaky roofs are one of the biggest concerns for any property owner, and seams are often the weak points where water finds its way in. BUR has fewer seams than many other roofing systems, reducing the chances of leaks developing over time.
The layered installation process creates a tight, secure surface that stays watertight even in harsh conditions. This seamless design also makes it easier to apply protective coatings or gravel to further enhance the roof’s strength.
With fewer weak spots, BUR provides reliable coverage that helps keep your building safe and dry for years to come.
Roofs are constructed with their strengths in mind, but none is perfect. Built-up roofing (BUR) offers solid protection, longevity, and fire resistance, but it also comes with drawbacks.
Before committing to BUR, it’s important to consider the downsides and see if they outweigh the benefits for your specific situation.
A strong roof is a good thing, but too much weight can be an issue. BUR is one of the heavier roofing systems available, and not all buildings can handle the extra load.
The multiple layers of bitumen and fabric, along with the gravel or reflective coating on top, add significant weight. In some cases, additional structural support is required to prevent stress on the building.
This can increase installation costs and extend the project timeline. If a building wasn’t originally designed to support a BUR system, reinforcing it can be expensive and may not always be practical.
Getting a BUR system installed isn’t as simple as laying down a few sheets of material. It requires a detailed, labor-intensive process that can take more time than other roofing options.
The use of hot asphalt or tar during installation can produce strong odors, making it unpleasant for people inside the building. For businesses, this can be disruptive, especially if the work is being done while operations are still running.
The longer installation time also means more labor costs, which can add up quickly. Compared to single-layer systems that go on quickly, BUR takes patience and skilled professionals to get it done right.
A flat roof isn't ideally flat and usually has a slope to it. BUR works well for low-slope roofs, but steeper roofs don't benefit from BUR's multi-layered design, and sometimes, the material may not adhere properly.
Buildings with weight restrictions or limited structural capacity may also struggle to support a BUR system without modifications. This makes it important to assess a building’s design before choosing BUR.
If the structure isn’t built to handle the extra weight or if the slope isn’t right, a different roofing system might be a better option.
Although BUR offers long-term savings, the initial investment can be high. The materials, labor, and time required to install it properly make it more expensive upfront than some other roofing systems.
| Cost Factor | Estimated Cost Range (per sq. ft.) |
| Materials (bitumen, fabric, gravel, coatings) | $2.50 - $5.00 |
| Labor (installation, skilled workers) | $3.00 - $7.00 |
| Structural Reinforcements (if needed) | $2.00 - $6.00 |
| Insulation (optional but recommended) | $1.50 - $3.50 |
| Maintenance (periodic inspections, minor repairs) | $0.10 - $0.50 (annual) |
| Repairs (leak fixes, patching layers) | $1.00 - $4.00 |
| Replacement (full re-roofing if necessary) | $6.00 - $12.00 |
This can be a dealbreaker for those looking for a budget-friendly option. The cost is often justified by the roof’s long lifespan and lower maintenance, but not everyone has the budget to cover the higher upfront expense.
If immediate affordability is a priority, BUR might not be the best choice.
Every roof has its maintenance needs, and fixing them can be a challenge when BUR develops issues. Since the system consists of multiple layers, pinpointing the exact location of a leak isn’t always straightforward.
Water can travel between layers before showing signs of damage, making it harder to detect the source of the problem. Patching a BUR roof also requires care.
If not done correctly, repairs can create weak spots or stand out visually from the rest of the roof. This can affect performance and appearance, which might be a concern for property owners who want a uniform look.
The type of roofing system you choose affects your building’s durability, maintenance needs, energy efficiency, and even long-term costs. Built-up roofing (BUR) has proven itself as a strong, long-lasting option, especially for flat and low-slope roofs.
The balance between form and function plays a key role in how a roof performs. Flat roofs require a roofing system that prevents water buildup and protects against UV exposure.
They provide more usable space and a modern, efficient design, but they also demand materials that can withstand standing water and heavy foot traffic. This is where the multi-layered construction of BUR excels as it creates a solid, watertight surface that works well in these conditions.
Missing shingles on your roof can leave your home vulnerable to water damage, energy inefficiency, and structural issues. Whether caused by severe weather, aging materials, or poor installation, addressing missing shingles promptly is crucial to preventing costly repairs. Understanding the causes of shingle loss can help homeowners take preventative measures and maintain their roof’s longevity.
This guide covers what to do if you have missing shingles on your roof, how to assess damage, make temporary fixes, and choose the best repair options. It also highlights the risks of ignoring missing shingles and key factors for replacement, helping you protect your home and extend your roof’s lifespan.
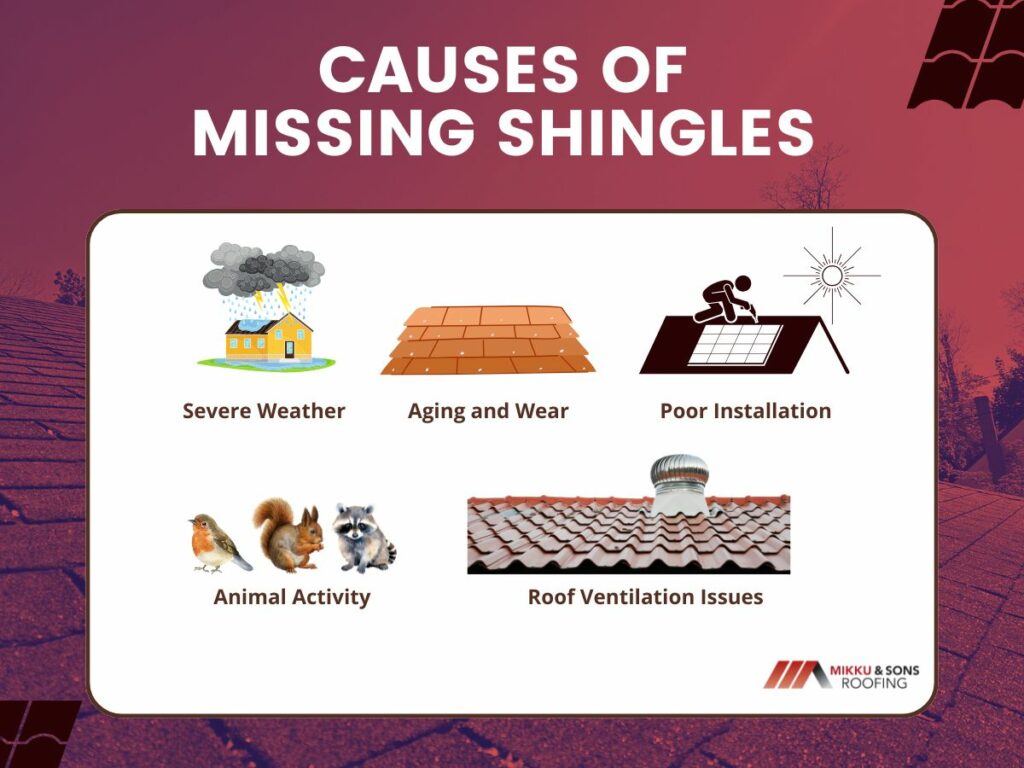
Missing shingles can be caused by various factors, ranging from weather conditions to aging materials. Understanding these causes can help homeowners take preventative measures to protect their roofs.
High winds, heavy rain, hail, and snow can loosen or tear shingles off the roof. Storms can also cause debris to strike the roof, leading to further damage.
Over time, shingles deteriorate due to exposure to sunlight, moisture, and fluctuating temperatures. As they age, they become brittle and more prone to cracking, curling, or falling off.
If shingles are not installed correctly, they may not be securely fastened and can detach more easily. Using improper materials or failing to follow manufacturer guidelines can also contribute to premature failure.
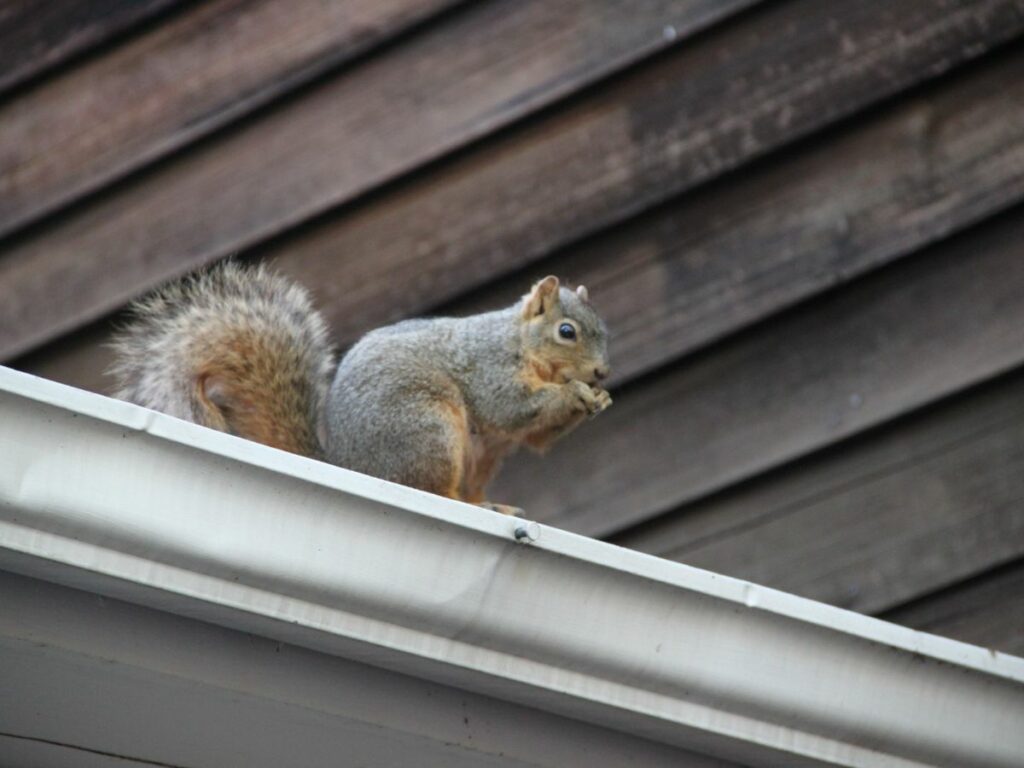
Birds, squirrels, and raccoons can damage shingles while searching for food or shelter. Their scratching, pecking, or nesting activities can loosen or remove shingles, leading to potential leaks.
Poor ventilation can cause heat and moisture buildup in the attic, leading to shingle deterioration from underneath. This weakens the adhesive and fasteners, making shingles more likely to come loose.
By understanding the common causes of missing shingles, homeowners can take proactive steps to maintain their roofs. Regular inspections and timely repairs can help prevent further damage and extend the roof’s lifespan.
Missing shingles on your roof can lead to leaks and further damage if not addressed quickly. Here’s what you should do:
Begin by visually inspecting the roof from the ground, noting the quantity and location of missing shingles. If it is safe to do so, use binoculars for a closer look. If you have a sturdy ladder and feel comfortable, you can carefully ascend to get a slightly better view but prioritize safety. Never walk on a wet or steep roof. Note any other signs of damage like curled, cracked, or loose shingles.
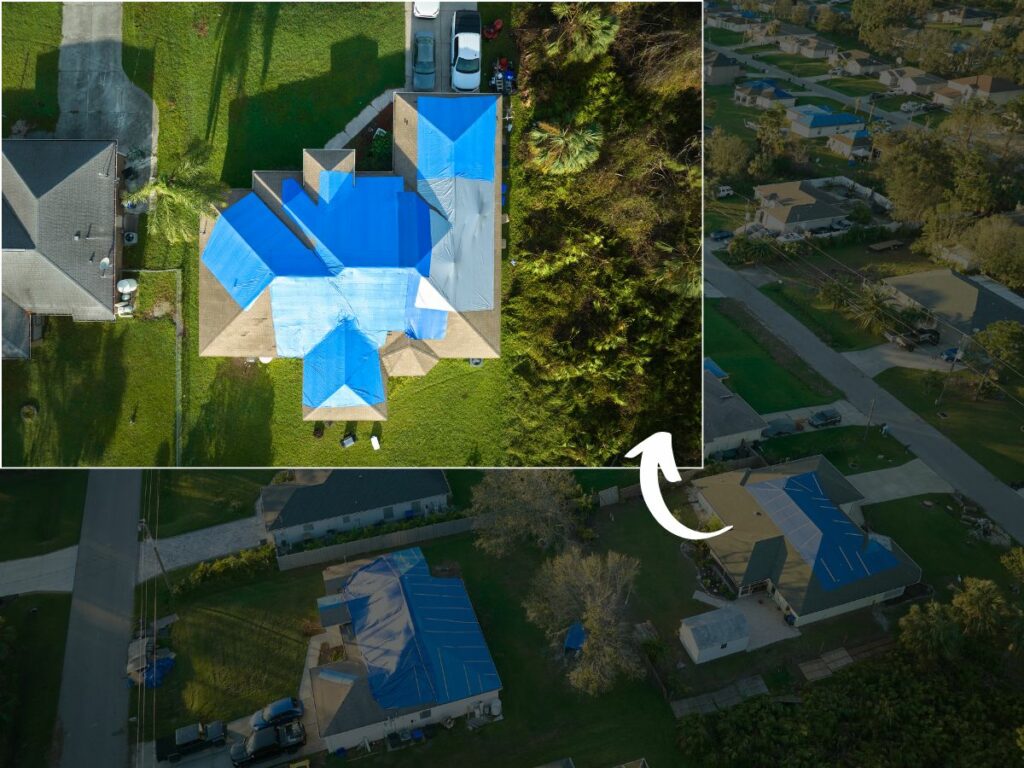
Use a heavy-duty tarp or reinforced plastic sheeting, not just thin plastic. Secure the covering with roofing nails or furring strips, ensuring it's taut and extends well beyond the damaged area. If windy conditions are expected, use extra fasteners and consider weighted objects to prevent the tarp from blowing away.
Obtain quotes from multiple reputable roofing contractors. Verify their licenses, insurance, and references. Ask about their experience with the specific type of shingles on your roof. A reputable roofer will provide a detailed estimate and explain the repair process.
Contact your insurance company immediately and document the damage with detailed photos and videos. Keep records of all communication with your insurer. If possible, get a copy of the police report if the damage was from a storm.
Remove any loose shingles or debris from the surrounding area and gutters. This will prevent further damage and make it easier for the roofer to work.
Maintain a detailed record of all expenses, including materials, labor, and insurance claims. This documentation will be helpful for insurance purposes and future repairs.
After the repairs are completed, conduct a thorough inspection of the roof, ideally with the roofer. Ensure that all shingles are properly installed and that there are no signs of leaks or other damage.
Addressing missing shingles promptly can help maintain your roof’s integrity and prevent costly repairs down the line. Whether you choose a DIY fix or hire a professional, taking action quickly is key.
Missing shingles may seem like a minor issue, but they can lead to serious consequences if left unaddressed. Understanding these risks can help homeowners take timely action to prevent costly damage.
Missing shingles expose the underlying roof structure to rain and moisture, which can lead to leaks. Over time, water infiltration can cause mold growth, wood rot, and interior ceiling damage.
A damaged roof can compromise your home’s insulation, allowing heat or cool air to escape. This can lead to higher energy bills as your HVAC system works harder to maintain a comfortable temperature.
Prolonged exposure to the elements can weaken the roof decking and support structures. If left unchecked, this can lead to costly repairs or even require a full roof replacement.
Gaps in the roof can provide entry points for rodents, insects, and birds. These pests can cause further damage by nesting in the attic and chewing on insulation or wiring.
A roof in poor condition can lower your home's curb appeal and resale value. Potential buyers may be deterred by the need for expensive repairs, making it harder to sell your home.
Addressing missing shingles promptly can prevent these serious consequences and help maintain the integrity of your home. Regular inspections and maintenance are key to avoiding long-term damage and costly repairs.
Replacing missing shingles is essential for maintaining the integrity of your roof and preventing further damage. However, several factors should be considered to ensure a successful and long-lasting repair.
It's important to choose replacement shingles that match the color, style, and material of the existing ones. Mismatched shingles can affect your home’s appearance and may impact its resale value.
Before replacing shingles, check for underlying issues such as water damage or weakened decking. If multiple shingles are missing or the damage is widespread, a partial or full roof replacement may be necessary.
Different types of shingles, such as asphalt, wood, or metal, offer varying durability and weather resistance. Consider your climate and budget when selecting materials to ensure longevity and protection.
While replacing a few shingles can be a DIY project, extensive repairs may require a roofing contractor. A professional can ensure proper installation and identify potential problems that might go unnoticed.
Plan shingle replacement during favorable weather conditions to avoid complications from rain, wind, or extreme temperatures. Spring and fall are often ideal times for roofing work due to mild temperatures.
Taking these factors into account can help ensure a smooth and effective shingle replacement. Proper installation and regular maintenance will keep your roof in top condition and protect your home for years to come.
Taking quick action when you notice missing shingles can prevent costly damage and keep your home well-protected. By understanding the causes, making temporary fixes, and considering the best repair options, you can maintain your roof’s durability and efficiency. Regular inspections and proper maintenance will also help you catch potential issues before they worsen.
Whether you choose to replace shingles yourself or hire a professional, ensuring a secure and weather-resistant roof is essential for your home’s longevity. By staying proactive, you can avoid major repairs, protect your investment, and keep your home safe from the elements.
Shingling a hip roof might seem like a job best left to the pros, but with the right prep and a step-by-step approach, you can tackle it yourself. Hip roofs, with their sloping sides meeting at a ridge, demand careful shingle installation to ensure a weathertight seal.
This guide will equip you with the knowledge to handle the task effectively. From prepping the roof and laying underlayment to cutting shingles for those tricky angles and finishing with ridge caps, each step is crucial. With attention to detail and safety, you can achieve a durable and attractive roof.
Installing shingles on a hip roof requires careful preparation and strict adherence to safety measures. Proper planning ensures a smoother installation process and helps prevent accidents. Before you start, it’s essential to gather the right materials, inspect the roof, and take necessary precautions.
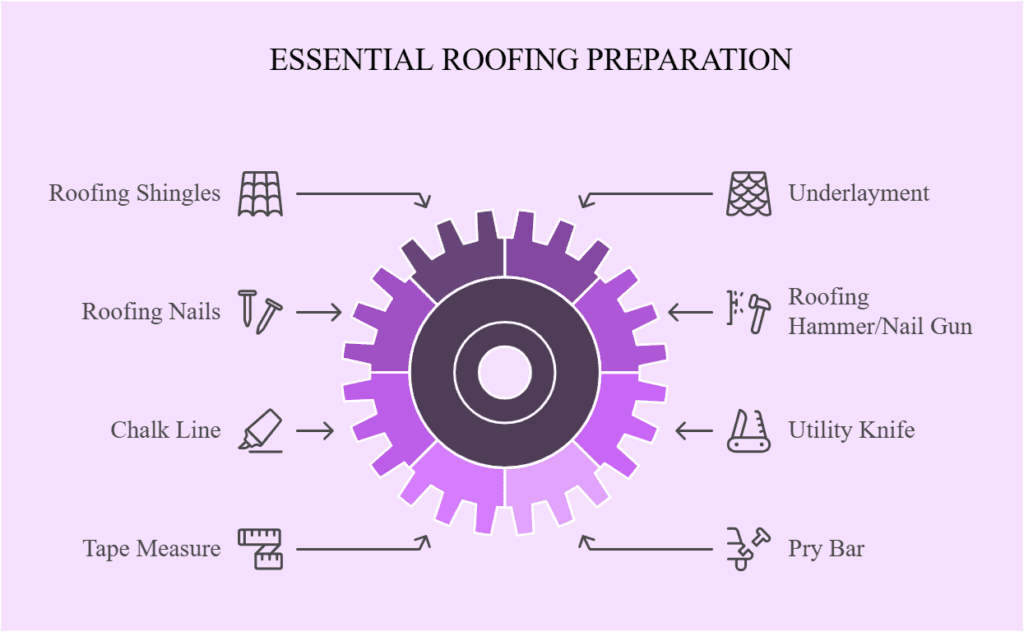
Before beginning, make sure you have all the necessary tools and materials on hand.
Having the right equipment will save you time and prevent unnecessary delays. You’ll need roofing shingles, underlayment, roofing nails, a roofing hammer or nail gun, a chalk line, a utility knife, a tape measure, a pry bar, and a ladder. Additionally, ensure you have protective gear, including gloves, safety glasses, and a harness.
A thorough roof inspection is crucial before installing shingles. Look for signs of damage, such as rotting wood, water leaks, or structural weaknesses. If any issues are present, they must be repaired before shingling.
Installing shingles over a damaged roof can lead to costly repairs down the line. Replace any compromised plywood sheathing, reinforce weak areas, and ensure proper ventilation to prevent future issues.
The weather plays a significant role in the success of your roofing project. Ideal conditions for shingle installation include mild temperatures and dry weather.
Avoid installing shingles on rainy, windy, or excessively hot days, as these conditions can make the process dangerous and reduce the lifespan of your roof. Wet surfaces increase the risk of slipping, while extreme heat can soften the shingles, making them more prone to damage.

Roofing work comes with inherent risks, so safety should always be a top priority. Before climbing onto the roof, secure a sturdy ladder on a flat surface and wear a safety harness attached to an anchor point.
Never work on a roof alone—having a partner can help in case of an emergency. Additionally, wear non-slip shoes to improve stability, and always be mindful of your footing, especially on steep slopes.
Clear the work area of any debris, loose tools, or unnecessary materials that could create tripping hazards. If working on a residential property, inform those inside about the project to prevent accidental disturbances.
Keeping a clean and organized workspace reduces the risk of accidents and increases efficiency. Use caution tape or safety barriers to prevent unauthorized access to the area, especially if children or pets are nearby.
Once the roof deck is prepared, the next step is installing the underlayment. The underlayment acts as a moisture barrier, protecting the roof deck from water damage and leaks. Proper installation is key to ensuring long-term durability.
There are different types of roofing underlayment, and selecting the right one is essential for optimal performance. Asphalt-saturated felt is a traditional and affordable option that provides basic protection.
Synthetic underlayment is lightweight, durable, and resistant to tearing, making it a preferred choice for many professionals. Peel-and-stick underlayment is self-adhering and waterproof, ideal for areas prone to heavy rain and ice. Choosing the right underlayment depends on your climate, budget, and roofing needs. High-quality materials will provide better protection and longevity.
Correct installation of the underlayment ensures maximum effectiveness.
A properly installed underlayment enhances the overall strength of your roof and prevents water-related issues. Taking the time to do it right will save you from costly repairs in the future.
The drip edge and starter shingles are essential for protecting your roof from water damage and ensuring a strong foundation for the shingles. Skipping these steps can result in leaks, wind damage, and premature roof failure.
The drip edge is a metal flashing that prevents water from seeping into the fascia and roof deck. To install it correctly, start at the eaves and position the drip edge so it extends slightly beyond the roofline to direct water away from the structure.
Secure it with nails every 12 to 16 inches to prevent movement in high winds. Overlap sections by at least 2 inches to create a continuous barrier against water infiltration. Install the drip edge on the rakes after the underlayment for added protection against wind-driven rain.
Starter shingles provide the first layer of defense against wind uplift and water infiltration. Cut off the tabs of standard shingles or use pre-cut starter strips to create a flat surface for the first row.
Align the starter shingles along the roof’s edge with a slight overhang to direct water into the gutters. Secure them with nails near the adhesive strip, following the manufacturer’s guidelines for a firm hold. Ensure precise alignment, as any mistakes at this stage can impact the appearance and durability of the entire roof.
A well-installed drip edge and starter shingle layer reinforce your roof’s resistance to water damage and wind uplift. Taking the time to do it right ensures long-term durability and performance.
Once the starter shingles are in place, it’s time to lay the asphalt shingles. Proper installation ensures durability, weather resistance, and a professional finish.
Start by placing the first row of shingles directly on top of the starter shingles. Ensure they are properly aligned along the eaves and leave a small overhang. Secure each shingle with roofing nails, following the manufacturer’s guidelines for placement and spacing. Proper alignment of the first row is crucial, as it sets the foundation for the entire roof.
For a strong and visually appealing roof, stagger each row so that seams do not align. Cut shingles as needed to create an offset pattern, preventing water from seeping between seams. A staggered pattern improves water resistance and overall structural integrity.
Nail each shingle securely, placing nails below the adhesive strip. Use enough nails to keep them firmly in place, especially in high-wind areas. Press down on each shingle to ensure it adheres properly. Properly secured shingles prevent wind uplift and leaks.
As you install shingles, carefully cut and fit them around vents, chimneys, and valleys. Use flashing and roofing cement to seal these areas and prevent leaks. Attention to detail in these areas is essential for long-term durability.
Hips and ridges are critical areas of a hip roof that require special attention. Properly cutting and fitting shingles in these areas will enhance your roof’s durability and weather resistance.
Start by measuring the length of the hip to determine how many shingles you’ll need. Cut each shingle to fit along the hip line, ensuring a slight overhang for proper water runoff. Use a chalk line to maintain a straight and consistent alignment. This helps prevent uneven spacing and gaps that could lead to leaks.
Lay the shingles from the bottom of the hip, overlapping each piece as you go up. Secure each shingle with nails on both sides to keep them in place. Overlapping properly prevents water infiltration and strengthens the roof’s structure. Trim excess material to ensure a neat finish.
For the ridge, use specially designed ridge cap shingles or cut standard shingles into ridge caps. Position each piece evenly along the ridge and nail them in place, following the wind direction for extra security. Proper ridge installation helps with ventilation and extends the roof’s lifespan. Apply roofing adhesive for added hold in high-wind areas.
Taking the time to cut and fit shingles correctly on hips and ridges will improve your roof’s overall strength and appearance. A well-finished hip and ridge system ensures long-term protection against the elements.
Ridge cap shingles provide the final layer of protection for your roof’s ridges, preventing water infiltration and enhancing the roof’s appearance. Proper installation ensures durability and a clean, finished look.
Ridge cap shingles are specially designed to cover the peaks of your roof. You can use pre-cut ridge cap shingles or cut three-tab shingles into smaller sections. Using manufacturer-recommended ridge cap shingles offers better durability and a polished finish.
To install ridge cap shingles, start at the end of the ridge opposite the prevailing wind direction. Align the first ridge cap shingle and secure it with nails on both sides, placing them about an inch above the overlap area. Continue overlapping each shingle as you move along the ridge, ensuring a consistent and uniform look.Properly overlapping shingles prevent wind uplift and water penetration.
After nailing all the ridge cap shingles in place, apply roofing adhesive to the final shingle to ensure a firm hold. In high-wind areas, additional adhesive or nails may be required for extra security. A well-installed ridge cap protects your roof’s most vulnerable points and enhances its overall lifespan. Taking the time to do it correctly will keep your roof in top shape for years to come.
After installing the shingles and ridge caps, the last step is performing a thorough inspection and making any necessary final adjustments. Taking the time for a final check ensures a long-lasting and well-protected roof.
Go over the entire roof and inspect the shingles for proper alignment, ensuring they are evenly spaced and securely fastened. Look for any lifted or loose shingles that could lead to leaks or wind damage. A properly installed roof should have a clean, uniform appearance without visible gaps or misaligned shingles.
Check around vents, chimneys, and valleys to confirm that flashing is properly installed and sealed. Apply roofing sealant where necessary to reinforce areas prone to water infiltration. Proper sealing prevents leaks and extends the lifespan of your roof.
Remove any debris, stray nails, or leftover materials from the roof and surrounding area. Clear gutters of any shingle granules or obstructions to ensure proper drainage. Finally, conduct a final walkthrough to double-check that every component is correctly installed and secured. A thorough cleanup and inspection complete the roofing process, leaving you with a durable and reliable roof.
To install shingles on a hip roof, begin by securing flashing around ridges and edges. Then, start shingling from the bottom, overlapping each row by two-thirds of the shingle length. Ensure a staggered pattern and secure with nails.
Finish with ridge cap shingles for added protection. For more roofing insights, consider whether you can shingle over existing shingles, a topic explored in our previous blog post, which delves into the pros and cons of this approach.
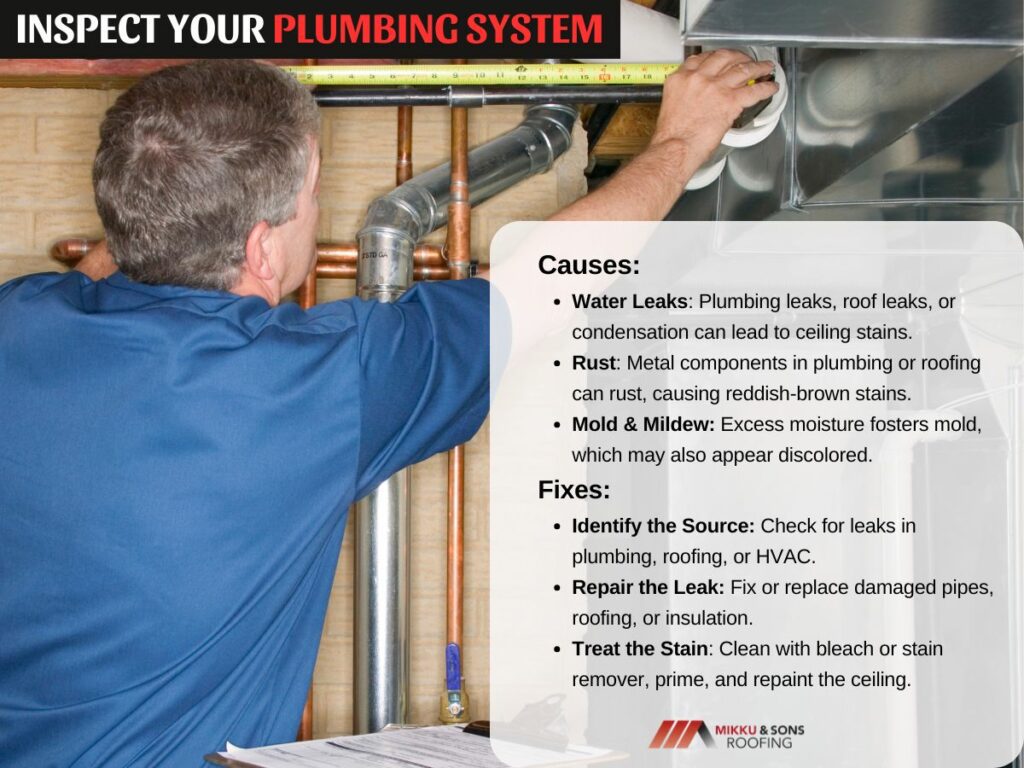
Ever glance up and spot an unwelcome guest? Reddish brown spots on your ceiling? It's more than just an eyesore; it's your home's way of whispering, "Something's not right!" These spots can be mysterious, hinting at hidden plumbing leaks, roof vulnerabilities, or even sneaky mold lurking above.
Ignoring them is like ignoring a cough – it might get worse. So, let's unravel the mystery behind those spots. We'll explore common causes, from water damage to unexpected sources, and equip you with practical fixes to reclaim your ceiling and ensure a healthy home!
Reddish-brown spots on your ceiling are a sign of water damage, often caused by roof leaks, plumbing issues, or high humidity. Ignoring these stains can lead to mold growth, structural damage, and costly repairs. Identifying the cause early can prevent more serious problems.
Reddish-brown stains on your ceiling are a clear sign that something is wrong. These stains don’t just ruin the look of your home—they indicate potential water damage, leaks, or mold issues. Understanding the root cause is essential to fixing the problem before it gets worse.
Reddish-brown stains on your ceiling are more than just an eyesore—they signal an underlying issue that needs attention. Before you can fix the problem, you need to identify where the stains are coming from. Pinpointing the source early can prevent costly damage and potential health risks.
If the stain is located near the center of a room or along an exterior wall, a roof leak might be the cause. Damaged shingles, cracked flashing, or clogged gutters can allow water to seep into your home. Over time, this moisture collects in the ceiling, leading to discoloration and potential structural damage.
To check for a leak, look for missing, cracked, or curled shingles on your roof. Inspect your attic for wet insulation or water drips after rainfall. You should also examine the roof flashing around vents, chimneys, and skylights for gaps or damage that may be allowing water to seep through.
Ceiling stains beneath a bathroom or kitchen often point to a plumbing leak. A slow, hidden leak from a pipe or fixture can cause significant moisture buildup over time. Even small leaks can create persistent staining, weaken the ceiling material, and lead to mold growth.
To check for plumbing issues, look for water spots directly under sinks, toilets, or bathtubs. Check exposed pipes for condensation or drips. You can also run water in upstairs fixtures and monitor if new stains appear on the ceiling below.
If the stain appears in areas with metal pipes, nails, or ductwork, rust could be the culprit. Rust forms when metal is exposed to moisture over time, causing brownish discoloration to seep through the ceiling. This is common in older homes with outdated plumbing or HVAC systems. If you suspect rust stains, inspect metal pipes and fasteners above the ceiling for signs of corrosion.
Poor ventilation can lead to condensation buildup, especially in humid rooms like bathrooms, kitchens, and attics. Excess moisture from everyday activities can collect on ceilings and walls, leading to stains. If a room has high humidity levels, condensation may be forming on cooler ceiling surfaces and causing discoloration.
To check for condensation problems, inspect areas with poor airflow for signs of mildew or peeling paint. Ensure exhaust fans are working properly in bathrooms and kitchens to remove excess moisture. If the problem persists, check attic ventilation to prevent moisture buildup.
If the stain has a musty smell or continues to grow, mold could be the issue. Mold thrives in damp environments and can cause brown, black, or reddish stains on ceilings. Mold exposure can also trigger allergies and respiratory issues, making it a serious concern for indoor air quality.
To identify mold problems, use a flashlight to inspect the stained area for fuzzy or speckled textures. Check for additional mold growth on walls, vents, or insulation. If mold is present, it’s important to address both the stain and the moisture problem causing it.
Reddish-brown stains on your ceiling aren’t just unsightly—they’re a sign of an underlying issue. Before you can remove the stains, you need to fix the root cause to prevent further damage.
Whether the stains are caused by a roof leak, plumbing issue, or condensation, here’s how to address them effectively.
Before cleaning or repainting, you must stop the issue that’s causing the stains. If you don’t fix the source, the stains will keep coming back.
If the problem is a roof leak, check for missing shingles, damaged flashing, or clogged gutters. Any roof damage should be repaired immediately to prevent further water infiltration. For plumbing leaks, inspect pipes above the ceiling for drips or moisture.
Tightening fittings or replacing damaged pipes can stop the issue before it worsens. If condensation is the problem, improve ventilation in humid areas like bathrooms and kitchens by using exhaust fans, dehumidifiers, or attic vents.
Once the source of the moisture is fixed, drying the ceiling thoroughly is the next crucial step. Trapped moisture can lead to mold growth and further ceiling damage. Use fans or a dehumidifier to remove excess moisture and speed up the drying process.
If the ceiling material is severely waterlogged, it may need to be cut out and replaced with fresh drywall. Ensuring the ceiling is completely dry before moving to the next step will prevent mold and mildew from forming.
After the ceiling is dry, you’ll need to remove the discoloration. The cleaning method depends on whether the stain is caused by rust, mold, or water damage. For water stains, mix equal parts bleach and water, then gently scrub the area with a sponge to lift the stain.
Rust stains can be treated with a vinegar or rust remover solution before wiping them clean. If mold or mildew is present, use a mold-killing cleaner or a mixture of bleach and water to eliminate spores and prevent regrowth.
Once the stain is cleaned, apply a high-quality stain-blocking primer to the affected area. This prevents the stain from bleeding through when you repaint.
Choose a primer specifically designed for water stains, as it will provide a better seal. Allow the primer to dry completely before moving on to painting.
After priming, repaint the ceiling with a color that matches the rest of the room. Using mold-resistant or moisture-resistant paint in high-humidity areas can help prevent future issues. Applying at least two coats will ensure even coverage and restore the ceiling’s appearance.
Reddish-brown stains on your ceiling are a warning sign of underlying issues like leaks, mold, or rust. Fixing the problem is only half the battle—taking preventative measures will help ensure the stains don’t return. Here’s how to protect your ceiling and keep your home in top shape.
Since roof leaks are a common cause of ceiling stains, regular roof maintenance is essential. Small cracks or missing shingles can allow water to seep in, leading to moisture buildup and discoloration. To prevent this, schedule roof inspections at least twice a year, especially after heavy storms.
Clear your gutters and downspouts to prevent water from pooling on the roof. Check for signs of damage like curled or missing shingles, cracked flashing, or sagging roof sections. If you notice any issues, repair them promptly to avoid leaks.
Plumbing leaks inside walls or ceilings can slowly create persistent stains. A small drip from a pipe or fixture can cause major damage over time. To prevent this, inspect pipes, faucets, and appliances regularly for leaks.
If your ceiling is beneath a bathroom or kitchen, check the plumbing connections for signs of wear. Look for damp spots, peeling paint, or unusual watermarks. If you suspect a hidden leak, hire a professional plumber to fix it before it worsens.
Excess moisture in your home can lead to condensation, which causes stains and mold growth. Proper ventilation helps control humidity levels and prevents moisture from settling on ceilings.
Make sure exhaust fans in bathrooms and kitchens are working efficiently. Open windows when cooking or showering to allow fresh air to circulate. If certain areas of your home remain damp, consider using a dehumidifier to reduce excess moisture.
If your home has metal pipes, nails, or HVAC ducts running through the ceiling, rust can be a problem. Moisture exposure over time can cause metal components to corrode, leading to brownish stains.
To prevent rust stains, ensure your home remains dry and well-ventilated. If you live in a humid climate, apply rust-resistant coatings on exposed metal surfaces. Replace old, corroded pipes or fittings before they cause further damage.
Mold thrives in damp conditions and can cause recurring stains. If you’ve had mold before, preventing its return is crucial for maintaining indoor air quality.
Keep your home dry by fixing leaks, improving ventilation, and using mold-resistant paint in humid areas. Clean and disinfect areas prone to moisture buildup, such as bathrooms, basements, and attics. If mold does appear, remove it immediately using a bleach solution or professional mold treatment.
Reddish-brown spots on ceilings often result from water intrusion, mold, or environmental factors. Common causes include roof leaks, faulty flashing, and leaking pipes.
To address these issues, inspect your roof for damaged shingles and ensure proper flashing. For plumbing leaks, check for worn-out pipes or clogs. After fixing the source, consider consulting our previous blog post on how to fix a leaking roof for comprehensive guidance on repairing roof-related problems.
When it comes to roofing, the spotlight often shines on the tiles themselves, but the unsung hero lurking beneath is the underlayment. This critical layer acts as a protective barrier, safeguarding your home from moisture, temperature fluctuations, and potential leaks.
Often overlooked, tile roof underlayment plays a vital role in enhancing the longevity and performance of your roof. By understanding its significance, homeowners can make informed decisions that not only protect their investment but also ensure peace of mind.

Tile roof underlayment is a protective layer installed beneath roof tiles to shield your home from moisture, leaks, and temperature fluctuations. Acting as a secondary barrier, it prevents water from seeping into your roofing structure when tiles are displaced or damaged.
Underlayment adds durability and protection, ensuring your roof remains effective for years. Without a reliable underlayment, your roof is vulnerable to leaks and structural damage. It also enhances energy efficiency by providing extra insulation.
Common options include felt, synthetic, and rubberized asphalt underlayments. Choosing the right type depends on your climate and roof design. Always consult a professional for the best choice.
Tile roofs are a popular choice for their durability, aesthetic appeal, and energy efficiency. However, beneath those beautiful tiles lies a critical component that ensures the roof performs its job effectively: the underlayment. Below are five key functions of tile roof underlayment:
1. Acts as a Secondary Barrier Against Water
The primary role of tile roof underlayment is to serve as a backup layer of waterproofing. While tiles are designed to repel water, wind-driven rain or improperly sealed tiles can allow moisture to seep through. The underlayment ensures that any water that gets past the tiles doesn’t reach the roof deck, preventing water damage, leaks, and mold growth.
2. Protects the Roof Deck from Damage
The roof deck, typically made of wood or composite materials, is highly vulnerable to moisture, heat, and other environmental factors. The underlayment acts as a protective shield between the tiles and the deck. By creating a barrier, it prevents the roof deck from deteriorating prematurely due to water, heat, or UV exposure, ultimately extending the lifespan of the roof.
3. Enhances Energy Efficiency
Modern underlayment materials are often designed to provide thermal insulation. This helps regulate the temperature inside the home by reflecting or reducing heat transfer through the roof. By minimizing heat absorption, the underlayment can improve energy efficiency, lower cooling costs, and create a more comfortable indoor environment.
4. Provides Additional Wind Resistance
In regions prone to high winds, tile roofs can experience uplift pressure that may cause tiles to dislodge or break. The underlayment helps secure the roof system by providing an added layer of stability.
It prevents wind-driven rain or debris from penetrating the roof and ensures the structure holds up during severe weather conditions. Some advanced underlayments are even designed to adhere more tightly to the roof deck for enhanced wind resistance.
5. Improves Tile Installation and Performance
Tile roof underlayment plays a crucial role during installation. It creates a smooth and even surface for laying the tiles, ensuring proper alignment and stability. The underlayment can absorb minor imperfections or unevenness in the roof deck, which improves the overall performance of the tile roof system. It also provides a safe walking surface for installers, reducing the risk of tile breakage during the process.
Roof underlayment may not be the first thing you think about when considering your roof, but its quality can make a world of difference. It acts as a hidden layer of protection that supports your roof's performance and longevity.
High-quality underlayment offers more than just a safety net—it provides practical benefits that impact your home’s durability, energy efficiency, and costs over time. Below, we break down the key advantages of investing in premium underlayment.
Increased Lifespan of the Roof
One of the most significant benefits of high-quality underlayment is its contribution to the lifespan of your roof. Roof tiles or shingles are the first line of defense against the elements, but they can become worn or damaged over time.
Underlayment acts as a second shield, preventing moisture, wind, and debris from compromising the integrity of your roof. By providing this extra layer of protection, high-quality underlayment helps reduce wear and tear on the visible components of your roof.
This means fewer repairs, less frequent replacements, and a roof that lasts longer overall. For homeowners looking to maximize their investment, quality underlayment is a must.
Enhanced Energy Efficiency
High-quality underlayment also plays a role in improving your home’s energy efficiency. Its insulating properties help regulate indoor temperatures by minimizing heat transfer through the roof. This is especially important in extreme climates where roofs are exposed to intense sunlight or freezing temperatures.
With better temperature regulation, your HVAC system doesn’t have to work as hard to maintain a comfortable environment. The result is lower energy consumption and reduced utility bills. If you’re aiming for a more energy-efficient home, upgrading your underlayment is a smart move that delivers long-term benefits.
Cost Savings
While high-quality underlayment may come with a higher upfront cost, it offers substantial savings in the long run. By preventing leaks, reducing energy expenses, and extending your roof’s lifespan, it lowers the overall cost of roof ownership.
For instance, roofs with inferior underlayment are more prone to damage, leading to frequent repairs and potentially costly replacements. Investing in a durable underlayment means fewer unexpected expenses and peace of mind knowing your roof is protected.
Selecting the proper underlayment for your tile roof is crucial to its performance and longevity. Underlayment acts as a critical barrier against moisture, wind, and temperature fluctuations, protecting your roof’s structural integrity.
| Underlayment Type | Pros | Cons |
|---|---|---|
| Asphalt-Saturated Felt | Affordable, traditional option, provides basic water resistance | Shorter lifespan, heavier, can wrinkle or absorb moisture |
| Synthetic Underlayment | Lightweight, durable, moisture-resistant, UV-resistant | More expensive than felt, requires professional installation |
| Rubberized Asphalt (Peel-and-Stick) | Superior waterproofing, strong adhesion, great for extreme weather | Higher cost, needs proper ventilation |
| Self-Adhering Membrane | Excellent for high moisture areas, easy installation, prevents ice damming | Costly, may not be needed in mild climates |
With various options available, making the right choice can feel overwhelming. This guide will help you understand the factors to consider and compare popular materials.
Choosing the right underlayment for your roof is a critical decision that impacts the durability, performance, and overall protection of your home. Here are key factors to consider when selecting underlayment:
1. Climate and Weather Conditions
The local climate plays a major role in determining the type of underlayment you need. In areas with heavy rainfall, hurricanes, or snowfall, water-resistant or waterproof underlayments like synthetic or self-adhered options are essential to protect against leaks and moisture damage. In hot climates, underlayments with UV resistance and heat tolerance are better suited to withstand extreme temperatures without degrading.
2. Roofing Material Compatibility
Different roofing materials require specific underlayment types to maximize their performance. For instance, tile roofs often need a thicker underlayment, such as asphalt-saturated felt or a synthetic underlayment, to handle the weight and provide added moisture protection. Metal roofs, on the other hand, benefit from underlayments designed to prevent condensation. Ensure the underlayment you choose is compatible with the roofing material for optimal results.
3. Durability and Lifespan
Not all underlayments offer the same longevity. Some options, like synthetic underlayments, are designed to last longer and resist wear and tear compared to traditional felt. If you’re investing in a long-lasting roof material like tiles or metal, it’s crucial to select an underlayment that matches its lifespan to avoid premature replacement. Look for tear resistance, UV stability, and waterproof properties as indicators of durability.
4. Installation Requirements
Some underlayments are easier to install than others, which can influence labor costs and overall project timelines. For instance, self-adhering underlayments simplify the installation process by eliminating the need for nails, while felt underlayments may require more labor-intensive methods. If you’re working with a professional roofing contractor, ask about installation preferences and the impact on total costs.
5. Cost and Budget
Underlayment costs can vary widely based on material type, brand, and quality. While traditional felt is more affordable, synthetic underlayments tend to offer better performance and longer lifespans, making them a more cost-effective choice in the long term.
| Underlayment Type | Cost Per Square Foot | Estimated Lifespan |
|---|---|---|
| Asphalt-Saturated Felt | $0.50 – $1.00 | 10 – 20 years |
| Synthetic Underlayment | $0.75 – $1.50 | 25 – 50 years |
| Rubberized Asphalt | $1.50 – $3.00 | 30 – 50 years |
| Self-Adhering Membrane | $1.75 – $3.50 | 30 – 50 years |
When selecting an underlayment, balance your budget with the desired level of protection and durability to ensure a smart investment.
Tile roof underlayment plays a crucial role in protecting your home from moisture and ensuring the longevity of your roof. Its importance cannot be overstated, as it serves as a barrier against leaks and enhances overall energy efficiency.
As we shift our focus to the next topic, we'll explore the best tile roof underlayment options specifically suited for Arizona's unique climate. Understanding the available materials and their benefits will empower you to make an informed choice that enhances your roof's performance and durability.
Your roof goes through countless rainstorms in its lifetime, and you wouldn't want one of these to invite a leak into your house. A roof leak is far from rare and it might be a sign that your underlayment is failing.
While tiles themselves often last long, the underlayment does not last as long. If you've noticed any signs of aging on your roof, or if it's been a while since the last inspection, it could be time for a check-up.
Ignoring these signs can lead to more severe damage, not just to your roof but also to the interior of your home. Replacing tile roof underlayment ensures that there are no leaks and that the lifespan of the tile roof is ensured.
Before going up a ladder and stripping away the old tiles, you need to know what makes up the roof. The underlayment is not a visible layer, but it is important to make your roof whole.
It is your roof's first line of defense against water intrusion and weather damage. The right underlayment can extend the life of your roof tiles by blocking moisture that might otherwise weaken them over time.
It is essentially a barrier material installed directly onto your roof deck under all other roofing materials as an added layer of protection from severe weather. Without it, even minor leaks can lead to major issues.
There are a number of underlayment to choose from when building your roof. Each have unique benefits for different roofing conditions and climates.
Felt underlayment, often referred to as tar paper, is the traditional choice that has been used in roofing for decades. It’s made from either organic or fiberglass substrate coated in asphalt. Felt comes in two main types:
This is made from recycled paper and wood fibers saturated with asphalt. It’s heavier and more water-resistant than many other underlayments but less durable when exposed to UV rays or high temperatures.
This type combines fiberglass with asphalt, offering improved resistance to tearing and better stability in high temperatures. Felt underlayment is usually less expensive than synthetic alternatives and works adequately for many standard roofing projects.
However, it can absorb water, become brittle, and break down faster if exposed to prolonged moisture or high temperatures.
Synthetic underlayment is a more modern solution made from woven or spun polyethylene or polypropylene. It is engineered to offer several advantages over traditional felt, including:
Synthetics are much stronger than felt and can withstand high winds and foot traffic during installation. They are lighter per square foot, which makes them easier and faster to install.
The materials also don't absorb water, which helps prevent mold growth and decking rot. Some synthetic underlayments are resistant to UV degradation, allowing them to be exposed for weeks or even months during prolonged construction projects.
Rubberized asphalt underlayment provides the highest level of waterproofing and protection. It contains rubber polymers and asphalt that create a waterproof barrier.
The rubberized nature of the material allows it to seal around nails that penetrate through, which greatly reduces the risk of leaks. This type of underlayment typically features a peel-and-stick application that bonds securely to the roof deck, providing excellent wind resistance.
This underlayment is ideal for regions prone to ice damming or where water accumulation is a concern, such as valleys and roof protrusions. Due to its superior waterproofing qualities, rubberized asphalt is often used in critical areas rather than over the entire roof.
It's not always obvious, but there are key indicators that can signal when your roof needs some attention. This is also the case for the non-visible layers like the underlayment.
If you know how to check for the damage you can have an idea whether you need a replacement or not.
One of the most straightforward signs that your underlayment may need replacing is the presence of water damage or leaks inside your home. If you notice water stains on your ceilings or walls, it's a clear indicator that water is breaching your roof’s defenses.
While tiles might be the first line of defense, the underlayment is what really keeps the water out. When it fails, moisture finds its way in, which can lead to costly interior damage.
While inspecting the tiles themselves might seem more related to the tiles than the underlayment, these signs can also indicate underlying issues. Cracked or missing tiles can expose the underlayment to direct sunlight and weather elements, accelerating its degradation.
If you start noticing an unusual amount of tile damage, it could be a sign that the underlayment is no longer providing the support and protection it should.
A sagging appearance in the roof is a red flag that should not be ignored. This can be a sign that the decking, supported by the underlayment, has been exposed to moisture for an extended period.
The constant presence of moisture can weaken the decking material, leading to a sagging or warping appearance. This structural compromise not only puts your roof at risk but can also affect the overall integrity of your home.
If you find yourself repeatedly addressing roof repairs, especially after every bout of severe weather, it might be a sign that your underlayment is failing. A well-functioning underlayment should offer a certain level of robustness against routine weather challenges.
Frequent repairs can indicate that the underlayment is no longer performing effectively, allowing more frequent and extensive damage to the roof tiles and structure.
Replacing the underlayment on your roof is a significant undertaking that requires careful planning and preparation. The right preparation can make the difference between a job well done and one that might need revisiting sooner than expected.
Timing is everything when it comes to roof work. Ideally, you want to schedule the replacement during a period of mild weather.
Extreme conditions—whether hot or cold—can complicate the installation of underlayment and roofing materials. Most professionals recommend undertaking roofing projects during the spring or fall when the weather is generally more predictable and temperate.
The choice of underlayment material is critical and should be influenced by the climate in which you live. Different materials perform better in different environments.
For instance, synthetic underlayments are often preferred in wet climates due to their superior moisture resistance, while felt might be adequate in drier regions. Consider also the longevity and durability of the materials.
Before you start, remember that roof work can be dangerous. Prioritize safety by using proper equipment and, if necessary, consider hiring professionals.
If you choose to proceed on your own, here’s how to replace the underlayment beneath your tile roof.
Safety cannot be overstated when it comes to working on a roof. Ensure you have a sturdy ladder, non-slip footwear, gloves, and safety goggles. Consider using a safety harness if the roof is particularly steep or high.
Clear the area around your home of any objects or debris to keep the work zone safe and unobstructed.
Start by carefully removing the tiles. Begin at the ridge or peak of the roof and work your way downwards.
Use a flat pry bar to lift the tiles gently, being careful not to crack or break them. It’s wise to have extra tiles on hand in case some do break.
Stack the removed tiles neatly away from the work area. Ensure they are on stable ground to prevent any accidents or additional breakage.
Once the tiles are removed, inspect the roof deck. Look for any signs of damage such as rot or structural weakness.
This is crucial as installing new underlayment over a compromised deck can lead to future problems. Next, remove the old underlayment, it may be nailed or stapled down.
Use a roofing shovel or scraper to remove it, being careful not to damage the roof deck.
Start from the bottom of the roof and work your way up. Roll out the new underlayment horizontally across the roof, overlapping each layer by at least 6 inches.
This overlap is critical for preventing water infiltration. Secure the underlayment with roofing nails or staples.
Make sure it lies flat and smooth against the roof deck.
Begin replacing the tiles from the bottom of the roof. Make sure each tile aligns correctly with those next to it. Misalignment can lead to gaps and potential leaks.
Use new fasteners to secure the tiles. Avoid reusing old nails or staples as they may not hold as securely after being removed.
While many home improvement tasks are manageable on your own, replacing roof underlayment might be a project where enlisting professional help is prudent. A well-chosen expert can ensure that the job is done efficiently and correctly, protecting your home for many years to come.
Understanding the scope and risks associated with replacing underlayment can help you decide whether to tackle the job yourself or hire a professional. Consider the following:
Evaluate your skills and experience. If you have experience with roofing projects and feel comfortable working at heights, you might handle some or all of the task yourself. However, if you're unsure about any part of the process, professional help is advisable.
Assess the project’s complexity. If your roof has multiple levels, steep slopes, or requires extensive repairs, these complexities are often best handled by a professional.
Choosing the right contractor is crucial for ensuring your roof’s longevity. Here are essential factors to consider:
Once you’ve selected a contractor, there are a few steps you can take to prepare for their arrival and the start of the project:
Your roof has many components that have specific needs and maintenance requirements. With new underlayment securely in place, your roof's durability against weather and wear greatly improves even during those stormy months.
If you're considering clay roof tiles, the choice of underlayment becomes even more impportant. Clay tiles are known for their longevity and ability to enhance the thermal efficiency of your home.
However, their performance hinges on the support that only a strong, properly installed underlayment can provide. With an underlayment in good condition, you maximize the protective benefits of clay tiles.
Walking on a tile roof is one of those things that can go very wrong if you’re not careful. You can be going up to fix a leak, clean the gutters, or just check things out.
The tiles beneath your feet are strong enough to shield your home, but they aren’t made to withstand careless footsteps. A single misstep could not only damage the tiles but also put you at risk of slipping and falling.
If you’ve ever wondered how to safely navigate a tile roof without cracking tiles or endangering yourself, you’re in the right place. Before you head up your roof, you need to be prepared, know what to watch out for, and the best ways to prioritize safety. Let's look at how to walk on a tile roof safely.
Walking on a tile roof isn’t something you should rush into without a plan. Tile roofs are designed to protect your home, but they are not made for frequent foot traffic.
The tiles can crack, shift, or even break under pressure if you don’t know how to step carefully. Beyond the risk to your roof, there’s also the danger of slipping and falling, which can lead to serious injuries.
If you’re planning to work on your roof, it’s essential to take a moment to understand what you’re dealing with before setting foot on those tiles. Tile roofs aren’t like flat or asphalt shingle roofs that offer straightforward footing.
The weight distribution and fragility of certain tiles can create tricky situations if you aren’t aware of their limitations.
Not all tile roofs are created equal, and knowing the different types can help you assess their strengths and weaknesses before stepping onto them. Each type of tile has unique characteristics that determine how much weight it can handle, how easily it might crack, and the kind of care it needs.
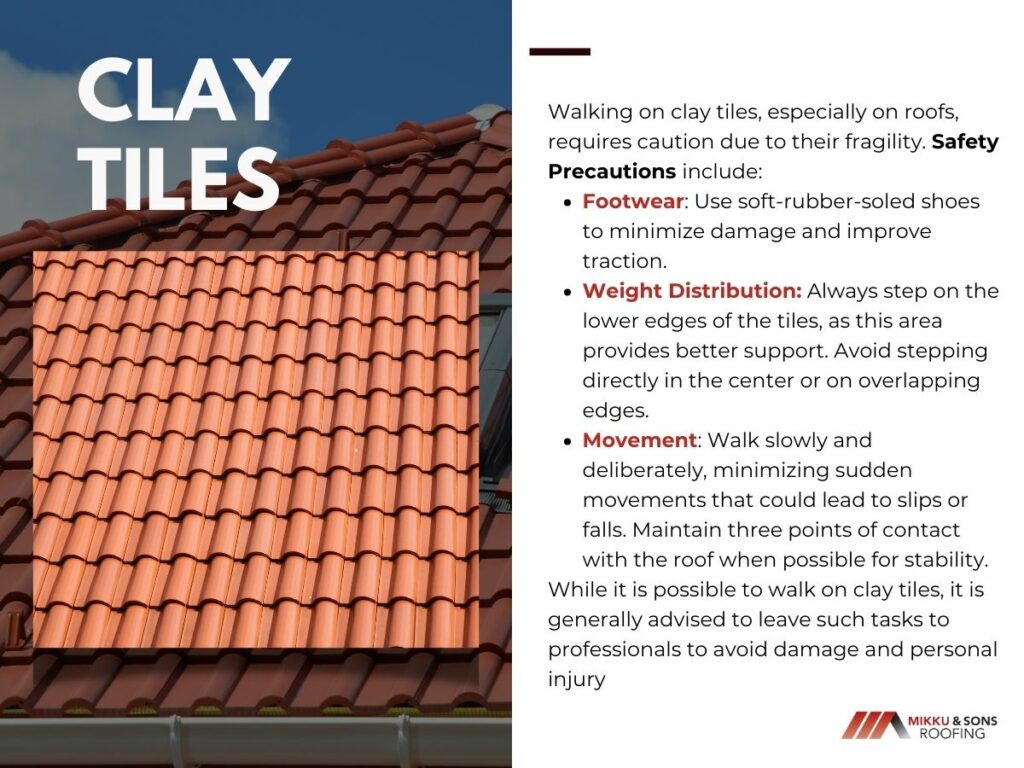
Clay tiles are among the most common and traditional types of roofing materials. They are loved for their ability to withstand harsh weather conditions and their longevity.
However, when it comes to walking on them, clay tiles are quite fragile. They can crack or shatter under uneven pressure, especially near their edges or if they have been weathered over time.
If your roof has clay tiles, it’s important to step gently and avoid areas where the tiles appear thin or worn. These tiles are often brittle and more likely to break if you don’t distribute your weight carefully.
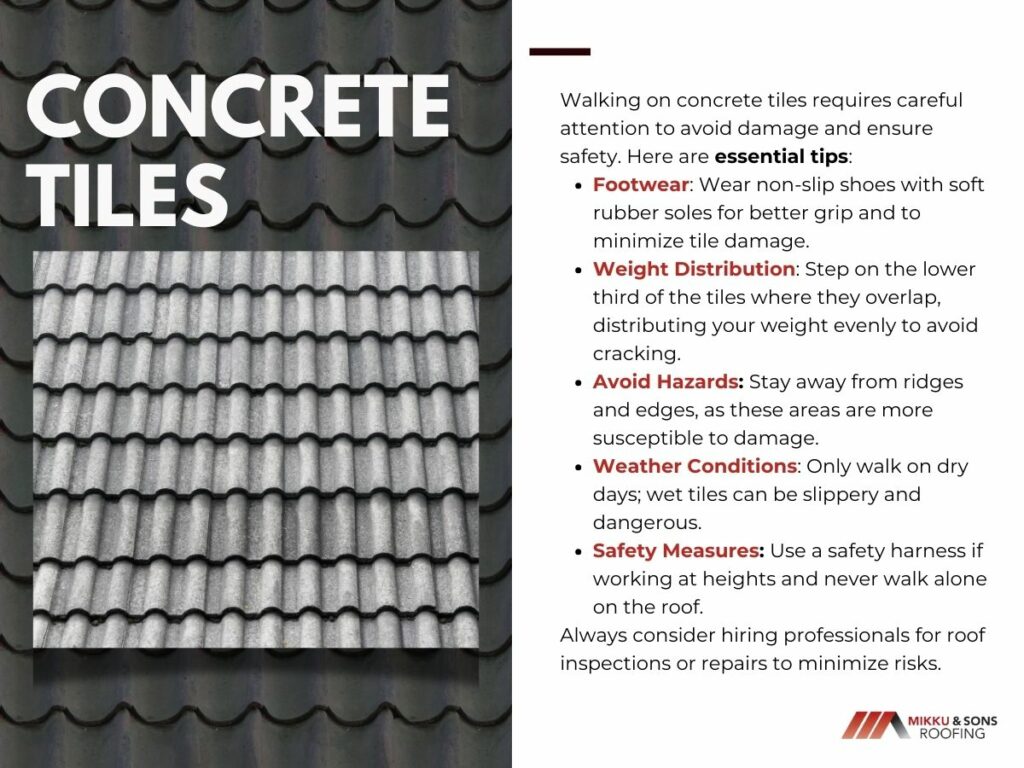
Concrete tiles are a modern alternative to clay and are generally more durable. They can handle more weight, making them slightly more forgiving for foot traffic.
However, they are far from indestructible. Older concrete tiles or those exposed to extreme weather can weaken over time, becoming more prone to cracks and chips.
While concrete tiles offer more stability, they still require careful navigation. Walking along the middle of each tile or where it overlaps with others is imporant to avoid putting too much pressure on a single spot.
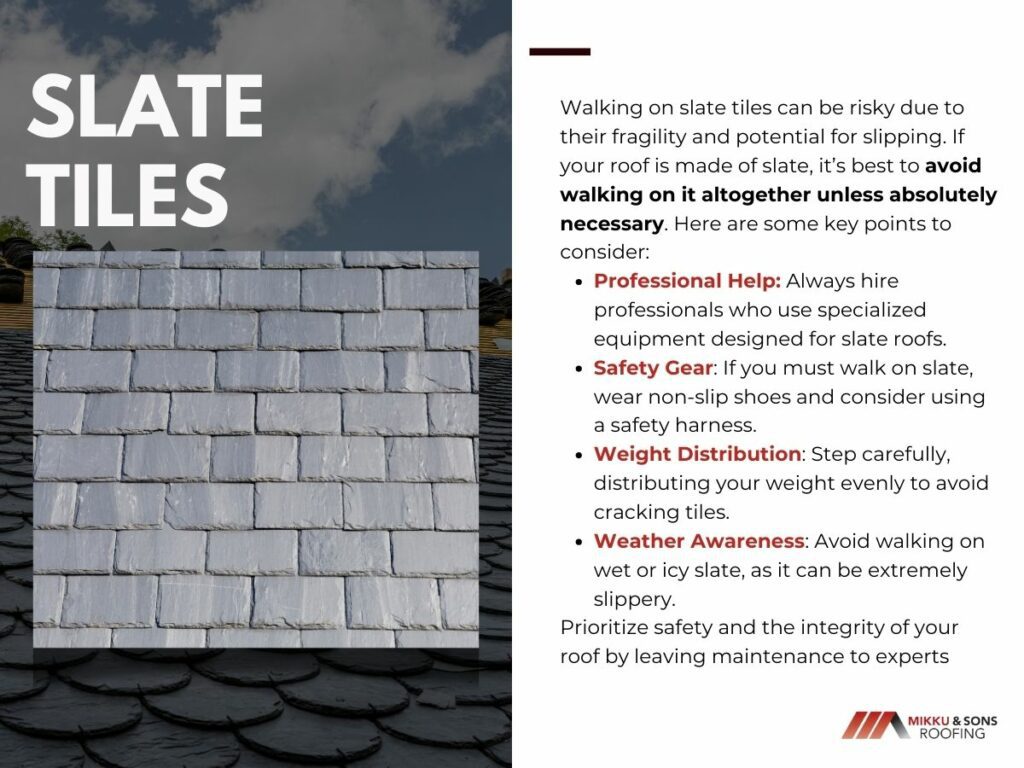
Slate tiles are often considered the most elegant type of roofing material, but they come with their own set of challenges. Slate is a natural stone, making it extremely brittle and susceptible to chipping or breaking.
If your roof is made of slate, it’s best to avoid walking on it altogether unless absolutely necessary. Professionals often use specialized equipment to work on slate roofs safely and for good reason.
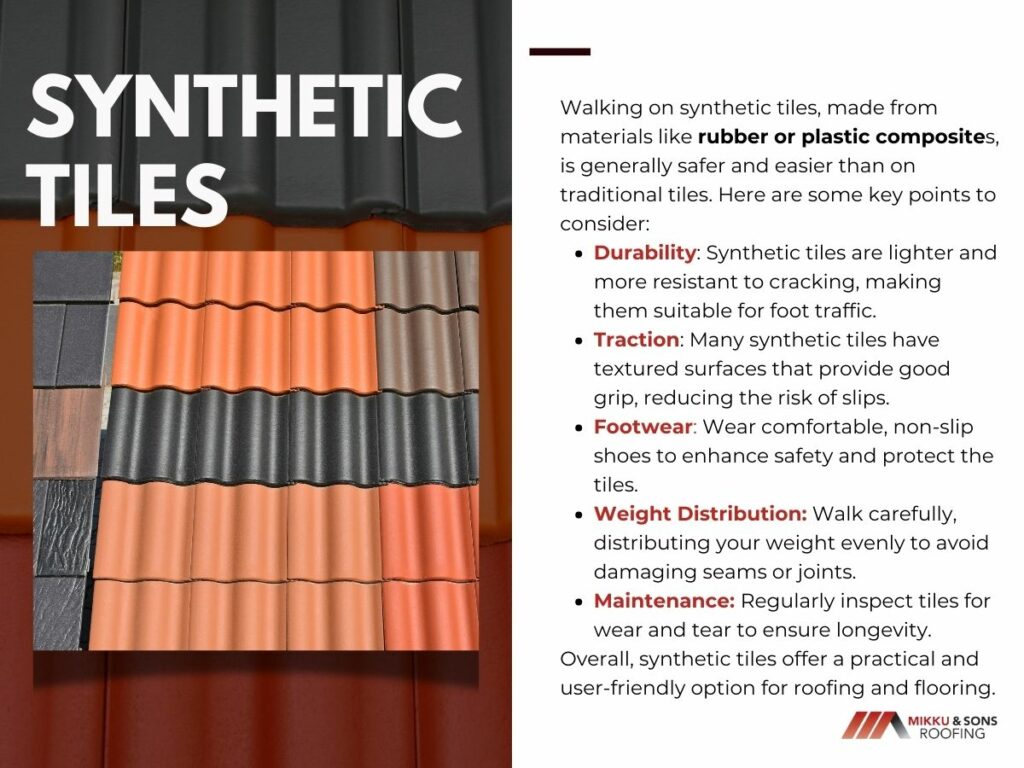
Synthetic tiles, made from materials like rubber or plastic composites, are a newer option. They are often lighter and less prone to cracking than traditional tiles.
Their behavior underweight can vary widely depending on the manufacturer and installation method. If your roof has synthetic tiles, treat them with caution.
They may feel more forgiving underfoot, but it’s still crucial to avoid stepping near edges or unsupported areas.
A quick check can save you from unnecessary risks and costly mistakes. Walking on a roof that has loose, cracked, or unstable tiles can lead to further damage.
Identifying problem areas before you climb up can help you plan your movements and avoid stepping where the roof is weakest.
Start by checking for visible damage. Use binoculars or inspect from a ladder before stepping onto the roof.
Cracked, chipped, or dislodged tiles are clear indicators of weak spots you’ll need to avoid. Pay attention to any sagging areas or tiles that seem out of alignment, as these could signal structural issues underneath.
Also, take note of moss, algae, or debris buildup. These can make tiles slippery and increase your chances of losing your footing.
Steeper roofs are harder to navigate and often require additional safety measures like a harness or roof anchors. Flat or gently sloping roofs are easier to walk on but can still present challenges if the tiles are brittle or damaged.
Take a moment to observe how the tiles are arranged. Some roofs have overlapping tiles that can shift under your weight if you’re not careful.
Knowing where the most stable spots are, typically where tiles overlap support beams, will help you plan your steps and reduce the risk of breaking tiles or losing your balance.
Planning your path before you even touch the roof is crucial for avoiding damage and keeping yourself safe. If you start without a clear plan, you risk stepping on weak spots, damaging tiles, or putting yourself in a dangerous position.
Taking a few moments to map out where you’ll walk can save you from costly repairs or potential injuries.
Walking on tiled surfaces, especially roofs, requires care and precision to avoid damage and ensure your safety. Tiles come in various materials—clay, slate, synthetic, or concrete—each with unique strengths and vulnerabilities. Understanding where to step can help you navigate these surfaces safely and minimize the risk of accidents or breakage.
Tiles are not typically designed to bear direct weight. Their primary purpose is protection, and stepping incorrectly can lead to cracks, dislodgment, or other damage. To navigate tiled surfaces safely, it’s essential to understand how different materials respond to weight and where the strongest areas are located.
Every tile is part of a system that relies on proper installation and even weight distribution to maintain its integrity. Even a small misstep can cause tiles to crack, which not only leads to expensive repairs but can also compromise the roof’s ability to protect your home.
Each step you take can either protect your roof or cause damage, so mindful movement is key. This is where patience pays off.
When you step onto a tile roof, aim to distribute your weight evenly. Use the balls of your feet to apply gentle pressure rather than pressing your full weight down immediately.
This reduces the likelihood of tiles breaking under concentrated force. Avoid stepping directly on the edges of tiles, as this is where they are most likely to crack or shift.
If the roof has a steep slope or uneven surfaces, keep your movements slow and calculated. Take small steps, and always ensure your footing is secure before shifting your weight.
Keep your body aligned and avoid leaning too far forward or backward, as this can throw off your stability. Sudden movements, like turning quickly or shifting positions abruptly, can destabilize tiles or cause you to lose your footing.
If you need to adjust your position, do so slowly and intentionally. Use your hands to steady yourself on a secure surface if needed, but be careful not to put pressure on fragile tiles.
Having the right tools is essential when working on a tile roof. The tools you use should help you move carefully, avoid damage, and complete your task efficiently.
Using the wrong tools or carrying too much gear can make your movements clumsy and increase the risk of accidents. When selecting tools for roof work, less is often more.
Heavy or bulky tools can throw you off balance and put unnecessary strain on the roof tiles. Choose lightweight tools that are easy to carry and store securely while you work.
For example, a small, padded tool belt or backpack can keep your hands free and your tools within reach. If you’re using power tools, opt for cordless versions to reduce the hassle of managing cords on an uneven surface.
Ensure that any tools you bring up are secure with straps or clips when you’re not using them. Dropping tools not only risks damaging tiles but can also create a hazard if someone is below.
Protecting the roof should always be a priority, and roof-safe accessories can help. For instance, consider using foam pads or cushions under ladders or scaffolding to prevent pressure points from cracking the tiles.
If you need to move across the roof frequently, portable roof planks or padded walk boards can distribute your weight more evenly, reducing the chance of damage.
If cleaning or repairing is part of your job, avoid abrasive tools or harsh chemicals that can erode or stain the tiles. Soft-bristle brushes and non-corrosive cleaning solutions are safer for maintaining the roof’s appearance and functionality.
Sometimes, the smartest move you can make is knowing when to step back and let a professional handle the job. While walking on a tile roof might seem manageable at first, there are situations where the risks far outweigh the benefits of doing it yourself.
Professional help is also a wise choice when you’re unsure about your footing, the roof’s condition, or the tools needed for the job.
If your roof has sagging areas, extensive damage, or large patches of loose or missing tiles, it’s best to call a professional. These issues could indicate underlying structural problems that make the roof unsafe to walk on.
Stepping on an unstable roof can worsen the damage or even lead to a collapse in severe cases. A professional roofer has the expertise and equipment to assess and address these issues without putting themselves or your home at unnecessary risk.
Some tasks, like replacing tiles in hard-to-reach areas, working on steep or multi-tiered roofs, or handling heavy materials, require specialized equipment and experience. If you lack the right tools or aren’t confident in your ability to complete the work safely, it’s time to bring in a professional.
Roofers are trained to navigate challenging surfaces and use the proper safety measures to avoid accidents. They also have access to tools that can make the job faster and safer, like roof harnesses, scaffolding, or hoisting equipment.
Walking on a tile roof requires care as the roof is brittle and works to protect your home. Every choice, from how you prepare to the tools you use, plays a role in keeping both you and your roof safe.
The right mindset and precautions can make all the difference between a job well done and a costly mistake. When thinking about footwear, for example, you might ask yourself: are Converse good for walking on roofs?
It’s a fair question, and the answer boils down to safety and practicality. Converse shoes, with their flat rubber soles, might provide a decent grip on smoother surfaces, but they aren’t designed to distribute your weight evenly on fragile tiles.
How long do metal roofs last in Arizona? Metal roofs in Arizona typically last between 40 to 70 years, making them one of the most durable roofing options available. Their longevity is attributed to the materials used, such as steel or aluminum, which are designed to withstand the state's extreme heat and weather conditions.
Factors influencing their lifespan include the type of metal, installation quality, and regular maintenance practices. With proper care, some high-quality metal roofs can even exceed 70 years. This durability not only provides long-term value but also contributes to energy efficiency in homes.
Metal roofs are renowned for their durability, making them a popular choice for both residential and commercial buildings. Generally, the lifespan of a metal roof ranges between 40 to 50 years under typical conditions. However, some types, such as standing seam roofs, can last as long as 70 to 100 years, making them an exceptionally long-lasting roofing option. The longevity of metal roofs depends on several factors, including the type of metal, environmental conditions, and the quality of maintenance over time.
Several factors can significantly affect the lifespan of metal roofs. Understanding these can help property owners make informed decisions and extend the life of their roofing investment.
Weather plays a crucial role in determining the longevity of metal roofs. In Arizona, for instance, extreme heat, harsh sunlight, and monsoon seasons pose unique challenges.
The type of metal roof chosen greatly influences its lifespan. While all-metal roofs are durable, their specific design and construction can make a significant difference.
Metal Coatings and Finishes
Another factor to consider is the type of finish or coating applied to the metal. High-quality coatings, like Kynar or PVDF, protect the roof from fading, rusting, and weather-related damage, significantly extending its lifespan.
The gauge thickness of the metal used in roofing also plays a vital role in its durability and longevity. Metal roofing is available in gauges ranging from 22 to 28, with lower numbers indicating thicker materials.
Metal roofs are a practical and durable choice for Arizona homes and commercial properties. Withstanding the state’s unique climate and environmental challenges, metal roofs offer significant benefits in terms of energy efficiency, durability, and long-term cost savings.
Arizona's climate is characterized by extreme heat, intense sunlight, and occasional monsoons. Metal roofs are built to endure these conditions. They are resistant to cracking, warping, and erosion, making them an excellent choice for long-term use. High-quality metal roofing materials, such as aluminum or steel, can handle high winds and heavy rains without losing their structural integrity.
One of the standout features of metal roofs is their ability to reflect solar radiation, reducing heat absorption. This is particularly valuable in Arizona’s desert climate, where temperatures can soar. Many metal roofs come with reflective coatings that enhance energy efficiency, keeping buildings cooler and reducing air conditioning costs. Over time, this can lead to significant savings on energy bills.
Fire safety is a crucial concern for Arizona residents, especially in areas prone to wildfires. Metal roofs are non-combustible and offer superior fire resistance compared to traditional materials like wood or asphalt shingles. This makes them a safer option for protecting homes and businesses.
Metal roofs can last 30 to 50 years or more, depending on the material and upkeep. In comparison to other roofing materials, metal roofs require less frequent repairs or replacements. This longevity makes them a cost-effective choice in the long run, especially in regions like Arizona where roofs are subjected to extreme weather conditions.
Despite their durability, metal roofs are lightweight, which reduces structural strain on buildings. They are also versatile, available in a variety of styles and colors to match architectural preferences. Whether you prefer a modern standing seam roof or a classic look that mimics tile, metal roofs can adapt to diverse aesthetic needs.
Metal roofs are an environmentally friendly option as they are often made from recycled materials and are fully recyclable at the end of their lifespan. This sustainability aligns well with Arizona’s focus on conservation and eco-conscious building practices.
While metal roofs are known for their durability, regular maintenance is essential to ensure they reach their full lifespan and continue performing efficiently. Here’s a guide to maintaining a metal roof in Arizona’s climate.
Regular inspections are crucial for identifying potential issues early. Check the roof at least twice a year and after severe weather events like monsoons. Look for signs of wear, loose fasteners, and any debris that may have accumulated.
Keeping the roof clean is a simple yet effective way to maintain its appearance and functionality. Leaves, dirt, and branches can accumulate and trap moisture, which may lead to rust or staining over time.
Minor scratches on the metal surface should be addressed promptly to prevent rust from spreading. Use touch-up paint specifically designed for your roof material to cover scratches and maintain the roof’s appearance.
The protective coating on a metal roof is its first line of defense against the elements. Over time, coatings may degrade, especially under Arizona’s intense sunlight.
While DIY maintenance can handle basic upkeep, scheduling professional inspections at least once every two years ensures that potential problems are addressed by experts. Professionals can spot issues that may not be visible to the untrained eye and perform repairs that require specialized tools or skills.
Preventative maintenance can go a long way in preserving your roof’s lifespan:
Metal roofs offer a compelling blend of durability, longevity, and energy efficiency, making them an excellent choice for homeowners, especially in regions like Arizona. With lifespans ranging from 40 to 70 years, they provide significant long-term value.
However, it's essential to weigh these benefits against potential drawbacks, such as initial costs and noise during rainstorms. By considering both the pros and cons, homeowners can make an informed decision that aligns with their needs and budget. Ultimately, investing in a metal roof can enhance your home’s resilience and aesthetic appeal for decades to come.
When monsoon season rolls around, the weather can feel both exhilarating and a little intimidating. The heavy rains, strong winds, and relentless downpours can take a toll on your roof without you even realizing it.
Your roof is your home’s first line of defense against the elements, and during a monsoon, it faces some of the harshest conditions of the year. But with the right attention and a little preparation, you can make sure your roof stays strong through the storm.
You might not always notice the damage until it's too late, but roofing problems can quietly creep in during a monsoon. The good news is that most of these issues can be prevented or caught early with a little maintenance. Let's look at monsoon roofing damage and prevention.
Rain, wind, and the occasional debris can all pose significant threats to the structural integrity of your home. Preparing for these challenges begins with understanding exactly how these elements affect your roof during the intense monsoon months.
During the monsoon, the winds can be fierce, carrying with them not just rain but potential debris and other materials that can impact your roof. These winds can worsen any existing vulnerabilities in your roofing system, leading to damages that might not be immediately apparent.
Strong winds can lift roofing materials, break seals, and even displace whole sections of a roof if not properly secured. The health of your roof before the monsoon can determine how well it will withstand these winds.

Water has a profound effect on roofing materials. Prolonged exposure to heavy rains can reveal any weaknesses in your roof's waterproofing measures, such as in the underlayment or shingle layout.
The key is not just resistance to water but also ensuring proper runoff to avoid the pooling that can lead to leaks and structural damage. It also includes considering how water drains off your roof, the condition of your gutters, and even the landscape around your home that could affect water accumulation.

Humidity and moisture from monsoon rains can infiltrate your home in ways you might not immediately notice. These elements can seep into cracks and crevices, potentially causing rot, mold, and deterioration in hidden areas.
The threat isn’t always from the rain that pounds on your roof but also from the moisture that lingers and builds up over time. Humidity affects the air quality inside your home and the efficiency of your thermal insulation.
When monsoon season hits, your roof faces some of the harshest conditions of the year. While it’s built to withstand normal wear and tear, the combination of heavy rain and high winds can expose vulnerabilities you might not have noticed before.
The stress of constant moisture, debris, and shifting winds can cause a range of issues that, if left unaddressed, could lead to costly repairs or worse.
Leaks are one of the most common and most troubling issues that arise during a monsoon. Even if your roof seems to be in good shape, the sheer volume of rain during a monsoon can force its way into places it shouldn't be.
Water can find its way through small cracks, damaged shingles, or even poorly sealed seams. You might not notice a leak right away, but over time, water seeping into your attic or ceiling can cause significant damage.
Water damage can lead to mold growth, wood rot, and rusted nails, all of which weaken your roof’s structure. If left unchecked, what starts as a minor leak can quickly escalate into a larger issue that requires extensive repairs or even a full roof replacement.
During a monsoon, high winds can easily rip off shingles or tiles, especially if they’re already loose or weakened by age. Missing shingles leave your roof exposed, allowing rainwater to seep underneath the protective layers.
Once water gets into the roof deck, it can cause serious damage. Strong winds can also break or crack roofing shingles, leading to the same risks.
The combination of strong winds and rain can also displace flashing and roofing membranes, creating entry points for water. Even if your shingles seem intact, any damage to the roofing underlayment could allow water to bypass the outer layer.

Your gutters and downspouts play a critical role in directing rainwater away from your home. But during a monsoon, they’re especially vulnerable to clogging.
With all the debris carried by the wind and rain, your gutters can quickly become overwhelmed. If gutters are clogged, water can pool around your roof’s edges, putting pressure on the roofing materials and increasing the risk of leaks.
Overflowing gutters can also cause water to spill over the sides and seep into areas where it shouldn't, potentially damaging the fascia and soffits. Even if you don’t see any immediate leaks, water pooling around the foundation of your house can cause structural damage over time.

Monsoon winds can sometimes feel like they’re pulling your roof apart, especially if there are already weaknesses in the structure. Winds strong enough to lift and tear at shingles can also shift and loosen roof vents, flashing, and other components.
Once wind causes these structural elements to loosen or detach, your roof is far more susceptible to water infiltration, which can lead to a cascade of problems. The wind can also put pressure on the frame and trusses of the roof itself.
If the wind is strong enough, it can cause the roof to lift slightly, shifting its position and creating gaps. These shifts can cause long-term issues, especially if your roof’s structure becomes misaligned over time.
Your roof works tirelessly to protect your home from the elements, but it’s not always easy to spot when things start to go wrong. Leaks can begin as slow drips, and shingles might crack or shift in ways that aren't immediately noticeable.
The key is to know what to look for so you can catch problems before they turn into bigger, more expensive repairs. Sometimes, the first signs of damage don’t come from the roof itself, but from inside your home.
If you start seeing water stains, damp patches, or even small puddles forming on the floor, there’s a good chance your roof is letting water through. Water stains often appear as dark spots or streaks on the ceiling or walls, and you might notice the drywall or plaster beginning to soften.

Dripping water is another clear sign that something's wrong. Even if it seems like a minor issue, dripping water indicates that the roof is no longer doing its job to keep water out.
Inspecting the outside of your roof regularly, especially after a storm, can help you catch early signs of damage. Start by looking for missing or cracked shingles.
These are often the result of high winds or age, and even a few missing shingles can lead to leaks if not repaired quickly. You should also check for any loose or curling shingles—if the edges are bent or uneven, rainwater may be able to sneak underneath, causing leaks and water damage.

Flashing is the metal sealant placed around joints, chimneys, vents, and skylights to prevent water from seeping in. If the flashing has become loose, cracked, or damaged, it’s an open invitation for water to get inside.
After the stormy weather clears, it can be easy to breathe a sigh of relief, but that’s actually the best time to inspect your roof for any damage. Monsoons often leave behind more than just wet sidewalks and muddy yards.
A post-monsoon inspection is essential to ensure that your roof is still in top shape and capable of protecting your home from whatever weather comes next.
Inspecting your roof after a monsoon can sound complex, but you can do it safely with the right precautions. Start by walking around your home and checking for obvious signs of damage, like fallen shingles or debris scattered around your yard.
In some cases, you may be able to apply temporary fixes to prevent further damage until you can schedule more permanent repairs. For instance, if you find a small leak, using roofing tape or a tarp can help block the water until you can have a roofer come out and replace damaged materials.
Similarly, if there are a few missing shingles, you may be able to replace them yourself using roofing adhesive or roofing nails. However, these fixes are just short-term solutions and should not be relied upon for the long haul.
For long-term solutions, it's always best to replace damaged shingles or repair flashing properly.
Sometimes the urge to fix things ourselves can be strong, especially when it might save some money. However, when it comes to your roof, understanding the line between a DIY job and a professional necessity is crucial.
There are aspects of roofing maintenance that can be managed on your own, such as minor repairs or regular cleaning of gutters and drains. However, when it comes to more complex issues like installing a new roof or repairing significant damage, professional help becomes indispensable.
Not only does this ensure that the job is done right, but it also keeps you safe from the hazards associated with roofing work.
Regular maintenance is about establishing a routine that extends the life of your roofing system which enhances your home's overall safety. Investing in it ensures that your roof can withstand the rigors of any season, monsoon included.
Remember, the goal is to avoid the stress of emergency repairs, especially during unpredictable weather. A well-maintained roof means peace of mind, knowing that you’ve taken proactive steps to safeguard your home against the elements.
Modern roofing materials have evolved significantly, offering homeowners a range of options that combine durability, aesthetic appeal, and energy efficiency. As traditional materials like clay and slate become less favored due to their weight and maintenance demands, innovative alternatives have emerged.
These modern solutions include metal roofing, known for its longevity and resistance to severe weather; composite tiles, which mimic the look of traditional materials without the associated drawbacks; and green roofing, which integrates vegetation for improved insulation and environmental benefits. This variety allows homeowners to select materials that best suit their architectural style and practical needs.
When it comes to roofing, traditional materials offer a blend of affordability, functionality, and aesthetics. Each type has unique advantages and drawbacks, making it essential to choose one that aligns with your needs and budget.
Asphalt shingles are the most widely used roofing material due to their affordability and ease of installation. Made from a combination of fiberglass and asphalt, these shingles are lightweight and versatile. They come in various colors and styles, allowing homeowners to achieve their desired look.
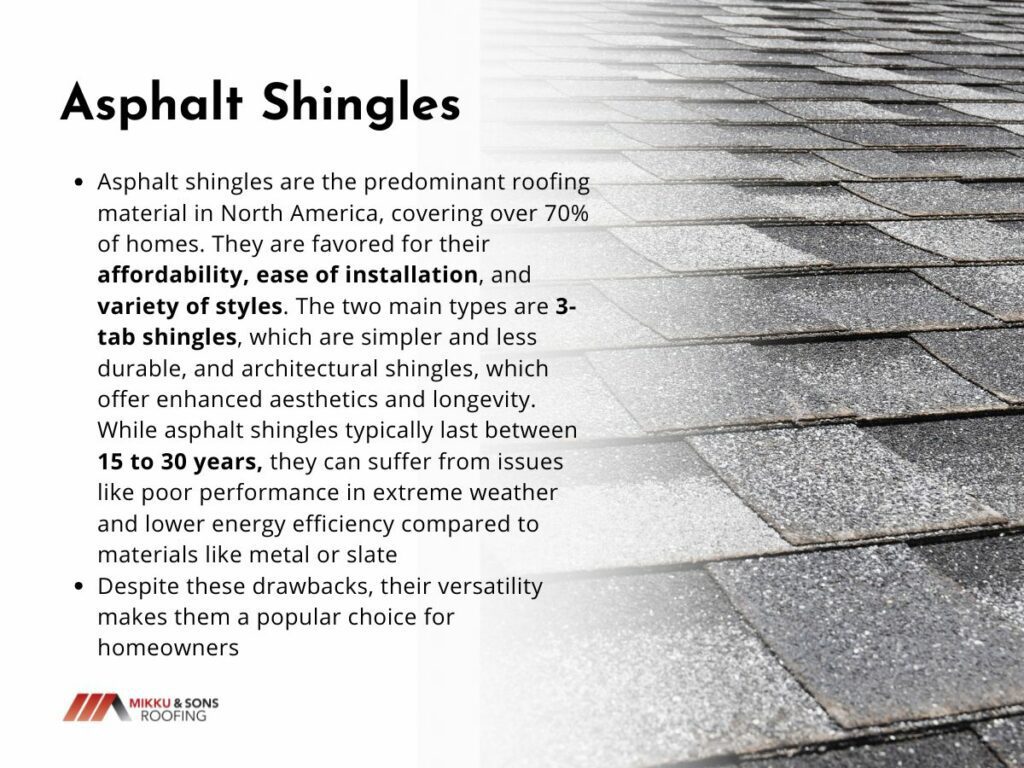
The primary advantage of asphalt shingles is their cost-effectiveness, making them an ideal choice for budget-conscious homeowners. Additionally, they are relatively easy to install, reducing labor costs. However, their lifespan is shorter than other materials, typically lasting 20–30 years.
Over time, exposure to harsh weather can cause wear and tear, necessitating more frequent replacements.
Wood shingles and shakes are known for their rustic charm and natural insulation properties. Typically crafted from cedar, redwood, or pine, they bring a unique aesthetic to homes. Their natural insulation can improve energy efficiency, making them a sustainable option.
However, wood roofing is more susceptible to rot, mold, and insect damage if not properly maintained. Additionally, it poses a higher fire risk compared to other materials, making it less ideal for areas prone to wildfires.
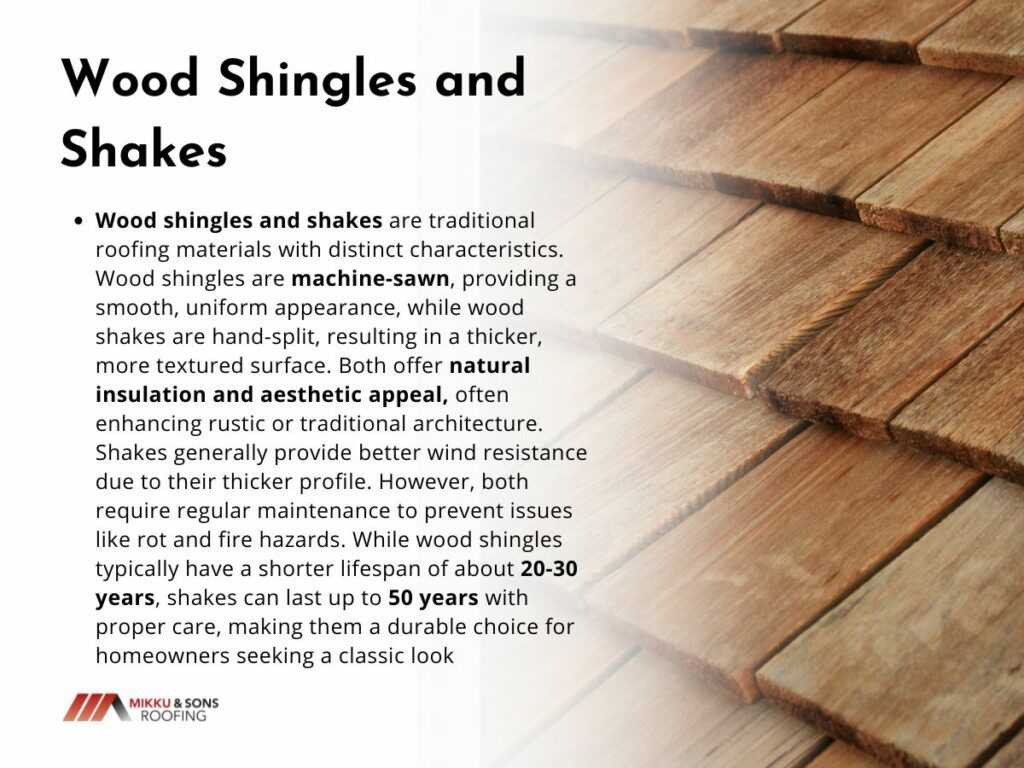
Metal roofing comes in various forms, including steel, aluminum, and copper, and is renowned for its durability and energy efficiency. It can last 50 years or more, resisting harsh weather conditions effectively. Metal roofing reflects solar heat, reducing cooling costs.
However, the higher initial investment may deter some homeowners. Noise during heavy rain or hailstorms is another potential drawback, though insulation can mitigate this issue.
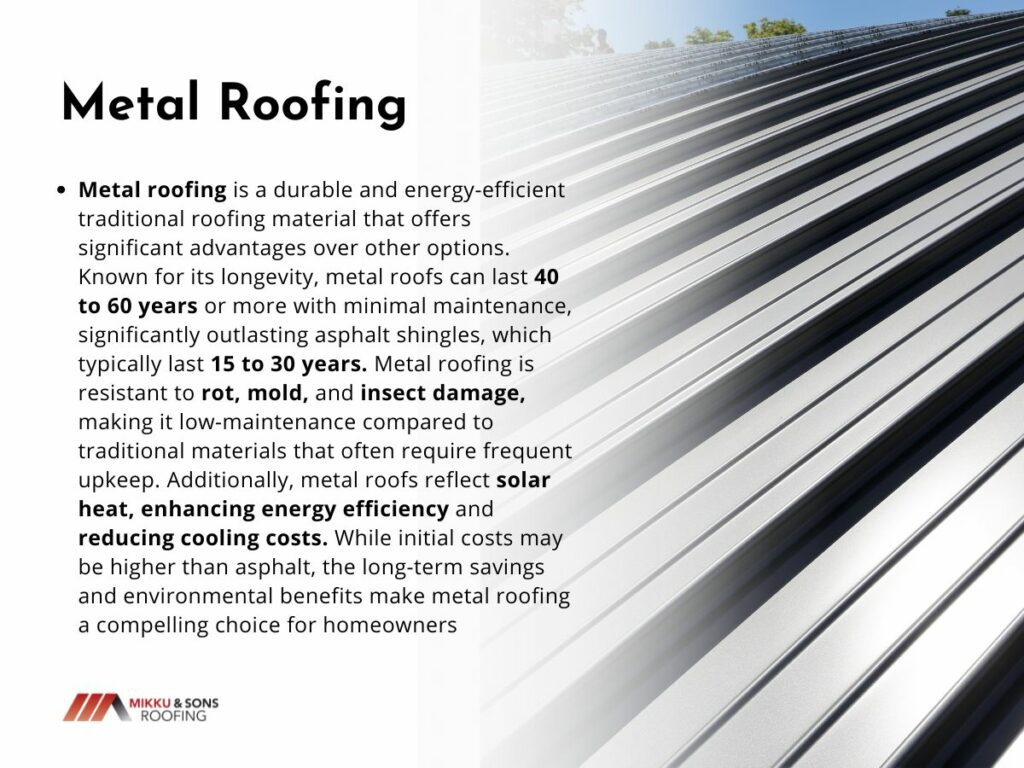
Roofing materials have evolved significantly, offering homeowners and businesses diverse options to enhance their properties. Modern roofing materials combine innovative designs with functionality, sustainability, and energy efficiency. This guide delves into synthetic, metal, green, solar, and cool roofing materials, highlighting their benefits and applications.
Synthetic roofing materials are a modern alternative that combines aesthetics with practicality. Designed to mimic traditional roofing materials, they offer durability and cost-effectiveness without compromising on style.
Metal roofing remains a popular choice due to its longevity, strength, and adaptability. It suits various climates and architectural styles, offering durability and aesthetic appeal.
Green roofing systems are designed with sustainability in mind, incorporating living plants into the roof structure. These roofs provide environmental benefits while enhancing the aesthetic value of a property.
Solar roofing integrates energy generation into the roof structure, allowing homeowners to harness renewable energy without compromising the home’s appearance.
Cool roofing materials are designed to reflect more sunlight and absorb less heat, improving energy efficiency and reducing cooling costs in warm climates.
Selecting the right roofing material is crucial for ensuring durability, energy efficiency, and aesthetic appeal. Several factors influence the decision, each playing a role in the overall performance and satisfaction with your roofing choice.
The local climate significantly impacts how well roofing materials perform. For instance, asphalt shingles are a cost-effective choice but may not hold up well in areas with extreme heat or heavy snowfall.
Metal roofing, known for its durability, is ideal for regions with high winds or frequent storms. In coastal areas, aluminum roofing resists corrosion caused by salt air. Understanding the weather patterns in your area helps ensure your roof withstands the elements.
Roofing materials vary widely in price, so it’s essential to balance initial costs with long-term savings. Asphalt shingles are affordable upfront but may require more frequent replacements. Metal or synthetic slate roofing may have higher installation costs, but their durability and energy efficiency can save money over time. Consider maintenance expenses and potential energy savings when calculating the total cost.
Your roof should complement the architectural style of your building. Wood shingles add rustic charm, while metal roofs offer a sleek, modern appearance. Synthetic materials provide versatility, allowing you to mimic traditional looks like slate or tile without the associated weight or cost. Choosing a material that enhances curb appeal can also boost property value.
Sustainability is an important consideration. Rubber roofing made from recycled tires or metal roofing, which is fully recyclable, are eco-friendly options. Additionally, materials like solar tiles or vegetative roofs can reduce carbon footprints and promote energy efficiency. Selecting sustainable materials supports environmental preservation while meeting your roofing needs.
As you explore the diverse range of modern roofing materials to consider, it's essential to weigh how these options perform in specific climates, particularly in regions like Phoenix, Arizona. The unique weather conditions here—characterized by intense heat and occasional monsoons—demand roofing solutions that not only offer durability but also energy efficiency.
We will now look into the top roofing material options available in Phoenix, highlighting local stores where you can find these materials. Whether you're a homeowner looking to upgrade or a builder seeking the best supplies, this guide will provide valuable insights tailored to the Arizona climate.
