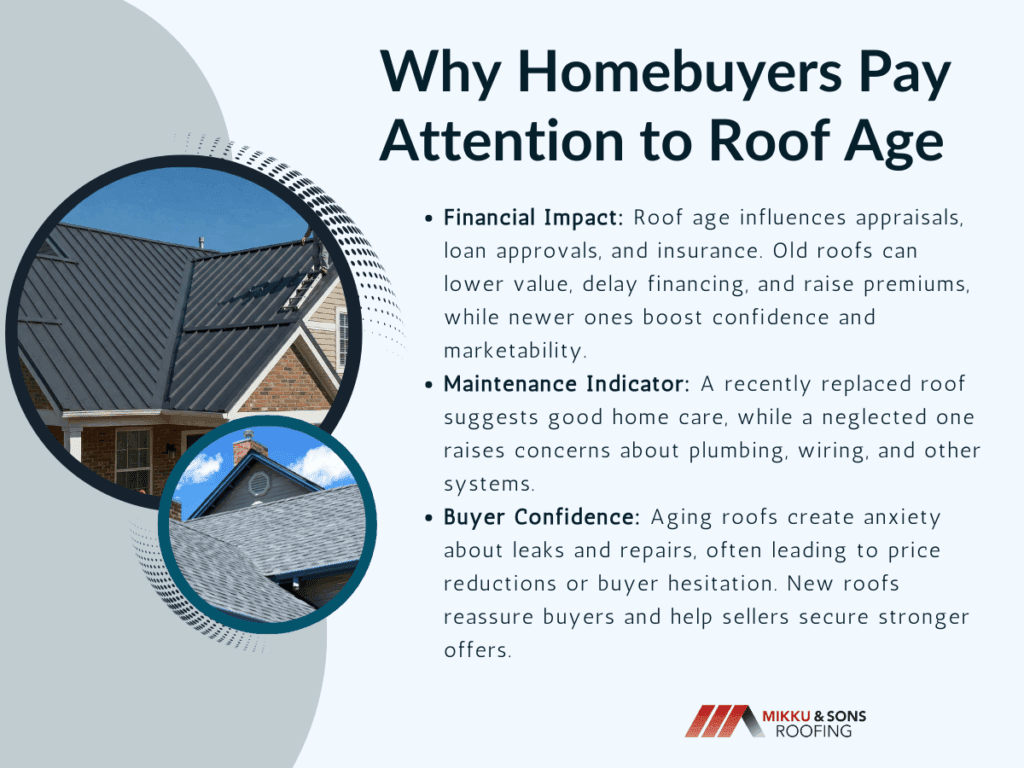
When shopping for a new home, people naturally ask about square footage, the kitchen, or the number of bathrooms. Yet one detail often outweighs all others: the age of the roof. This question comes up early in showings and negotiations because the roof is far more than a cosmetic feature. It is a protective system that guards everything beneath it. For buyers, roof age signals safety, upcoming costs, and overall home condition, making it one of the most scrutinized details in real estate.
If a roof is approaching the end of its lifespan, buyers see a looming expense. If it is new or well-maintained, buyers relax, knowing that one of the largest potential repairs has already been handled. Sellers, appraisers, and insurers also recognize its importance. Why homebuyers pay attention to roof age? In nearly every way, the roof’s age influences how smoothly a transaction proceeds. Let's find out.
Every roof has a natural life expectancy. The timeline depends on the material and the climate in which it sits. Asphalt shingles, the most common in the United States, last about 20 to 25 years. Wood shakes may endure 25 to 30 years, clay tiles can stretch to 40 or 50 years, metal roofing often holds up for 40 to 70 years, and slate can exceed 75 years. Buyers are aware of these averages.
If a listing states the roof is 22 years old and made of asphalt, a buyer immediately calculates replacement. Roof age matters because buyers associate it with future expenses, sometimes amounting to tens of thousands of dollars. Roof replacement cost typically ranges between $8,000 and $20,000, depending on home size, region, and material. For many buyers, that figure feels overwhelming on top of the purchase price.
Roof age also acts as a proxy for overall care. A seller who replaced the roof on schedule likely maintained other systems responsibly. A seller who ignored the roof’s decline may have neglected plumbing, wiring, or HVAC systems as well. Thus, roof age becomes both a financial marker and a psychological indicator of trust.
Appraisals anchor real estate transactions. They determine how much lenders are willing to finance and influence how much buyers are willing to pay. Roof age plays a direct role in this process.
Appraisers evaluate roof age because it influences both the safety and the value of the home. A roof that is visibly worn, damaged, or simply beyond its expected lifespan may reduce the appraised value. It suggests to appraisers that the home will soon require major investment, making it less desirable than comparable properties with newer roofs.
For certain loans, the impact is even stronger. FHA and VA loans have strict minimum property standards. If the roof has less than two years of usable life, the appraiser may flag it as noncompliant. In that case, lenders often withhold approval until the roof is repaired or replaced. Even with conventional financing, lenders may condition their approval on roof improvements.
On the positive side, a new or durable roof can bolster appraisal value. A 10-year-old slate roof, which may last 65 more years, adds confidence to the valuation. Appraisers recognize that longevity reduces risk and enhances marketability. By contrast, a 15-year-old asphalt roof already raises concerns about near-term replacement.
For anyone asking, “does roof age affect appraisal?” the answer is unequivocally yes, because appraisers must factor in structural reliability and buyer demand.
Insurance carriers are deeply concerned with roof condition because it is often the first line of defense against water damage, one of the most costly claims they handle. Many insurers have strict policies regarding roof age.
Some refuse to cover asphalt roofs older than 20 years or tile roofs older than 40. Others will insure but exclude roof damage from the policy, leaving homeowners responsible for repair costs. Even when insurers do provide full coverage, premiums for older roofs are almost always higher.
Buyers pay attention to roof age because it affects whether they can secure affordable homeowners insurance at all. If insurance is denied, lenders may refuse financing, effectively killing the sale. Even when coverage is available, higher premiums eat into monthly budgets, making a property less attractive.
This link between roof age, insurance, and financing creates a cycle. An uninsurable or high-risk roof lowers demand, which in turn lowers appraised value. Buyers quickly learn that an old roof complicates not just maintenance but also the financial and legal framework of ownership.
Numbers and policies matter, but buyer psychology may be the most powerful factor of all. Buying a home is an emotional decision as much as a financial one. An old roof stirs anxiety, even when it technically still functions.
Roof age shapes buyer confidence, often determining whether they feel secure enough to proceed. A buyer who worries about leaks, water intrusion, or hidden mold may hesitate to commit. Even if the roof has five years left, the perception of age may push them to request a price reduction or walk away.
Negotiations almost always circle back to the roof. Buyers use age as leverage, arguing for lower prices or demanding seller credits. For example, if they believe a replacement will cost $15,000, they may reduce their offer by that amount, regardless of the actual market rate. Fear tends to magnify estimates.
Conversely, a new roof often acts as a selling point. Buyers feel reassured and more willing to pay full asking price. Sellers who replace a roof before listing often recover much of the cost through faster sales and stronger offers.
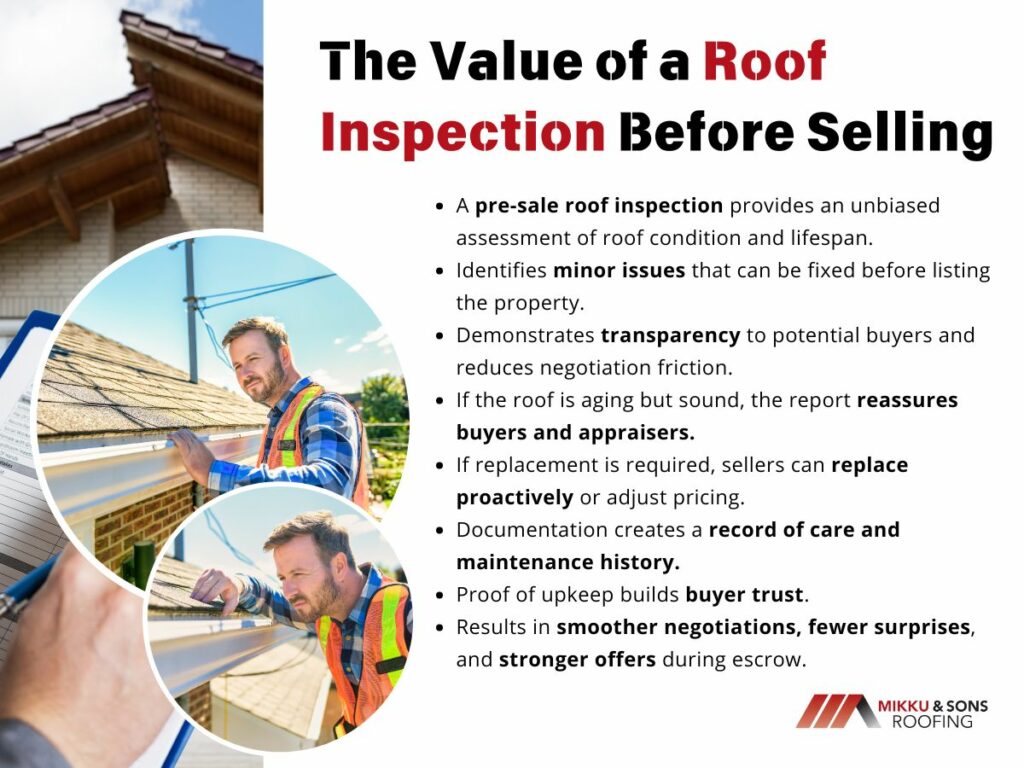
For sellers, one proactive step can change the entire dynamic: scheduling a roof inspection before selling. An inspection provides an unbiased assessment of remaining lifespan and identifies small issues that can be fixed before listing.
A pre-sale roof inspection demonstrates transparency and allows sellers to address problems before buyers raise them. If the roof is aging but still sound, the report can reassure buyers and appraisers. If replacement is needed, sellers can choose to replace it upfront or adjust the price accordingly.
Documentation from roof inspectors and contractors also provides a record of care. Buyers trust sellers who present proof of maintenance. That trust translates into smoother negotiations and fewer surprises during escrow.
Roof age is critical, but maintenance often determines whether a roof reaches or exceeds its expected lifespan. A 15-year-old roof with consistent upkeep often looks better than a 10-year-old roof neglected for years.
Homeowners can extend roof lifespan and reduce buyer concern by investing in routine care. Regular inspections, prompt shingle replacements, clean gutters, trimmed branches, and adequate attic ventilation all reduce wear and tear. Sealing small cracks, replacing flashing, and addressing minor leaks immediately prevent larger problems.
Sellers who keep detailed records of this maintenance hold a powerful tool. Receipts and inspection notes assure buyers and appraisers that the roof, though older, remains reliable. In competitive markets, such documentation can preserve value and prevent downward price negotiations.
Different roofing materials age differently, and understanding these differences helps both buyers and sellers evaluate roof age accurately.
| Roofing Material | Average Lifespan | Appraisal Impact | Insurance Consideration | Buyer Appeal |
| Asphalt Shingles | 20–25 years | Neutral after 10 years; negative after 15–20 | Higher premiums past 20 | Affordable, common choice |
| Wood Shakes | 25–30 years | Concerns about fire risk; moderate value | Higher premiums in fire-prone areas | Attractive, rustic look |
| Metal Roofing | 40–70 years | Strong positive for durability | Favorable coverage | Seen as modern and efficient |
| Clay/Concrete Tile | 40–50 years | Positive; structural checks needed | May raise concerns about weight | Popular in warm climates |
| Slate | 75+ years | Highly positive; luxury feature | Premium coverage available | Strongest long-term appeal |
Buyers judge roof age differently depending on the material. A 20-year-old asphalt roof is nearly finished, but a 20-year-old slate roof is still young. Sellers benefit when they understand this distinction and present it clearly during negotiations.
At the heart of roof age discussions is money. Buyers calculate how soon they’ll face a replacement and what it will cost. Sellers decide whether to replace the roof before listing or leave it to buyer, but with an older roof, selling as-is often means losing money on the sale.
Roof replacement cost is often recouped through higher resale prices and faster closings. A seller who spends $12,000 replacing a roof may recover most or all of it, as buyers are more willing to pay full price for peace of mind. Homes with new roofs also face fewer delays with appraisers, inspectors, and insurers.
From a long-term perspective, replacing an old roof protects the home itself. A new roof prevents water damage, mold, and structural decay, all of which could reduce value more severely than the cost of replacement. For buyers, knowing they will not face a major roofing bill for decades makes the purchase far more attractive.
A roof’s condition ripples across every aspect of real estate. It determines how buyers perceive the home, how much insurers charge, how appraisers set value, and how negotiations unfold.
Roof age consistently impacts both immediate sale price and long-term resale value. A newer or well-maintained roof protects not just the physical structure but also the financial health of the property. An old or neglected roof creates ongoing costs and uncertainty, dragging down value.
This reality underscores why buyers are so focused on roof age and why sellers should address it proactively. Whether through replacement, maintenance, or documentation, managing roof age is essential for preserving property value.
For both buyers and sellers, understanding the lifespan of a new roof puts the discussion of age into perspective. Asphalt shingles, the most common roofing material, typically last 20 to 25 years. Wood shakes can last 25 to 30 years with proper care. Metal roofing offers longevity between 40 and 70 years, while clay and concrete tiles often endure for 40 to 50 years. Slate roofs, considered the pinnacle of durability, can last well beyond 75 years.
The lifespan of a new roof depends not only on the material but also on climate, installation quality, and ongoing maintenance. A well-installed and well-maintained roof may last decades longer than its average life expectancy. For homeowners, this means a new roof is not just a repair but an investment that safeguards property, supports appraisal value, lowers insurance costs, and reassures future buyers.
Replacing your roof is one of the most significant home improvement projects you can undertake. A new roof protects your home from the elements, improves energy efficiency, and boosts curb appeal.
However, the roof replacement process is not always as smooth as it seems. What can go wrong during a roof replacement? Unfortunately, a lot can. From hidden costs and unexpected delays to installation mistakes and unforeseen structural damage, many factors can complicate the process.
Understanding these potential issues beforehand and preparing for them can help prevent delays, added costs, and long-term problems. In this article, we will dive into the common problems that homeowners often face during a roof replacement and how to avoid them.
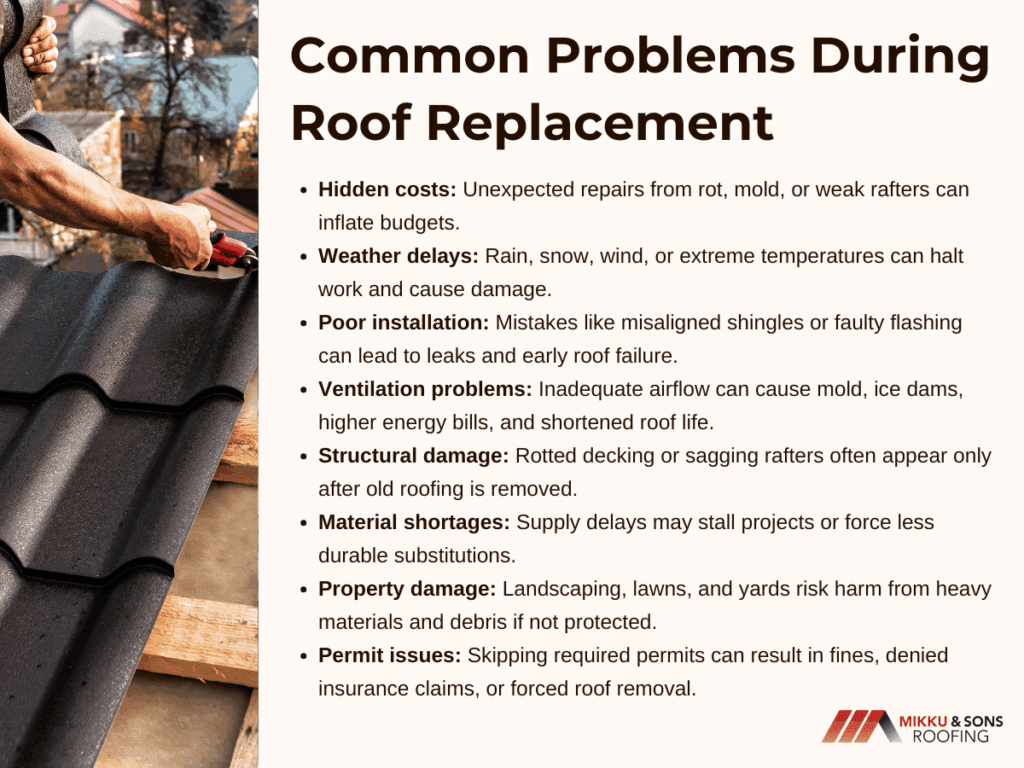
One of the most frequent issues homeowners encounter during roof replacements is receiving inaccurate estimates, which leads to hidden costs. A roofer's estimate may look great on paper, but it often doesn't include all potential costs or consider any structural issues that could arise during the job.
When roofers provide estimates, they typically base them on a visual inspection of your roof. While this works for most cases, hidden damage that isn't visible until the roof is removed can cause significant cost increases.
For example, the wood decking beneath your shingles may be rotted, or the rafters may show signs of weakening due to water damage or pests. Mold or mildew could also have compromised parts of the roof’s structure.
This hidden damage often results in a delay in the project and an increase in the total cost. If the decking or structure is compromised, the old material must be replaced before the new roofing materials are installed.
Similarly, if there is any damage to the roof framing, like sagging rafters, those will need to be repaired as well.
To minimize the risk of hidden costs, it’s essential to hire a reputable contractor who conducts a thorough inspection of your roof before providing an estimate. A detailed written estimate should cover all aspects of the job, from materials and labor to potential hidden issues.
Additionally, it’s a good idea to set aside a contingency budget of 10-20% of your total project cost. This will allow you to absorb any unexpected repairs or changes without feeling overwhelmed by additional expenses.
A professional contractor should be able to explain the types of repairs that may arise and help you understand how much they might cost.
Roof replacement is highly sensitive to weather conditions, and poor weather can significantly impact the timeline and overall progress of your project. Even though roofers typically work under tight deadlines, unexpected weather interruptions can lead to serious delays.
Proper project scheduling helps avoid costly pauses due to weather or material delays.
Weather plays a huge role in the success of any roof replacement. For instance, if it starts raining before your roof is completely replaced, water can leak into your home, causing interior damage.
Snow can also be a problem if you're replacing your roof during the winter months. High winds make it dangerous to install roofing materials, especially if you're using a crane to lift shingles and other supplies onto the roof.
Extreme temperatures can affect the materials themselves. For example, asphalt shingles can become brittle and difficult to install properly in freezing weather, causing the installation to take longer and making the roof more susceptible to damage after installation.
To avoid weather-related issues, schedule your roof replacement during a season with relatively mild weather, typically late spring, early summer, or fall. These seasons provide more predictable weather conditions, making the project less prone to interruptions.
However, if you must replace your roof in a less predictable season, ensure your contractor has a contingency plan in place for sudden weather changes. This may include covering the roof with temporary tarps or plastic sheeting to protect it from rain or snow.
Contractors should also be prepared with the right equipment to manage wind and prevent materials from being blown away. Additionally, roofers should know when to halt work during inclement weather to avoid accidents and ensure a safe environment for everyone involved.
Even with the best materials, poor installation is one of the most common causes of problems during a roof replacement. What can go wrong during a roof replacement often comes down to poor workmanship that results in leaks, damaged shingles, or even premature roof failure.
One of the biggest concerns homeowners have during roof replacements is ensuring that the job is done right. Improperly installed shingles, faulty flashing, or even issues with ventilation can lead to water leaks, roof sagging, and other significant problems that may not show up immediately.
For instance, improper flashing around chimneys, vents, and skylights is a common cause of leaks. Flashing needs to be installed correctly to ensure water doesn't seep through the joints and into your home. If this is done poorly, you may end up dealing with leaks soon after the roof is installed.
Another common mistake is improperly aligned shingles. Shingles must be installed in a specific pattern, and if the alignment is off, shingles can lift or curl, creating weak spots that allow water to penetrate the roof.
The key to preventing installation problems is to hire an experienced, licensed roofing contractor with a solid track record of quality work. Take the time to read reviews, ask for references, and check if they’re insured and properly licensed to handle roofing work.
Always ask your contractor about their warranty and whether it covers issues like leaks or installation defects. Keeping accurate time records and progress tracking from the field helps homeowners and teams understand where delays are happening and how labor is being allocated.
If issues arise after the work is done, you can rest assured knowing the contractor will make necessary repairs at no additional cost to you.
Roof ventilation is crucial for the long-term health of your roof and the energy efficiency of your home. However, roof ventilation is often overlooked during roof replacements, despite its importance.
Proper roof ventilation helps regulate temperature and moisture in the attic. Without sufficient ventilation, heat and moisture can accumulate in the attic, leading to several problems.
Excess moisture can cause mold and mildew growth, while trapped heat can shorten the lifespan of your shingles. In cold climates, poor ventilation can lead to the formation of ice dams, which can force water back up under the shingles and lead to leaks inside your home.
Furthermore, inadequate attic ventilation forces your HVAC system to work harder to maintain a comfortable temperature in your home, driving up energy bills. Poor ventilation can significantly impact your comfort and your wallet.
When replacing your roof, make sure your contractor checks the attic’s ventilation system. If necessary, they should add or improve vents to allow for proper airflow.
Ridge vents, soffit vents, and gable vents are all great options for improving attic ventilation. Additionally, ask the contractor to evaluate and upgrade attic insulation, as this helps maintain a consistent temperature and prevents excessive heat buildup in the attic.
Another issue that can complicate roof replacements is the discovery of unforeseen structural damage. It’s not uncommon for underlying issues to remain hidden until the old roof is removed.
Structural issues such as rotting wood, sagging beams, or weakened rafters may not be apparent until the roof is stripped down. These issues can cause delays, as the damaged materials must be replaced before the new roof can be installed.
For instance, the decking, which serves as the foundation for your roof, can deteriorate over time due to water damage or pests. If the decking is weak, it will need to be replaced with new, sturdy materials before the new shingles can be installed.
If the rafters or trusses are warped or sagging, they must be reinforced or replaced to ensure the roof is secure and stable.
Before beginning the roof replacement, make sure your contractor performs a comprehensive structural inspection of the roof’s framing and decking. This will help identify potential problems early, allowing you to address them before the new roof is installed.
Though repairing structural issues can be costly, it’s essential to ensure the integrity of the roof and avoid future problems.
Material shortages are a reality that many homeowners face when it comes to roof replacements. What can go wrong during a roof replacement sometimes involves unexpected delays due to issues with roofing material availability.
Roofing materials like shingles, underlayment, and flashing are essential for completing a roof replacement. If these materials are in short supply, your project may be delayed until the materials are available.
If the preferred materials are unavailable, your contractor may be forced to substitute them with similar but potentially less durable or aesthetically pleasing materials.
To avoid delays related to material shortages, order your roofing materials well in advance of the project start date. Speak with your contractor to confirm material availability and, if necessary, arrange for backup suppliers. This will help you avoid unexpected delays and keep your project on track.
Roof replacement can be a messy process, and if not handled properly, it can lead to property damage or an incomplete cleanup.
During the roof replacement, heavy materials and tools need to be moved around the property. This can result in damage to landscaping, flower beds, and even lawns.
Roofing debris, such as broken shingles and nails, can also be left scattered around the yard.
Before the project begins, discuss ways to protect your property with your contractor. Roofing crews should use tarps or plywood to shield your landscaping from damage.
After the job is done, ask the contractor to perform a comprehensive cleanup of the property, including using a magnetic tool to pick up nails and other debris. This will help prevent injury and maintain the appearance of your home.
In many locations, roof replacements require permits to ensure compliance with local building codes. Failing to obtain the necessary permits can result in fines, legal issues, or even forced removal of the new roof.
Permits are required to ensure the new roof meets safety and structural standards. If your contractor doesn’t obtain the necessary permits, you could face significant penalties or fines from local authorities.
Additionally, if an insurance claim is needed for damage to the roof in the future, your insurer may deny coverage if permits weren’t obtained.
Before work begins, confirm that your contractor is responsible for obtaining the necessary permits. Make sure that they’ve submitted the proper paperwork to the local building department.
This ensures that the project meets all local regulations and that the work is legally compliant. Keeping a centralized job folder with photos, inspection reports, and material specs helps you and your contractor stay aligned and avoid overlooked problems.
A roof replacement is a crucial home improvement project, but what can go wrong during a roof replacement often involves hidden costs, unexpected weather, poor installation, structural damage, material shortages, and improper permits.
Hiring a reputable, experienced contractor, planning for unexpected costs, and addressing issues like ventilation and property protection upfront are essential steps for a successful project. When done correctly, a roof replacement can provide you with peace of mind and a durable roof that will protect your home for many years to come.
Insurers look at your roof’s material, condition, and age to assess the risk of damage and determine your homeowners insurance rates. Your roof isn’t just a cosmetic feature it’s your home’s first defense against weather, and its ability to withstand hazards like wind, hail, fire, and heavy snow plays a major role in whether you’re considered a low- or high-risk policyholder. The sturdier, longer-lasting, and more hazard-appropriate your roof is, the more favorable your insurance terms are likely to be.
This guide explains why roof type affects insurance, compares how common materials are viewed by insurers, outlines other key evaluation factors, and shares simple tips to make your roof more appealing for coverage. Let's look at roof types for insurance purposes. What do insurers look for?
Your roof is a critical factor in determining your home’s risk level and overall insurability. Because it’s the first line of defense against costly damage from weather and other hazards, insurers closely evaluate its type, condition, and expected performance. The stronger and more durable the roof, the more confidence an insurer has in offering better rates and broader coverage.

Insurers evaluate roof type to estimate its ability to withstand hazards like wind, hail, snow, or fire. Roofs with proven resilience in your local climate are considered lower risk, often resulting in reduced premiums and better policy terms.
A roof’s expected longevity and upkeep requirements directly influence the likelihood of claims. Durable, low-maintenance roofs suggest fewer potential repairs, which insurers view favorably.
Even strong roofs can be costly to replace or repair after damage. Insurers factor in material and labor expenses when determining premium rates.
Roofs that meet or exceed local building codes—such as impact-resistant standards in hail-prone areas—are often rewarded with discounts. Non-compliant roofs can lead to higher costs or limited coverage.
Certain roof types and ages qualify for replacement cost coverage, while others may be settled at actual cash value. Choosing a long-lasting, resilient roof can improve the payout terms in the event of a claim.
A roof is more than just a shelter—it’s a major component in your insurance risk profile. By understanding what insurers value in a roof, you can make decisions that enhance both your home’s protection and your policy’s affordability.
Your choice of roofing material not only impacts your home’s appearance and structural protection but also plays a direct role in how your insurance policy is priced and structured. Each roof type comes with its own strengths, weaknesses, and risk profile in the eyes of insurers.
Asphalt shingles are the most common and affordable roofing option, with a lifespan of about 15–30 years. While they offer decent weather resistance, they are more susceptible to hail, wind, and granule loss over time, which can lead to more frequent claims. Insurers typically treat them as a standard risk, but premiums may be higher in storm-prone areas.
Metal roofing is highly durable, lasting 40–70 years, and offers excellent resistance to wind, hail, and fire. Its longevity and low maintenance needs often make it a favorite with insurers, especially in wildfire or severe weather zones. However, higher installation costs and potential denting from large hail can slightly offset these benefits in premium calculations.
Clay and concrete tiles are known for their exceptional fire resistance and long lifespan of 50–100 years. They are ideal for hot or fire-prone climates but can crack easily under impact and require strong structural support due to their weight. Insurers often view them positively for fire safety but factor in the high replacement costs when setting rates.
Slate is among the most durable roofing materials, lasting 75–200 years with minimal upkeep. Its fire resistance and resilience to weather make it attractive to insurers, but its extreme weight and expensive, specialized installation raise replacement costs significantly. As a result, premiums may remain high despite the low risk of damage.
Wood shakes and shingles provide a natural, rustic look but are vulnerable to fire, rot, and insect damage. Even with fire-retardant treatments, many insurers consider them a higher risk, particularly in wildfire-prone areas. Homeowners with wood roofs may face higher premiums or limited coverage options.
Flat roofs, often made from materials like modified bitumen, TPO, or EPDM, are common in commercial and some residential properties. They are cost-effective but prone to drainage problems and water pooling, which can lead to leaks and costly repairs. Insurers may view them as higher risk unless well-maintained and located in dry climates.
Selecting the right roof type is about balancing appearance, cost, and long-term performance with insurance considerations. By understanding how each material is perceived by insurers, you can choose a roof that not only protects your home but also helps you secure better coverage terms and potentially lower premiums.
While the material and style of your roof are major considerations, insurers look at several other aspects that influence your risk profile and potential insurance costs. These factors provide a more complete picture of your home’s overall durability, susceptibility to damage, and the likelihood of future claims.
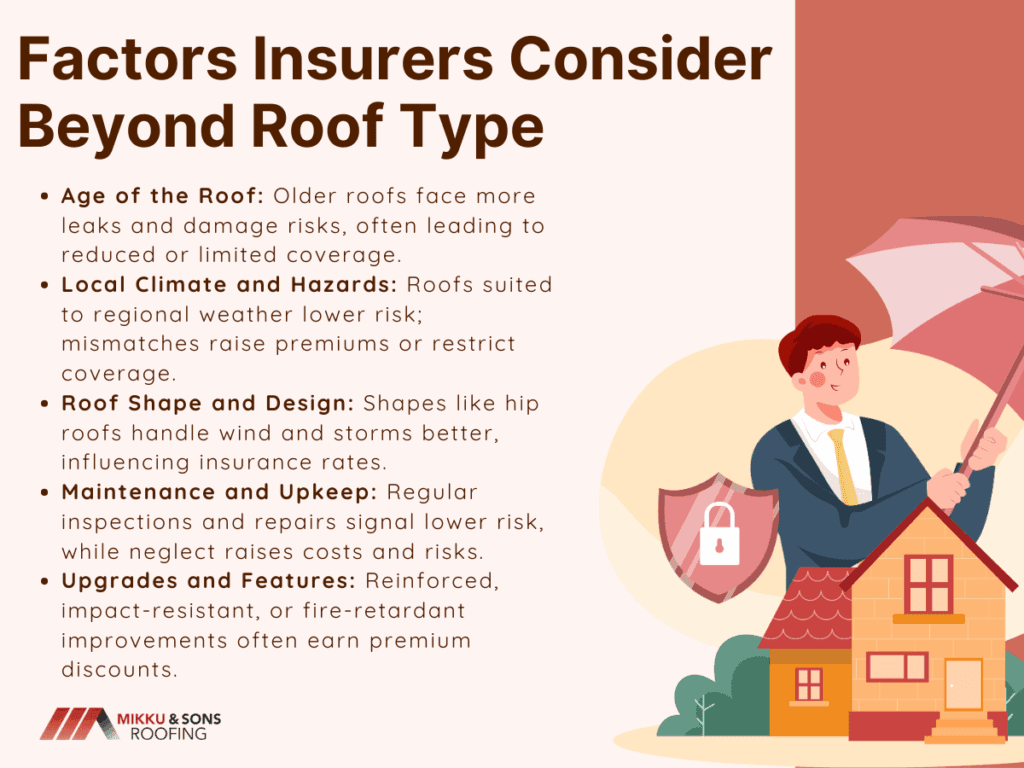
The age of your roof is a critical factor because older roofs are more likely to experience leaks, deterioration, and weather-related damage. Many insurers have age thresholds—often 15–20 years for asphalt shingles—beyond which they may reduce coverage or only pay the depreciated value in the event of a claim. Keeping your roof updated can help you avoid these coverage limitations.
Insurers consider the environmental risks your home faces, such as hurricanes, hailstorms, wildfires, or heavy snowfall. A roof that performs well in your region’s specific climate is seen as less risky, while a mismatch between roof type and hazard exposure can result in higher premiums or restricted coverage.
The shape and slope of your roof affect how it handles high winds, heavy rains, and snow loads. For example, hip roofs tend to fare better in strong winds than gable roofs, which can make a noticeable difference in insurance rates for storm-prone areas.
Insurers value evidence of regular roof inspections, cleaning, and repairs because they signal a lower risk of costly damage. Neglected roofs, on the other hand, increase the likelihood of water intrusion, structural issues, and higher claim frequency, which can raise premiums or limit coverage.
Adding features such as impact-resistant shingles, reinforced underlayment, or fire-retardant treatments can significantly reduce the chance of major damage. Many insurers offer discounts for these upgrades, especially in high-risk zones where prevention measures can save on future claim costs.
In short, insurers evaluate far more than just the material covering your home. By managing the age, design, maintenance, and protective features of your roof, you can strengthen your home’s resilience, improve your insurability, and keep insurance costs under control.
An insurance-friendly roof is one that minimizes the likelihood of damage, complies with safety standards, and demonstrates consistent, proactive care. Insurers reward roofs that reduce risk with better coverage terms, lower premiums, and even discounts.
Select roofing materials that are well-suited to your region’s most common weather threats, such as hail, high winds, or wildfires. Options like metal, slate, or Class 4 impact-resistant shingles can offer superior protection, longer lifespans, and a lower risk profile in the eyes of insurers.
Conduct regular inspections—ideally twice a year and after major storms—and keep documentation of all repairs, cleanings, and upgrades. Detailed records prove to insurers that your roof is properly maintained, which can help prevent disputes and support claims approval.
Don’t wait for leaks or structural issues to emerge before replacing your roof. Proactive replacement keeps your roof within the insurer’s preferred age limits and helps you qualify for replacement cost coverage rather than actual cash value settlements.
Adding Class 4 shingles, reinforced underlayment, or non-combustible materials can dramatically reduce damage from hail, high winds, or fire. Many insurers provide substantial discounts for these enhancements, especially in areas prone to severe weather or wildfires.
Ensure your roof meets or exceeds the latest building codes, particularly if you live in a region with special requirements for storm, seismic, or fire safety. Compliance shows proactive risk management and can prevent coverage issues during a claim.
A roof with proper drainage and ventilation is less likely to suffer from water pooling, mold growth, or heat damage. Installing or upgrading gutters, downspouts, and attic vents not only extends your roof’s life but also reduces the risk of costly insurance claims.
Small problems like loose shingles, minor leaks, or damaged flashing can quickly turn into major repairs if ignored. Promptly fixing these issues demonstrates responsibility to insurers and helps maintain your policy’s favorable terms.
Making your roof insurance-friendly is about combining smart material choices, diligent upkeep, and protective enhancements to reduce the likelihood of costly damage. By taking these steps, you can protect your home, strengthen your position with insurers, and potentially save money on premiums year after year.
Your roof is one of the most significant factors influencing your homeowners insurance, from the type of coverage you can get to how much you’ll pay for it. Insurers look beyond appearance, evaluating your roof’s material, age, condition, and ability to withstand local hazards. By understanding these considerations, you can make informed choices that not only protect your home but also position you for better coverage terms and potential cost savings.
The bottom line: a roof that’s durable, well-maintained, and hazard-appropriate benefits both you and your insurer. By selecting the right materials, following a consistent maintenance routine, and investing in upgrades that enhance safety and resilience, you can lower your risk profile, improve your policy options, and enjoy greater peace of mind knowing your home is well protected.
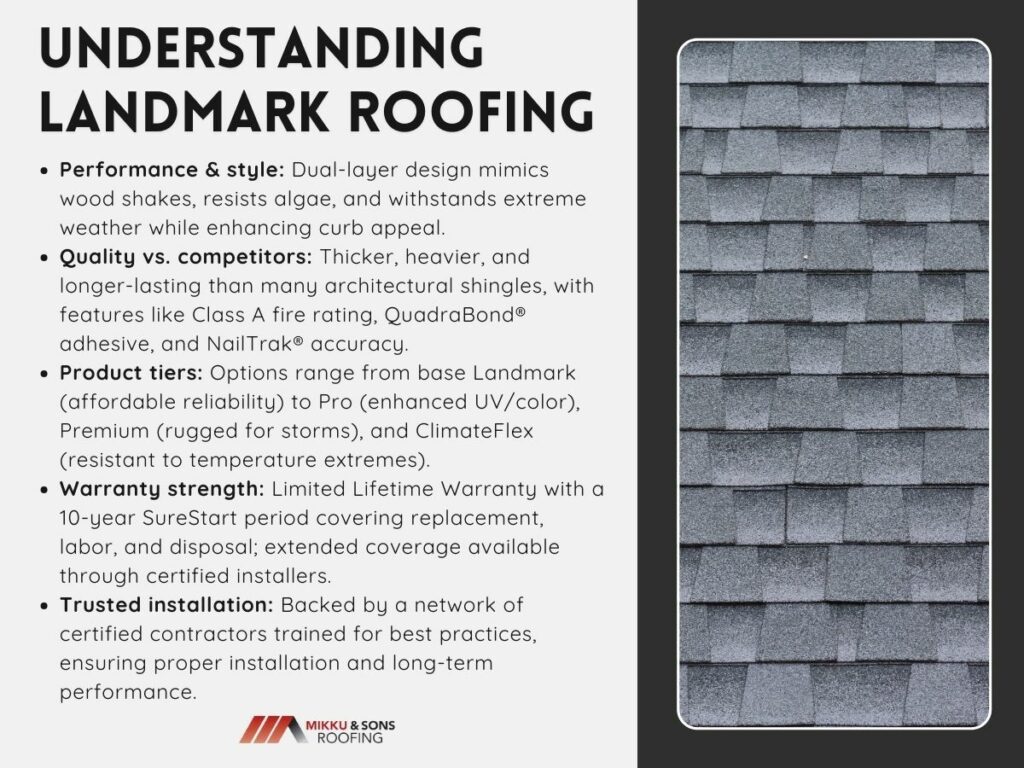
There’s a reason you keep hearing about Landmark roofing when researching shingle options for your home. It’s not just a brand name tossed around by contractors, it’s one of the most consistently chosen roofing systems in the U.S.
What makes it stand out? From reliable performance in extreme weather to eye-catching curb appeal, Landmark shingles offer more than just coverage, they offer confidence. In this blog, we’ll explore why Landmark roofing has become a go-to for many American homeowners, how it compares to other products, and what to expect if you're thinking of upgrading to it.
When homeowners invest in a new roof, they want something that can handle wind, rain, snow, and sun without looking bland. Landmark roofing shingles are engineered to balance long-lasting performance with the kind of style that can instantly elevate your home’s exterior.
The Landmark line is manufactured by CertainTeed, one of the most respected names in the roofing industry. These architectural shingles are known for their dimensional appearance, thanks to a dual-layer design that mimics wood shake roofing. That means you’re not only getting function, you’re also getting form.
What adds to their popularity is how well they stand up to America’s wide-ranging climates. Whether you're in a rainy part of the Pacific Northwest or a snow-prone area in the Midwest, Landmark shingles are built to resist algae, offer high wind warranties, and maintain color vibrancy for decades.
On top of that, the range of color choices is outstanding. Homeowners can choose from earthy tones, deep charcoals, rich browns, and more vibrant hues depending on the region and architectural style. The layering creates shadow lines that look far more high-end than basic strip shingles.
Not all shingles are created equal, even if they look similar on the shelf. The real differentiator for Landmark roofing is in the quality of materials, manufacturing standards, and robust warranties.
Compared to entry-level architectural shingles, Landmark shingles are thicker, heavier, and often offer longer warranties. Their weight, in particular, contributes to their durability, especially in areas with high wind or sudden temperature shifts. The heavier the shingle, the less likely it is to be lifted or torn off during storms.
Many products in the Landmark line come with:
All of this means you’re getting more than just a roofing shingle; you’re getting a full roofing system designed with longevity in mind. These systems are often easier to integrate into existing underlayments and are compatible with other CertainTeed components such as ridge vents and hip shingles, making for a seamless installation.
Homeowners love options, especially when balancing budget with features. That’s why Landmark offers multiple levels of shingles within its product family.
From basic protection to enhanced features, the Landmark lineup makes it easier to find a roofing solution that fits your exact needs.
Here’s a breakdown of some of the most well-known Landmark tiers:
The standard Landmark shingle is a solid choice for homeowners looking for reliability without overextending their budget. It’s still a high-performance architectural shingle with dual layers and comes with a limited lifetime warranty, but without the added thickness or enhanced ratings found in premium options.
A step above the base model, Landmark Pro includes more granules, better UV protection, and more vibrant Max Def color options. This model is ideal for homeowners in sun-exposed states like Arizona, Texas, or Florida where fading is a real concern. The Pro version is also thicker, which boosts wind resistance.
For those who want the most rugged, weather-resistant version available, Landmark Premium is built with greater weight and thickness. These shingles are designed for homes that face harsh winters or hurricane-level winds. Some models can resist wind speeds up to 130 mph with proper installation.
This tier is a common choice in regions with storm-prone seasons like the Southeastern United States. The added upfront cost pays off long-term with fewer repairs and better insurance incentives.
A newer addition, ClimateFlex is designed for extreme temperature fluctuations. Its rubberized asphalt formula helps reduce cracking and thermal shock. Homeowners in cold-winter states like Minnesota or Maine often opt for this version to get better peace of mind through frost and thaw cycles.
Warranties on roofing materials can be tricky to navigate. Many companies advertise "lifetime" protection, but the fine print tells a different story.
Landmark roofing distinguishes itself with more transparent warranty coverage, making it easier for homeowners to know what’s covered and for how long.
Landmark’s standard warranty is a Limited Lifetime Warranty, which means coverage lasts for as long as the original homeowner owns the house. What makes it stronger than others is how it handles the first ten years, the “SureStart” period. During this time, CertainTeed covers:
After this period, prorated coverage continues based on the age of the roof, but the initial decade of protection gives homeowners some of the strongest security in the industry.
If installed by a certified CertainTeed contractor under the Integrity Roof System, homeowners may be eligible for extended warranty options such as the SureStart PLUS warranty, which can stretch up to 50 years and include workmanship coverage. That’s a big deal in an industry where installer error causes many of the problems down the line.
Finding a qualified roofer is half the battle in any roofing project. A great product can quickly fail if poorly installed. Landmark roofing is backed by a nationwide network of certified installers, helping ensure better craftsmanship and fewer long-term issues.
CertainTeed offers a credentialing system for contractors, meaning roofers must meet rigorous standards before being allowed to install Landmark roofs under warranty terms. Homeowners can also search their zip code through CertainTeed’s website to find local certified roofers familiar with the Landmark system.
Having a trained, experienced roofer who understands the nailing zones, sealant timing, and integration of underlayments makes all the difference. It also helps homeowners avoid voiding their warranty due to improper installation.
In places where weather conditions vary wildly, like Colorado or Pennsylvania, many certified contractors are already trained in best practices for cold-weather installation or impact-resistance upgrades.
Home improvements are often about more than comfort, they’re about value. Roofing sits high on the list of projects that can yield strong returns. A new Landmark roof not only protects your home but also adds tangible value when it’s time to sell.
According to the Remodeling 2023 Cost vs. Value Report, a midrange roof replacement recoups about 61.1% of its cost at resale. However, homes with architectural shingles like Landmark often see stronger interest from buyers due to the upgraded appearance, transferable warranties, and peace of mind.
If your old roof is starting to show its age, curling edges, discoloration, or leaks, a Landmark roofing upgrade could be a smart investment not just for performance, but for long-term resale value. Buyers today are looking for move-in ready homes, and roofing tops the list of big-ticket concerns.
Additionally, many insurance companies offer discounts or incentives for homes that use roofing systems with high wind resistance or impact ratings, which Landmark Pro and Premium shingles can offer.
While not all homeowners think about energy savings when replacing a roof, it’s becoming more common to prioritize materials that reduce utility bills and environmental impact. Landmark shingles can help support energy savings, especially when paired with proper ventilation and insulation.
Some Landmark products carry ENERGY STAR® ratings when installed with certain colors. These "cool roof" options reflect more of the sun’s rays and reduce the amount of heat absorbed into the attic, which can lower air conditioning costs during summer.
Furthermore, CertainTeed has a strong sustainability initiative, including:
This makes Landmark roofing a better fit for eco-conscious homeowners looking to reduce their carbon footprint without sacrificing performance or style. It's not the same as installing a green or living roof, but it’s a step toward sustainability.
Testimonials often speak louder than specs. Landmark roofing has built its reputation not just on brochures and sales pitches, but on the lived experience of homeowners across the country. Many homeowners praise Landmark for its durability through hurricanes, heavy snow, and aging with minimal issues.
Some report that even after 10 to 15 years, their shingles still maintain vibrant color and strong adhesion. Others point to how much smoother the installation went thanks to certified contractors and clear instructions.
In hail-prone states like Texas and Oklahoma, Landmark Pro and Premium versions are often credited with preventing leaks and avoiding complete tear-offs after storms that damaged neighboring homes. The algae-resistant features are a favorite in humid regions like the Southeast, where streaking can ruin curb appeal. While no roofing product is immune to wear, Landmark has earned a reputation for delivering on its promises, weather after weather, year after year.
Landmark roofing isn’t just popular because of brand recognition. Its widespread use across the United States is built on performance, protection, and aesthetic appeal. From the variety of shingles and colors available to the strength of its warranties and installation network, Landmark offers real peace of mind.
Whether you’re upgrading a worn-out roof or building a new home, Landmark gives you options that balance durability and design, without forcing you into overpriced premium categories. If you're looking for a roofing solution that lasts, looks great, and brings long-term value, Landmark roofing continues to stand out as a trusted and smart choice for today’s homeowners.
To properly notify tenants about roof replacement, landlords should provide a clear, timely, and legally compliant written notice that outlines the scope, schedule, and impact of the project. This communication should be delivered well in advance, using appropriate methods, to ensure tenants are informed, prepared, and able to take necessary precautions during the construction period.
This article highlights the importance of proper notification, outlines key elements to include, suggests effective delivery methods, and provides a sample notice. It also covers legal considerations to help ensure compliance and maintain positive tenant relations.
Properly notifying tenants about a roof replacement is more than a courtesy—it’s a legal and practical necessity. Clear communication helps prevent misunderstandings, reduces complaints, and ensures a smoother renovation process for both tenants and property managers.
Most local landlord-tenant laws require advance notice for major repairs like roof replacements. Failing to provide proper notice can result in fines, legal disputes, or tenant claims of lease violations.
Roof work involves equipment, debris, and restricted access areas that can pose safety risks. Informing tenants ahead of time allows them to take precautions, especially for children, pets, and anyone with mobility concerns.
Roof replacement can be noisy and intrusive. Advance notice gives tenants time to adjust schedules, plan around disruptions, and avoid frustration.
Transparent and respectful communication fosters trust and shows tenants that their comfort and safety are a priority. This can lead to higher tenant satisfaction and retention.
Letting tenants know what to expect—such as noise levels, work hours, or access restrictions—prevents confusion and helps them prepare accordingly.
Providing proper notice ensures the roof replacement process goes smoothly and respectfully. It protects both landlords and tenants while promoting a cooperative living environment.
A well-crafted roof replacement notice keeps tenants informed, respected, and prepared. Including clear, relevant details reduces confusion, builds trust, and helps ensure a safe and organized project.
Including these elements ensures your notice is clear, complete, and respectful—laying the foundation for a smooth and successful roof replacement.
Properly notifying tenants of a roof replacement project involves more than sending a quick note—it's a structured process that ensures clarity, compliance, and cooperation. By following these steps, landlords can minimize disruptions, maintain trust, and complete the project with fewer issues.
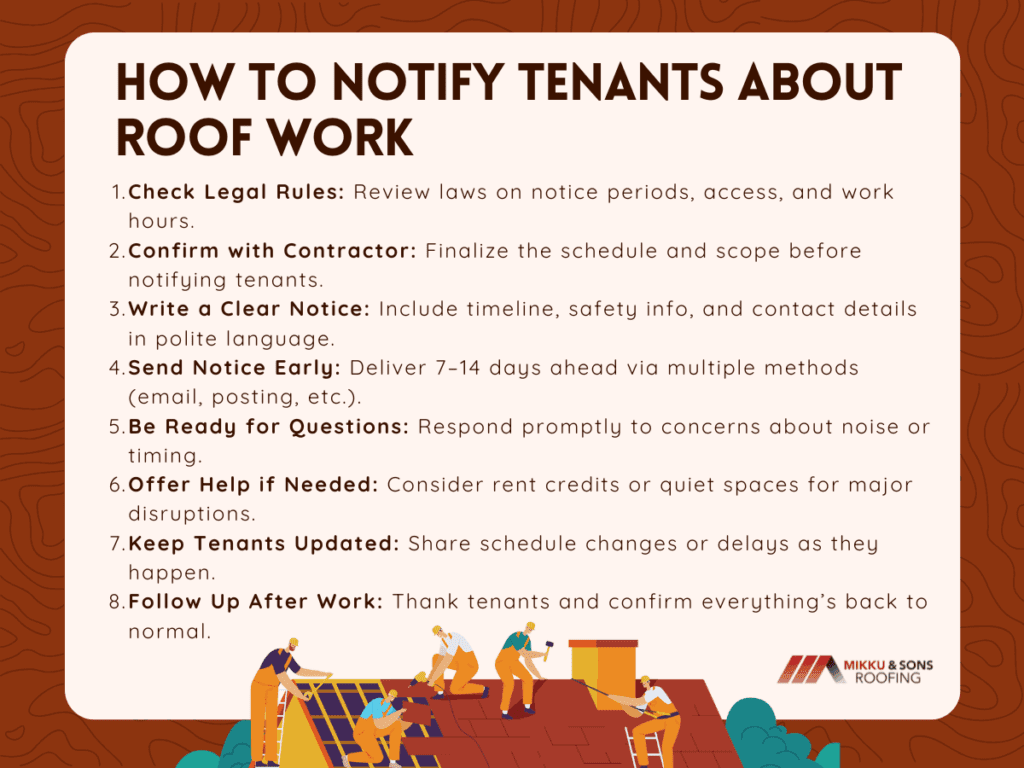
Start by checking local and state landlord-tenant laws regarding notice periods, access rights, and construction hour regulations. This ensures your notice is legally compliant and protects you from potential disputes.
Before notifying tenants, finalize the roof replacement schedule, scope of work, and estimated duration with your contractor. Understanding the logistics will help you provide accurate and detailed information in the notice.
Coordinating your project scheduling clearly; including start dates, estimated completion windows, and daily work hours; helps landlords set expectations and avoid confusion before, during, and after tenant notifications.
Write a professional notice that includes all essential information: project timeline, affected areas, safety guidelines, and contact details. Use clear, respectful language and keep the tone informative and courteous.
Send the notice well in advance—ideally 7 to 14 days before work begins—even if local laws require less. Use multiple delivery methods such as hand delivery, email, and posting in common areas to ensure all tenants receive it.
Be ready to address tenant feedback and questions promptly and respectfully. Having clear answers about timelines, noise levels, or access issues can prevent frustration and build tenant confidence.
If the work will cause significant inconvenience, consider offering small accommodations such as rent credits, alternative parking, or quiet zones for remote workers. These gestures show good faith and can reduce tenant complaints.
Stay in touch with tenants during the project, especially if there are delays or changes to the schedule. Timely updates help manage expectations and show tenants that you're being proactive.
Accurate time-keeping of crews and labor progress helps property managers track how long each phase of the roof replacement takes, making updates to tenants more transparent and reliable.
Once the project is finished, follow up with tenants to confirm that everything is back in order. A brief thank-you message and any necessary cleanup notes reinforce professionalism and tenant care.
Notifying tenants of a roof replacement requires planning, transparency, and good communication. By taking these steps, landlords can complete essential maintenance while preserving positive tenant relationships and ensuring a safe, respectful environment.
Choosing the right way to deliver a roof replacement notice ensures tenants are informed and understand what to expect. Using multiple methods improves reach and shows professionalism.
Using a mix of these methods helps ensure no tenant is left uninformed and supports a smooth, well-communicated project.
Having a ready-to-use template for roof replacement notifications can save time and ensure all critical information is communicated clearly. Below is a sample notice you can customize based on your property, schedule, and tenant needs.
| [Your Company/Property Name] [Company Address] [Phone Number] | [Email Address] Date: [Insert Date] Subject: Notice of Scheduled Roof Replacement at [Property Address] Dear [Tenant Name], We are writing to inform you that roof replacement work is scheduled to take place at your building located at [Property Address]. This essential maintenance is being done to improve the safety and long-term condition of the property. Work is scheduled to begin on [Start Date] and is expected to be completed by [End Date], weather permitting. Construction crews will be working between [Start Time] and [End Time] each day. During this time, you may experience elevated noise levels, temporary restrictions to certain areas (such as parking spaces, balconies, or entrances), and other minor disruptions. For your safety, please avoid entering any marked or restricted construction zones. We ask that pets and children be kept indoors or away from the work areas during this time. If access to any part of your unit becomes necessary, we will provide additional notice in accordance with your lease agreement and local regulations. If you have any questions or concerns, please don’t hesitate to contact [Property Manager's Name] at [Phone Number] or [Email Address]. We appreciate your patience and cooperation as we complete this important project. Sincerely, [Your Name] [Your Title] [Management Company Name] |
This sample template can be easily adapted for any rental property and helps ensure your notice is both professional and legally sound. Clear, respectful communication like this sets the tone for a positive experience during major maintenance projects.
Roof replacement projects in rental properties must follow legal guidelines and practical best practices to avoid disputes and ensure smooth execution. Proper planning helps protect both tenant rights and landlord responsibilities.
Laws often require landlords to give 24–72 hours' written notice before major repairs. For roof replacements, providing 7–14 days’ notice is a good practice to keep tenants informed.
If workers need to enter tenant units, landlords must follow legal entry requirements. Even exterior work should be clearly communicated in advance.
Landlords must maintain livable conditions during construction. If the work causes significant disruption, they may need to offer rent adjustments or temporary accommodations.
Ensure your contractor is licensed and insured to avoid liability for damages or accidents. Confirm your property insurance covers construction-related risks.
Tenants with disabilities may require special accommodations, like alternate access routes or extra notice. These must be considered under ADA and Fair Housing laws.
Follow local laws on construction hours and noise limits to prevent fines and complaints. Typical work hours are between 8 a.m. and 6 p.m.
Being mindful of legal and practical details ensures the roof replacement is handled professionally, safely, and in compliance with the law. This reduces risk and builds tenant trust.
Properly notifying tenants about a roof replacement is not just a courtesy—it’s a legal and practical necessity that promotes trust, transparency, and safety. A clear, timely, and detailed notification helps reduce confusion, prevent disputes, and ensure tenants feel informed and respected throughout the process.
By understanding the importance of notification, including all key elements, using effective delivery methods, and following legal requirements, landlords can manage the project professionally while maintaining positive tenant relationships. Thoughtful communication turns a disruptive project into a well-handled upgrade that benefits both property and residents.
Gutters are one of those features homeowners often install without question, assuming they’re essential for every home. But that’s not always the case. While gutters play an important role in directing water away from your foundation and protecting siding, there are specific situations where your house might function just fine without them.
This blog explores real-life cases when are gutters not necessary, how to tell if your home qualifies, and what to consider before opting out. Let’s take a deeper look at when gutters are more of an optional feature than a critical one.
Before exploring when gutters aren’t needed, it’s worth understanding what they actually do. Gutters aren’t just decorative, they serve to control rainwater runoff and direct it safely away from your house. Without gutters, heavy rainfall can erode the soil, damage siding, flood basements, and compromise foundations.
In areas with frequent storms, they help protect entryways, flower beds, and walkways. In colder climates, properly installed gutters also prevent ice dams from forming at the roof’s edge.However, not all homes are affected by water in the same way. The effectiveness of gutters depends heavily on your location, roof design, ground slope, and even the type of soil around your house.
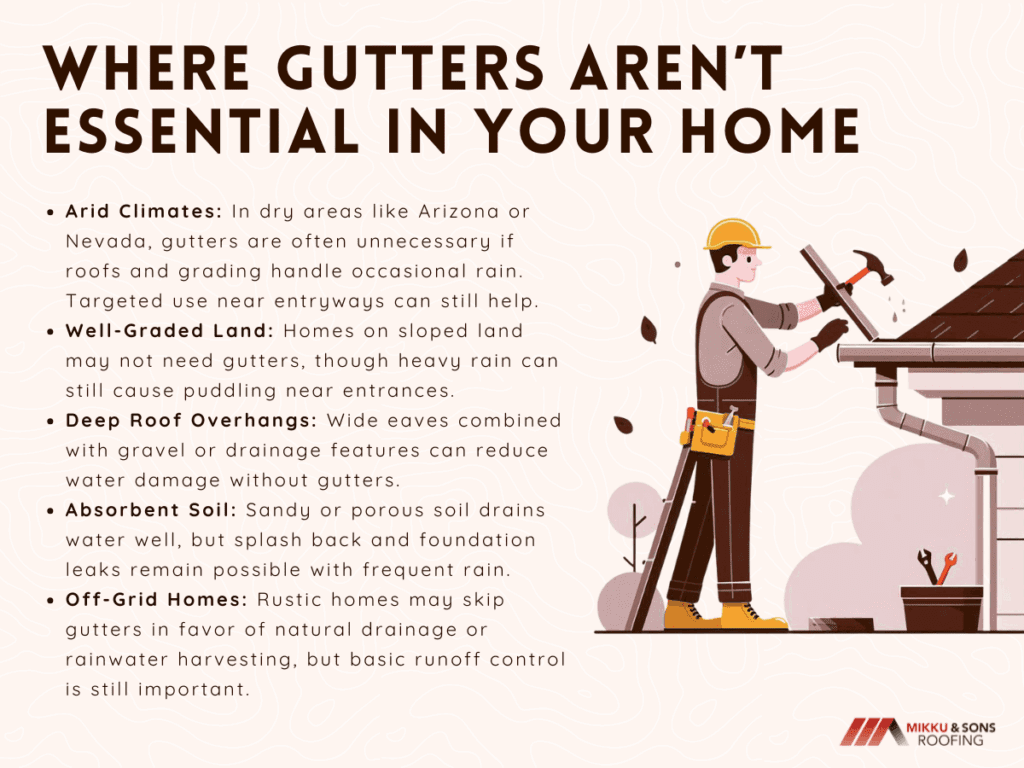
In areas like Arizona, Nevada, and parts of New Mexico and southern California, rain is so infrequent that traditional gutter systems offer limited value.
In climates where annual rainfall is minimal and flash flooding is rare, gutters may not be a practical necessity. In places like Phoenix or Las Vegas, homes are often built with minimal roof overhang and may include ground grading that naturally directs water away from the house. Many roofs are designed to shed the occasional rain directly onto gravel or concrete pads that help manage water without the need for downspouts.
That said, sudden monsoons or intense seasonal rains can still cause localized pooling if the home isn’t well-designed. Even in the desert, some builders choose to add gutters as a protective layer especially around high-traffic entry points or patios.
So if you live in a low-rainfall zone, check your roof’s pitch and drainage setup before skipping the gutters entirely. They might still be useful in targeted spots.
One of the strongest arguments against needing gutters comes down to landscaping and topography. If your home sits on land that naturally slopes away in all directions, you may not need gutters to manage water runoff. Well-graded soil allows rainwater to flow away from the house without pooling near the foundation. This setup is common in rural properties or hilly areas where homes are elevated above the surrounding terrain.
For instance, in parts of the Midwest or Appalachia, older farmhouses are often gutter-free because of the way they’re situated. Builders used to rely on simple grading, deep eaves, and gravel perimeters to keep water away from basements.
However, even with a perfect slope, you’ll want to observe how water behaves during heavier rains. Puddling near doorways or garage thresholds is a clue that gutters might still be worth adding in select areas.
Some home designs are built to let water fall naturally away from the structure, using roof overhangs to their advantage.
If your home has deep eaves that extend beyond flower beds, walkways, and the foundation, gutters might not be necessary. Traditional southwestern-style homes, Japanese architectural designs, and even certain Craftsman bungalows are known for their extended rooflines.
The wide overhang keeps rain from splashing onto walls or seeping into window frames. Combine that with gravel trenches, concrete borders, or porous soil, and you’ve got a passive drainage system.
But this only works when overhangs are paired with other water-dispersing features. If your roofline ends right above flower beds or bare dirt, water damage could creep in over time. Also, longer eaves don’t help much if the ground underneath slopes back toward the house.
The type of soil around your home matters more than most people realize.If you live in an area with sandy, porous, or well-draining soil, you may not experience the typical runoff issues that require gutters. Sandy soil tends to absorb water quickly and allows it to disperse downward without creating surface puddles.
This is common along parts of the Gulf Coast, certain areas in Florida, or even parts of the Carolina coastline. Homes built on well-drained lots in these regions may be fine without gutters, especially if combined with sloping terrain.
But keep in mind, absorbent soil doesn’t mean floodproof. Water can still find its way through foundation cracks or cause rot in wooden siding if it's allowed to splash unchecked. Consider how much rainfall your region receives annually and whether high water tables are a concern.
Many off-grid homes and rustic cabins in the United States are built intentionally without gutters. In self-sustaining or remote properties, gutters may be skipped due to simpler design goals, reliance on natural drainage, or water harvesting methods. For example, some log cabin owners allow roof runoff to fall directly into rock trenches or custom rain gardens. Others use rain chains or collection barrels without a full gutter system.
These choices are often tied to lifestyle preferences and environmental values. Owners may prefer natural erosion over artificial piping, especially if they’re not dealing with stormwater regulations or neighborhood codes.
Still, it's important to think long-term. Even a remote cabin benefits from having water directed away from the entry door, especially in spring snowmelt or autumn rains. If you're skipping gutters in these homes, at least reinforce drainage paths with gravel, stone, or French drains.
Even if you live in one of the above scenarios, there are still signs to watch for if you decide to go without gutters. Water has a way of finding the weak spot. Skipping gutters doesn’t mean skipping drainage, it means managing it in other ways. Watch for these red flags:
Water that pools even a few inches from your foundation can, over time, lead to cracks, shifting, or mold inside the basement or crawl space. Even if you have absorbent soil, too much water in one place can create problems.
If water runoff from the roof carves out channels in your garden or causes mulch and topsoil to wash away, that’s a strong clue that gutters (or at least splash guards) would help. Landscape erosion doesn’t just look messy it exposes roots and can damage your home’s curb appeal.
Look for signs of water streaks down siding or rotted trim near windows and doors. Over time, repeated water exposure can ruin paint and allow mold or mildew to spread. Deep eaves help, but they’re not always enough, especially in windy storms.
A slippery green walkway means that runoff is consistently falling in the same spot and not drying out fast enough. This creates safety hazards and long-term concrete damage.
If you're not installing gutters across the entire roofline, you can still take selective measures to manage water effectively.
Spot treatments like rain diverters, French drains, and gravel trenches can handle localized runoff without installing full gutters. These alternatives are often more cost-effective and lower maintenance than a full aluminum system.
These are metal strips installed on the roof to redirect water away from entry doors or windows. They're ideal for places with short bursts of rainfall and help keep thresholds dry.
A decorative and functional choice, rain chains replace downspouts and guide water into barrels, basins, or gardens. They work best in moderate rainfall zones and can be used in combination with partial gutters.
Simple but effective. By lining the ground with gravel or concrete splash blocks under the eaves, you help dissipate water energy and reduce erosion. Just be sure the trench has a downward slope away from the house.
These are underground systems that collect surface water and carry it away from critical zones. They’re ideal for homes built on clay or silt-heavy soil and work well even without gutters.
Even if you don’t need gutters everywhere, there are certain areas of your home where they’re always worth considering.
Over driveways, entrances, and decks, gutters help protect not just your house but your comfort and safety. Nobody likes stepping into a puddle or having icy runoff drip onto the walkway in winter. Gutters here do more than preserve structure; they protect people.
Also, local building codes and HOA rules might require you to install them. In certain flood-prone zones or city areas with water management ordinances, you may need to prove that runoff is being directed appropriately.
If you’re unsure, consult a local contractor or building inspector. They can help determine if your home qualifies as a no-gutter home or whether you’d be better off with at least partial coverage.
While gutters are standard on many American homes, they aren’t always mandatory. If your home sits in a dry region, on well-graded land, or uses thoughtful architectural features like deep overhangs and gravel trenches, you might safely skip them.
Choosing whether or not to install gutters comes down to understanding how water behaves around your specific home. Observe how your property handles rainfall, look for signs of erosion or damage, and be honest about your long-term maintenance goals. You may discover that selective drainage measures or partial gutter systems are all you need to keep your home safe and sound.
When gutters aren’t necessary, it doesn’t mean drainage isn’t important. It just means your home might be built to manage water in more natural or minimal ways, something worth appreciating when it works well.
Arizona's intense heat and sun-soaked days shape nearly every aspect of residential living, from landscaping choices to cooling strategies. One of the most heavily impacted elements of any home in this desert state is the roof.
In particular, asphalt shingles, which are common roofing materials, face challenges unique to the arid, scorching environment. With temperatures frequently soaring above 100°F during summer months, the longevity and performance of roofing systems come under significant stress.
High thermal loads can cause structural changes in roofing materials, which over time lead to curling, cracking, and premature degradation. Compromised shingles increase the risk of water infiltration, insulation damage, and elevated cooling costs. How does Arizona’s climate affects your roof? How do shingles and heat relate? Let's find out.
Asphalt shingles are particularly susceptible to heat-related deterioration. Arizona's climate worsens the natural aging process, often shortening the expected lifespan of these shingles by several years.
Constant exposure to ultraviolet radiation and high ambient temperatures triggers chemical changes within the asphalt binder, reducing its flexibility and making it more brittle over time.
UV rays act as an aggressor, gradually degrading the asphalt and the protective granules embedded within the shingle surface. As granules detach, the underlying asphalt becomes more exposed and vulnerable to heat and weathering.
This accelerates the breakdown process, making shingles more prone to cracks and surface blisters, especially on sun-facing slopes of the roof.
Arizona’s dramatic diurnal temperature shifts, where daytime heat is followed by much cooler nights, can cause repeated cycles of expansion and contraction in roofing materials. Over time, this movement weakens the integrity of shingles, leading to edge curling, splitting, and loss of adhesion.
These mechanical failures not only reduce the roof's durability but also open pathways for moisture penetration during monsoon season.
When shingles deteriorate, the risks extend beyond visible damage. The structural components of the roof, including decking and underlayment, are exposed to greater stress.
Water intrusion becomes a significant concern, particularly during Arizona's summer storms, which can bring heavy rainfall in short bursts. Even small leaks can lead to mold growth and insulation degradation if not promptly addressed.
Damaged shingles also contribute to increased interior temperatures. Without a fully intact roofing barrier, homes absorb more heat, forcing air conditioning systems to work harder.
This results in higher energy bills and reduced HVAC system lifespan. Roofing that reflects more sunlight and insulates against heat transfer, such as light-colored shingles or those with reflective coatings, can significantly reduce these cooling loads.
Proper attic ventilation and insulation work hand-in-hand with roofing materials to manage heat. Inadequate airflow traps hot air within the attic space, compounding the thermal stress on shingles.
Investing in ventilation upgrades, such as ridge vents or attic fans, helps regulate attic temperatures and enhances overall roof performance.
Selecting roofing shingles in Arizona is a decision that has long-term implications for energy efficiency, durability, and overall home protection. The intense solar radiation, frequent thermal cycling, and occasional severe weather mean that not all shingle types will perform equally.
Homeowners must evaluate materials based on how well they resist heat, reflect sunlight, endure storm conditions, and integrate with proper ventilation and installation methods.
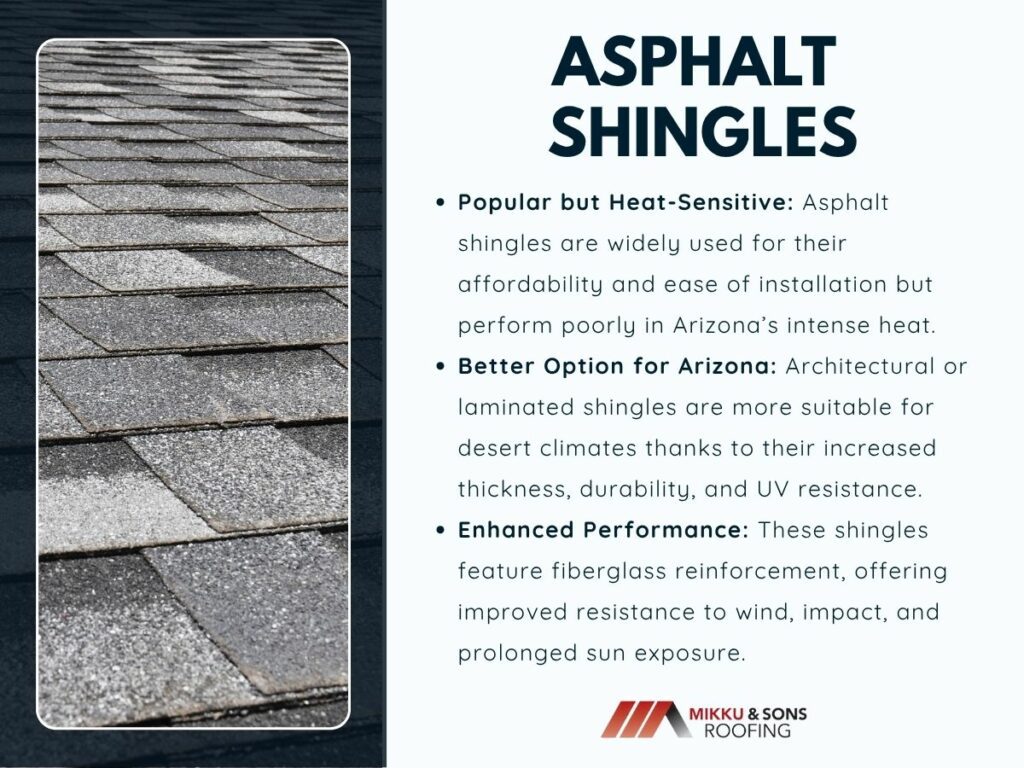
Asphalt shingles are the most commonly used roofing material in the United States, including Arizona, largely due to their affordability and ease of installation. However, traditional three-tab asphalt shingles are not always ideal for desert climates.
They tend to absorb and retain heat, which can accelerate the aging process under Arizona’s relentless sun. To increase their suitability, Arizona homeowners should opt for architectural or laminated asphalt shingles, which are thicker, more durable, and more resistant to UV damage.
These shingles typically feature multiple layers of asphalt with fiberglass reinforcement, offering better wind and impact resistance.

Cool roof shingles are engineered to reflect more sunlight and absorb less heat than standard roofing materials. By reducing surface temperatures, these shingles help to lower attic heat gain and lessen the burden on air conditioning systems.
Manufacturers like Owens Corning, CertainTeed, and GAF offer Energy Star-rated shingles with solar-reflective properties. These products often include advanced coatings or highly reflective granules that deflect UV rays and slow material degradation.
Although cool roof shingles may cost more initially, the long-term savings in energy consumption and the extended lifespan often offset the upfront investment.

Metal shingles and standing seam metal roofing offer exceptional performance in high-temperature environments. These systems are designed to reflect solar radiation effectively, reducing rooftop temperatures by up to 50°F in some cases.
Metal does not degrade under UV exposure like asphalt, and modern coatings prevent rust and fading even in arid conditions. While metal roofing is more expensive upfront, its longevity, often 40 to 70 years, and minimal maintenance requirements make it a practical option.
Additionally, metal roofs are resistant to fire, wind, and hail, providing superior protection during Arizona’s monsoon season.
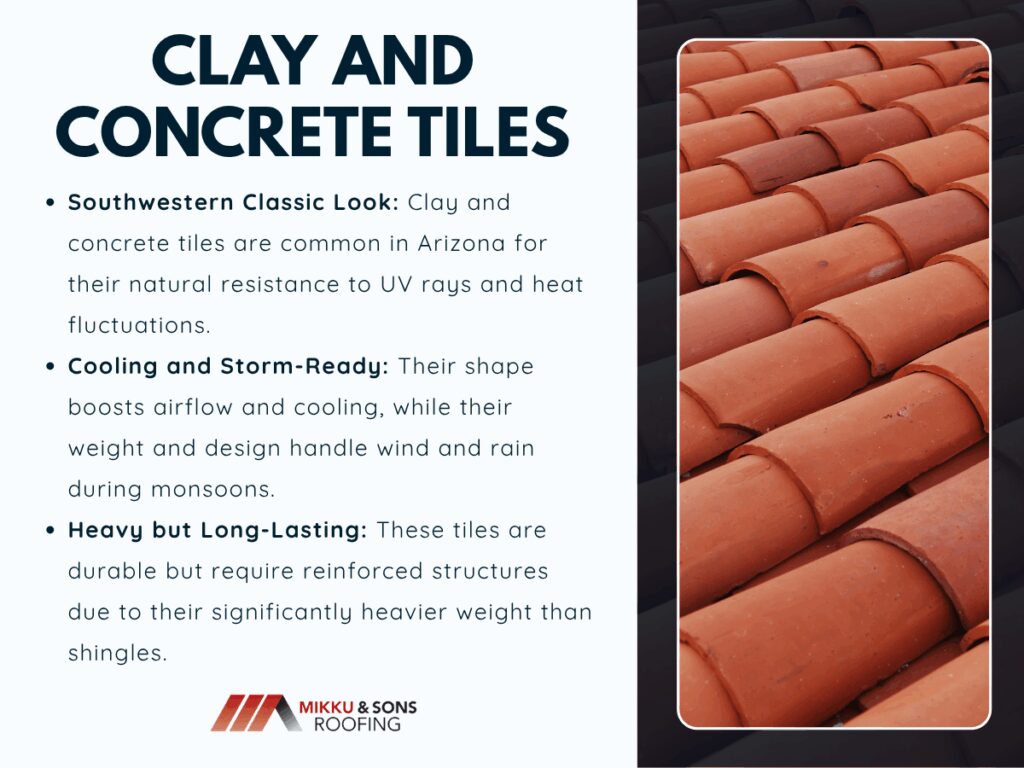
Clay and concrete tile roofs are iconic in Arizona’s southwestern architecture for good reason. These materials are inherently resistant to UV radiation and thermal cycling.
Their mass helps stabilize temperature swings, and their curved shapes facilitate airflow beneath the tile, naturally cooling the roof structure. Tiles also perform well in monsoon conditions, resisting wind uplift and shedding water efficiently.
Clay tiles and concrete tiles are significantly heavier than shingles and require reinforced roof structures to support their weight.
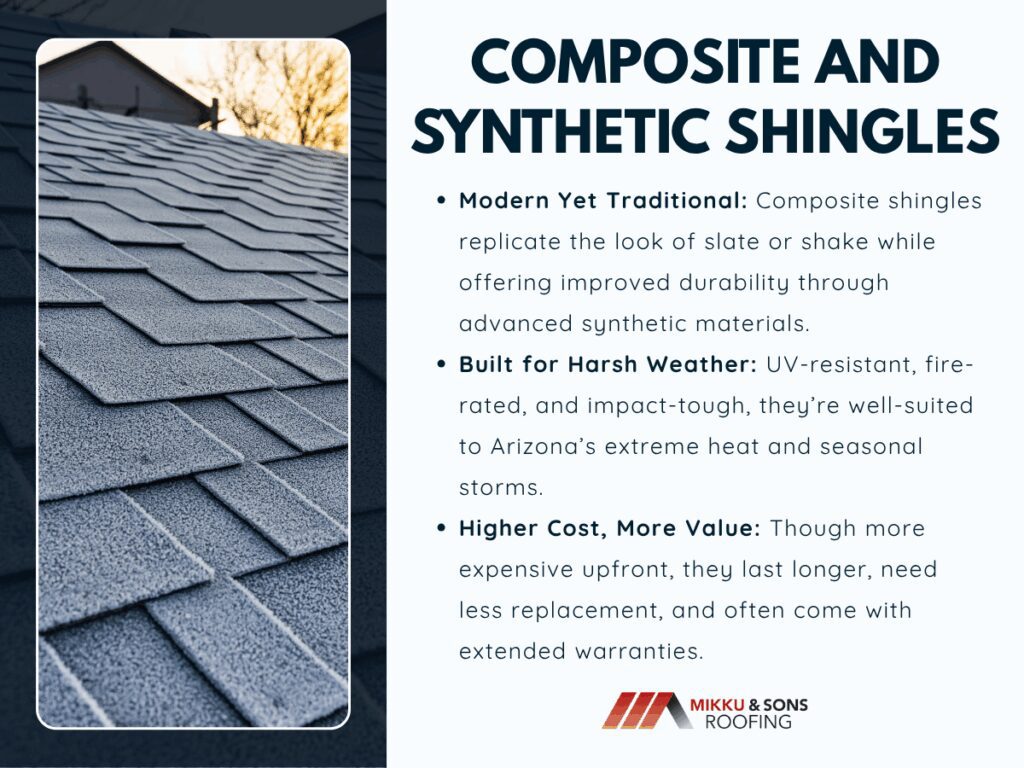
Composite shingles made from synthetic polymers offer a balance between the aesthetic appeal of natural materials and the performance benefits of modern engineering. Brands like DaVinci and Brava produce shingles that mimic the appearance of slate or shake but weigh less and offer greater resilience in harsh climates.
These products are UV-resistant, fire-rated, and capable of withstanding high winds and impacts, making them an increasingly popular choice in Arizona. Although synthetic shingles come with a higher price tag, they require less frequent replacement and generally include extended manufacturer warranties.
They also tend to perform well in both high temperatures and during sudden weather events.
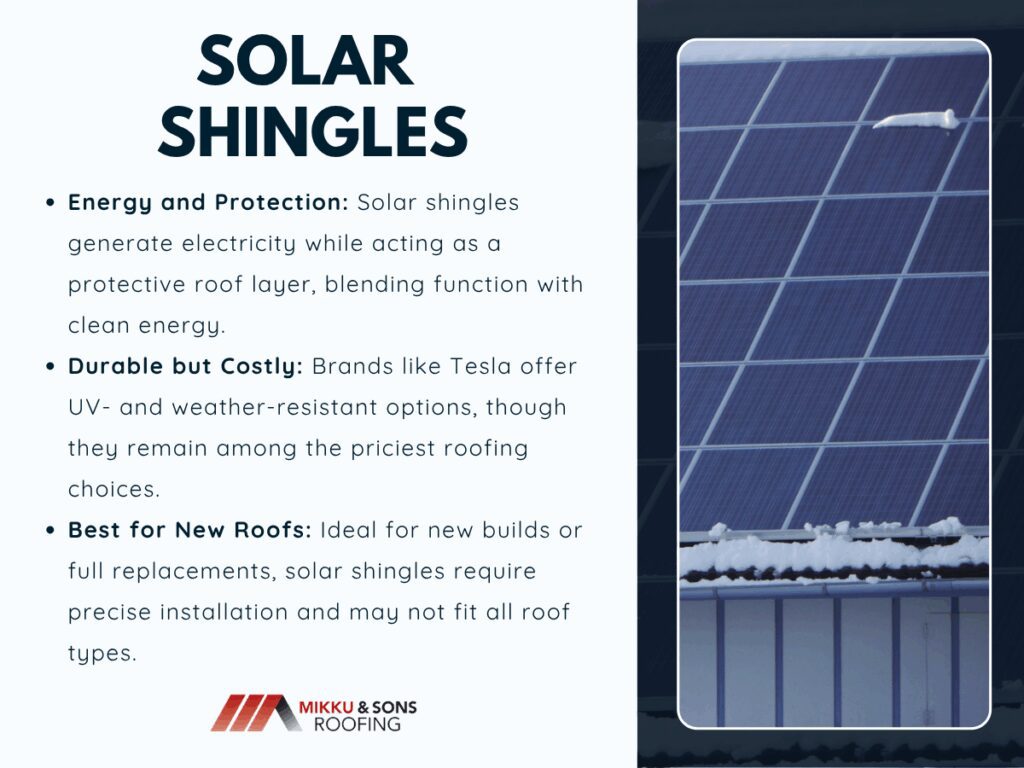
For those interested in combining renewable energy with functional roofing, solar shingles present a futuristic solution. Unlike traditional panels that sit atop the roof, solar shingles are integrated into the roof surface, generating electricity while protecting the home.
Brands like Tesla and CertainTeed offer solar roofing products designed to withstand harsh weather and UV exposure. However, they remain one of the most expensive roofing options and may not be suitable for every roof style or pitch.
Proper installation is crucial, and these systems are best suited for new builds or full roof replacements rather than retrofits.
The extreme conditions in Arizona accelerate wear on all types of roofing systems, particularly asphalt shingles. The upfront investment in durable materials and expert installation is important, and so is the longevity and effectiveness of any roof.
Thoughtful, consistent care can help prevent minor issues from becoming costly repairs and ensure your roof performs optimally for decades.
Arizona homeowners should conduct inspections twice a year: once in late spring before summer temperatures peak, and again in early fall after monsoon season. During these inspections, look for cracked, curled, or missing shingles, loose flashing, degraded sealants around vents and chimneys, and exposed underlayment.
Pay close attention to any areas that seem discolored, which could indicate trapped moisture or heat damage. In addition to visual inspections from the ground or a ladder, consider using binoculars or drone footage to examine hard-to-reach sections of the roof.
This method can reveal damage around skylights, dormers, or valleys that would otherwise go unnoticed.
Arizona’s dry climate means less organic buildup than in more humid regions, but wind-blown debris still presents a problem. Twigs, leaves, dust, and sand can accumulate in valleys and around roof penetrations, especially after monsoon storms.
These materials trap moisture during rain events and create conditions where mildew and algae can grow, even in desert conditions. Set a schedule for gently removing debris using a soft broom or air blower.
Avoid using pressure washers or scraping tools, which can dislodge protective granules from the shingles or damage flashing. Don’t forget to clear gutters and downspouts, which are critical for redirecting water off the roof and away from the foundation.
The effects of thermal cycling; daily expansion and contraction from extreme temperature swings; can go unnoticed until major damage occurs. Over time, this stress can loosen nails, warp shingles, and separate seams.
Homeowners should periodically check for these signs of movement, particularly after summer heat waves or significant temperature fluctuations. Inspect for small separations or lifting at shingle edges, which may allow water to infiltrate the underlayment.
Look for nail pops (raised nails protruding from shingles), which can compromise the roof’s waterproof barrier. Structural areas around chimneys, skylights, and vents should also be closely examined, as these are common failure points due to shifting materials and weakened seals.
In Arizona’s harsh climate, sealants and caulking dry out and crack much faster than in temperate zones. This deterioration can create tiny openings that allow water ingress during a storm or monsoon event.
Regularly inspect and refresh caulking around roof vents, chimneys, skylights, satellite mounts, and HVAC components. Use high-quality, UV-resistant sealants that can withstand the heat without softening or cracking prematurely.
If existing sealant shows signs of shrinkage, brittleness, or detachment, it should be removed and replaced rather than layered over, which can mask underlying problems.
Arizona’s extreme weather patterns place extraordinary demands on roofing systems. Materials that perform well in other parts of the country often fall short in Arizona unless they are specifically engineered or selected with the desert climate in mind.
Smart homeowners evaluate roofing options through a climate-specific lens and provide structural integrity during both scorching summers and sudden storms. It can be by investing in reflective cool roof shingles, durable metal systems, traditional clay tiles, or high-tech solar shingles
Just as vital is working with local roofing professionals who understand the challenges of Arizona construction and can ensure proper installation and ventilation.
Arizona’s dry desert landscape may not seem like a place where rain gutters are necessary. With its long, hot summers and clear skies most of the year, many homeowners assume water runoff isn't a serious concern.
Monsoon season brings short but intense bursts of rainfall that can create real problems for homes not equipped to handle it. Arizona homes are designed to handle the sun and heat, with stucco exteriors and tile roofs.
However, when water hits those surfaces without a clear path to drain, it begins to wear away at what should be long-lasting protection. Uncontrolled rainwater can find its way into tiny cracks, settle around the foundation, or run directly into low-lying areas, eroding soil and staining walls. Why do you need gutters on your house in Arizona? Let's find out.
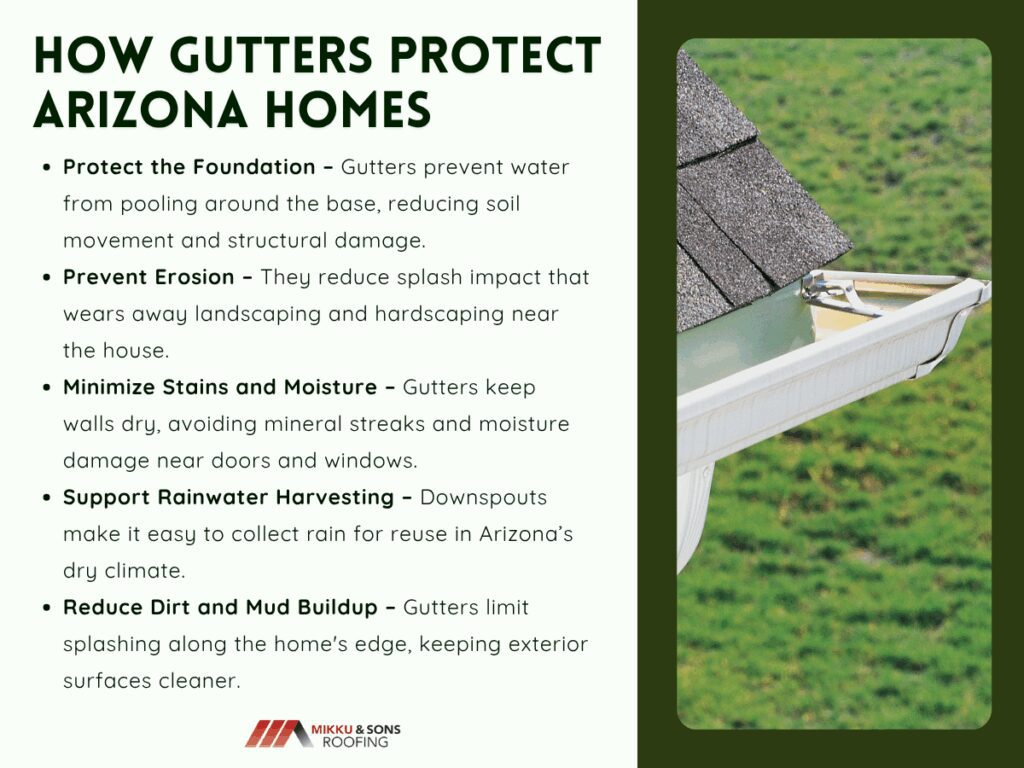
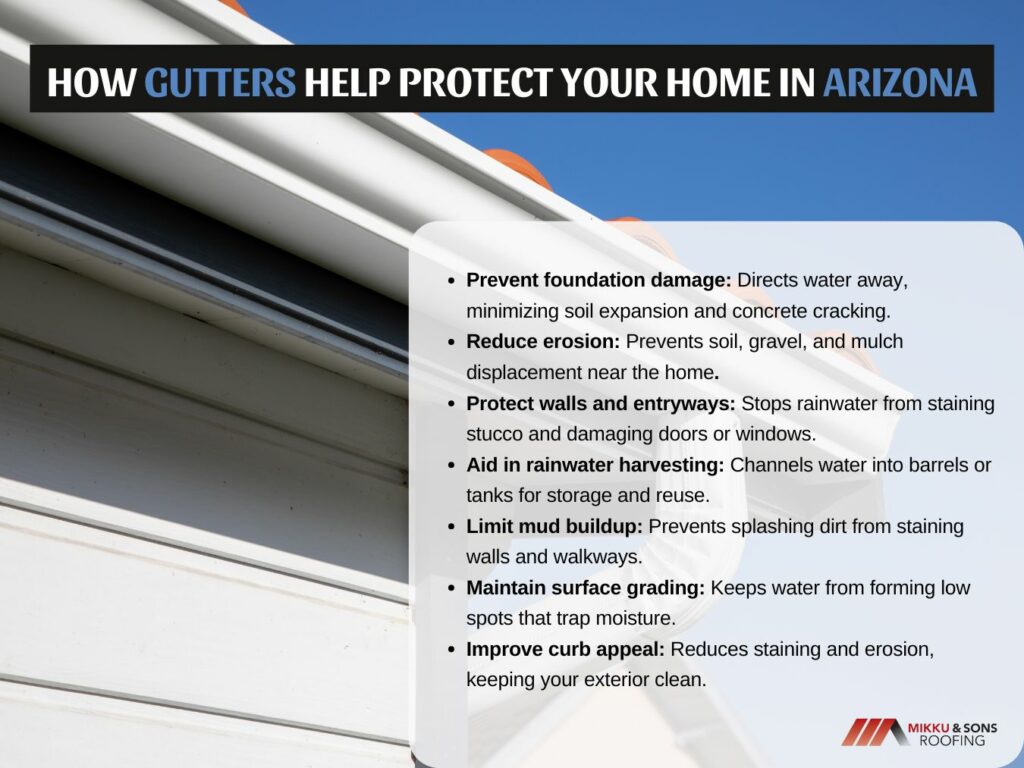
Rain gutters are part of a system designed to redirect water and reduce structural strain during storms. Homes without a means to manage runoff often show signs of early wear near the base, corners, and along exterior walls.
Although roofs are designed to shed water, without gutters, that runoff has no specific exit route. Water spills over, pools in unintended areas, and gradually causes damage.
A well-installed gutter system can carry rainwater away from the home’s base, keeping moisture from collecting around footings and slab edges. This helps limit soil movement beneath the home, especially where expansive soils exist.
Arizona’s clay-rich ground often responds to water by swelling or shrinking, depending on moisture content. Consistent exposure to runoff increases that fluctuation, which may eventually affect the levelness of flooring or cause small but costly foundation cracks.
The weight and force of runoff from even a single storm can quickly alter the landscape near the home if there is no proper system in place.
Exterior materials are built to withstand heat, wind, and dust, but water exposure shortens their effective lifespan. In homes without gutters, repeated rainwater contact along the walls often leads to staining, surface discoloration, and material breakdown.
Stucco and paint, especially in shaded or north-facing areas, are more likely to retain moisture if runoff continues to hit them directly. Over time, this can contribute to mold and mildew growth on outer walls.
Gutters reduce this risk by keeping water off siding and away from features like window sills, door frames, and walkways. The presence of a clean drainage path also helps protect surrounding patios and paved areas from surface wear caused by unchanneled flows.
Arizona homes face a unique set of environmental pressures, especially during the monsoon season. While the region doesn’t see regular rainfall throughout the year, the bursts of intense weather that do occur can create lasting problems for buildings without proper runoff control.
Gutters function as a protective barrier by redirecting water and keeping critical parts of the home dry and stable.
Foundations are most vulnerable when water gathers directly around their edges. Repeated exposure to moisture, even over short periods, can affect the integrity of concrete footings and slabs.
In Arizona, many homes are built on expansive soils, which react strongly to changes in moisture. Water that collects too close to the structure may trigger soil movement, which leads to cracks, misaligned door frames, or uneven flooring.
A gutter system diverts that water, often into splash blocks or underground drains that lead toward safer areas of the yard. This spacing helps keep the soil near the foundation more stable throughout the year, reducing the chance of movement caused by moisture cycles.
Homes with hardscaping or shallow landscaping beds are especially prone to erosion when water is not directed away. With no gutters in place, rainwater falls heavily near the edge of the roof and hits the ground in concentrated streams.
This repeated impact displaces gravel, soil, mulch, and loose concrete over time. In some cases, exposed edges become visibly worn or undermined, creating small trenches that grow with each storm.
Erosion also reduces the effectiveness of surface grading, which is meant to angle water away from the home. When soil is washed out near the base, it can create low spots that trap water instead of moving it..
Arizona homes are often finished with stucco, painted block, or other porous materials that can stain when exposed to mineral-heavy rain. Without gutters, water falls directly down the sides of the house, carrying dust, roofing debris, and minerals that stick to the surface.
This creates visible streaks over time, especially around entry points like doors, garage frames, or large window panes. Gutters keep this water off the wall by redirecting it to controlled downspout exits, which means fewer marks and less chance for long-term moisture absorption.
This is especially helpful in shaded areas or recessed corners where air circulation is limited. Entryways that stay dry also reduce the chance of wood swelling, rusting of metal fixtures, and the slow breakdown of door seals.
With a proper gutter system in place, it becomes easier to add rainwater harvesting components, which are encouraged in many Arizona municipalities. Storage tanks, barrels, or collection basins can be connected directly to downspouts, allowing homeowners to save water during each storm.
In desert climates, even a few hundred gallons of stored rainwater make a difference. These systems can be as simple or advanced as needed, and gutters act as the first step in ensuring clean, direct flow into them.
When water enters the system from a controlled source, debris is reduced, and efficiency improves.
Homes built close to the ground are prone to splashing and dust accumulation during a storm. Without gutters, rain hits the roof and falls directly along the home’s edge, stirring up dirt and mud that sticks to stucco, siding, or concrete.
This type of buildup is especially common in Arizona’s desert zones where loose sand or fine gravel surrounds much of the structure. Redirecting water away from the base of the house helps limit this mess and makes outdoor maintenance easier.
In addition, by preventing mud from splashing onto stucco or brick, gutters help reduce long-term staining that can require pressure washing or repainting.
Local climate, building design, and environmental exposure all influence how a gutter system performs. Arizona’s weather poses unique challenges, including high heat, seasonal dust, and occasional downpours.
A good system should resist corrosion, maintain its shape under temperature swings, and remain effective during sudden weather events. Before installation, it helps to consider how these systems interact with the structure and surrounding ground features.
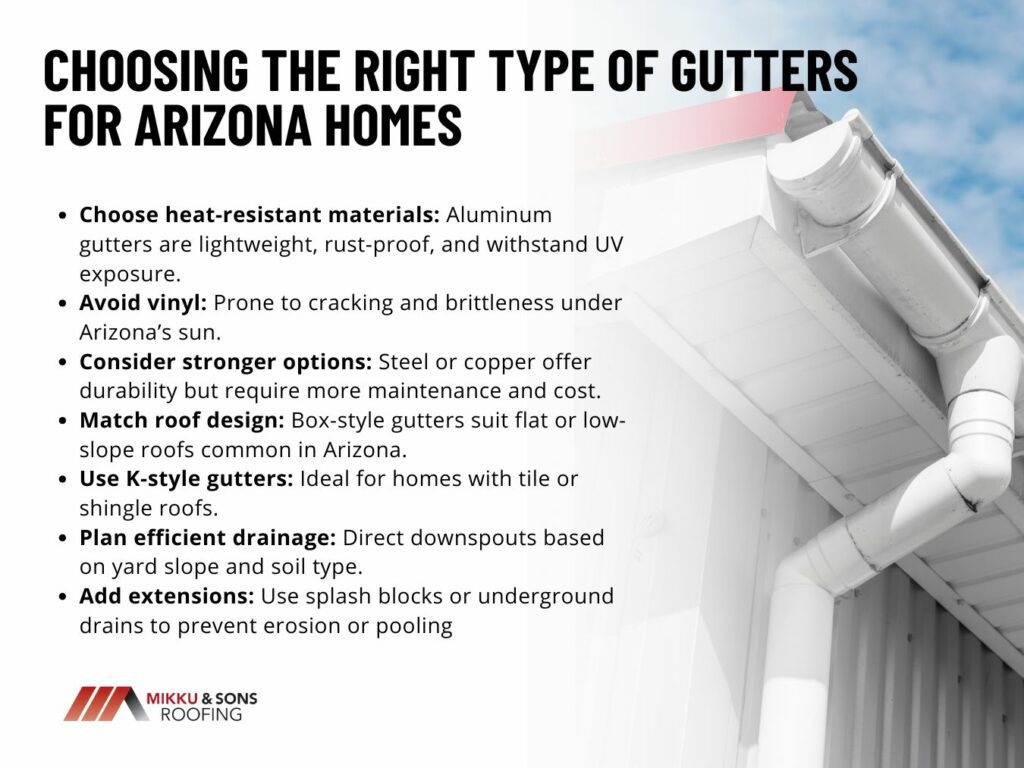
Arizona homes are regularly exposed to intense sunlight and high surface temperatures. Standard materials can warp, crack, or fade when exposed for extended periods without adequate resistance.
Gutters made from aluminum are a common choice because they are lightweight, rust-resistant, and can withstand high heat without significant expansion. They also tolerate dust accumulation and do not corrode easily in dry air.
Other options like steel or copper offer greater strength but come at a higher cost and may require additional maintenance to retain appearance. Vinyl gutters are often avoided in this region due to their tendency to become brittle under long-term UV exposure.
Arizona homes often feature flat or low-slope roofs that collect and release water differently than steep-pitched roofs. Gutter systems must account for how water flows off these surfaces and how quickly it needs to be moved away.
Downspouts must be planned according to how the lot is graded and where water should be directed. In areas with desert landscaping, a gentle slope and ground-level exit may be enough. In more developed lots, it may be necessary to install splash blocks or buried extensions to move water toward a drainage zone or collection area.
Many Arizona homeowners only recognize the need for gutters after spotting early signs of wear or drainage failure. These indicators typically point to larger problems developing beneath the surface.
Sometimes a home was built without gutters, while in other cases, the existing system may be undersized, clogged, or poorly placed..
One of the most obvious signs that a gutter system is lacking or failing is visible pooling around the base of the home after a storm. Water that gathers too close to the foundation can seep into cracks, create damp spots, or lead to soil movement that causes uneven settling.
These pools often form at corners or beneath eaves where runoff falls in a concentrated stream. If puddles remain long after the rain has passed, or if the soil near the home appears unusually soft or sunken, it may indicate poor drainage.
In clay-heavy soil, this can become more problematic as moisture causes expansion and contraction that exerts uneven pressure on the home’s foundation. Long-term exposure to this cycle can lead to foundation cracks and the need for structural adjustment.
Soil cracks that appear along the perimeter of a home are often caused by dry expansion followed by sudden saturation. Arizona’s soil tends to harden during dry months, then quickly shift when it absorbs moisture during storms.
Without gutters, the soil near the home experiences more abrupt changes in moisture content, especially if water runs off the roofline unchecked. This can result in uneven settling, visible gaps between walkways and the soil beneath them, or a noticeable lean in fencing and edging structures.
Over time, even patios and driveways may shift slightly if repeated runoff causes erosion at their edges.
Exterior walls should remain clean and dry after a storm, but when gutters are absent or blocked, water tends to run down the sides of the home. This often leads to visible water marks or mineral staining, particularly on stucco or other porous finishes. These vertical streaks are more than just cosmetic issues.
In some cases, the affected areas may begin to show early signs of wear, including hairline cracks or fading in paint finishes. When paired with mud splatter or debris accumulation near the bottom of the wall, this kind of staining is a reliable sign that water flow needs to be redirected.
Gutters can help keep walls clean, maintain surface coatings, and reduce the chance of long-term damage caused by trapped moisture.
Gutters serve a daily function and provide protection when conditions shift without much warning. Homes without them may appear unaffected during dry months, yet they often show gradual signs of strain as time goes on.
Even systems that are already in place can become liabilities when neglected. Gutters that are misaligned, undersized, or clogged can cause as much harm as having none at all.
Water overflowing from blocked gutters tends to pour over the sides, concentrating force along the foundation and walls. This creates the very problems a gutter system is supposed to prevent and when ignored,they can compromise that system.
When it comes to creating an energy-efficient home or building, roof insulation plays a key role. The R-value is a key measure of a material's ability to resist heat flow, directly affecting indoor comfort, energy bills, and overall building performance.
A well-insulated roof helps maintain stable temperatures, reduces the workload on heating and cooling systems, and lowers energy costs. Whether you’re building from scratch or upgrading an older roof, understanding how R-value works will help you make smarter and more cost-effective decisions for the long term. What is R-Value and why does it matter for your roof? Here’s what you need to know.
When it comes to building energy-efficient homes or commercial spaces, understanding R-value is key. The R-value measures how well a material resists the flow of heat.
In simpler terms, a higher R-value means better insulation. This translates to less heat escaping during winter and less heat entering during summer, helping to maintain comfortable indoor temperatures while reducing the need for heating or cooling systems.
In construction, R-values are used to assess the thermal performance of insulation in walls, roofs, floors, and even windows. Builders and homeowners rely on these values to select the right materials based on the climate and specific building needs.
For instance, colder regions require insulation with higher R-values to keep the heat in. Overall, R-value is a critical factor in energy savings, indoor comfort, and sustainable building practices. Whether you're constructing a new space or upgrading insulation, understanding R-value helps you make smarter, more efficient choices.
The roof is one of the largest and most exposed parts of any building. Without proper insulation, it becomes a major source of heat loss or gain. This is why the R-value of roof insulation is so important, it directly affects energy efficiency, indoor comfort, and long-term costs.
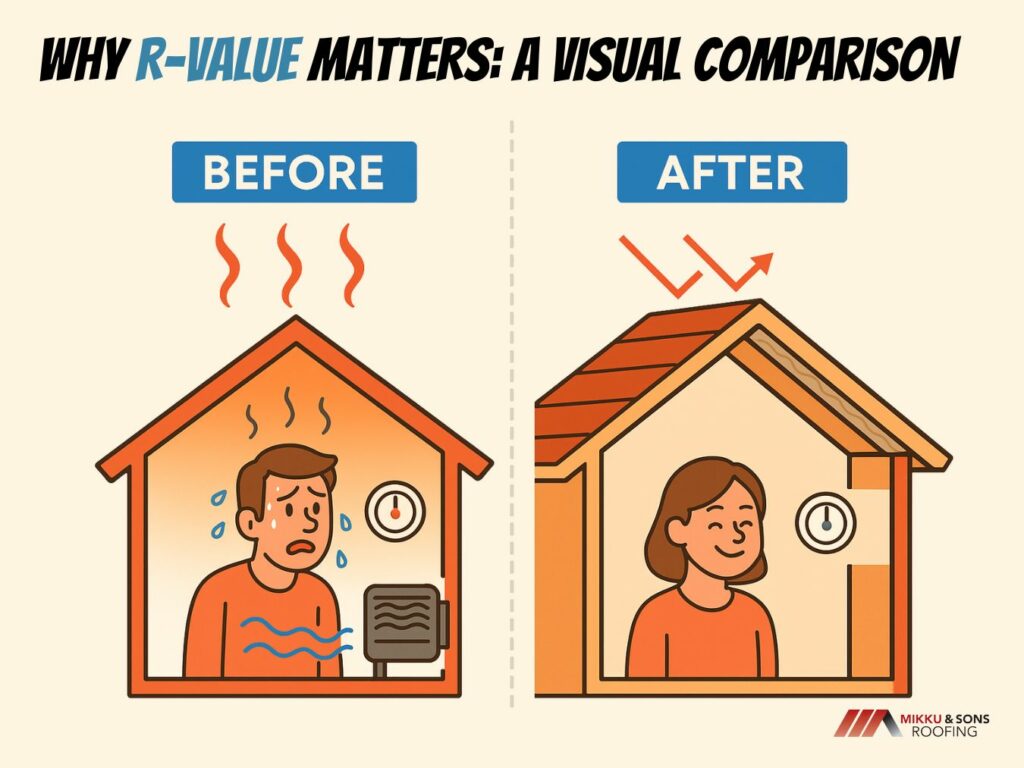
When planning or upgrading a building's insulation, many people focus on the R-value—the number that represents how well a material resists heat flow. However, the R-value listed on an insulation product isn't the only thing that determines how effective it will be in practice. Several external and internal factors influence the actual thermal performance of a roof. Understanding these elements is crucial for making smart, long-lasting decisions that affect energy efficiency, indoor comfort, and overall building performance.
Each insulation material has a different base R-value per inch. Spray foam insulation, for example, typically offers a higher R-value (about R-6 to R-7 per inch) than fiberglass batts (around R-2.9 to R-3.8 per inch).
Cellulose and mineral wool fall somewhere in between. The material you choose will largely determine how much insulation you need to meet building code or efficiency goals. High-performance materials might cost more upfront but offer better long-term returns through reduced energy bills.
Insulation works by trapping air in small pockets that resist heat flow. The thicker the insulation, the more pockets, and therefore, the higher the R-value. Simply put, doubling the thickness of insulation can nearly double the R-value, assuming no compression.
That said, roof space is often limited, especially in older homes or buildings with sloped ceilings. Choosing high-R-value-per-inch materials can be helpful in tight spaces.
Even the highest-quality insulation can underperform if installed improperly. Common issues include compression of batt insulation, gaps around framing, or poor coverage in corners and tight spaces.
These problems lead to thermal bridging, where heat bypasses insulation through uninsulated parts. Hiring experienced installers and conducting post-installation inspections can greatly improve the effective R-value of your roof system.
What’s above your insulation also matters. Roofing materials like asphalt shingles, metal panels, or clay tiles absorb and transfer heat at different rates.
Dark-colored roofs, for example, absorb more solar radiation and can significantly increase attic temperatures, especially in warm climates. On the other hand, reflective or “cool” roofing materials help reduce heat gain, complementing insulation by lowering the overall thermal load.
Insulation isn't the only factor in thermal control. Good attic or roof ventilation allows heat and moisture to escape, which can prevent heat buildup in the summer and ice dams in winter.
At the same time, air sealing prevents conditioned air from leaking into the attic space. Without proper air sealing, even high R-value insulation can fall short because warm or cool air escapes around it, reducing its effectiveness.
Insulation’s R-value drops drastically when it gets wet. This can happen from roof leaks, condensation, or poor vapor control. Wet insulation loses its air pockets and becomes dense, allowing heat to pass through more easily.
Over time, damp conditions also promote mold growth and can damage your roof structure. Using moisture-resistant insulation and ensuring proper waterproofing and ventilation can preserve R-value over time.Proper installation and protection layers like tile roof underlayment can help prevent moisture damage
The shape and design of your roof also play a role in how well it can be insulated. Steep-sloped roofs may have narrow cavities that are harder to fill evenly, while flat or low-pitched roofs may accumulate water and require special moisture controls.
Dormers, skylights, and other roof features introduce breaks in insulation coverage that must be properly addressed to prevent thermal bridging.
Foam insulation’s performance over time also depends on proper maintenance and application. Fiberglass batts may settle, foam may shrink, and cellulose can compact especially in older homes. This leads to a lower effective R-value than what was originally installed.
If your roof insulation is more than 10–15 years old, it’s worth inspecting and considering an upgrade or top-up to maintain peak performance.
The recommended R-value for roof insulation varies significantly depending on geographic location. A home in a cold region like Minnesota may need roof insulation rated at R-49 or higher, while a home in Florida might only need R-30.
Building codes are typically adjusted by zone, so choosing the right R-value for your local climate ensures efficiency without overspending on materials you don’t need.
Some roofing systems use multiple layers of insulation or combine different types of materials. For example, a radiant barrier might be used alongside traditional batt insulation to reflect heat away.
Others may incorporate vapor barriers, reflective coatings, or even insulated roof panels. When layered correctly, these systems can increase the overall effective R-value, but only if each component is compatible and properly installed.
When insulating a roof, it's not just about choosing the highest R-value. You also need to meet local building codes and standards. These regulations exist to ensure homes and buildings are safe, energy-efficient, and appropriate for the climate they are built in.
Most regions have minimum R-value requirements for roof insulation based on climate zones. In colder areas, higher R-values are needed to reduce heat loss. In warmer zones, the focus is often on keeping heat out. If these standards are not met, it can lead to failed inspections, costly changes, or even legal complications when renovating or selling a property.
Building codes also address fire safety, proper ventilation, and moisture control. These elements affect how insulation should be installed and which materials are allowed. Whether you're a homeowner or a contractor, staying informed about these rules ensures your project is both effective and compliant.
Building codes are not just regulations. They help protect your investment, increase comfort, and support long-term energy savings. Always check local requirements or consult a professional before beginning any roofing or insulation work.
Maximizing energy efficiency with your roof starts with the right choices , from selecting high R-value insulation to ensuring proper installation and maintenance. Every detail, including ventilation, material type, and compliance with building codes, plays a role in your roof’s overall performance.
By understanding how each factor contributes to energy savings and comfort, you can make informed decisions that benefit your home and your wallet. Whether you're building new or upgrading an existing roof, investing in energy-efficient solutions leads to long-term savings, better indoor comfort, and a more sustainable future for your space.
Replacing a skylight involves removing the old unit, assessing the roof opening, and installing a new skylight with proper flashing and waterproofing to prevent leaks. Whether you're dealing with damage, age, or an upgrade for energy efficiency, knowing when and how to replace your skylight ensures your home stays bright, comfortable, and protected from the elements.
This complete guide covers everything from recognizing signs it’s time for a replacement to selecting the right skylight type for your space. You’ll also find step-by-step instructions for installation, tips for post-installation care, cost breakdowns, and advice on whether to go DIY or hire a professional. Below is a complete guide to replacing a skylight.

Skylights bring light and life into your home, but they don’t last forever. Recognizing the signs that it’s time for a replacement can save you from costly repairs and help maintain your home's energy efficiency and comfort.
Water stains, mold, or peeling paint around your skylight often signal a leak. These issues typically arise from failing seals or flashing and can lead to serious structural damage if not addressed promptly.
Visible cracks or chips compromise the skylight’s insulation and safety. Even small fractures can worsen over time, allowing water and air infiltration.
Condensation between panes indicates a broken seal, reducing visibility and insulation. This often occurs in older, double- or triple-pane units.
Older skylights lack modern glazing and insulation, leading to heat loss in winter and overheating in summer. Newer models offer improved thermal performance and UV protection.
If you’re replacing your roof, it’s an ideal time to update your skylight. Doing both at once ensures a proper seal and eliminates the need to disturb new roofing later.
Knowing when and why to replace your skylight helps protect your home and improve its performance. Timely replacement not only prevents damage but can also enhance natural lighting and energy savings.
Choosing the right type of skylight is essential for meeting your lighting, ventilation, and energy efficiency needs. Different designs offer unique benefits and are best suited for specific spaces and purposes.
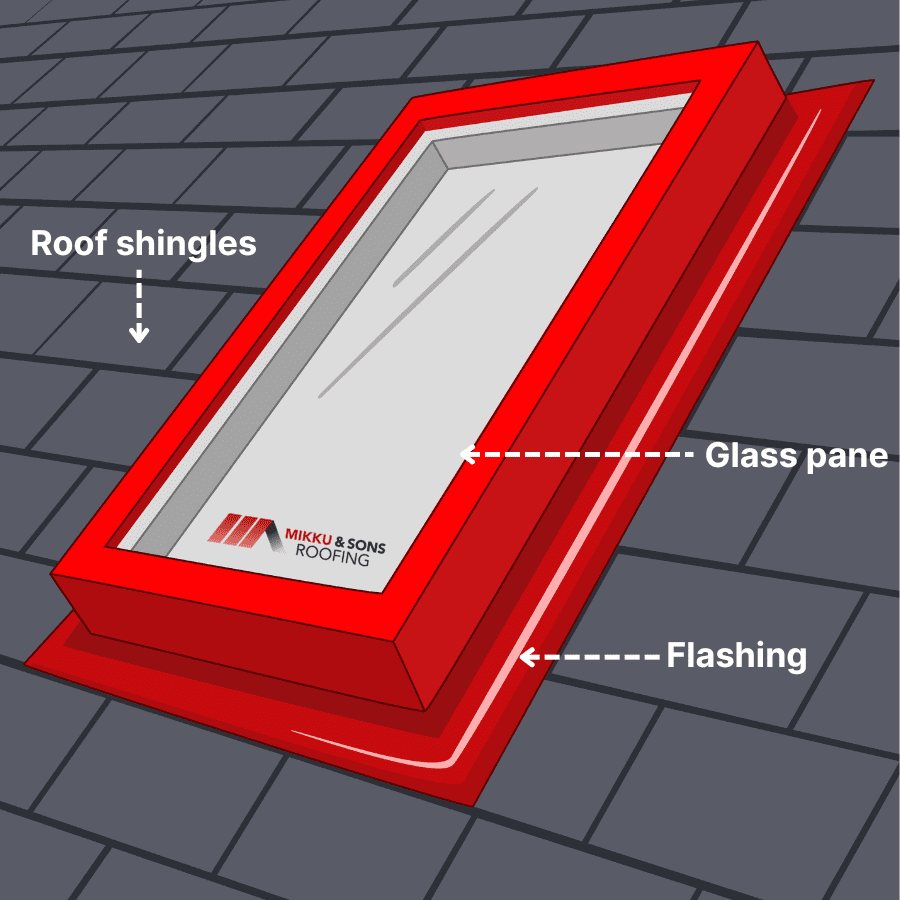
Fixed skylights are non-operable and designed solely to provide natural light. They’re ideal for areas that don’t require ventilation, such as hallways or living rooms, and typically offer the best insulation and lower maintenance.
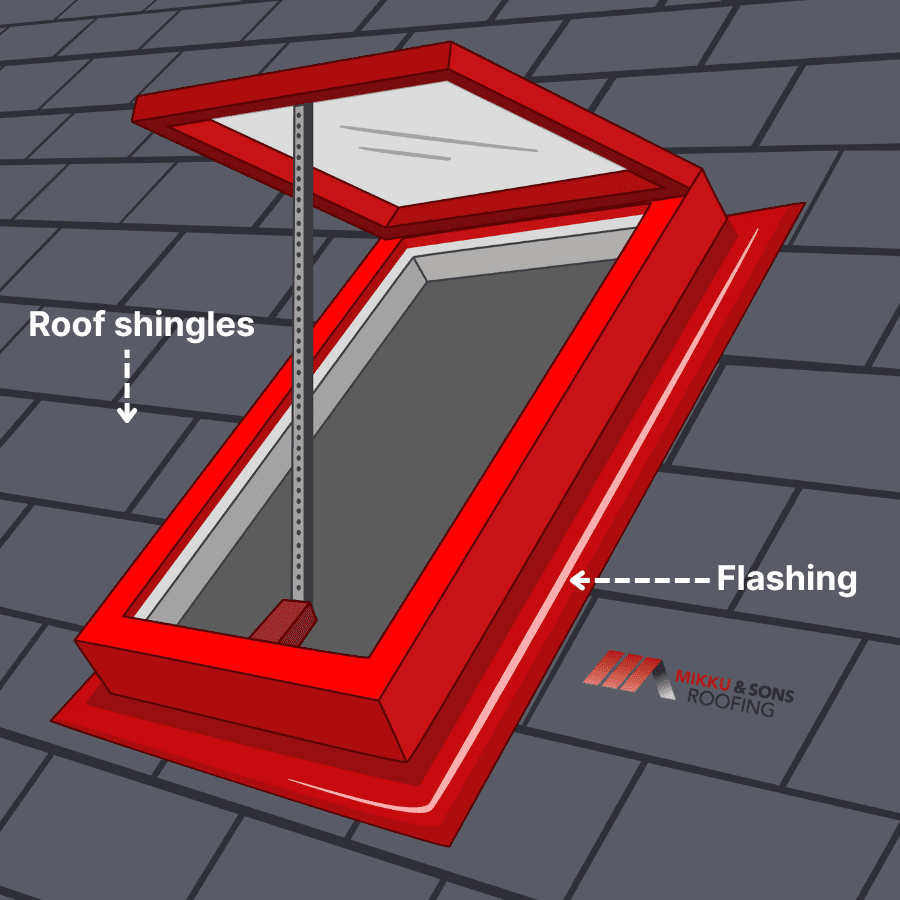
These skylights can be opened manually or automatically to allow fresh air into the room. They’re perfect for moisture-prone areas like kitchens and bathrooms, helping to reduce humidity and improve air circulation.
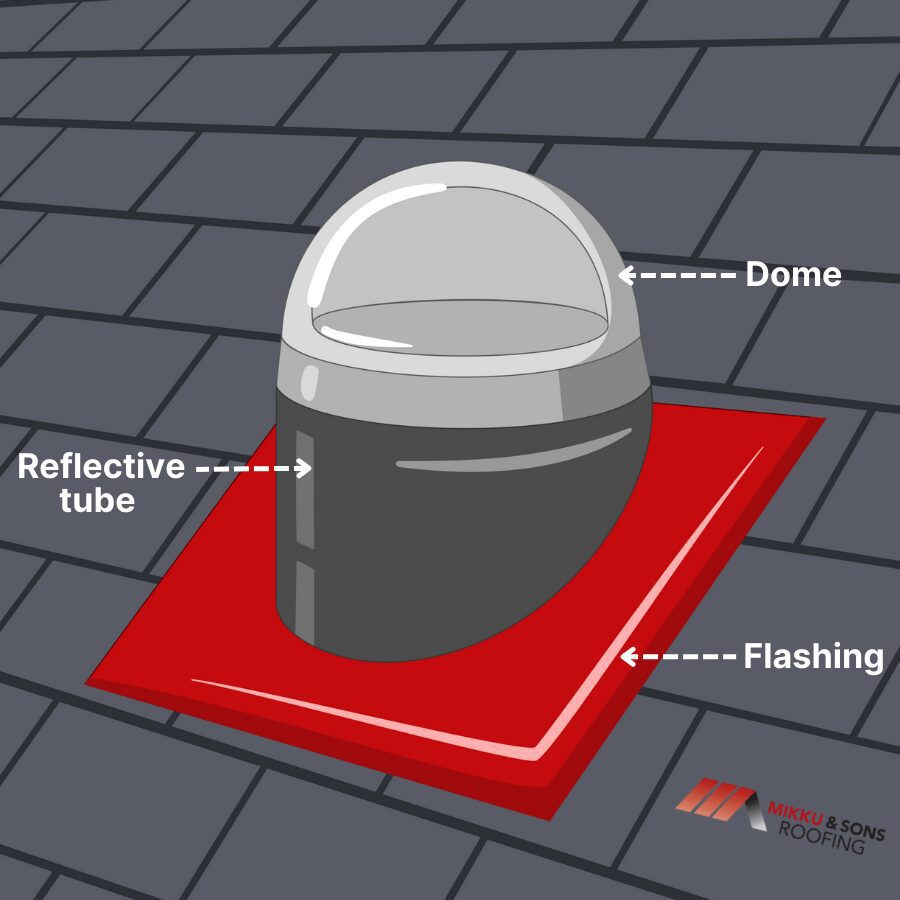
Tubular skylights use a reflective tube to direct sunlight into smaller or enclosed spaces. They’re energy-efficient, cost-effective, and great for hallways, closets, or bathrooms where traditional skylights may not fit.
These advanced skylights open and close via remote or wall switch, often equipped with rain sensors and built-in blinds. They’re convenient for hard-to-reach areas and enhance comfort with added automation and energy-saving features.
Understanding the different types of skylights allows you to choose one that fits both your space and lifestyle. Whether you need simple daylighting or high-tech ventilation, there’s a skylight designed to meet your needs.
Proper preparation is key to a successful skylight replacement. Taking time to plan, measure accurately, and gather the right tools ensures a smooth installation and long-lasting results.
Before starting, verify your local building codes and permit requirements. This step ensures your replacement meets safety standards and may be necessary for inspections or insurance.
Accurate measurements of the existing skylight and roof opening are crucial. Be sure to measure the width, height, and roof pitch to ensure a proper fit and compatibility with your chosen skylight model.
Having the right tools on hand—such as a pry bar, circular saw, screws, waterproof membrane, and flashing kit—can save time and reduce errors during installation. Make sure all materials meet the manufacturer’s specifications for your new skylight.
Preparing thoroughly helps prevent costly mistakes and delays. With everything in place, you're ready to move forward with a confident and efficient skylight replacement.
Replacing a skylight requires careful execution to ensure a watertight, energy-efficient installation. Each step is important for both functionality and the long-term durability of the skylight and roof.
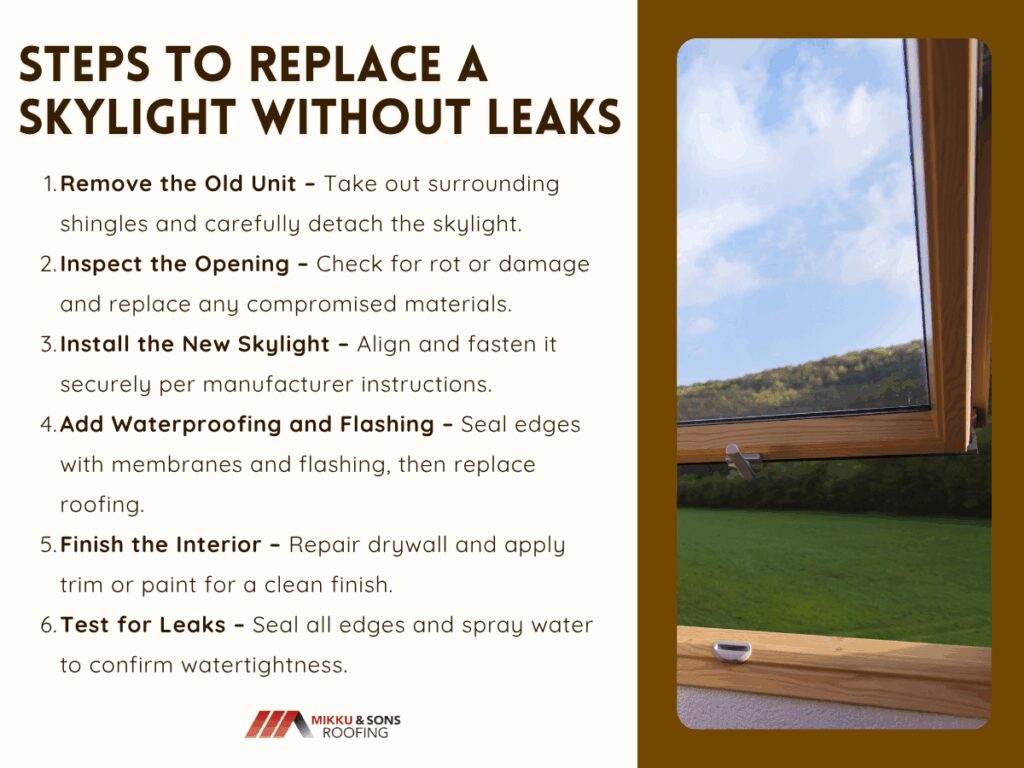
Start by clearing away shingles or roofing materials surrounding the skylight. Carefully unscrew and lift out the old unit, being mindful of any damage to the surrounding roof structure.
Check the opening for signs of water damage, mold, or rot. Replace any compromised wood or underlayment to create a solid, clean base for the new skylight.
Position the new skylight according to the manufacturer’s instructions. Secure it with the appropriate fasteners, ensuring it’s properly aligned and flush with the roof surface.
Apply a waterproof membrane around the skylight frame, followed by the flashing kit to seal all edges. Reinstall shingles or roofing materials around the skylight to blend with the rest of the roof.
Inside the home, patch or replace drywall around the skylight as needed. Finish with trim or paint to restore a clean, polished look.
Once your skylight is installed, inspect all seams and edges for a tight seal, applying roofing cement or high-quality exterior caulk as needed. Consider testing for leaks by spraying water over the skylight to simulate rain before finishing the project.
By following each of these steps with care, you’ll ensure a leak-free and energy-efficient installation. A properly replaced skylight enhances your home’s comfort, lighting, and overall value.
After replacing your skylight, a few key steps can help ensure it performs well for years to come. Proper care and routine checks will protect your investment and prevent avoidable issues like leaks or wear.
After installation, monitor the area around your skylight during and after the first few rainfalls. Look for water stains, drips, or condensation, which could indicate an issue with sealing or flashing. Addressing problems early helps avoid costly water damage.
Regularly clean the skylight glass with a non-abrasive cleaner to maintain clarity and light quality. Check the seals, flashing, and frame at least twice a year for signs of deterioration, and clear away debris like leaves or branches that can trap moisture.
If your skylight is operable, open and close it a few times to ensure smooth operation. Test any built-in features like blinds, sensors, or remote controls to make sure they’re functioning correctly.
Repaint or touch up the interior shaft and trim if needed to restore a clean, polished look. You might also consider adding blinds or shades to improve temperature control and light filtering.
Make a habit of inspecting your skylight as part of seasonal home maintenance. Look for cracked glass, worn seals, or any signs of structural movement that could affect the installation over time.
Caring for your new skylight doesn’t take much effort but goes a long way in preserving its performance and appearance. With simple, routine maintenance and quick attention to any issues, your skylight will continue to brighten your space and protect your home for years to come.
Understanding the costs and factors involved in replacing a skylight can help you budget effectively and choose the best option for your home. Various elements influence the final price, so it’s important to weigh both material and labor expenses along with any additional needs.
The price of skylights varies widely based on size, type, and features. Basic fixed models can start around $200, while larger, ventilated, or electrically operated skylights can cost $1,000 or more.
Professional installation typically ranges from $500 to $1,500 depending on roof complexity, skylight size, and location accessibility. Skilled labor ensures proper sealing and flashing, which can prevent costly repairs down the road.
Replacing or repairing roof materials around the skylight adds to the overall expense. Proper flashing installation is critical for waterproofing, often costing an additional few hundred dollars.
Extras like built-in blinds, remote controls, rain sensors, or energy-efficient coatings can increase upfront costs but may save money long-term. Consider the balance between initial investment and future energy savings or convenience.
While DIY installation can reduce labor costs, it carries risks such as improper sealing or safety hazards. Hiring a professional usually ensures quality workmanship, warranty protection, and compliance with local codes.
Replacing a skylight is an investment that varies based on your choices and circumstances. Carefully considering all costs and benefits will help you make an informed decision that enhances your home’s value, comfort, and energy efficiency.
When it comes to replacing a skylight, deciding whether to tackle the job yourself or hire a professional is an important choice that impacts cost, safety, and quality. Both methods have clear advantages and potential drawbacks depending on your experience and resources.
Replacing a skylight yourself can save money and give you control over the project timeline, especially if you have some experience with roofing or construction. However, it requires careful attention to detail to avoid leaks and safety risks, making it potentially challenging for those without the right skills or tools.
Hiring a professional ensures the skylight is installed correctly, safely, and in compliance with local codes. While it costs more and requires scheduling, professionals bring the expertise, proper tools, and warranties that help prevent costly mistakes and provide peace of mind.
Choosing between DIY and professional installation depends on your skill level, budget, and comfort with roofing tasks. While DIY might appeal to experienced handymen looking to save money, most homeowners benefit from the reliability and security of professional installation.
Replacing a skylight requires careful planning, accurate measurement, and proper installation to ensure a leak-free, energy-efficient outcome. Whether fixing damage, upgrading, or refreshing an old fixture, choosing the right skylight and following clear installation steps is key to lasting success.
Regular maintenance and inspections protect your investment and keep the skylight functioning well. Considering costs, complexity, and your skill level will help you decide between DIY or professional installation—each with its pros and cons. Done right, a new skylight can brighten your home and add lasting value.
