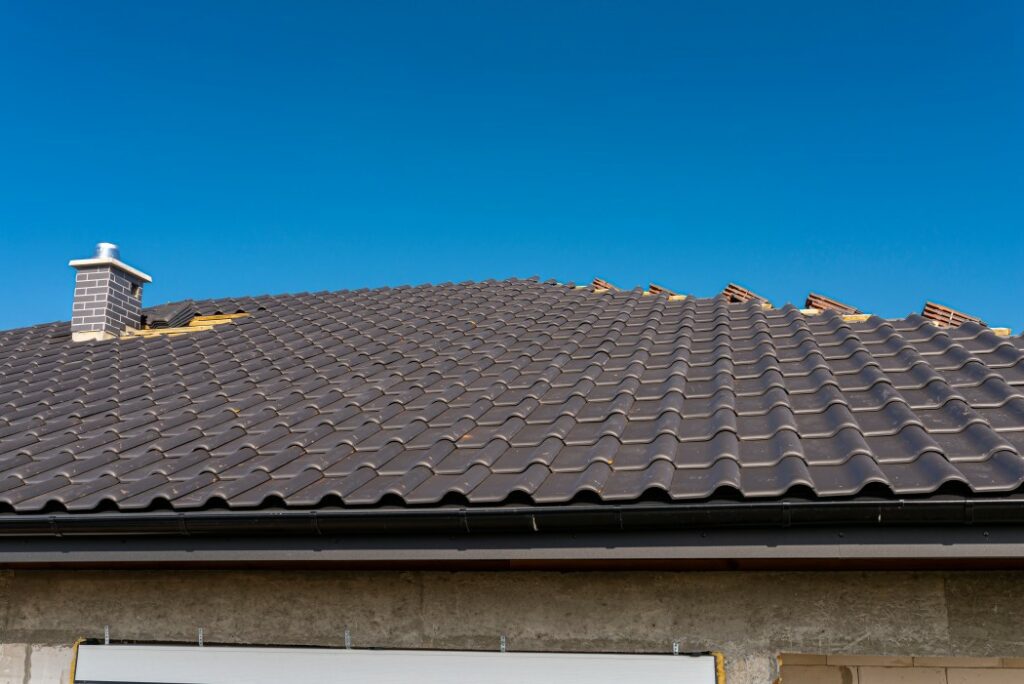
A roof is the most crucial part of a house. It protects the home from outdoor elements such as heavy rain and storms and provides insulation depending on the season and more.
There are several types of roofs, each with different materials and functions. Choose a simple design that is cost-effective but suitable for you.
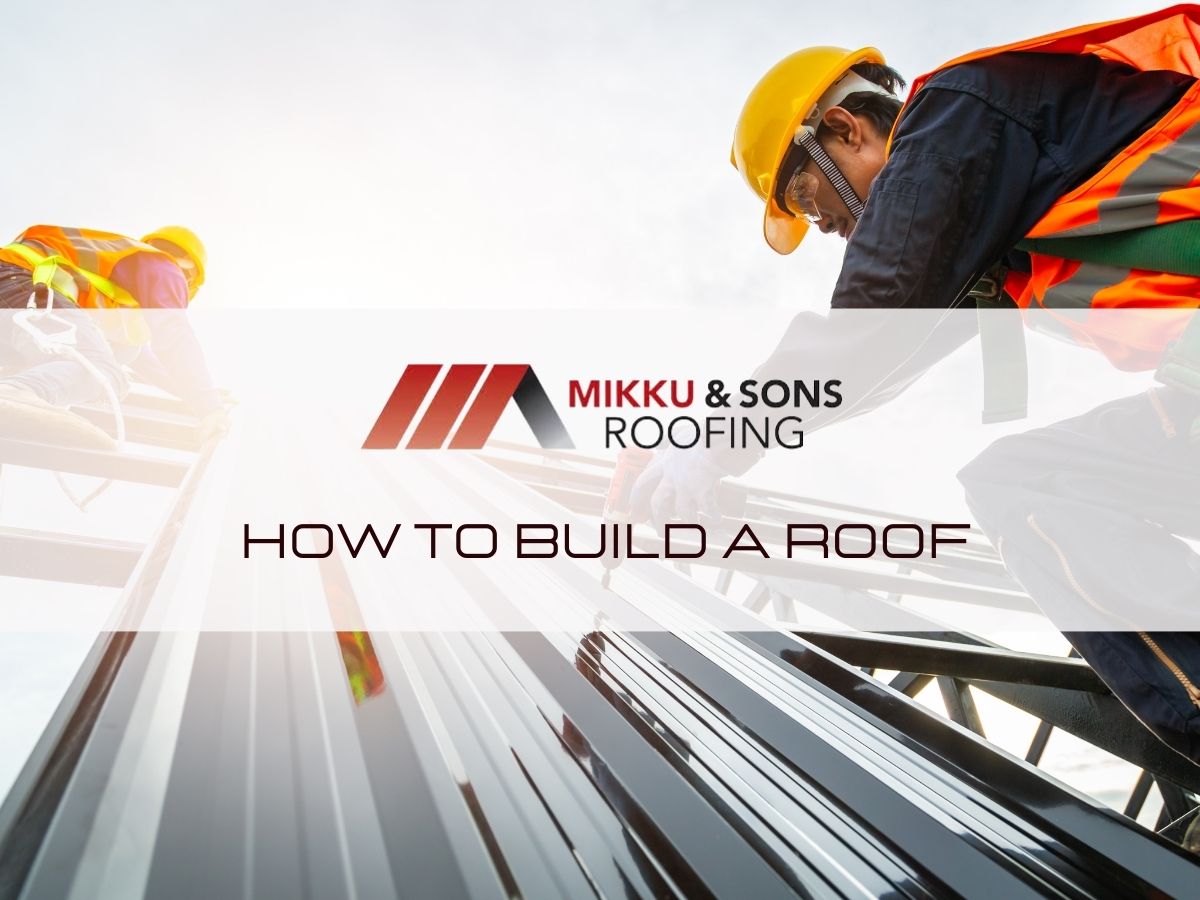
Continue reading our guide on How to Build a Roof, to get you started. However bear in mind that to build a roof, you need to be trained!
The two most common types of roofs are flat roofs and pitches roofs.
Flat roofs are slightly sloping roofs used primarily in places with top living spaces or outdoor living spaces.
Gable roof
Gable roofs are the most common type of pitched roof and look like an inverted V. They have different variations and can accommodate most building shapes.
Hipped roof
This type of roof looks like a gable roof with the top triangular points pinched inwards. It has four slopes and an even roof-to-wall junction for the eaves and houses on all sides.
The hip and valley roof
This type of roof has an L or U shape due to the building design. The valley is formed at the meeting point of the two different angled roofs.
Hipped roof with Dutch gable
This roof looks like a hipped roof with a gable roof on top of it.
Skillion roof
This is a roof with only one pitch and only one rise of rafters from the top end to the bottom end. It's a sloped roof with no ridge or valley.
A simple roof, depending on the type, has
Before you consider building your roof, it is vital to obtain accurate measurements. There is a step-by-step checklist to get the structure up when building your roof. This starts with the framework and progresses to the finished top.
The truss is the support frame of the roof where the sheathing and the rest of the roof will be held. It is important to have a good support framework for your roof to prevent collapsing, especially during extreme weather conditions.
The roofing frame comprises different parts that work together to hold it up. Each one of them plays an essential role in the roof structure.
These are wooden structures that define the shape of the roof and hold the roof deck for installation of the roof cladding. They are fixed on the slope of a roof and run in the same direction as the slope.
The rafters' overhang is the length of the rafter that extends past the roof edge, while the rafter spacing is the length between two adjacent rafters.
Hip rafters run upwards and meet at the hip of a roof.
This horizontal piece runs along the roof to provide a base for support for a continuous rafter span.
Underpurlins are fixed under the rafters horizontally and perpendicular to the direction of the slope. It prevents the roof from sagging due to over-loading, which may collapse the roof.
Purlins are fixed above the rafters and may be used when fixing tiles onto a roof. They offer base support as well as distribute some weight evenly on the roof truss.
Battens are installed along the roof and used when installing tiles on a roof. They are used as spacers and secondary support on the roof framework.
Purlins are attached directly to rafters, and they offer support for the roof and extra attachment points for the roof sheathing.
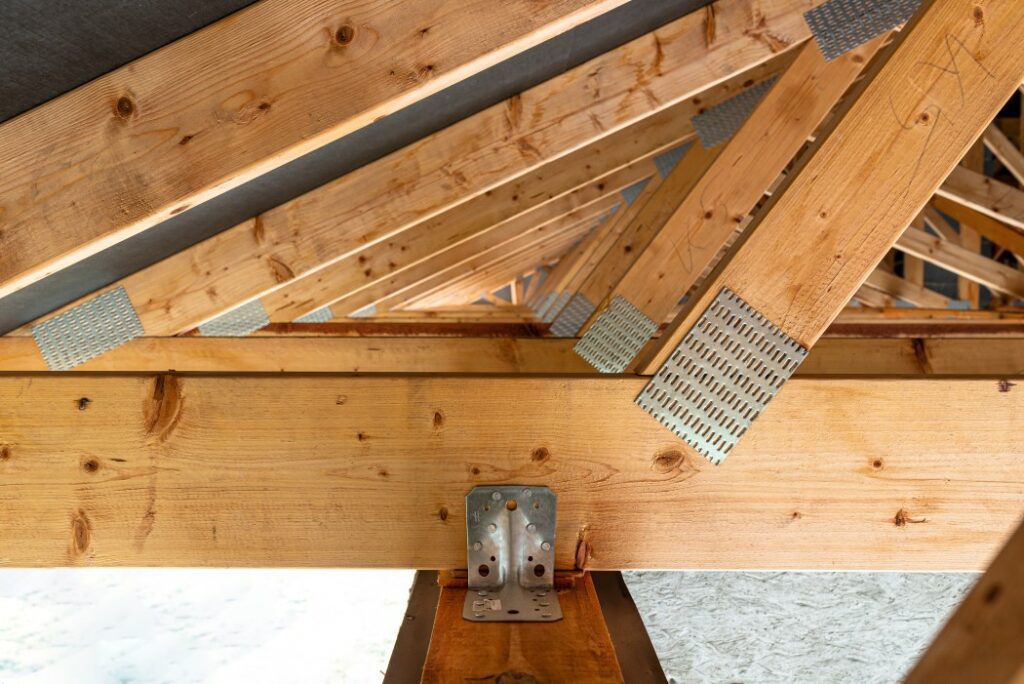
The truss is the part of the roof that produces its shapes. It is attached to the house frame with the help of the other roof frame parts.
This load is transferred via roof struts from the underpurlins and other structural components.
Depending on the application, they can either be mounted laterally or horizontally.
The ridge board usually referred to as the roof's spine connects the end trusses of a roof while providing attachment points for rafters.
The roof hip runs vertically from intersections or corners of a roof to the ridge.
The roof flashing is made of metal and is installed over the open roof valleys. It directs water down the roof and may also be installed around roof accessories like skylights and chimneys.
In addition to complementing joists in the ceiling, collar ties bind rafters on opposing slopes of a roof by tying them together horizontally.
They form a triangle with opposite rafter pairs.
On the rafters or roof cladding, the valley board serves as a surface where the framework of another roof can be fixed.
Some porch roofs frequently use them, such as those with a gable design.
These run the length of the roof's vacant space. They provide structural support for the roof and serve as ceiling mounting surfaces.
As you have learned, the roof frame is the most important part since it keeps the roof together. Building it the right way is the first step toward having a robust and long-lasting roof, but let's get further into How to Build a Roof.
1. Measure the roof
To get the pitch (height) and the roof slope, you need to make a plan with the necessary measurements.
This includes determining the pitch or the height of your roof. This will give you the roof slope because you already have the horizontal measurements to which the truss will connect.
Your pitch depends on how steep you want it to be. A low-pitched roof has less height than a high-pitched roof, which may have a truss creating a maximum of 45 degrees.
You could use a roofing calculator to determine needed material quantities.
2. Make a plan
Once you have the roof measurements, draw out a plan with the roof style, shape, and spacing. Rafter spacing is the space between two successive trusses, comprised of a pair of rafters and a collar tie.
The rafter span is the length of the rafter from the ridge board to the edge of the roof. If your roof has a long rafter span, it is advisable to use struts and underpurlins to support the middle sections or to join two rafters.
3. Purchase the roofing materials
The type of materials you buy depends on the roof you want to build. This is greatly influenced by the type of roof cladding and the roof's slope.
Flat roofs require different materials compared to pitched roofs. There are various types of roof cladding to choose from, each with its pros and cons.
The type of roof cladding you choose is dependent on your location, environment, and local regulations. Talk to a roofing contractor or get local guidelines on selecting the best type.
4. Get ready to build
This includes on-site safety precautions and understanding the layers of the roof. The frame goes up first, followed by the roof deck, underlayment installation, and the roof covering.
Any insulation is placed in the attic after the ceiling is attached to the ceiling joists. This can be done before putting the roof deck or sheathing.
Secondary insulation includes ice and water dam protection in areas vulnerable to water damming. This could lead to roof collapse as a result of the extra load.
5. Install the truss
The truss may be hoisted with the help of a crane or by a trained workforce, whereby it is laid out flat and then put in an upright position once up. The truss spacing depends on a few things.
Support the weight of the truss or hold it in place by using temporary braces. This will hold the trusses in place till the roof frame is complete and can regulate itself.
Nail a plank of wood spanning the width of the roof to the wall and, at successive thirds, install three vertical planks that will hold the truss at three points.
Attach the two end trusses to the support braces.
6. Install the ridge board
The ridge board will connect the trusses at the ends to support the other roof framing. If the ridge board is not continuous from one end to another, and if local building codes allow it, you could use the bracing techniques to attach the two together.
You can use braces to hold the roof frames in place as you go about your project to make everything simpler. The ridge board might be heavy for a long span, and bracing it at points to the joists may be helpful.
7. Attach the rafters
Connect them with collar ties to make a firm secondary truss in pairs. Do this successively according to the rafter spacing chosen.
If the rafters span a long length, connect their underside to the ceiling joists using struts. Putting in underpurlins and securing them the right way makes it possible for these attachment points to be made.
8. Nail the roof sheathing
Nail your roof sheathing to the rafters; ensure it is attached at the base and the nails aren't hanging. Start from one corner of the base and move across and upwards for a good finish.
9. Install the drip edge
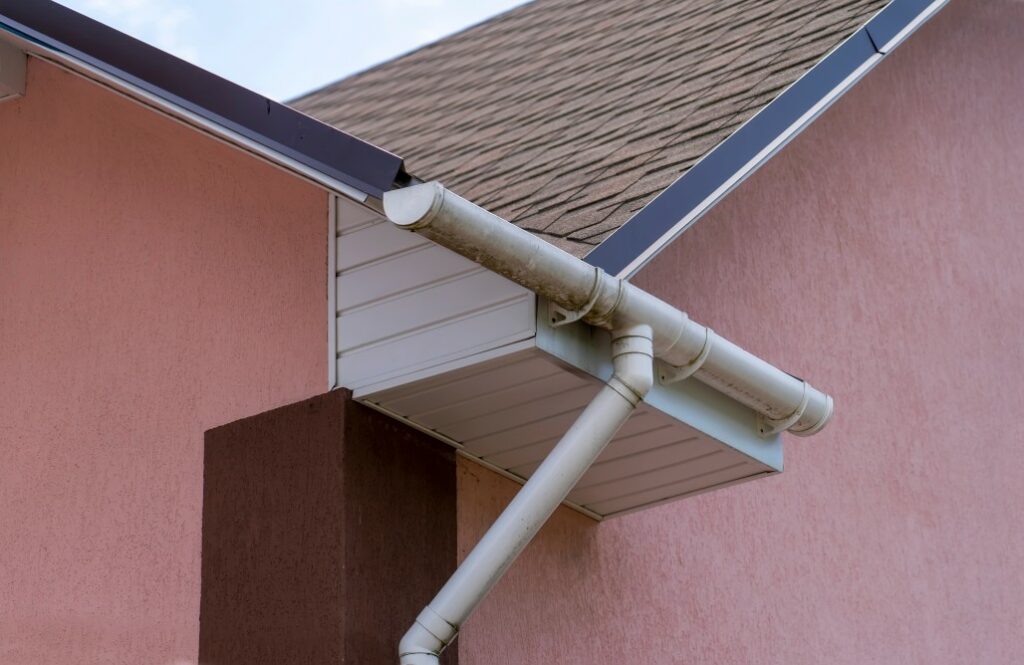
Connect the drip edge to the roof. This directs water to the gutter or off the roof, preventing water from seeping up the sheathing into the roof base.
10. Install the underlayment.
This protects the roof from water penetration if it seeps through a nail hole or damaged roof.
The underlayment is installed from the edge upwards to the ridge. Overlap the layers by 4"–6" and 8" over the other side of the roof to ensure a watertight cover.
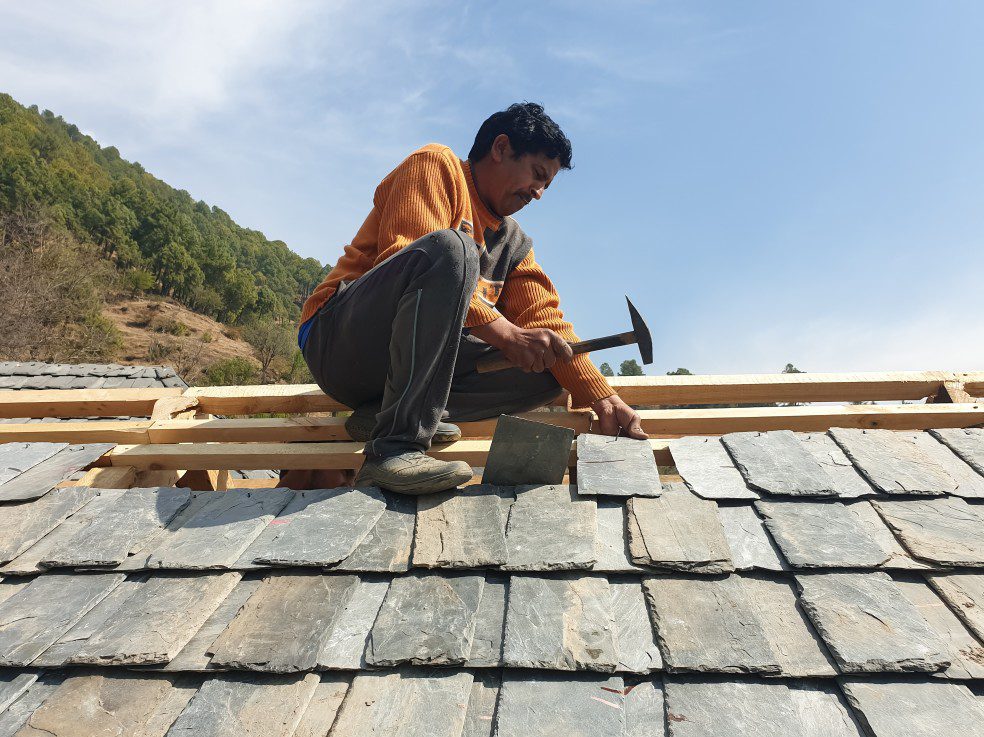
11. Install the roof cladding
Install the appropriate roof cladding as per the manufacturer's instructions.
A flat roof can be either level or angled. For angled flat roofs, the truss is shaped like a right square, with the hypotenuse being the roof's slope.
Building a flat roof requires some unique materials. Flat roofs tend to let off run-down water slowly and therefore are subject to prolonged water contact compared to sloped roofs.
For this reason, materials developed to serve the purpose of protecting the roof are used. Flat roofs, in general, usually have a 1–10-degree slope so that water can run down efficiently.
To construct a flat roof, you will need;
Installation follows the standard roof method but is different in terms of the frame type due to the slope. The most significant difference is in the roofing materials used.
The iso-board is put over the roof sheathing or deck for insulation.
An EPDM rubber membrane is used after the insulation. It is a light but tough material that offers protection from water.
The rubber primer is used when connecting rubber membranes at different parts of the roof, for example, when installing a porch roof or extending the roof. A seam tape is used after the two layers of rubber are primed to provide a good seal.