Do you want to work as a roofer in Arizona? The building business in Arizona is booming; therefore, many jobs are available for roofers in the Grand Canyon State. The roofing employment market may be competitive whether you're just starting out or have years of experience under your belt.
The purpose of this blog is to guide you on how to find a roofing job in Arizona and help you get started in the roofing industry. We will go through everything you need to know to get the ideal roofing project, from finding reliable local contractors to making connections with other experts in the field. Let's dive in right now!
If you’re looking for a job in the roofing industry in Arizona, you’ve come to the right place. With plentiful resources for contractors and job seekers, Arizona is a great place to start your search for roofing jobs. From Phoenix to Flagstaff, there are plenty of opportunities to gain experience and make a living in the roofing industry.
It is crucial to be well-prepared for the job search. Ensure a resume ready to go, and be sure to list any relevant experience you have in the roofing field. Utilize online job boards to search for roofing jobs in your area.
LinkedIn, Indeed, and Craigslist are three popular options. Additionally, consider networking with roofing contractors in Arizona. Ask them if they are hiring or if they can refer you to someone who is.
There are several resources available to help you find roofing jobs in Arizona. Consider joining a trade organization or professional association such as the Arizona Roofing Contractors Association (ARCA). ARCA provides its members with a job board and access to a network of other roofing professionals.
You can also join local clubs, such as the National Roofing Contractors Association of Arizona, to make connections and stay up-to-date on the latest industry news.
In addition to the resources above, there are several other avenues to explore when looking for roofing jobs in Arizona. Reach out to local schools and businesses, as they may be looking for contractors to work on their roofs. You can also attend job fair trade shows to meet potential employers and learn more about the industry. Finally, consider advertising your services in newspapers and online to get the word out.
Choosing a reliable roofing contractor in Arizona can be challenging, but it’s crucial if you want your roof to survive for years. Choose the best roofing contractor for your house by taking your time and doing some research. If you need a roofer in Arizona, read below for some tips on how to get the best one.
These tips can help you find a good roofer in Arizona. Take your time and research to find an experienced contractor that will do a good job on your roof.
Roofing- is the practice of installing or repairing roofs on houses and other buildings. It is a specialized trade that requires knowledge and skill to complete. Roofers are responsible for installing, repairing, and maintaining roofs. They must be knowledgeable about construction materials, tools, and safety procedures. Roofers must also be able to work in all kinds of weather conditions, as well as in confined spaces.

Arizona is known for its hot, dry climate, making it a good place for roofing jobs. The state is also known for its diverse landscape, including desert and mountain regions. Roofing jobs in Arizona provide good benefits to those who take them on. Here are a few key benefits of doing roofing jobs in Arizona.
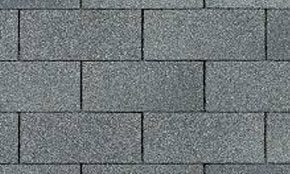
One of the great benefits of roofing jobs in Arizona is the wide variety of materials available.You can find everything from traditional asphalt shingles to modern metal options. It gives you multiple choices when finding the perfect roofing material for your job.
Arizona is known for its high-quality craftsmanship when it comes to roofing jobs. Roofers in the state have access to the latest technology and materials, allowing them to complete the job quickly and efficiently. It ensures that your roof will last for years to come.
Roofing jobs in Arizona are often more affordable than in other states due to the competitive nature of the market, as well as the availability of materials. In addition, roofers often offer discounts for large jobs or customers who purchase their materials in bulk.
Roofers in Arizona are typically highly professional and experienced. They understand the importance of providing quality work and customer service. It ensures that you get the best possible results from your roofing job.
Roofers in Arizona are required to follow all safety regulations and guidelines. It ensures that the job is correct and safe. This also helps to ensure that your roof is free from potential hazards that could result in damage or injury.
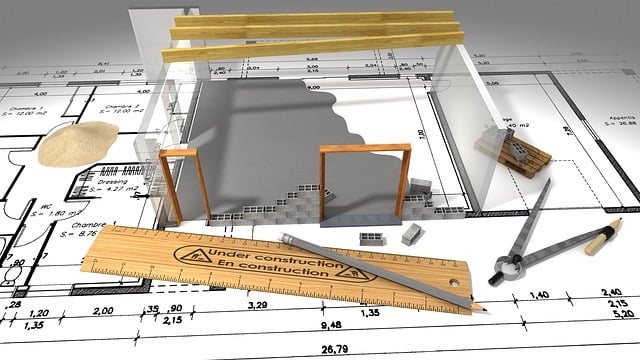
Roofing jobs can be very complex and require a lot of preparation. Whether you are a professional roofer or a homeowner looking to repair or replace your roof, it's important to make sure you have the necessary materials and tools to get the job done right. Here are some tips for preparing for a roofing job.
Before starting a roofing job, do some research. Look into the type of roof you have, the materials you need, and the tools and safety gear required. Also, consider the weather and terrain when preparing this job.
Knowing what the job will entail, it's time to gather the necessary materials. These include the roofing materials, such as shingles, nails, and sealants, as well as any other necessary supplies, such as ladders, buckets, and safety gear.
Before beginning the job, ensure the area is cleaned and cleared of debris and debris. These include removing any existing shingles, trimming trees, and removing any other obstacles that could interfere with the job.
Once the area is cleaned and cleared, it's time to inspect the roof. Look for any signs of damage, such as missing shingles or loose nails, and make any necessary repairs.
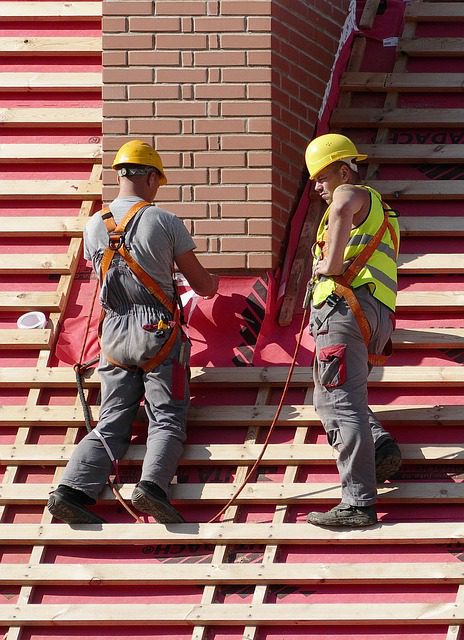
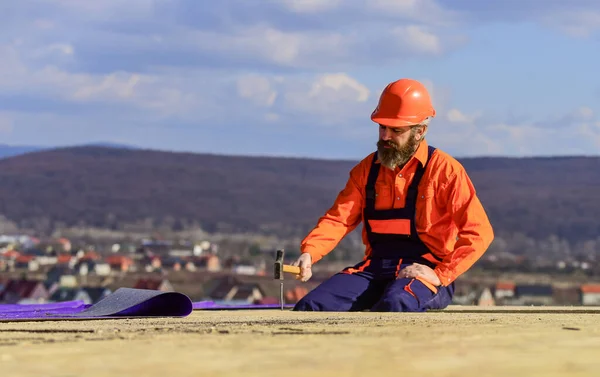
When working on a roof, it is required to use the proper safety gear. Ensure to use a harness and wear a hard hat, protective eyewear, and gloves.
When you have all the materials and safety gear, it's time to set up the equipment. These include setting up ladders, scaffolding, and other tools and equipment needed to complete the job.
Finally, it is best to check the weather before beginning the job. If the weather is too windy, rainy, or otherwise hazardous, wait until the conditions are more favorable.
Experiencing the warmer weather and longer days in Arizona, roofing job opportunities are plentiful. Whether you’re looking for a full-time job or a part-time gig, there are roofing job opportunities to check in the Grand Canyon state.
But how do you go about evaluating these job opportunities? Here are some tips for evaluating roofing job opportunities in Arizona:
Before committing yourself to any roofing job, it’s important to do your due diligence and research the employer. Look up their online reviews, ask around, and see if anyone has previously worked with them, and find out what their reputation is. It’s also important to make sure they are licensed and insured.
Once you’ve narrowed your list of potential employers, check the job description. Be sure to pay special attention to the duties and responsibilities, as well as the required skills and qualifications. It is a great way to make sure the job is a good fit for you.
Every job should come with some benefits, like health insurance, vacation time, or retirement benefits. So, check for these and make sure the job you’re considering offers a competitive package.
Location is also an important factor to consider when evaluating roofing job opportunities in Arizona. When looking for a full-time or part-time job, you may want to consider the location of the job to determine if it is close to your home.
Last but not least, you should consider the pay. Compare the salary offered by the other employers you have chosen and make sure you’re getting a competitive wage.
By following these tips, you can evaluate roofing job opportunities in Arizona and find a job that will fit you. Good luck!
Finding a roofing job in Arizona can be an opportunity for anyone interested in the roofing trade. It is better to be prepared for the job search by gaining experience, obtaining certifications, and researching employers. There are many ways to find roofing jobs in Arizona, including networking, online job sites, and trade magazines. Finally, evaluate job opportunities before applying. By following these steps, you can find a roofing job in Arizona that is right for you.
Hello there! Are you a homeowner in Phoenix, Arizona? If so, then you may have a porch roof that needs some attention. Porch roofs are a great addition to any home, providing a cozy outdoor space for relaxation and entertainment.
However, like any other part of your house, porch roofs need proper maintenance and care to stay in top shape. One important aspect of porch roof maintenance is ventilation. In this article, we will explore whether porch roofs need to be vented in Phoenix Arizona, and discuss whether it is necessary or not. So, let's dive in!
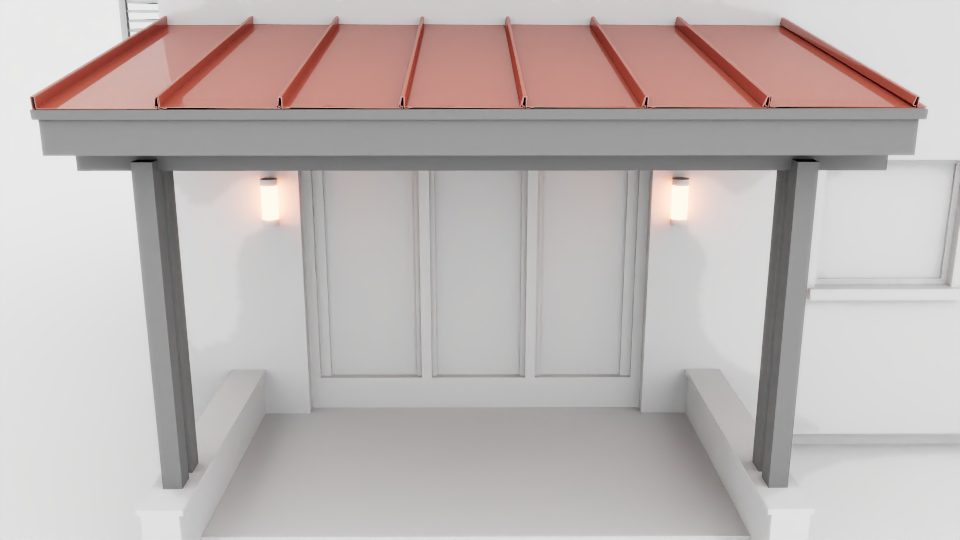
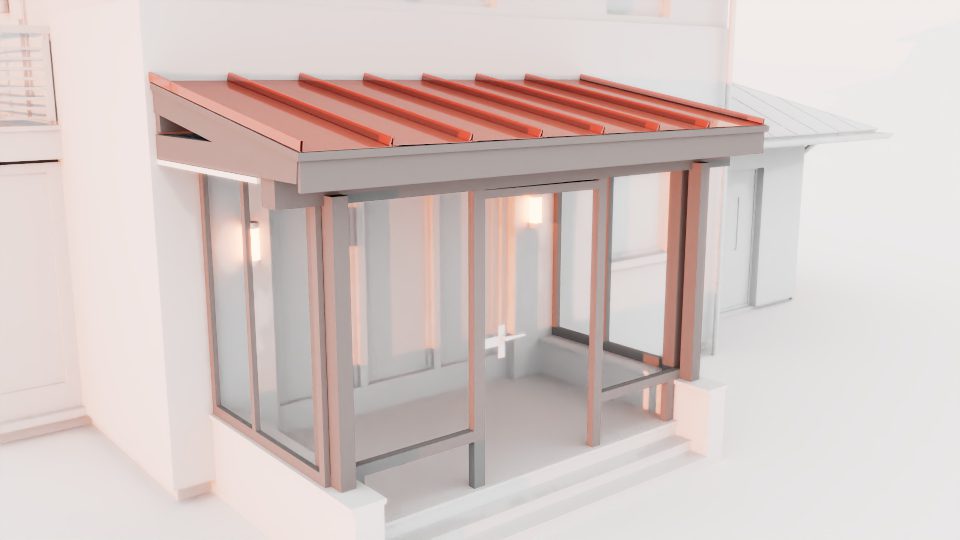
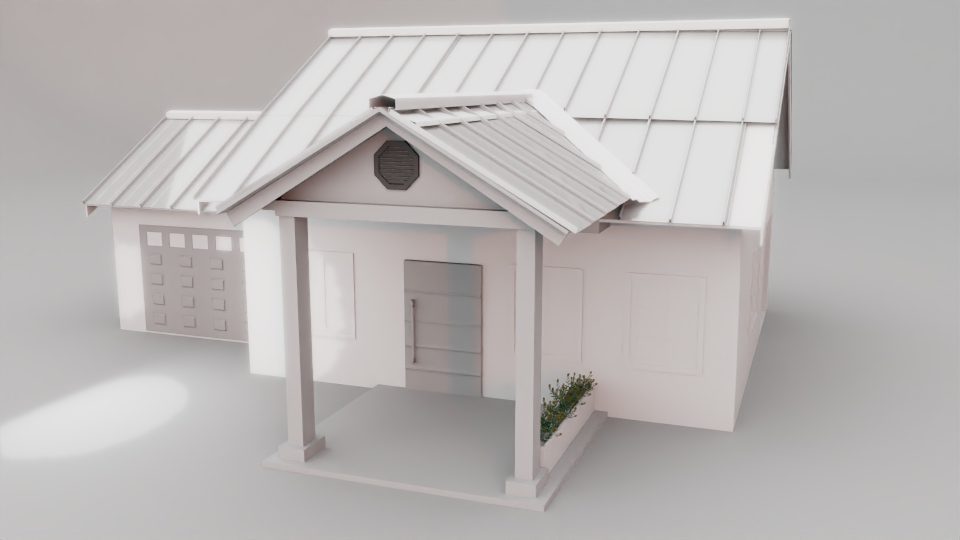
Before we delve into the topic of porch roof ventilation, let's first understand what porch roofs are. Porch roofs are an extension of the main roof that covers a porch or patio area. They come in various shapes and sizes, from simple flat roofs to more complex gable or hip roofs. Porch roofs can be attached to the front, side, or back of a house, and are often supported by columns or pillars.
The purpose of a porch roof is to provide shade and shelter to the outdoor space, making it a comfortable area to sit and relax in. They also add aesthetic value to the home and can increase its curb appeal. So, if you have a porch or patio area in your home, chances are you have a porch roof too.
The answer is YES! Like any other part of your home, porch roofs require proper ventilation to maintain health and functionality.
Without proper ventilation, your porch roof can suffer from a range of issues, such as moisture buildup, mold growth, and premature aging. These problems can compromise the structural integrity of your porch roof and compromise the safety and comfort of your outdoor living space. And let's face it, nobody wants a moldy and old-looking porch roof, right?
Good ventilation helps to regulate the temperature and moisture levels in your porch roof, preventing damage and ensuring that it stays in good condition for years to come. So, if you want to keep your porch roof looking and functioning its best, make sure to give it the ventilation it needs.
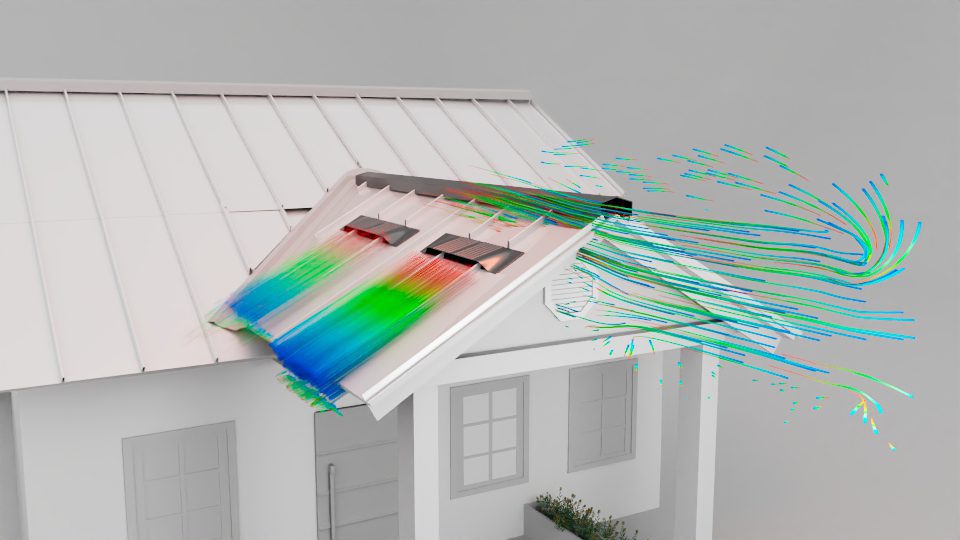
Do you know what's cooler than a cool roof? A well-ventilated roof! That's right, roof ventilation is not just a fancy term, it's actually crucial for the health and longevity of your roof.
Roof ventilation is essential to maintain the health and longevity of your roof. Proper ventilation helps to regulate the temperature and moisture levels in your attic, preventing damage to your roof and the rest of your home.
Here's why:
So, make sure to give your roof some love by paying attention to its ventilation needs, including your porch roof!
Okay, so we've established that porch roofs need proper ventilation to stay healthy and functional. But are there any instances where a porch roof can do without ventilation? The answer is yes, but these situations are few and far between.
In general, most porch roofs require ventilation to prevent moisture buildup and damage, but there are some instances where ventilation may not be necessary.
Shed roofs are single-sloping roofs that are often used for porches, patios, or outdoor storage areas. Since they have only one slope, they don't require any ridge or soffit vents. However, installing a gable vent at the top of the roof can still help improve airflow and reduce moisture buildup.
Gable roofs are the most common type of porch roof, with two slopes that meet at a ridge. These roofs require ventilation to prevent moisture buildup and damage, and homeowners can install ridge vents or gable vents to achieve proper airflow.
Flat roofs are another type of porch roof that may not require ventilation. These roofs are typically made of concrete, metal, or rubber-like material, and often feature a slight slope for water runoff. Since they don't have any ridges or slopes, ventilation may not be necessary. However, if the flat roof is attached to the main roof, proper ventilation is required.
Screened-in porches are another type of porch that may not require ventilation. Since they are enclosed, the screens can provide natural ventilation, and installing additional vents may not be necessary. However, if the porch is not screened, proper ventilation is still required to prevent moisture buildup.
In some cases, ventilation may not be necessary if the porch roof is in a dry climate or if the roof is not exposed to direct sunlight. Additionally, if the porch is used only occasionally and doesn't have any electrical or HVAC equipment, ventilation may not be necessary.
Remember, a healthy porch roof is a happy porch roof, and a happy porch roof makes for a happy homeowner. So, make sure to give your porch roof the love and care it deserves!
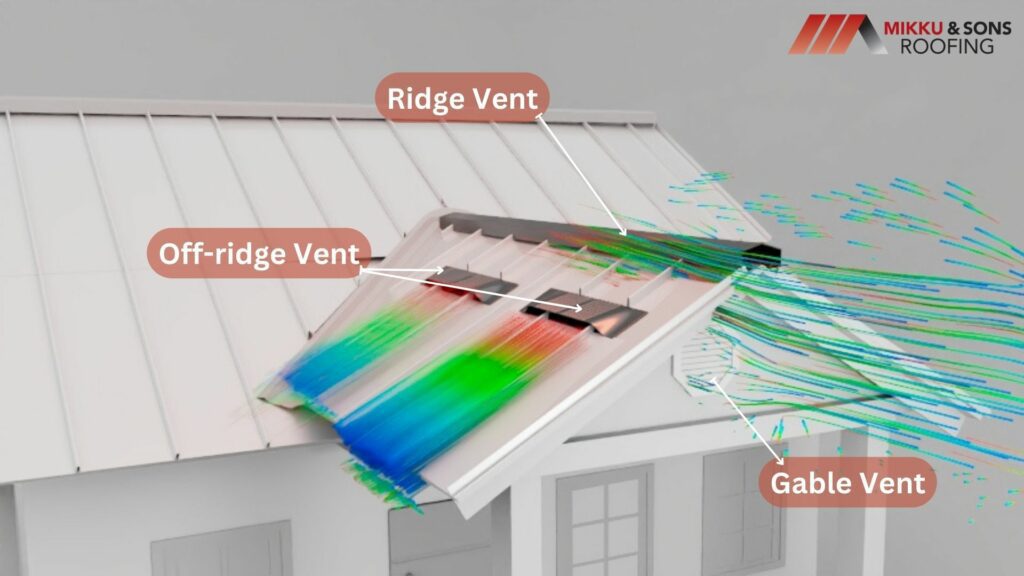
When it comes to porch roof ventilation, there are several types of systems that can be installed. Here are a few of the most common options:
Ultimately, the type of ventilation system you choose will depend on the specific needs of your porch roof and your budget. But regardless of which system you choose, proper ventilation is key to maintaining the health and longevity of your porch roof.
So, go ahead and get creative with your ventilation options! Whether you opt for a classic ridge vent or a high-tech solar-powered fan, your porch roof will thank you for the fresh air and healthy environment.
When connecting a porch roof to another type of roof, it's important to consider the ventilation requirements for both roofs. This may require installing additional vents or modifying existing ventilation systems to ensure proper airflow between the two roofs. Proper ventilation is essential to prevent moisture buildup and damage to the roof.
By ensuring proper ventilation when connecting a porch roof to another type of roof, you can prevent moisture buildup and damage to the roof, ensuring a longer lifespan for your porch roof.
When it comes to porch roof ventilation in Phoenix, Arizona, there are specific laws and regulations that homeowners and contractors must follow. These laws are in place to ensure that the roof is structurally sound and that it provides proper ventilation to prevent moisture buildup and other types of damage.
The City of Phoenix has a roofing code that outlines the specific requirements for roof ventilation. The code stipulates that a minimum of 1/150th of the attic area must be ventilated, with a balanced distribution of vents between intake and exhaust vents.
In addition to the roofing code, there may be other laws and regulations that govern porch roof ventilation, depending on the location and type of property. For example, historic buildings may have additional requirements to preserve the integrity of the structure.
If a porch roof is found to be non-compliant with the ventilation requirements set out in the roofing code or other laws and regulations, the homeowner or contractor may be subject to fines or other penalties. In addition, failure to comply with ventilation requirements can lead to roof damage, which can be costly to repair.
Compliance with porch roof ventilation requirements is essential to ensure the safety and longevity of the roof, as well as the health of the occupants of the building. Proper ventilation prevents moisture buildup, which can lead to mold and mildew growth, rot, and other types of damage that can compromise the structural integrity of the roof.
Proper ventilation is essential for porch roofs in Phoenix, Arizona. Without adequate ventilation, the roof can be susceptible to damage caused by moisture buildup, including mold and mildew growth, rot, and other types of damage that can compromise the structural integrity of the roof.
Homeowners and contractors must comply with the specific requirements set out in the roofing code and other laws and regulations to ensure that the porch roof is structurally sound, and provides proper ventilation.
In addition, proper ventilation is essential to ensure the safety and health of the occupants of the building and this way, homeowners can ensure that their roof is protected from damage, and their property remains safe and secure.
Picture this: you're sipping a cup of coffee in your living room as the rain gently taps on your roof above. Suddenly, you hear a loud crash from above, and then water starts pouring through the ceiling.
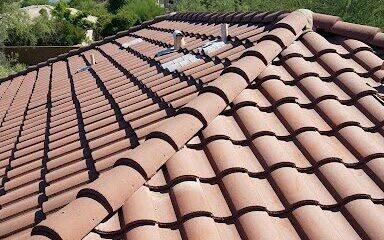
You take a look up and notice that your roof has finally caved in. Yikes! Now you have to decide whether to replace your aging roof with clay tiles or with something more up-to-date, like concrete. Yes, it's a difficult concrete vs clay tile roof choice, but have no fear!
We're here to help you make a smart choice that will not only protect your home but also make it look better from the exterior. If you're trying to decide between a clay roof and a concrete roof, this essay can help you make an informed decision.
Do you find yourself drawn to the traditional beauty of a tiled roof for your home? If that's the case, you should look into purchasing clay tiles for your roof.
These tiles have been in use for centuries, giving them a rich heritage that dates from ancient times. Homeowners love clay tiles for their durability, variety of colors, and one-of-a-kind appearance.
So, what exactly are clay tiles, and why are they so popular?
They are made from natural clay, shaped, and burned at high temperatures to provide a strong and long-lasting roofing material. First, the clay is extracted from the ground, and then it is processed to eliminate any unwanted particles, like rocks or sticks.
After that, it gets combined with water and other ingredients to form a clay that can be molded. Once the mixture is ready, it is shaped into the tile's final form and set aside to dry.
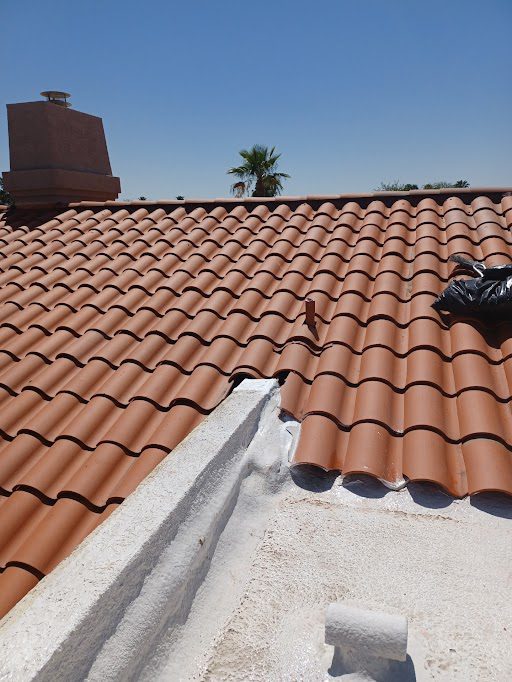
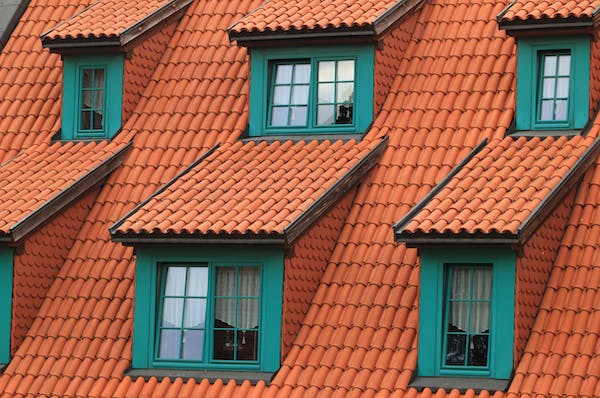
After being shaped, the clay tiles are burned at high temperatures to make a tough and long-lasting roofing material. The clay tiles' signature red or orange hue comes from the firing process, which also renders them weatherproof.
Clay roof tiles can be found in a wide spectrum of colors, from the more classic red and orange to the more contemporary green, blue, and gray. The tiles' final color is affected by numerous variables, including the clay they were made from and the temperature of the firing process.
Clay tiles can also be found in a number of different forms and styles, from the classic S-shaped tile to the more contemporary flat or curved tile. By offering such a wide selection of sizes, shapes, and designs, tile companies give homeowners more opportunities to improve the aesthetic value of their homes.
Clay roof tiles have a strong reputation for lasting for many years. If properly cared for, they have a lifespan of 100 years or more, making them a wise choice for homes in need of a durable roofing material.
Clay tiles are fireproof, windproof, and watertight, making them a great roofing material for residences in high-risk climates. They also have a high resistance to decay and insect damage, which can add years to their useful lives.
Roofs made from clay tiles last a long time and have a low impact on the environment. They are constructed with renewable resources that may be found in abundance worldwide.
They're great insulators too, so that helps cut down on utility bills and environmental impact. Also, clay tiles are safe for both homes and the environment because they don't include any chemicals or contaminants.
Keeping clay roof tiles in good condition calls for consistent maintenance. Periodic cleaning is necessary to eliminate dirt, moss, and other organic buildups that can occur on the tiles.
Once a tile becomes cracked or broken, it should be replaced immediately to avoid further problems caused by water.
As a homeowner on the market for a new roof, you may feel confused by the numerous options available to you. You have to decide whether to use asphalt shingles, metal, or another material.
In any case, concrete roofing tiles might be the answer you didn't even realize you needed. Concrete roof tiles have become increasingly common in recent decades.
They are manufactured by shaping a cement, sand, and water combination into the required form, and then curing the material to make it hard and waterproof for use as a roofing material.
Concrete tiles are a versatile roofing material since they can be made in a wide variety of forms, sizes, and colors to suit a wide range of architectural styles and personal tastes.
Concrete roof tiles can be found in a broad variety of colors and designs, from the more conventional red and orange to the more contemporary green, blue, and gray. They can be styled to seem like clay tiles or slate to complement existing roofs.
Concrete tiles can be purchased in a wide variety of forms and styles, from flat to curved to interlocking. As a result, homeowners can find a tile that complements their home's aesthetic while also adding to its value.
Concrete tiles are widely regarded as the most resilient and long-lasting option for roofing. They are a wonderful option for homeowners who want a roof that will last for at least half a century with minimal upkeep.
Concrete tiles are a wonderful option for residences in high-risk areas due to their resistance to fire, wind, and water damage. They also have a high resistance to decay and insect damage, which can add years to their useful lives.
Concrete tile roofs last decades and reduce waste because they are weather- and fire-resistant. They reduce heating and cooling energy by insulating the building. Concrete tiles can be recycled as tiles or aggregate for road bases, landscaping, and other construction materials.
However, manufacturing concrete tiles consumes a lot of energy and releases carbon dioxide and other pollutants, which contribute to climate change and air pollution. They require a lot of water to make, which strains local water resources and ecosystems.
Maintaining the quality of concrete roof tiles calls for consistent care and attention. The tiles need to be cleaned on a regular basis so that dirt, moss, and other organic buildups may be removed.
A tile that has been fractured or cracked should be replaced immediately to avoid further problems due to water leakage.
Concrete and clay tiles are two of the most well-liked roofing materials available.
There are advantages and disadvantages to both materials, but there are also some important distinctions to keep in mind.
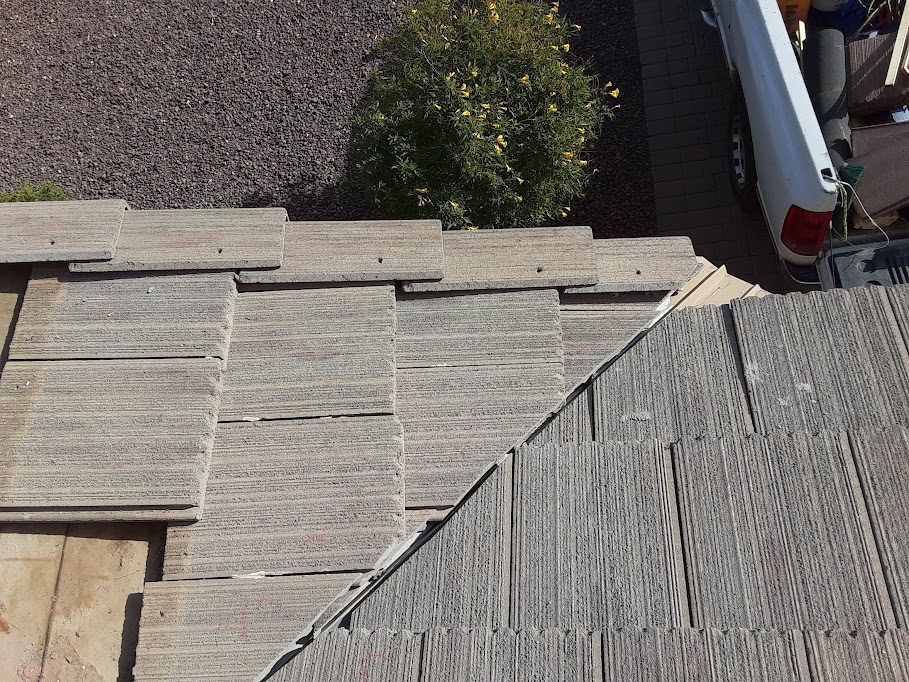
The weight differential between concrete and clay tiles is one of the most noticeable distinctions between the two materials. When compared to clay tiles, which weigh on average around 600 pounds per square, the weight of concrete tiles is significantly higher at around 900 pounds per square (100 square feet).
Thus, the installation cost of concrete tiles may rise if extra structural supports are needed.
There are a variety of sealants available for use on both concrete and clay tiles to prevent damage from moisture. There is a need for periodic reapplication of the sealant applied to the surface of concrete tiles to prevent water damage and deterioration.
Sealing clay tiles, on the other hand, can be done with an impregnating sealer that penetrates the tile and extends its lifespan.
There are some key differences to keep in mind while installing either concrete or clay tiles. Screws or nails are used most often for installing concrete tiles, whereas mortar or adhesive might be used for clay tiles.
The additional time and effort needed to install concrete tiles is a potential drawback of this material.
Despite their similar durability, concrete tiles are much less likely to crack or break than clay tiles. This is due to the fragility of clay tiles, which can be damaged by impacts too great, such as those caused by falling tree limbs or hail.
The weight and density of concrete tiles make them much less prone to break or chip.
Whether you choose concrete or clay tiles, you will eventually need to tend to them and possibly repair them. Yet, maintenance and repair requirements can be of varying natures.
Clay tiles should be replaced if they crack or break, but concrete tiles can be resealed or patched on occasion.
Because of their increased permeability, clay tiles are more prone to water damage than their concrete counterparts. Water can seep into the material and accelerate its deterioration if the seams aren't sealed properly.
Meanwhile, concrete tiles are more resistant to water damage because they are less porous.
Clay tiles may be more sensitive to salt intrusion if you reside in a region with high quantities of salt in the air, such as near the beach. Over time, this can cause the tiles to become brittle and lose their original color. Saltwater infiltration is less likely to damage concrete tiles.
Clay tiles may develop efflorescence, a white powdery substance caused by mineral accumulation. It may not cause any damage to the tiles, but it certainly detracts from their aesthetic value. It's less common for efflorescence to occur in concrete tiles
Both concrete and clay tiles come in a range of colors and styles, but there are some differences in their long-term appearance. Concrete tiles may fade over time due to exposure to sunlight, while clay tiles may retain their color for longer.
Concrete and clay tiles, respectively, are both extremely long-lasting and durable, often lasting 50-100 years or more. Yet, because of their resistance to ultraviolet (UV) damage and weathering, clay tiles may have a modest advantage in durability.
Extreme weather conditions, such as high winds and heavy rainfall, are no match for either concrete or clay tiles. Concrete tiles, however, may prove more long-lasting than their clay counterparts due to their greater weight and density.
There is a wide difference in pricing for both concrete and clay tiles from different manufacturers and roof sizes. Concrete tiles are often less expensive than clay tiles, but the cost of adding the necessary support systems can mount up quickly.
Concrete roof tiles:
Clay roof tiles:
Concrete Vs Clay tiles
Roofing tiles made of clay and concrete each have their own set of benefits and drawbacks. Clay tiles have been used for centuries because of their durability, beauty, and resilience to fire, water, and other natural disasters.
Although they are more beautiful, they are also more delicate and need more upkeep. As an alternative, concrete tiles are more long-lasting and need less upkeep, although they may fade in color and are heavier.
The final decision between these two roofing options should be based on the homeowner's specific requirements, financial constraints, and aesthetic choices.
Homeowners can make a well-informed selection about a roofing material that serves their needs and those of the home's aesthetics by comparing the advantages and disadvantages of several options.
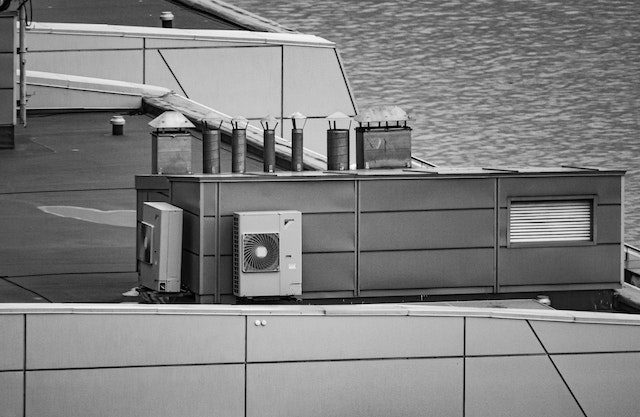
Welcome to the Arizona sun! It goes without saying that the summer heat in the desert can be awful, so keeping your house or place where you work cool requires a reliable air conditioning system.
However, did you know that mounting your air conditioner on the roof has benefits? In this article, we'll examine why, in Arizona, setting up an air conditioner on the roof is the best way to battle the heat.
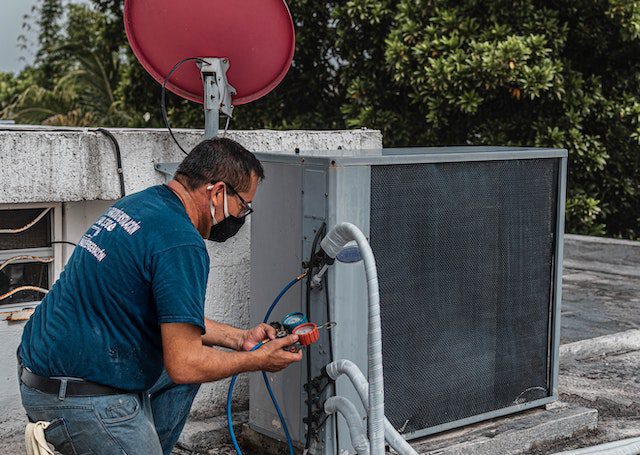
As Arizonans, we know that the desert sun can be brutal in the summer months. Many households and businesses depend on air conditioning systems to be comfortable throughout the summer. But why do so many Arizona residents decide to install their air conditioners on the roof?
For residents of Arizona, installing an air conditioner on the roof is the greatest choice for a number of reasons. First of all, because it is the building's highest point and receives the most direct sunlight, the roof.
This makes it possible for the air conditioner to absorb heat more effectively and maintain the building's interior temperature. Second, the location on the roof makes it simple to maintain and repair the unit. Last but not least, installing a unit that needs a lot of space on the roof is a great idea.
There are benefits to installing an AC unit on the roof, but there are also some significant factors to take into account. To prevent potential issues, it's crucial to ensure that the roof is sturdy enough to hold the weight of the air conditioning unit and that the device is installed and maintained correctly. Additionally, it's crucial to confirm that the location of the unit will allow for proper ventilation.
You can be confident that you're making the greatest choice for your house or place of business by taking the time to explore the benefits and drawbacks of having an air conditioner on the roof in Arizona. Your rooftop air conditioner can give you many years of dependable service with appropriate installation and maintenance.
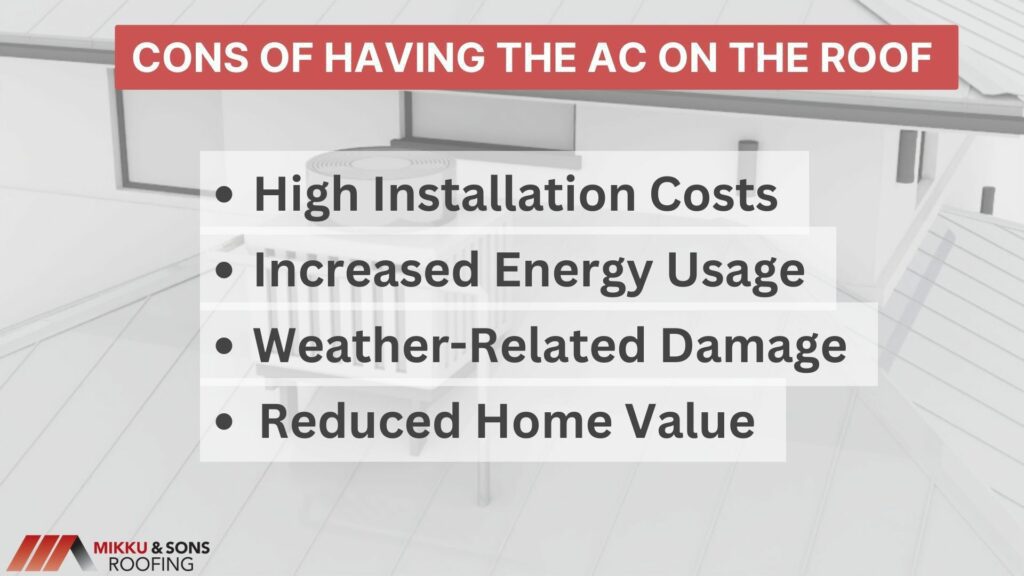
Air conditioning installation on the roof is common in Arizona due to the state's hot and dry climate. Putting an air conditioner on the roof in Arizona has its advantages, there are a few drawbacks that should be considered first.
The high price of installation is one of the major drawbacks of installing a rooftop air conditioner in Arizona. It can be time-consuming and costly to have a new air conditioning system constructed specifically to fit the roof. In addition, the price of labor and supplies to set up the unit might add up quickly. It is also important to factor in the price of any essential maintenance or repairs.
Having an air conditioner on the roof in Arizona also has the potential downside of increasing energy consumption. When the AC system struggles to keep up with the sun's heat, more power is needed to keep the building cool. Because of this, energy costs may rise, and pollution levels may rise as a result of an increase in the use of fossil fuels.
In Arizona, the danger of weather damage is increased when an air conditioner is installed on the roof. Severe weather, such as tornadoes, hurricanes, and hailstorms, are common in Arizona. Air conditioning units and roofs are particularly vulnerable to these elements, which may lead to expensive repairs. The sun's heat may also cause the air conditioner to overheat, which can be disastrous.
Last but not least, an Arizona home's value might drop if an air conditioner is installed on the roof. Many potential buyers may be put off by the sight of an AC unit on the roof, as it can be unsightly and detract from the overall appeal of the home.
A roof-mounted air conditioner may raise monthly energy bills, which might deter prospective buyers and result in a lower selling price.
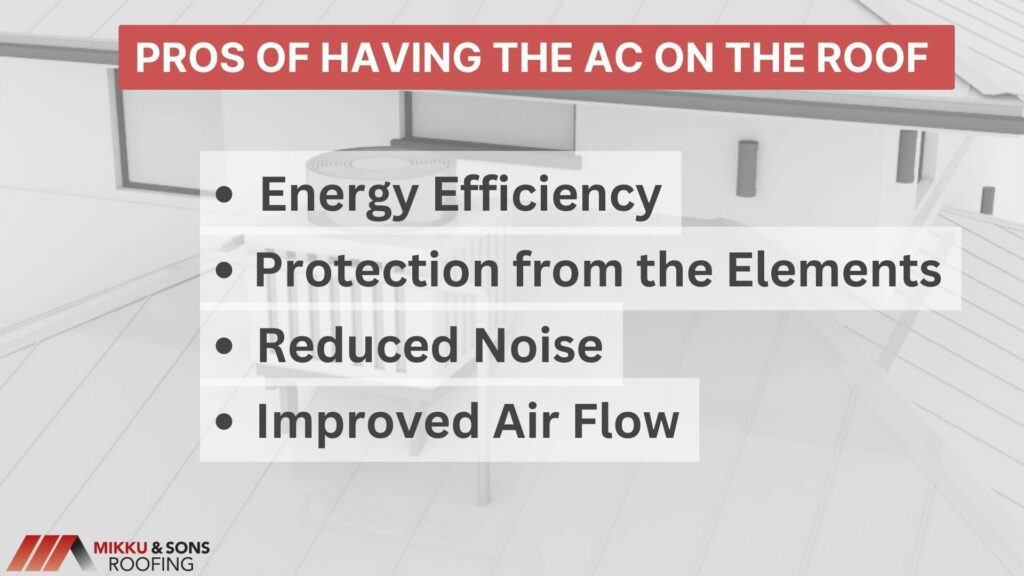
Hot, dry weather and high temperatures are typical of the state of Arizona, making it challenging to maintain a comfortable indoor environment throughout the summer. Installing an air conditioner (AC) on the roof is a popular method of reducing a building's inside temperature.
Arizona residents and company owners are increasingly leaning toward this option due to its potential advantages. Having an air conditioner on the roof in Arizona has several benefits, including the following:
Energy efficiency is a major benefit of a rooftop air conditioner. Installing the air conditioner on the roof allows for more efficient distribution of cooled air throughout the building, leading to lower cooling costs.
Over time, this may have a major impact on how much money you save on your energy expenses. Additionally, the rooftop AC unit can be strategically placed so that it is exposed to the maximum amount of sunlight, which can help to further reduce energy costs.
Putting an air conditioner up on the roof also has the added benefit of keeping it out of harm's way. Due to its high position, the unit is less prone to dirt and dust accumulation and severe weather.
In the long run, this may save money on repairs and maintenance and increase the lifespan of the device. In addition, insects and animals that attempt to enter the unit from the ground are less likely to do damage to it.
Putting an air conditioner on the roof is a great way to cut down on outside noise. The higher the apartment is located, the less probable it is that it will be heard from the rest of the building or the street below. Those with a low tolerance for noise or those who just prefer a peaceful environment at home or work would appreciate this feature.
Putting an air conditioner on the roof is one method for improving ventilation within a building. The placement of the unit may be planned such that the conditioned air is circulated thoroughly throughout the building.
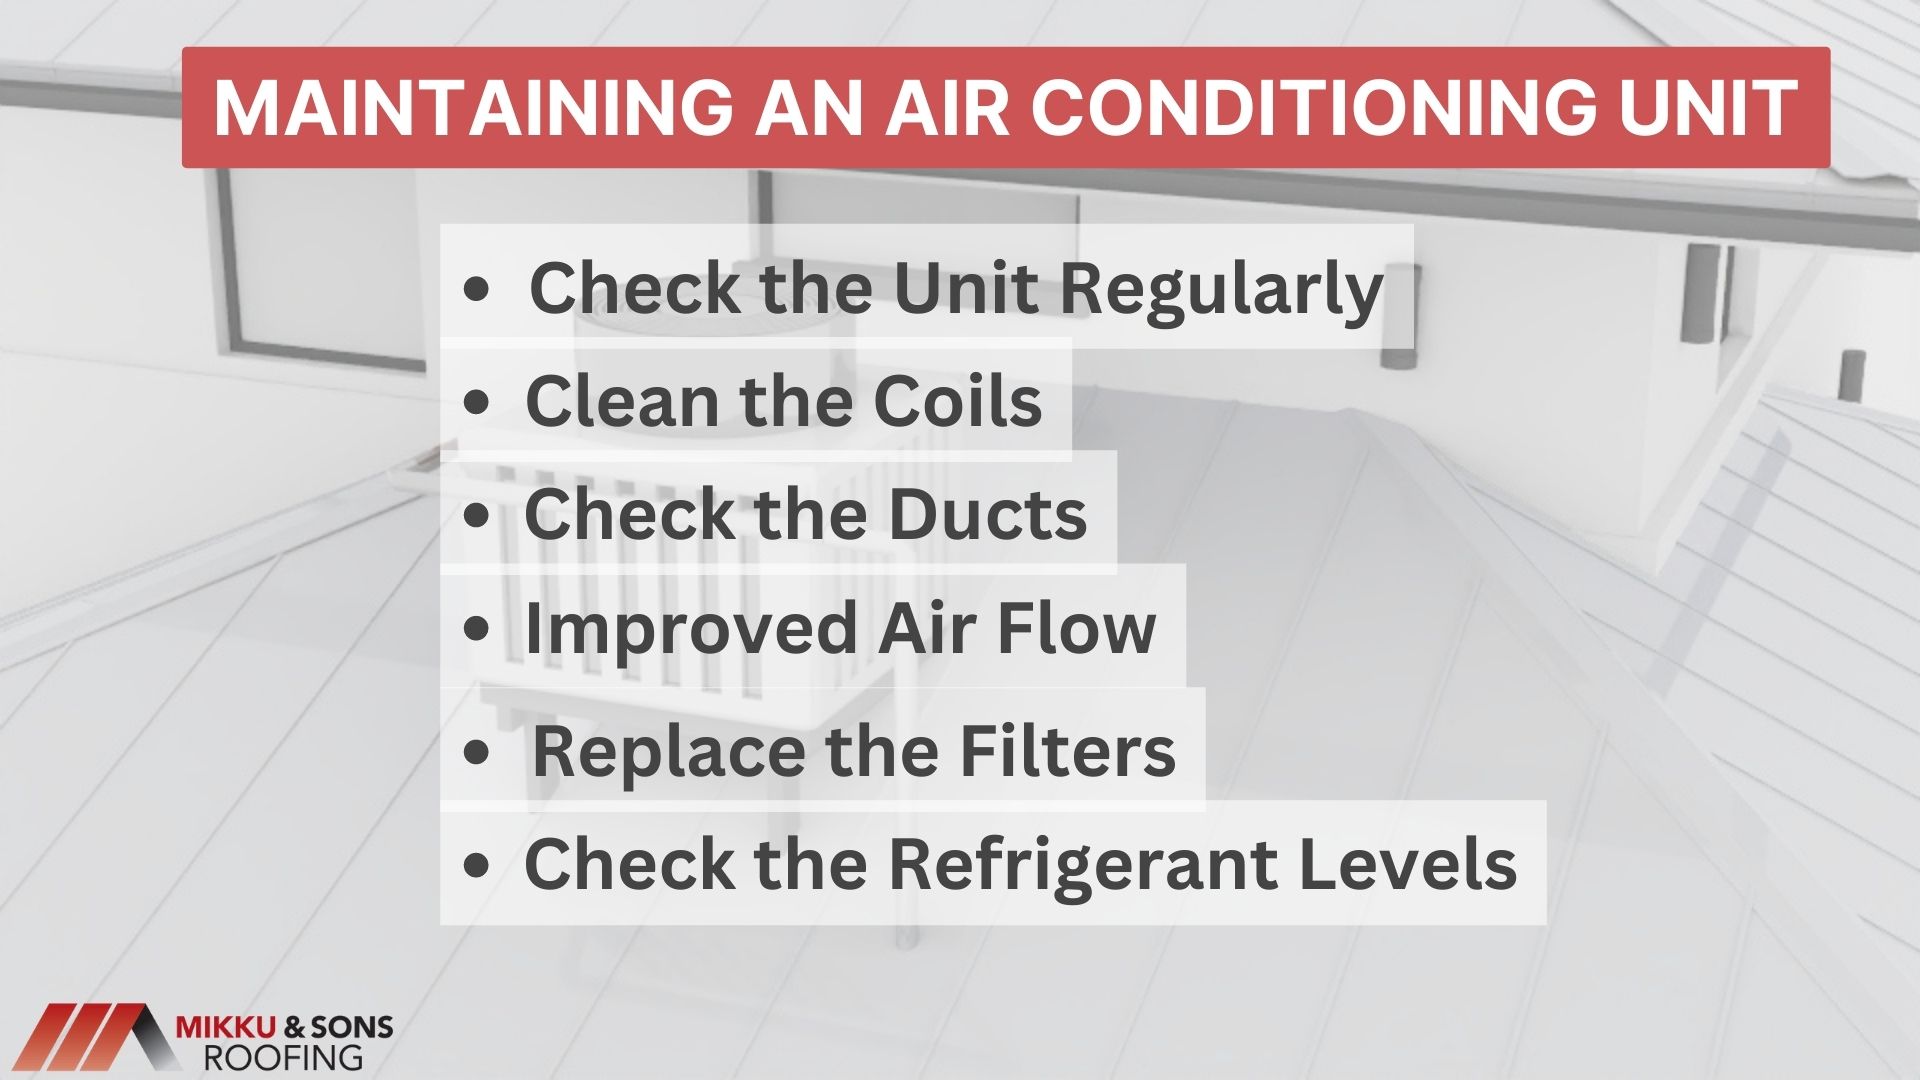
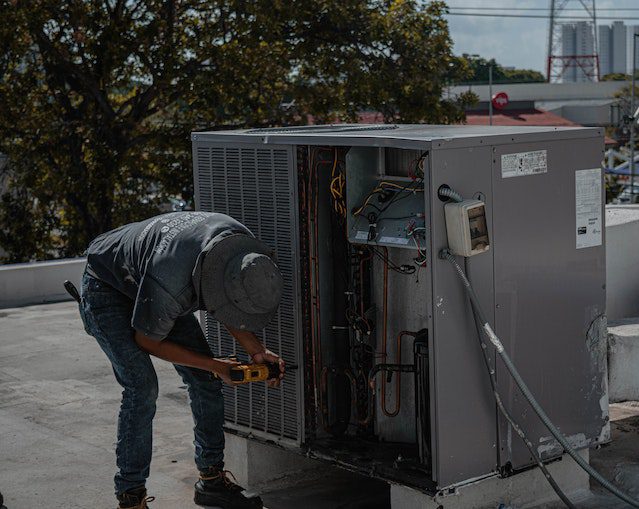
Rooftop air conditioning units need regular maintenance to ensure continued operation. Keeping up with routine maintenance can keep your unit running well, saving you both money and energy.
Keeping an air conditioner in good working order begins with routine inspections. It is important to visually examine the exterior of the device for any evidence of corrosion, damage, or missing or loose components.
Moreover, make sure that all of the filters are clean and in excellent shape, as this will increase the efficiency of the unit. If problems are detected, it is recommended to have the device serviced by a qualified technician.
Cleaning the coils is the next step in maintaining a rooftop air conditioner. It's recommended to conduct this at least once a year, since dirt and debris may accumulate on the coils and cause the system to function less efficiently.
You may use a brush and some mild detergent to clean the coils. Before you begin cleaning the coils, make sure to cut off the electricity to the device.
Duct inspection is another important part of operating a rooftop air conditioner. Ducts need to be inspected for blockages and other damage. You should also look for mold or mildew in the ductwork, since this may have a negative impact on the performance of the HVAC system.
Having the filters changed often is also important. A dirty filter might decrease the effectiveness of the unit, hence it's recommended to change filters at least once a year. Furthermore, keeping the filters clean and changed out on a regular basis keeps the machine free from dust and other particles.
As a last step, be sure to always check the refrigerant levels. Low refrigerant levels might affect the efficiency of the device. However, the device itself might be damaged if the levels are not properly maintained.
Rooftop air conditioning (AC) units are a specific kind of air conditioning system that are mounted on the roof of a building. Commercial and industrial settings, such as offices, industries, schools, and hospitals, are popular locations for rooftop units. Size, efficiency, features, and installation all play a role in how much a rooftop AC unit will set you back.
Rooftop air conditioner prices are heavily influenced by the system's capacity. British thermal units are the standard for determining the size of the unit (BTUs). Larger units with greater BTU ratings cost more than smaller ones with lower ratings for the same purpose. In addition, the area of the room and the volume of air that has to be cooled should be determined before deciding on a unit so that the right size may be chosen.
A rooftop air conditioner's price might vary depending on how efficient it is. There will be a price premium for higher SEER-rated units compared to their lower-rated counterparts. Yet, high-efficiency units may be worth the initial investment if they help you save money on your monthly energy bills.
A rooftop air conditioner's price may also be affected by the unit's specific characteristics. Humidity regulators, thermostats, digital readouts, and other extras may come standard on certain models. The unit's performance and efficiency may benefit from these additions, but they come at an extra expense.
Next, you need to think about how much money it will cost to have an air conditioning unit put up on the roof. The price of installation might change based on factors including the size and complexity of the project, as well as the material used for the roof. Hiring a professional contractor is important for guaranteeing a thorough and secure installation of the unit.
Generally, small residential rooftop air conditioners can range in price from around $500 to $3,500 or more. Commercial rooftop air conditioners can range in price from around $1,500 to $20,000 or more.The final price tag for a rooftop air conditioner depends on many factors.
Common kinds of air conditioning systems in both business and residential structures include rooftop units and those installed in the ground. There are benefits and drawbacks to both options. Rooftop air conditioners are more expensive than ground-mounted units.
The total cost of purchasing, installing, and maintaining an air conditioner might vary widely. Air conditioners installed on a roof often cost more than those put in the ground. Putting the air conditioner on the roof adds more work time and material costs, so it's not a cheap option.
Rooftop installations often take longer than ground installations and need more work and supplies due to the difficulties of getting to the rooftop. The cost may also rise if the rooftop air conditioner has to be fortified against the weather.
Installing an air conditioner in the ground is often more cost-effective than on the roof. This is due to the reduced complexity and lower overall cost of installation. Moreover, ACs installed on the ground are more convenient to service and repair.
There seems to be an infinite number of ways to cool a house. The use of an air conditioner is a common choice. There are many different types of air conditioners on the market, but the two most common installations are on the roof or in a side yard. Both types of air conditioners have their benefits and drawbacks, and homeowners can make an informed choice by learning about both.
Designed specifically for installation on the roof of a building, rooftop air conditioners are typically larger than their side-yard counterparts. They are more expensive than window or wall units, but more cost-effective in the long run. Air conditioners installed on the roof are more effective at cooling large areas and generate less noise pollution than those installed on the ground. As they tend to be situated higher up and further away from the elements, they are also less vulnerable to weather conditions.
Air conditioners for the backyard are generally affordable and compact to those intended for rooftop installation. Apart from being easier to install and maintain, they also have a lower noise than rooftop AC units since they are closer to the ground, making them more susceptible to weather, and more exposed to noise pollution from nearby streets and buildings.
Despite being more compact, less expensive, and quieter, side-yard air conditioners may still contribute to unwanted noise pollution. The choice whether to install a rooftop or a side-yard AC unit should be made based on the square footage to be cooled, the homeowner's budget, and the threshold for noise pollution.
A wide range of climatic conditions, from hot and dry to cold and wet, can be found in Arizona. Therefore, Arizona homeowners ought to be familiar with the state's roofing regulations to protect themselves and their homes.
In this article, we'll examine the Arizona roofing license requirements so that you can get up to speed on the latest roofing laws and regulations.
We'll talk about the various roofing licenses out there, the requirements for getting one, and any other rules and regulations you need to know about. Let's get started with making sure you meet all the criteria for a roofing license in Arizona.
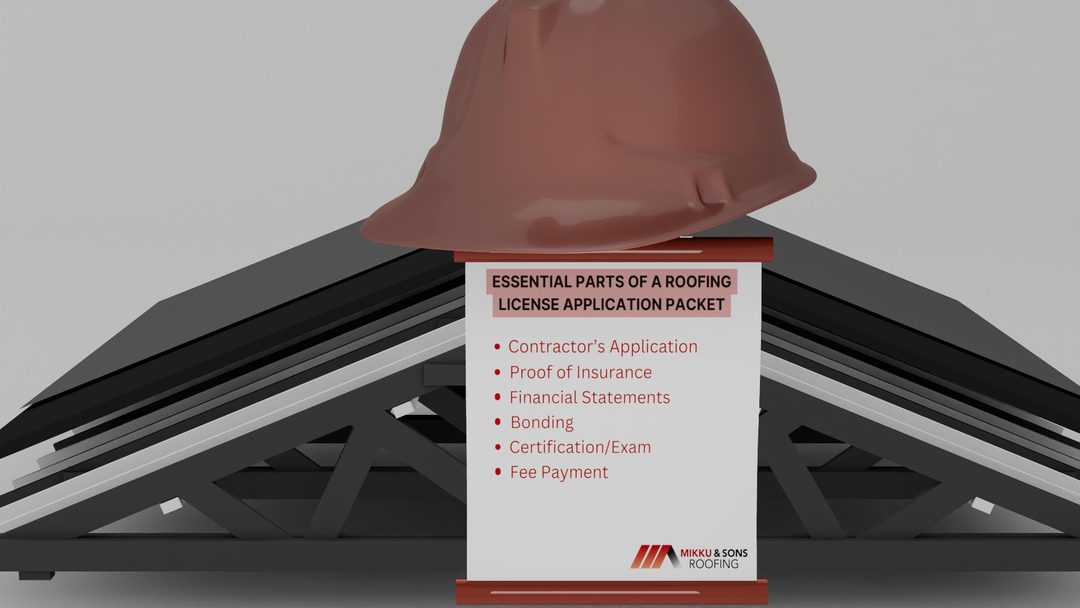
If you're a contractor looking to get your roofing license so you can start working on roofing projects, you need to fill out a roofing license application packet. A contractor's application, along with copies of any necessary documents and the appropriate fee, is usually required. What follows are the most crucial components of a roofing license application.
In order to get the contractor's name and contact information into the hands of the state licensing board, this form must be filled out. You can find the contractor's name, address, phone number, and license number on this document. Also included are the contractor's background and qualifications, as well as any disciplinary actions taken against them.
This certificate shows the licensing board that the contractor has purchased adequate liability insurance to pay for any damages that may arise as a result of the contractor's work. The policy's coverage levels must be at least as high as the state requirements.
The contractor's ability to pay taxes and other expenses is one factor the licensing board considers, so they need to see proof of financial stability in the form of tax returns, profit and loss statements, and balance sheets. With this information in hand, the board will be better able to determine whether or not the contractor has the resources necessary to finish the project.
Bonding is a way of providing the licensing board with assurance that the contractor will complete the job as promised. In the event that the contractor does not finish the job or does not fulfill the terms of the contract, the bonding company will provide financial compensation.
Getting a contractor's license in most states involves passing a certification exam. In most cases, the contractor will be tested on his or her knowledge of roofing techniques and safety procedures.
The licensing board requires all prospective contractors to submit an application fee. The cost can range from several hundred to several thousand dollars, depending on the state in which you live.
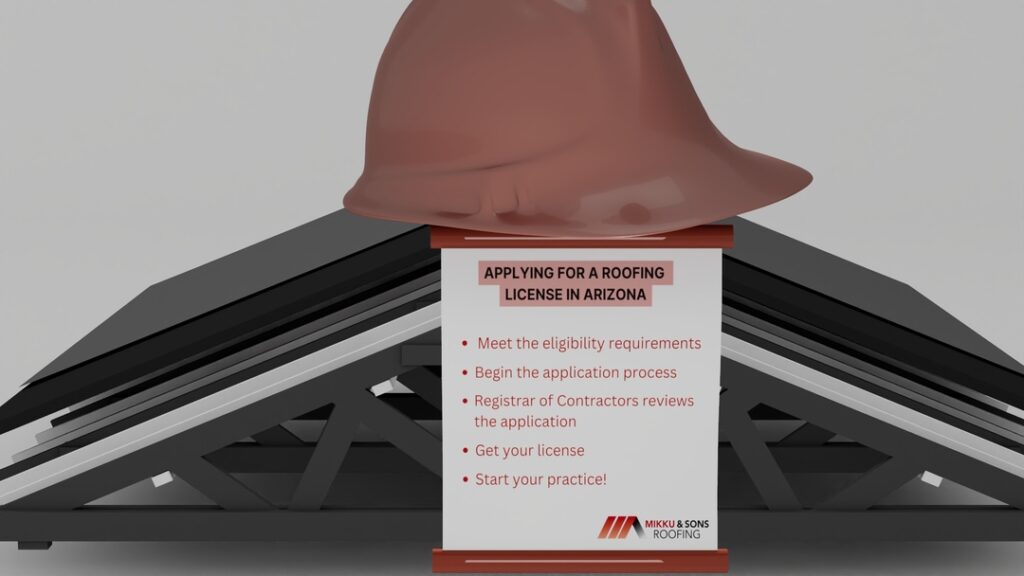
In Arizona, the steps necessary to apply for a roofing license are few and simple. It is necessary to fulfill the state's requirements before applying for a roofing contractor's license. Once that's done, you'll be able to get your license and begin working as soon as possible.
If you are a professional roofer looking to obtain a roofing license in Arizona, you need to meet the requirements set forth by the Arizona Registrar of Contractors (ROC). The process of obtaining a roofing license in Arizona involves completing an application and providing a surety bond.

If you want to get a roofing license in Arizona, you’ll need to take the Arizona Roofers Exam. This exam is administered by the Arizona Registrar of Contractors (ROC) and is designed to ensure that roofers in the state have the knowledge and skills necessary to safely and effectively perform roofing work.
The Arizona Roofers Exam consists of two parts: a written exam and a practical exam. The written exam covers topics such as roofing materials, roofing systems, roofing installation, and roofing codes. You’ll need to answer multiple-choice, fill-in-the-blank, and true/false questions on the written exam. The practical exam requires you to demonstrate your skills in roofing installation, inspection, and repair.
In order to take the Arizona Roofers Exam, you’ll need to register with the Arizona Registrar of Contractors. You’ll need to provide proof of experience in roofing or related construction work, as well as proof of completion of the appropriate training courses. Once you’ve been approved to take the exam, you’ll need to schedule a testing appointment and pay the required fee.
Once you’ve passed both the written and practical exams, you’ll be issued a roofing license. This license is valid for four years, at which point you’ll need to renew it. You’ll also need to complete continuing education courses to maintain your license.
Getting a roofing license in Arizona is a major responsibility, and it’s important to make sure you have the knowledge and skills necessary to perform roofing work safely and effectively. If you’re considering becoming a roofer in Arizona, make sure you take the time to understand the requirements for getting a roofing license and take the necessary steps to become licensed.
In order to pass the Arizona Roofers Exam, it’s important to make sure you’re well-prepared. You can prepare for the written exam by studying the topics covered on the exam, such as roofing materials, roofing systems, roofing installation, and roofing codes. You can also find study guides and practice tests online to help you prepare for the exam.
For the practical exam, it’s important to make sure you have the necessary hands-on experience in roofing or related construction work. You can also take courses or workshops to help you learn the skills you’ll need to pass the exam.
Finally, make sure you take your time during the exam and read all of the questions carefully. If you’re not sure of the answer to a question, take your best guess and move on. Good luck!
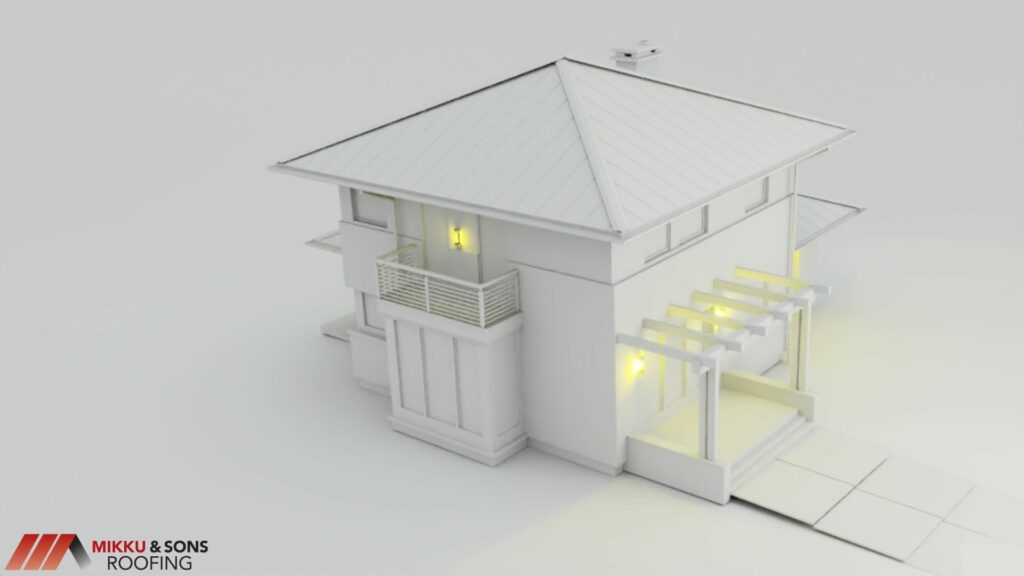
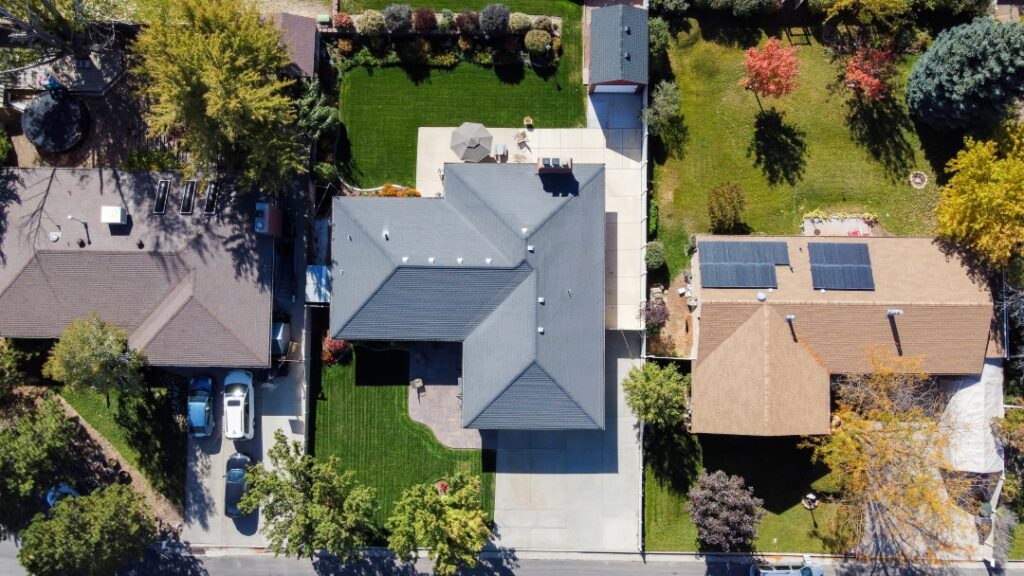
The visual appeal and market value of your home are directly tied to the color of your roof, making it a difficult decision. The sheer number of possible color combinations can make it difficult to find one that works well with your home's design, the surrounding landscape, and your own personal preferences.
To help you make the best choice, Mikku and Sons Roofing has compiled this article on house and roof color combinations (with examples) to help you learn more about the various roofing colors and how they might look on your property.
There are a number of considerations that should be made while deciding on a color scheme for your home's exterior and roof. Taking into account these aspects will help you zero in on a color scheme that is a perfect fit for your home and your life.
It's true that different color schemes complement various architectural styles better than others. A house designed in the Victorian style, for instance, may look best painted a deep red or forest green, while a house designed in the minimalist style might be better off painted a neutral color like white or gray.
Colors should be picked such that they go well with the trees, plants, and scenery around your home. White and pastel hues, which reflect heat and make a home cooler, are good options if you live in a very sunny and hot climate.
Darker hues, such as brown or gray, can assist absorb heat and keep a home warmer in cooler climates.
Picking colors that make you happy and at ease will help your home be a true representation of you and your taste. If you're stuck for ideas, browse images of houses painted in various color schemes for motivation.
If you need assistance deciding on paint colors for your house, you can always go to an expert like an interior designer or builder.
Color tones should be taken into account while selecting a roof and siding color for a home. A home's ambiance can be affected by a number of color tone factors.
There are various popular house and roof color combinations that might enhance your home's appearance. These color choices have worked for homeowners and designers.
Each color combination has advantages and downsides. A classic white house with a black or gray roof may reveal dirt and stains more than other colors. While a red brick house with a black or brown roof is classic, it may not fit with certain accent colors.
Your color mix depends on your taste, your home's architectural style, and your surroundings. Choose a color scheme you like and that complements your home's qualities.
Examples of successful color pairings and why they work:
The contrast of a white house with a black or gray roof is a classic and timelessly beautiful sight. The clean white siding serves as a blank canvas that works with any accent color, while the dark roof stands out dramatically.

All eyes will be drawn to the stunning contrast between the white exterior and the black or grey roof. It's easy to work with and adaptable to varied color schemes since any building type, from contemporary to classical, may benefit from its clean, elegant design.
Gray is a color that can be used to establish a relaxed and tranquil mood. When combined with a white or black roof, it gives the sleek, contemporary aspect that is so characteristic of today's most sought-after home designs.
The roof's white color and the walls' pale gray serve as a blank canvas upon which to paint any accent color. This color scheme is as adaptable as it is beautiful, and it may be used with a wide variety of accent hues.
A common color scheme for historic residences is a beige or brown exterior with a green roof. The green roof and beige siding help generate a comfortable, homey mood.
This pairing can produce an organic aesthetic that is particularly suited to environments with abundant greenery.
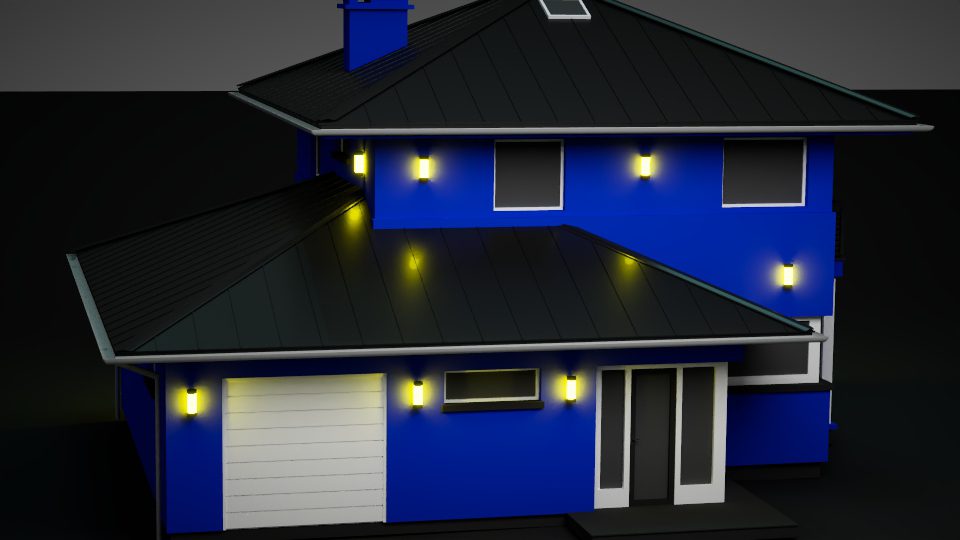
One common color scheme for beach houses is a blue exterior with a gray or white roof. The combination of the neutral gray roof and the soothing light blue cladding is quite soothing.
The color blue spans a wide spectrum, from pastels to dark navy. It can make a space feel more open and airy, making it perfect for coastal areas.
The traditional look of a brown roof over a red brick residence is timeless and charming. There's a cozy vibe thanks to the roof's earthy brown color and the building's red brick front.
Using natural materials like wood or stone in the mix will help you achieve a warm and welcoming classic aesthetic. The combination of this color with a brown roof is a timeless classic.
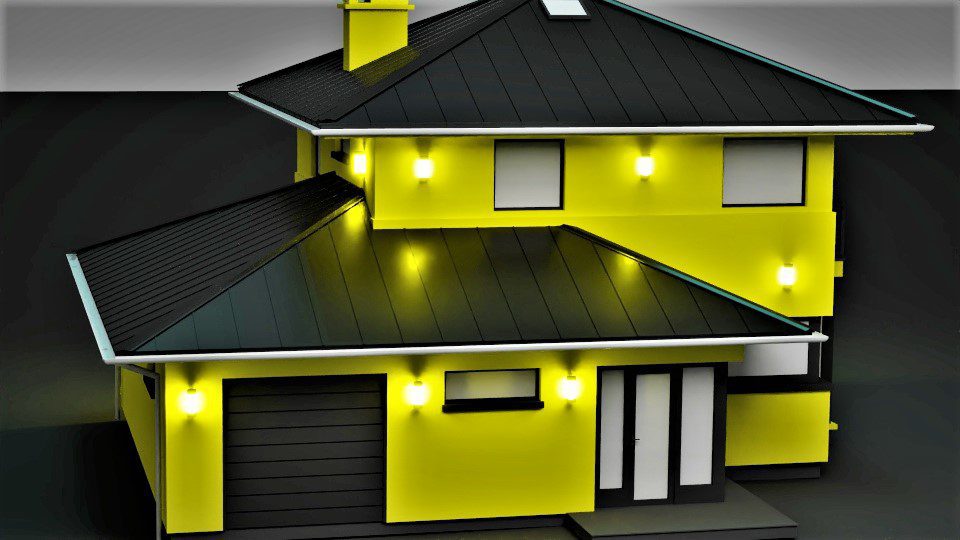
This bright and sunny color scheme is sure to put anyone in a good mood. A house's façade painted a vibrant yellow shade can make it feel more fun and carefree.
Suburban-style homes often feature this color scheme because it produces a warm and welcoming appearance when combined with a brown or black roof.
There is a direct correlation between the roof and siding, therefore it's crucial to have them match. Having a roof and siding that go together effectively can increase your home's curb appeal, making it more desirable to potential buyers or guests.
On the other side, your home's value and curb appeal could take a hit if the roof and siding don't go together well. You may achieve harmony and cohesion in your home's exterior design by using colors and materials that go well together.
When deciding on a color scheme for a project, it's important to consider how the different colors and finishes of each material will interact. Here are some possible combinations of the roofing and siding materials
It's not easy to pick out the perfect colors for your home's exterior and roof, but with these tips, you'll have a far better chance of making the proper choice.
Many companies in the home improvement industry now have online color planners that let you upload a photo of your house and try out various color schemes. This might help you see how several colors will look on your house before you commit to a specific paint job.
Although you may have an affinity for some vibrant or unusual color schemes, potential buyers may be put off by them. You should find a happy medium between using colors that you find beautiful and those that will appeal to the largest possible audience.
Color coordination is an art, and these experts can help you learn how to do it right.
In addition, they may advise you on what colors would look best in your home given its specific characteristics and design.
There are color schemes that are more suited to some architectural styles and some climates. A house on the seashore might flourish from using light, cold tones, while a house in the woods might look better with warm, earthy tones.
Color choices for homes in a PUD must be harmonious with the surrounding structures. Homeowners' association regulations may also place limitations on you.
Doors, shutters, and window frames should all be a different color than the siding and roof. Take into account the color of your roof and trim, as well as the color of your siding, while making your decision.
Mikku and Sons Roofing is committed to providing clients with exceptional service and support throughout their roofing projects. Our team of experienced professionals is always available to answer any questions you may have and provide you with the guidance you need to make informed decisions.
We'll work with you to help you choose the perfect roof color for your property, and we'll ensure that your roofing project is completed to your satisfaction. Contact us today to schedule a consultation and start planning your roofing project.
The role of a CEO in a roofing company is to provide strategic direction and leadership, oversee daily operations, and make important decisions that impact the company's success. As the top executive, a CEO is typically responsible for setting goals, developing plans and policies, and evaluating performance.
With such significant responsibilities, it is not surprising that CEO salaries can vary widely, depending on a range of factors. But how much does a CEO of a roofing company make?
According to data from various sources, the average salary for a CEO in the roofing industry is around $80,000 to $98,000 per year. This is, of course, only a ballpark figure; certain CEOs may make much more or much less than the average based on their individual skills and experience, as well as the requirements and goals of their company.
Mikku and Sons Roofing aims to educate on all the parameters of the roofing industry, including how much a roofing company CEO earns. We will therefore explore how much they can expect to make, taking into account the various factors that determine this.
The exact salaries of roofing company CEOs in various states can vary widely depending on a variety of factors. However, according to data from salary websites Glassdoor and Payscale, the average salaries for CEOs in the roofing industry in the top 5 states (based on population) are as follows:
It is worth noting that these figures are just estimates and do not reflect the full range of salaries that a CEO in the roofing industry may earn in these states. Some CEOs may earn significantly more or less than the averages reported by these websites, depending on the specific circumstances of the company and the CEO.
In recent years, the topic of CEO salaries has garnered significant attention and scrutiny. While some argue that these high salaries are justified due to the complex and demanding nature of the role, others believe that they are excessive and not reflective of a CEO's actual contributions to the company.
We will explore the various factors that can impact a CEO's salary and through this analysis, we hope to shed light on the complex and often opaque process of CEO compensation.
Size and profitability of the company
The size and profitability of a roofing company can have a major impact on the salary of its CEO. Larger companies with higher revenues and profits may be able to afford to pay their CEO a higher salary than smaller companies.
For example, a roofing company with $10 million in annual revenues may be able to pay its CEO a higher salary than a company with $5 million in annual revenues. This is because the CEO's responsibilities and level of authority tend to increase with the size of the company, and the CEO's role in driving growth and profitability becomes more important.
Industry and market conditions
The roofing industry is a competitive and fast-changing sector, and the demand for roofing services can fluctuate based on a range of factors, including the economy, weather conditions, and the regulatory environment. As a result, the salary of a CEO in the roofing industry can be affected by the overall health and performance of the industry.
For example, a CEO of a roofing company that is experiencing strong growth and demand for its services may be able to negotiate a higher salary compared to a CEO of a company that is struggling to keep up with the competition.
Location and cost of living
The location of a roofing company can also impact a CEO's salary, as the cost of living and average salaries vary widely across different regions. For example, a CEO of a roofing company in a large metropolitan area with a high cost of living, such as New York City or San Francisco, may earn a higher salary than a CEO of a company in a smaller city or rural area with a lower cost of living.
This is because the CEO's salary needs to be sufficient to cover their living expenses and maintain their standard of living in the location where they are based. According to the Council for Community and Economic Research, the cost of living index for New York City is 195.4 (with the national average being 100), while the cost of living index for San Francisco is 273.9. In comparison, the cost of living index for a smaller city like Omaha, Nebraska is 92.9.
CEO's education, experience, and performance
The education, experience, and performance of a CEO can also play a role in determining their salary. A CEO with a higher level of education, such as a master's degree or MBA, may be able to command a higher salary than a CEO with only a bachelor's degree.
Similarly, a CEO with extensive experience in the roofing industry or in a leadership role may be able to negotiate a higher salary than a CEO with less experience. Finally, a CEO's performance can impact their salary, as companies may be willing to pay a higher salary to a CEO who has a track record of delivering results and driving growth.
How much can a CEO of a roofing company expect to make? According to data from the U.S. Bureau of Labor Statistics, the median annual wage for a CEO in the roofing industry was $115,440 in 2020. However, it is important to note that this figure represents the median wage, meaning that half of all CEOs in the roofing industry earned more than this amount, while the other half earned less.
To get a better idea of the average salary of a CEO in the roofing industry, we can look at salary surveys and other sources of data.
According to Payscale, the median annual salary for a CEO in the roofing industry is $80,000. However, this figure should be taken with a grain of salt, as it is based on self-reported salary data and may not be representative of the entire industry.
PayScale estimates that a CEO of a small roofing firm (one with fewer than 50 employees) may expect to earn an annual income of $101,846. For CEOs of medium-sized roofing companies (50-99 people), this amount rises to $119,398 annually, and for CEOs of large roofing companies, it rises to $147,866 annually (100 or more employees).
Glassdoor is a job and salary marketplace where users can post anonymous salary histories and receive salary statistics from other users. Glassdoor reports that the typical compensation for a CEO in the roofing sector is $98,000 annually.
However, it's important to note that this estimate relies on a relatively small sample size and so might not be representative of the whole.
According to data from Salary.com, the average salary for a CEO with a bachelor's degree in the roofing industry is $119,998 per year, while the average salary for a CEO with a master's degree is $131,482 per year. Salary.com reports that the median annual salary for a CEO in the roofing industry is $85,447, based on self-reported salary data.
The education and experience of the CEO can also impact their salary in the roofing industry. Those with advanced degrees or extensive experience in the field may be able to negotiate higher salaries due to their expertise.
Overall, the average salary of a CEO in the roofing industry can vary widely depending on the size of the company, the location, and the CEO's education and experience. Understanding these factors can help both employees and stakeholders get a sense of the expected salary for a CEO in this industry.
It is worth noting that these figures are just estimates and do not reflect the full range of salaries that a CEO in the roofing industry may earn. Some CEOs may earn significantly more or less than the average, depending on the factors discussed earlier, such as the size and profitability of the company, industry and market conditions, location and cost of living, and the CEO's education, experience, and performance.
As the head of a company, a CEO has the potential to earn a significant salary and enjoy a high level of earning potential. However, there are a number of factors that can impact a CEO's earning potential.
By understanding these complex and multifaceted factors, we can gain insight into the CEO compensation process and these top executives' earning potential. While many factors can impact a CEO's salary, there are also several things that a CEO can do to increase their earning potential.
Here are a few:
A CEO's ability to negotiate their salary and benefits package can have a significant impact on their earning potential. This may involve leveraging their education, experience, and performance to negotiate a higher salary, or negotiating for additional benefits such as stock options or bonuses.
Some key factors that can affect a CEO's negotiating skills include their ability to communicate effectively, their knowledge of the industry and market conditions, and their ability to persuade and negotiate effectively.
The willingness of a company to pay a competitive salary to its CEO can also affect the CEO's earning potential. Companies that are willing to pay top dollar for top talent may be more likely to attract and retain top executives, while companies that are unwilling to pay competitive salaries may struggle to attract and retain the best talent.
This can be influenced by a range of factors, including the company's financial situation, its priorities and goals, and its overall culture and values.
A CEO's ability to drive revenue and profits can significantly impact their earning potential. A CEO who is able to drive growth and increase profits for the company is likely to be more valuable to the company and may be able to negotiate a higher salary as a result.
This can involve implementing strategic initiatives and plans that drive growth, maximizing efficiency and profitability, and making smart business decisions that benefit the company. Some key skills that can help a CEO drive revenue and profits include financial acumen, strategic thinking, and leadership skills.
The roof is one of the most vital aspects of the house’s exterior. Offering a protective value, it also contributes to the overall aesthetic appeal of the building. The roof is one of the things people see when approaching the house. As such, many homeowners spend quality time and thoughts on making a roof. And that is where the job of a roofing estimator comes in.
Roofing estimators are professionals that provide roofing estimates and oversee roofing activities for building projects. This profession is usually needed for large building projects in the past. However, its popularity has recently increased due to every building owner wanting the best for their properties and hiring professionals to take charge of different aspects of the construction. This has made finding a job as a roofing estimator more seamless. You can easily land projects by clicking on Jooble on the internet.
As easy a job as being a roofing estimator seems, it is an important job that requires focus, conciseness, and adequate training. However, many people do not know what it takes to become a roofing estimator or what duties are required.
In this regard, we have collaborated with experts from job aggregator Jooble to research the job of a roofing estimator. We will discuss what you need to become one and what the responsibilities of a roofing estimator are.
Contrary to what may be believed, roofing estimators work in the office and use a computer to execute most of their jobs. Although they travel to sites, it is minimal as it is only to measure, take photographs of the building and inspect.

Some other things roofing estimators do are:
The job of a roofing estimator is both technical and mental. Therefore, it requires both education and skills. Also, getting licensed in the state you practice can help you gain a better footing.
Below are the basic requirements to work as a roofing estimator:
A Bachelor’s degree is the minimum education required to become a roofing estimator. You must get a bachelor’s degree in construction, quantity surveying, or other related fields. You need a high school diploma to get into a university, and it usually takes four to five years to get a degree in construction-related courses.
In addition, you should take classes in technical drawing and mathematics, so an excellent background knowledge in those subjects is essential.
Being a roofing estimator requires both soft and technical skills. Soft skills are needed to navigate the nuances of the business relationship, while hard skills are necessary to do the job itself. However, no skill is superior to the other because a failure in one part will likely put dampness in the other.
Soft skills are personal attributes that enable people to interact and navigate harmoniously with people. For example, a roofing estimator needs soft skills like communication, human relations management, organization, and time consciousness.
Communication is vital because roofing estimators will have to relate their estimates and work to people, including the house owner and the builders. Therefore, a roofing estimator must have good written, verbal, and visual communication skills.
Human relations management is essential in roofing estimation as a roofing estimator will likely have to work with people often. Knowing how to manage different people will make their work go smoothly and help them avoid crises.
The job of a roofing estimator involves the measurement and collation of data. Therefore, organizational skill is vital to prevent issues arising from mix-ups. Also, roofing estimators travel with objects that may be dangerous if used wrong. Therefore, a roofing estimator must know how to organize his bags to not cause problems.
More so, many people are waiting for a roofing estimator’s job output before starting their own work. Therefore, you must finish within the deadline given. Technical skills, such as mathematics and AutoCAD proficiency, are also crucial for roofing estimators.
Roofing estimation requires no formal training, but you must be experienced. Most employers prefer candidates with at least five years of experience. Some may require as many as ten years.
However, the good news is that the experience does not necessarily mean you need to gain it working as a roofing estimator. You can start by interning as a quantity survey assistant. You can also get a job in construction labor, roofing installer’s assistant, or carpenter’s assistant.
Certification is proof of your professionalism and competence. It builds more faith in your brand, allows you to get high-end clients, and allows you to negotiate better pay.
While you do not necessarily need certificates to work as a roof estimator, the more you grow, the higher the requirement. It is, therefore, advised that you get at least one certificate. Some of the best certifications for a roofing estimator are:
The CCM is a construction certification course that is offered by the Construction Manager Certification Institute (CMCI). The certification has been available for more than 25 years, and it is highly revered as it has certified more Construction managers than its counterparts in the industry.
To get a CCM certification, you must have a 2 or 4 years degree with at least 4 years of active responsible-in-charge experience. You can also get it with eight years of field experience with 48 months of responsible in-charge experience.
You can start your application by sending a mail containing your application. However, it will not be processed if all the documents are incomplete. Also, you must provide references from two clients.
The Engineering In Training (EIT) certification is obtained after passing the NCEES Fundamentals Of Engineering Exam. You also have to get a degree from an ABET-Accredited university.
OSHA certification is a program from the Occupational Safety And Health Administration (OSH). OSHA has different certification programs, and they are all assessment based.
We have certified Estimating professionals, also known as Certified cost Professionals. This certification is for advanced professionals.
A roofing estimator job is a highly technical job that requires some soft skills to thrive in it. Although roofing estimator jobs are not so much, they pay well. However, you need skills and education to snatch the available positions, as the competition is high.
This article has discussed, in advance, some of the things you need to put in place to get the job of a roofing estimator.
Unlike other roofs, a composition roof is made of reinforcing mats and mineral fillers, making it much sturdier. If you’re considering which option is best for you, read on to find out why you should invest in a composite roof.
In this article, we’ll answer the following questions
A composition roof is one of the most common roof types used on modern buildings.
Composite roofs are made of shingles consisting of fiberglass with reinforcing mats made of asphalt and fillers to make the roof sturdier. Unlike traditional asphalt roofs, composite roofs last longer and are more robust.
Yes, composition roofs are an excellent choice. They last much longer than traditional roofs, with a lifetime of up to 50 years. They are also more cost-effective, as while you’ll pay more in the short term, a composite roof lasts far longer than any other type.
Composite roofs also look sleek, and because of the variety of materials used, you can customize your roof to your individual home and tastes.
The lifetime of a composition roof depends on the materials you opt for and the quality of the roofer you hire. Typically, composite roofs, on average, last for 30 years, but if installed and cared for correctly, they can last for more than 50 years (depending on the type of material. Also, a 50-year roof may only last 40 years.
Note: If you have used a previous roofer who did not install your roof to a professional standard, you can sue in small claims court. You can also get in touch with us to see if we can remedy the situation.
Care for your composite roof by removing overhanging branches that might damage your home, regularly inspecting and cleaning your roof, and checking for potential leaks. By doing this, you’ll likely extend your roof’s life significantly.
Asphalt and composition shingles are essentially the same things, except the term ‘composition’ refers to using a composite fiberglass mat and asphalt or minerals. In comparison, asphalt shingles are made from one material—most modern shingles made in the US use mats made of fiberglass.
Because a composite roof is made of multiple materials, it often has a unique appearance compared to other types of roofs.
Composition roofs are made up of shingles containing various materials like wood, slate, and laminate. This means that composite roofs can look far different from one another.
Because composition roofs contain multiple materials that permeate the tile, they won’t fade as quickly as other roofs, such as metal or wooden shingles that are only colored with surface-level paint.
However, your composite roof will likely start to fade after ten years without proper care and attention. Regularly maintain your roof by cleaning and scrubbing the tiles to avoid this. We recommend doing this yearly to prevent your roof from looking weathered and damaged.
There are three types of composite roofs to choose from, each with its own benefits. These are:
For those with a smaller budget, 3-tab shingles are the cheapest choice. This roof type earned its name because of the vertical slots slotted into part of the shingle.
3-tab shingles cost less to install, making them a suitable choice from a budget perspective. However, they don’t have as long a lifespan as other composite roof types. They also have shorter repair warranties and a higher chance of mold because of the moisture that builds up within the roof.
3-tab shingles are also not built for harsh weather conditions like wind and storms. If you live in an area where the weather can be intense, we don’t recommend this type of composite roof.
Composition architectural shingles, or dimensional shingles, are currently the most popular roof option. While they cost more than 3-tab shingles, they’re less expensive than premium-level composite roofs.
Dimensional shingles are more attractive than other types, with a variety of colors and shingle styles to choose from. They also have a far more extended warranty than the 3-tab, with some coming with up to a 50-year warranty.
Unlike the 3-tab roof, composition architectural roofs can withstand much harsher weather conditions such as high winds and storms, making them a far more durable product.
Although these types of roofs cost more, they’re worth it for the increased warranty, durability, and design.
If you have the money to spend, premium composite shingles look impressive and have a longer lifespan than other types of composite roofs.
Because of their larger size and weight, premium composite shingles are more resistant to extreme weather conditions and come in various colors, materials, and styles.
While premium tiles are significantly more expensive, they come with more extended warranties, so your new roof is guaranteed to stand the test of time.
Composite roofs are the most popular option on the market for a reason. They’re attractive to look at and can withstand harsh weather conditions, and last up to 30 years longer than other types of roof available.
If you’re actively looking for a new roof, we’d recommend the composition architectural shingles because of their durability and design while still being affordable. However, if you have a smaller budget, 3-tab composite roofs are still a cost-effective option and will likely last longer than other types of roofs available to you. For expert roof replacement and repairs in the Phoenix area, talk to us today by calling 623-465-1068 or chatting to one of the Mikku and Sons team online.
A roofing salesperson receives between 8% and 12% of the total collected, depending on commission structure and administrative charges, despite the fact that there are additional variables to consider, the majority of which will be covered below.
How much commission does a roofing salesman make? A roofing salesperson often receives between 8 and 12 percent of the total amount collected, depending on your compensation plan and administrative charges.
First, we need to understand the two types of commission structures. We have commissions that are based on either:
Here’s the difference.

The top-line figures are referred to as the percentage of sales. I'll use round numbers to demonstrate this in the example below. They are preliminary estimations that do not match industry standards. Keep in mind that these norms vary depending on the market, the industry, and the profit margin goals of each organization. So, we'll just use some arbitrary approximate figures here.
As an example, let's say I sell a $10,000 roof. That is the contract price of $10,000. The percentage of sales will often range between 7 and 12%. Assume it's 10%. In this situation, the commission would be $1,000. A $1,000 commission on a $10,000 contract? Done.
Why is this % range present? Two factors:
Typically, percentage-of-profit commissions range between 30 and 50 percent. Now, if you're a (n):
I would suggest that you not pay 50%. This is due to the corporation's massive responsibility for this installation. I've discovered that when a higher commission is paid, the majority of enterprises fail. I wouldn't do it unless the person is a high-volume producer.
When you are paid a percentage of sales, you must constantly focus on recruiting new customers. To receive your commission, you must make as many sales as possible. This is how you should approach the situation because the salesperson will be exclusively accountable for generating new revenue through contract signing.
The assignment is then frequently assigned to a production team, which meets with the adjuster. The labor order, manufacturing, and augmentation will be handled by someone else.
If you are compensated based on a proportion of gross sales, you should pursue volume. Do the math if you want to earn $100,000 every year. To earn $100,000, you would need to sell one million dollars.
To illustrate the operation of percentage-of-profit commissions, I will utilize the same $10,000 contract. After making a sale, the majority of roofing firms will deduct an "overhead percent."
This ranges between 10 and 15 percent. This is the cost of maintaining office lighting, employing office personnel, and purchasing liability insurance. This includes the internet bill, administrative employees, phone lines, the internet, and marketing costs, among other things.
Therefore, we will deduct 10 to 15% for overhead. That is typical and expected. If overhead is 10%, that would be $1,000. Now, we're down to $9,000.
From the $9000, we will need to cover all expenses, including labor and materials, permits, and anything else related to constructing the roof. If everything costs $6,000 (again, these are just arbitrary amounts), we would be left with $3,000.That's a profit of $3,000. I will utilize 40% of the range between 30% and 50% for this percentage commission. That would be a commission of $1,200.
A commission structure specifies how corporations compensate their sales staff in the sales sector. Various sales commission models result in varying levels of remuneration.
Commissions may be paid weekly, bimonthly, or monthly. Most are paid at the end of the period, but some may be delayed if employers must wait for client payments before paying you.
Importance of an effective commission structure
Fairness and accuracy are important concerns for businesses when developing a successful commission structure. Sales employees who believe they are being adequately compensated are more inclined to stay with a company rather than leave for greater chances.
Effective arrangements contain a good blend of wage and commission and quotas that may be met. How a firm compensates its salespeople can impact profitability while attracting and retaining the greatest sales force.

Businesses use a range of sales commission models depending on their services or products. The following are the nine most prevalent structures
Sales personnel are paid hourly or flat compensation under the base rate-only scheme. This incentive system is advantageous for firms when salespeople spend a significant amount of time educating and helping customers both before and after the sale. There is no motivation to upsell or sell additional goods or services.
For instance, the company's four salespeople each get $1,250 every week, regardless of how many sales they generate. Because no commission is paid, no calculation is required.
2. Base salary plus commission
It pays salespeople an hourly or fixed base income plus a commission rate. The base wage is frequently too little to cover someone's whole income, although it does give a fixed income when sales are poor.
The typical salary-to-commission ratio is 60:40, with 60% being base pay and 40% being commission-based. The plan works best as an incentive or motivation to improve sales performance.
Example: A salesperson earns $500 per month in salary plus a 10% commission on sales of $5,000 or more. If he sells $20,000 in one month, he will make $2,500: $500 in salary and $2,000 in commission. Commission calculation with merely the base rate:
Commission Total = Commission Percentage x Amount Sold.
3. Draw against a commission.
In order to help new hires get used to their sales duties without causing a dip in income, the commission draw plan is based on early payment or draw. It incorporates aspects of both the commission-only and the base salary plus commission structures. The more you sell, the more commissions you earn.
Sales agents are paid a monthly income or draw, regardless of sales volume. If they make less in commission than they do in pay, they keep the commission as well as the difference. The monies are considered forward payments until commissions equal or surpass the salary drawn.
Employers must eventually be reimbursed for these upfront payments. Only when commission totals exceed the draw amount does the salesperson benefit.
Example: A salesman is supposed to make $4,000 in commission and $2,000 in draw per month. If they reach their $4,000 target, they will receive an additional $2,000, the amount over the draw. If they only earn $1,000, they owe the firm $1,000, which is the amount of the draw.
Draw commission is calculated as follows:
Commission Total - Draw = Commission Owed.
4. Gross margin commission
The gross margin commission model accounts for the costs of the products being sold. The salesperson is paid a percentage of the profit. Salespeople are less likely to cut corners because their pay is based on the final cost of the sale. The more money they can make by upselling a product or service.
Assume a salesperson is selling a $100,000 automobile that costs $60,000 to produce. The gross profit margin is $40,000 each year. The salesperson is paid 5% of the profit margin, which amounts to $200.
Calculating the gross margin commission:
Total Sale Price - Cost Equals Gross Margin Gross Margin x Commission Percentage Equals Total Commission.
5. Residual commission
The residual plan benefits salespeople who have repeat customers or clients. Commission payments will continue indefinitely as long as accounts generate revenue. Salespeople are pushed by the framework to retain or acquire repeat customers. This structure is especially common in long-term account agencies and consulting firms.
An insurance salesperson, for example, wins a large account. The salesman receives a 5% commission, or $150 per month, as long as the corporation pays its $3,000 monthly premiums.
Calculation of the remaining commission:
Payment x Commission Percentage = Total Commission.
6. Revenue commission
When determining commission rates, companies that are more concerned with wider company goals than overall profit sometimes adopt the revenue commission model. Top sales performers are sales reps who get a predetermined percentage of the income they create.
For example, a car salesperson earns 3% of the sale of a $25,000 automobile. For such a sale, they receive a revenue commission of $750.
Revenue commission calculation:
Total Commission = Sale Price x Commission Percentage.
7. Straight commission
Straight commission salespeople only make money when they make a deal. There will be no money if no sales are made. Because there is no base income, the corporation may give greater commission rates, which generally attracts the finest salesmen. The straight commission structure allows salespeople to work as independent contractors, setting their own hours and saving organizations money on taxes, benefits, and other expenses. The company only loses money when the salesman really brings in money.
For instance, a telemarketer who promotes holiday condo rentals makes $150 for each booking. The more time spent on the phone, the more likely it is that a transaction will be made.
Straight commission calculation:
Sales x Commission Rate = Income.
8. Tiered commission
Salespeople in the tiered commission model earn a set percentage of commission on all sales up to a specified amount. When they reach their revenue target, their commission grows. This motivates them to outperform their sales targets and close more agreements.
For instance, a salesperson's basic compensation is 5% up to $100,000 in sales. For total sales between $100,000 and $200,000, the commission rises to 7%. Any sales in excess of $200,001 earn them a 10% commission.
9. Territory volume commission.
Salespeople in this strategy are paid depending on the fixed rate for their defined region. The amount of remuneration is usually determined by territorial volume, in which sales figures are tallied, and commissions are divided evenly among salespeople in the region. This pay plan only applies to sales professionals working in a team environment.
Example: Two salespeople are supposed to sell $50,000 in merchandise in a 100-mile radius each month. One sells $30,000, while another sells $20,000. They divided the 10% commission, receiving $2,500 apiece because the overall target was accomplished.
The territorial volume commission is calculated using a variety of parameters based on the company's sales algorithms. A quick calculation would be:
Total Sales x Commission Percentage divided by Total Salespeople = Commission per Person.
One of the most significant things a company can do for its sales operation is to define its commission structure. What works best for one company may not be the ideal solution for another. Here are some pointers for determining the best commission plan for your business:
Sales often have a high turnover rate, so don't hesitate to experiment with alternative incentive schemes. What was motivating five years ago may no longer be motivating today's sales teams.
The average monthly salary for a Roofing Sales Representative in the United States is $6,664 as of September 5, 2022. While ZipRecruiter reports monthly earnings as high as $11,250 and as low as $1,625, the majority of Roofing Sales Representative salaries in the United States now vary from $4,958 (25th percentile) to $8,041 (75th percentile).
A Roofing Sales Representative's average salary range varies substantially (up to $3,083), implying that there may be several prospects for promotion and increased income based on skill level, location, and years of experience.
Roofers in the United States earn an average of $23.90 per hour and $6,375 per year in overtime. 3.1k salaries were recorded as of September 9, 2022.
In the roofing industry, typical roofing companies earn between 20% and 40% gross profit. The number for service-oriented businesses could be higher, while the number for new development and major commercial businesses could be lower.
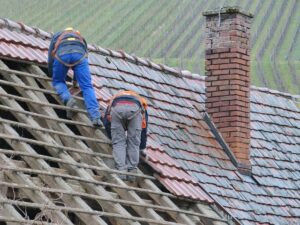
The work of a roofer requires considerable physical strength and stamina. It takes fortitude to keep one's footing and move confidently, whether standing, climbing, or walking in temperatures above or below freezing, in heavy winds or snow, or in the pouring rain. Roofing contractors ensure that their clients' facilities are secure for any employees or valuables housed therein.
