Roofing, often seen as a mere protective layer, is a complex blend of architectural design, scientific principles, and environmental considerations. Understanding the Impact of Roof Shape on Energy Efficiency, as the crown of a building, it plays a pivotal role in determining energy efficiency, aesthetic appeal, and overall functionality.
This article delves into the multifaceted world of roofing, shedding light on how our choices atop our homes and buildings resonate deeply with our living experience and environmental footprint. Join us as we ascend to understand the significance of what lies above.
Before diving into roof shapes, it's essential to understand the basic principles of thermal dynamics. Thermal dynamics, central to building design and architecture, focuses on the movement and distribution of heat.
Heat naturally moves from warmer areas to cooler ones, seeking equilibrium, much like a hot coffee cooling to room temperature. Buildings act as thermal systems, with interiors often warmer in winter and cooler in summer than in the external environment. Depending on the season, this causes heat to either escape from or enter the building.
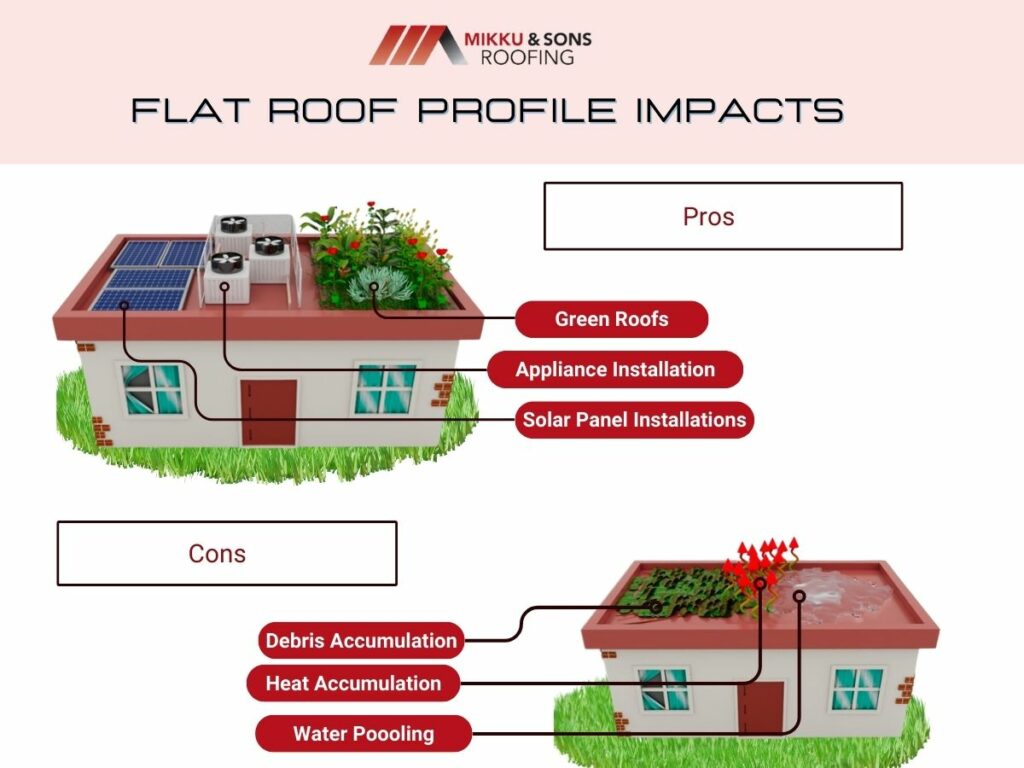
As the topmost structure, the roof plays a vital role in this heat exchange. Its design, from surface area exposure to material choice, can influence how heat is absorbed, circulated, or retained. For instance, flat roofs might absorb more sunlight, while gabled roofs can trap air.
The efficiency of this heat management affects a building's energy consumption, with implications for cooling and heating costs. Therefore, a roof's design is crucial for optimizing building energy efficiency and thermal comfort.
Roof shapes not only define the aesthetic appeal of a building but also play a significant role in its energy efficiency, durability, and functionality. Here's a breakdown of various roof shapes and their impacts:
While the shape of a roof plays a significant role in determining a building's energy efficiency and overall performance, several other factors come into play. These elements can either enhance or diminish the effectiveness of a roof in terms of energy conservation, durability, and maintenance.
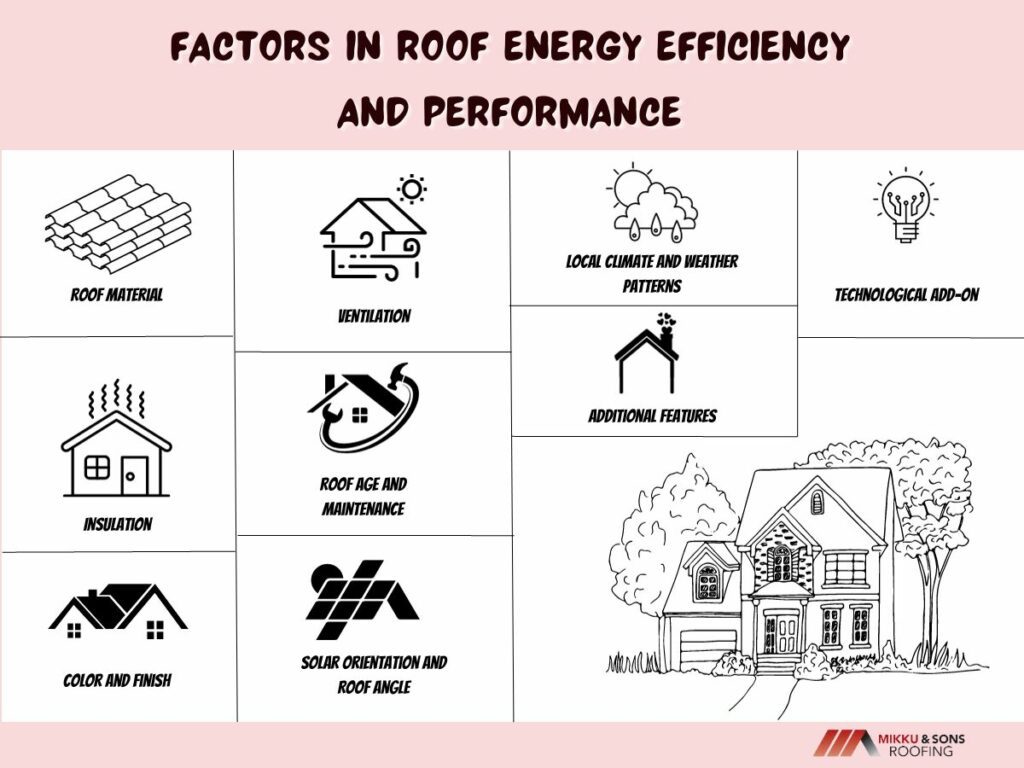
Here's a breakdown:
Selecting the optimal roof involves balancing aesthetics, functionality, and sustainability. Here's a condensed guide:
The right roof choice combines scientific understanding, aesthetic appeal, and practical considerations, ensuring energy efficiency and structural beauty.
Beyond its primary role as a protector, the roof embodies the fusion of design, science, and environmental consciousness. As we've explored the intricacies of roofing, it's clear that our choices significantly influence energy efficiency, sustainability, and living experience.
In an age where sustainability is paramount, our roofing decisions should cater to aesthetic and functional needs and reflect our commitment to harmonious living with nature. A well-chosen roof is a testament to thoughtful design and responsible living.
The importance of a robust and durable roof cannot be overstated. So, when is the right time to re-coat a foam roof?
Foam roofing, composed primarily of polyurethane foam, has proven to be a dependable choice for many property owners due to its insulation proficiency, water resistance, and longevity. Even with these merits, ensuring timely maintenance, particularly the recoating of a foam roof, is pivotal to maximizing its lifespan and efficacy.
This detailed article explores the critical considerations and guidelines for determining the optimal time for recoating a foam roof, offering insights into the signs, seasonal preferences, and step-by-step procedures involved in the re-coating process.

A foam roof, characterized by its insulation capabilities and durable nature, is an asset to any building. However, understanding the significance of timely re-coating is crucial to sustain its performance and extend its lifespan.
Re-coating a foam roof is applying a new coating layer over an existing foam roof. This is done to protect the foam from the elements and to extend its lifespan. Foam roofs are typically re-coated every 5-10 years, depending on the type of coating and the climate.
The re-coating process typically involves cleaning and inspecting the roof, applying a base coat, and then applying a top coat. There are various coatings that can be used to re-coat a foam roof, and the best coating for your roof will depend on the climate, the type of foam, and your budget.
Re-coating is an indispensable aspect of foam roof maintenance, enhancing the roof's resilience against various environmental and mechanical stressors, including UV radiation, rainfall, wind, and physical impacts.
Here are some of the benefits of re-coating a foam roof:
A consistent recoating schedule effectively preserves the foam roof's structural integrity, thereby prolonging its service life.
Determining the right time to re-coat a foam roof is a strategic decision that hinges on various factors, ranging from the visible condition of the roof to its age and the external environmental factors to which it is exposed.
Here's an in-depth exploration into the various considerations and indicators that can guide property owners in making an informed decision about the right time for re-coating their foam roof.
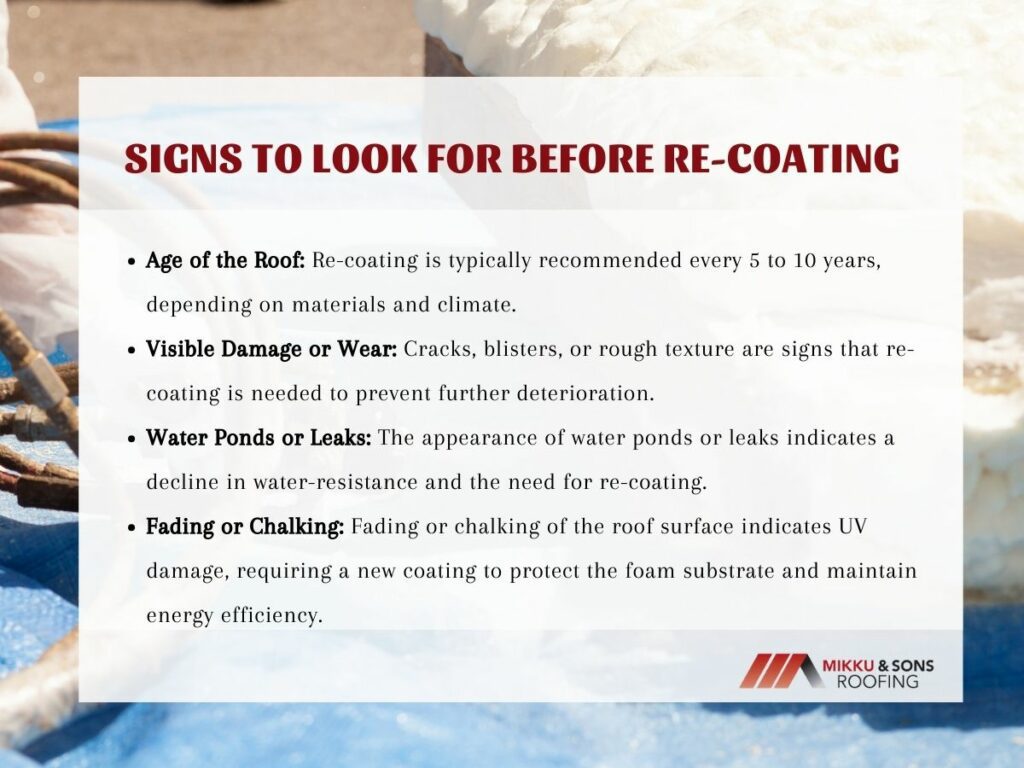
One primary factor in determining the need for re-coating is the age of the foam roof. Typically, a re-coating is recommended every 5 to 10 years, though this timeline may vary based on the specific materials used and the climate in the area. Keeping track of the last time the roof was coated is essential for timely maintenance.
Visible signs of damage or wear on the foam roof, such as cracks, blisters, or a rough texture, indicate the need for re-coating. Prompt attention to these issues prevents further deterioration and ensures the continued effectiveness of the roofing system.
The appearance of water ponds or leaks on the foam roof suggests a decline in its water-resistance capabilities. Re-coating at this juncture is crucial to restore its waterproof properties, thereby preventing additional water damage to both the roof and the underlying structure.
Fading or chalking of the roof surface indicates the breakdown of the existing coating under UV exposure. This sign signifies that it’s time to apply a new coating to protect the foam substrate from UV damage and maintain the roof’s energy efficiency.
Weather plays a significant role in determining the right time for re-coating. Ideal re-coating should be undertaken in mild, dry weather conditions, preferably when temperatures are consistently between 50°F (10°C) and 100°F (37.8°C). This range allows for optimal adhesion and curing of the new coating.
The rainy season is unsuitable for re-coating due to moisture, which can negatively impact the adhesion of the new coating. Similarly, freezing conditions can affect the curing process and the performance of the coating. Planning the re-coating project outside these seasons is advisable.

A professional inspection can provide a thorough and accurate assessment of the foam roof’s condition, helping make an informed decision about the timing for re-coating.
Roofing experts can identify issues or potential problems that may not be apparent to the untrained eye, ensuring that the re-coating is performed at the optimum time to maximize its benefits.
Engaging professional services for inspection and assessment adds an extra layer of assurance, ensuring that the re-coating process is timely and effective, and contributes to the prolonged life and performance of the foam roof.
Re-coating a foam roof is a meticulous process that involves several crucial steps to ensure the effectiveness and longevity of the new coating. A structured approach, incorporating a thorough inspection, repair, cleaning, and correct application of the new coat, guarantees optimal results.
Below is a comprehensive guide outlining the successive steps involved in re-coating a foam roof.
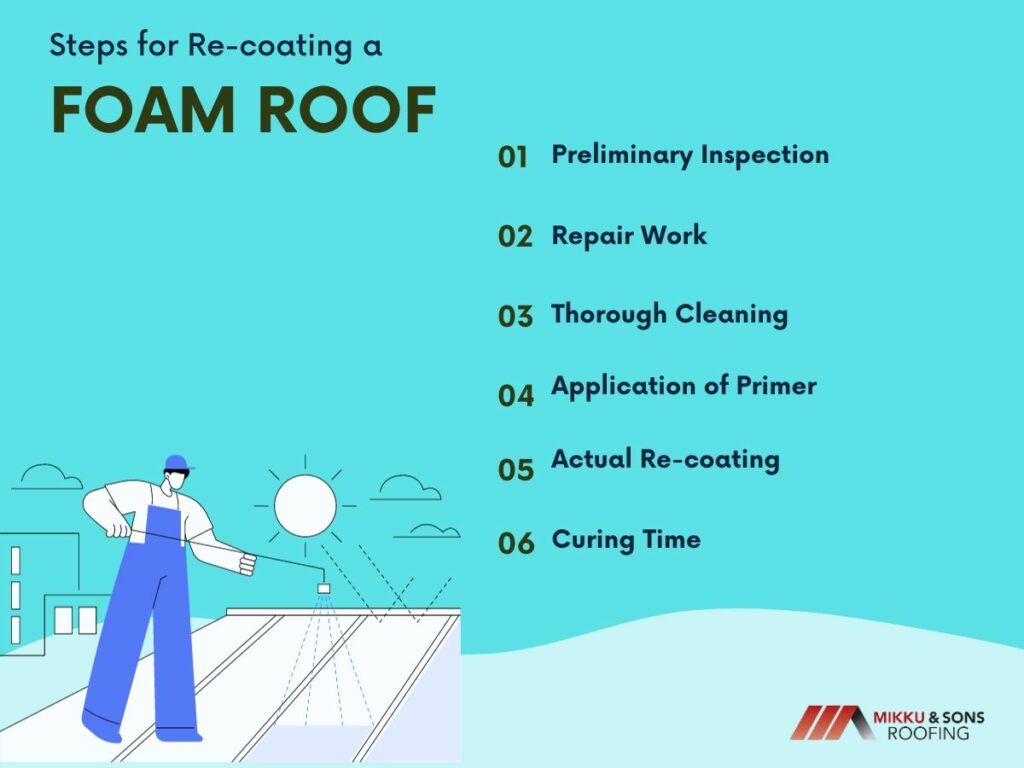
Initiate the recoating task with a comprehensive inspection of your foam roof. Assess its current condition, identifying and documenting areas requiring repairs or special attention. Engaging a professional roofing contractor for this evaluation can provide expert insights and recommendations.
Prioritize addressing any discernible damage, including cracks, blisters, or areas of foam exposure. Effective repair work ensures a solid foundation for the new coating, guaranteeing optimum adhesion and protective coverage.
A clean surface is crucial for the new coating’s successful application. Employ appropriate cleaning techniques, possibly utilizing a power washer, to meticulously remove accumulated dirt, debris, and loose materials from the roof surface.
Apply a suitable primer to the cleaned and repaired roof surface. A primer enhances the new coating’s adhesion, ensuring a secure and long-lasting bond with the foam roof surface.
With the roof surface primed, proceed with applying the new coating. Adhere to the manufacturer’s guidelines, ensuring you achieve uniform coverage and the recommended coating thickness for maximum protection and durability.
Post-application, allow ample time for the new coating to cure fully. Refrain from any activity on the roof during this period to avoid compromising the coating’s integrity.
Understanding the appropriate timing and processes for recoating a foam roof is imperative for maintaining its durability and functional reliability. Heeding the highlighted signs, opting for suitable weather conditions, and following the detailed recoating steps ensure your foam roof remains in peak condition, providing dependable protection for your building for years.
Hiring experienced and skilled professionals for the recoating project can further guarantee exceptional workmanship and results, warranting your investment's optimum value and your building's sustained safeguarding.
The roof of a structure, be it residential, commercial, or industrial, serves as the primary barrier against the elements. Over time, roofs undergo wear and tear due to constant exposure to sunlight, rain, wind, and other environmental factors.
Roof coatings have emerged as a popular solution for extending the life of existing roofs, providing additional protection, and offering energy-saving benefits. But like any solution, roof coatings come with both advantages and limitations.
Dive into this article as we unravel the myriad benefits of roof coatings and shed light on their limitations, ensuring you make an informed decision for your roofing needs.
Roof coatings are a protective layer applied to a roof to extend its life, enhance its performance, and prevent or repair minor damages. They are designed to protect roofs from the effects of weather, UV radiation, and other environmental factors.
Roof coatings can be applied to various types of roofing systems, including metal, asphalt, single-ply, and built-up roofs. Roof coatings are typically applied using rollers, brushes, or spray equipment. Before application, the roof should be thoroughly cleaned and any necessary repairs made.
Here are the most common types of roof coatings to consider:
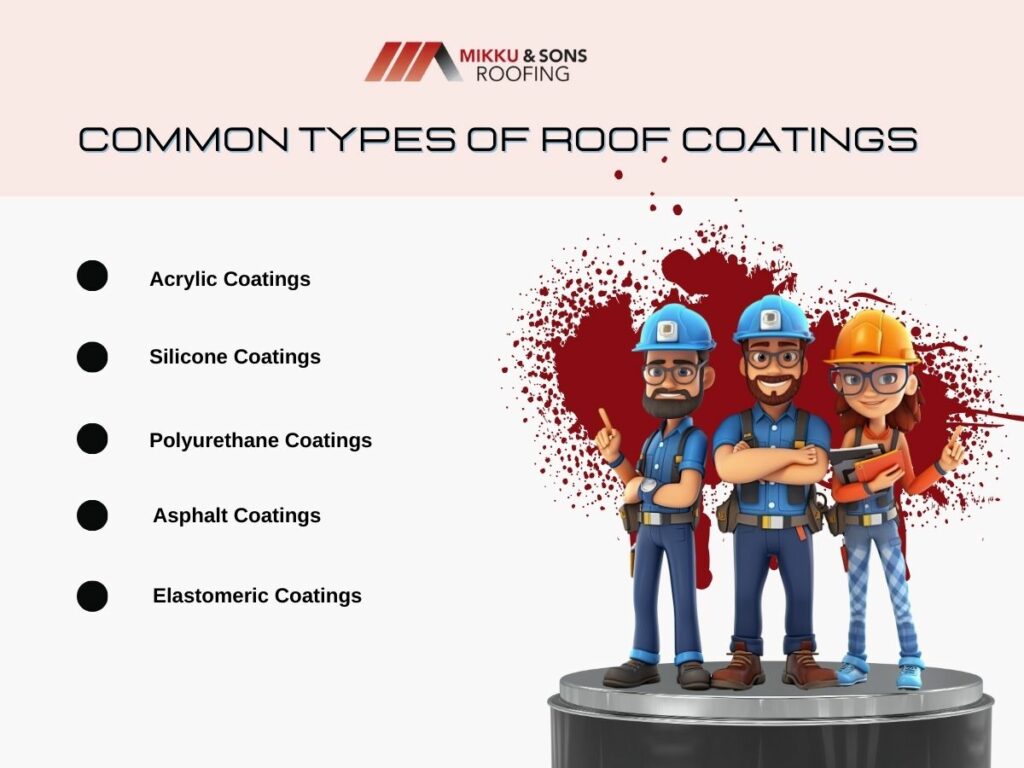
When considering a roof coating, it's essential to consult with roofing professionals to determine the best product and application method for the specific roof and climate.
Roof coatings offer a multitude of benefits that extend beyond merely providing a fresh look. From sustainability to energy efficiency, here's a rundown of the notable advantages of using roof coatings:
One of the primary benefits of roof coatings is the extension of a roof's service life. The coating acts as a protective layer against various environmental factors, such as UV rays, reducing the underlying roof system's degradation rate.
Reflective roof coatings have the ability to reflect sunlight and absorb less heat. This means that buildings remain cooler, which can significantly reduce air-conditioning costs during hot months.
UV rays can harm many roofing materials, causing them to degrade faster. A roof coating can offer protection against these rays, ensuring the roof materials don't prematurely age or deteriorate.
In many cases, it's more cost-effective to apply a roof coating than to replace or extensively repair the roof. This can be especially true for minor damages or leaks.
Applying a roof coating can reduce the need for a full roof replacement, which, in turn, reduces the amount of waste material sent to landfills.
Some roof coatings offer improved resistance against rain, hail, wind, and temperature fluctuations. This can be particularly beneficial in areas prone to severe weather conditions.
Since roof coatings are fluid-applied, they can create a seamless layer over the roof, reducing the potential for leaks.
Over time, roofs can discolor, stain, or generally look worn out. A roof coating can refresh the appearance of a building, giving it a cleaner and more updated look.
By reflecting sunlight, certain roof coatings can decrease a roof's surface temperature, which helps reduce the urban heat island effect in populated areas.
Some roof coatings are elastomeric, meaning they have the capability to stretch and then return to their original shape. This can help accommodate a building's natural movements without causing damage or cracks in the coating.
When considering a roof coating, it's essential to select the right type based on the existing roofing material, local climate, and specific requirements of the building.
While roof coatings offer numerous benefits, they also have some limitations that one should be aware of before deciding on a roofing solution. Here's a summary of the potential drawbacks and limitations of roof coatings:
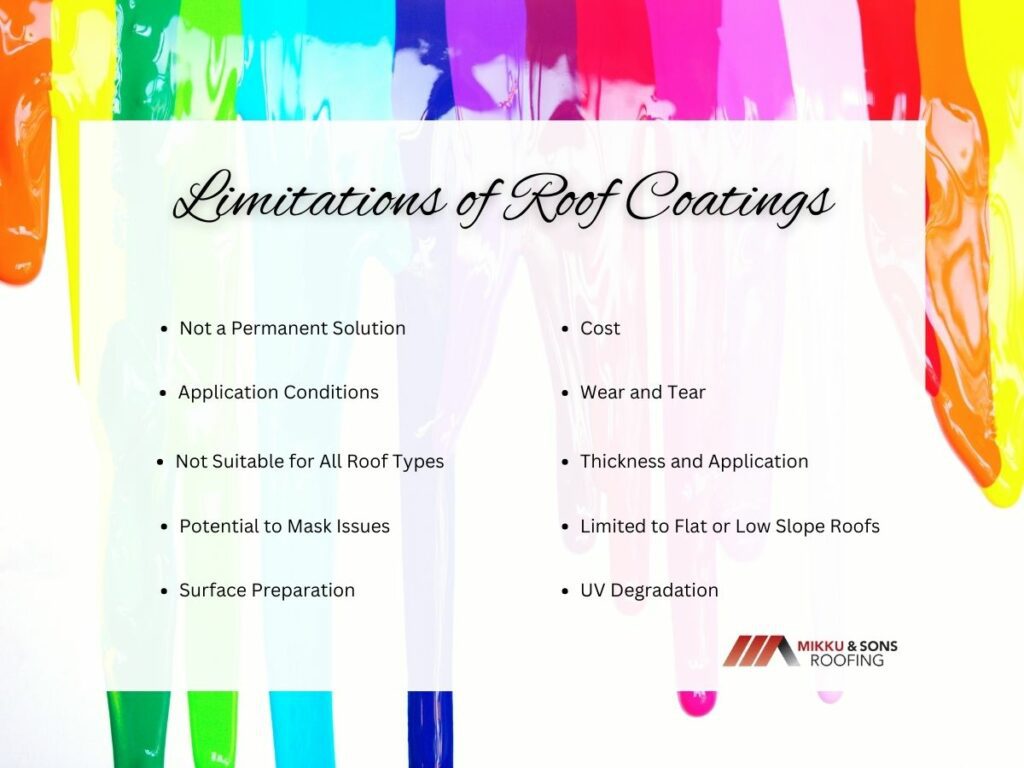
Roof coatings can extend the life of a roof, but they are not a forever solution. Over time, even coated roofs will require maintenance, and the coating itself may need reapplication.
Roof coatings need specific weather conditions for application. If the temperature is too cold or too hot, or if there's too much humidity, the coating might not adhere well or take longer to dry.
Some roof materials might not be compatible with certain coatings. Roofs with ponding water, for example, may not work well with some types of coatings.
A roof coating can sometimes mask deeper, underlying problems. Without a proper assessment, users might overlook significant structural or moisture issues that could become more severe over time.
For a roof coating to adhere properly and last, the existing roof needs to be thoroughly cleaned and prepped. This can be labor-intensive and sometimes requires professional intervention.
High-quality roof coatings and professional application can be expensive initially, even if they might save money in the long run.
While roof coatings are designed to be durable, they are not immune to wear and tear, especially in areas with severe weather conditions or high foot traffic.
Getting the right thickness during application is crucial for the coating's performance. Too thin might not provide adequate protection; too thick, and it could crack or not cure properly.
Many roof coatings are primarily designed for flat or low-slope roofs. They might not be as effective or suitable for steep-sloped roofs.
Over time, certain roof coatings, especially those not specifically designed for UV protection, can degrade due to prolonged exposure to UV rays.
When considering roof coatings, weighing both the benefits and limitations is essential. Consulting with roofing professionals can provide insight into whether a coating is the right solution for a specific building or structure.
Roof coatings offer an innovative solution for enhancing roof lifespan, energy efficiency, and aesthetics. While they present numerous advantages, they also come with inherent limitations, from application challenges to potential masking of deeper roofing issues.
As with any construction decision, evaluating the benefits and drawbacks is essential. Consulting with roofing professionals and understanding the specific needs of your building will guide you in making the most informed choice, ensuring longevity and optimum performance.
The roof, a fundamental element of any structure, serves as the primary barrier against environmental elements, safeguarding the occupants and the contents within. However, despite its critical role, the roof is often overlooked when it comes to regular home maintenance.
This neglect can lead to severe repercussions, impacting not just the structural integrity of the home but also the health and safety of its inhabitants, along with financial implications that can take homeowners by surprise.
This article highlights the dangers and costs associated with neglecting roof maintenance and emphasizes the significance of regular and proactive roof care. Let’s start!
The first step in understanding the cost of neglecting roof maintenance is to appreciate the importance of the roof and regular upkeep. A roof's functionality goes beyond providing shelter; it also significantly contributes to the energy efficiency of your home, ventilation, and temperature regulation.
Regular roof maintenance ensures that the roof remains in optimal condition, enabling it to fulfill these roles effectively.
Failing to maintain your roof can result in the gradual degradation of roofing materials, which can lead to leaks, mold growth, structural damage, and, eventually, a complete roof failure. Regular inspection and timely repairs are integral to avoiding these negative outcomes and preventing the exponential growth of repair costs.
Roof maintenance frequency varies depending on factors such as the roof's age, material, local climate, and whether there are overhanging trees. Generally, it's recommended to have your roof inspected once or twice a year, ideally during spring and fall.
While some basic maintenance tasks can be done personally, it's best to hire a professional for inspections as they can spot early signs of damage. Regular maintenance helps avoid substantial costs down the line.
The financial implications of neglecting roof maintenance are substantial. Regular maintenance might seem like an added expense, but it is a preventive measure that can save you significant amounts in the future.
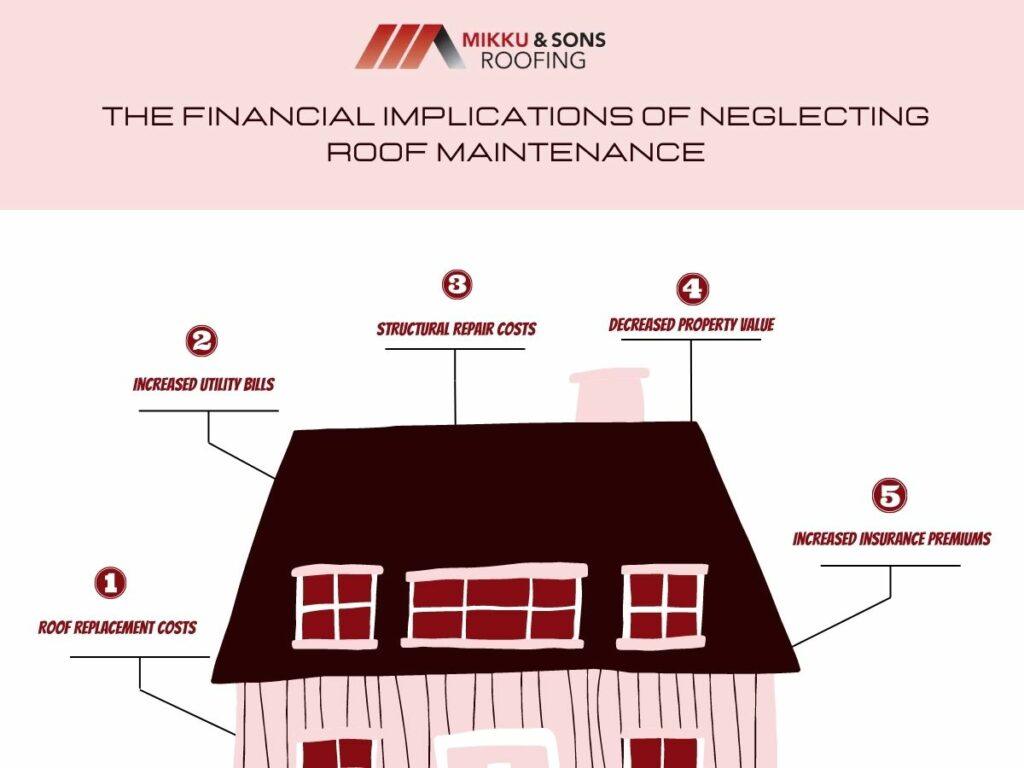
Here's a closer look at some of the serious financial implications of neglecting roof maintenance:
The most apparent financial cost of neglecting your roof is the potential need for a complete roof replacement. Small problems, if left unattended, can escalate into major issues that compromise the integrity of the roof, necessitating a complete overhaul.
The cost of roof replacement can range from $5,000 to over $30,000 depending on the size of your home, the materials used, and the labor costs in your region. This huge expense can be avoided or delayed significantly with regular maintenance.
A well-maintained roof plays a crucial role in your home's energy efficiency. It helps keep your home warm in the winter and cool in the summer, thereby reducing the load on your heating and cooling system.
However, a damaged roof can lead to poor insulation, causing heat loss in the winter and excessive heat gain in the summer. This can result in significantly higher utility bills.
Neglecting your roof can cause water to seep into your home, damaging walls, ceilings, and insulation. The cost of repairing this damage can be quite substantial. On top of that, water damage can lead to mold growth, requiring expensive professional mold remediation services.
Your roof is one of the key components potential buyers or real estate agents look at when assessing your home’s value.
A roof in poor condition can decrease your property's value, making it harder to sell or reducing the price you can command. Conversely, a well-maintained roof can enhance curb appeal and increase your home's resale value.
In some cases, if your roof is in poor condition, it can even impact your home insurance premiums. Insurance companies may view a poorly maintained roof as a higher risk for a claim and may adjust your premiums accordingly.
In summary, while it may seem that regular roof maintenance is an unnecessary expense, especially if there are no obvious issues, the costs of neglecting your roof can be far more substantial in the long run. It's an investment that pays off in financial savings and peace of mind.
Neglecting roof maintenance can lead to safety concerns that extend beyond financial costs. Let's dive deeper into the safety concerns associated with neglecting roof maintenance.
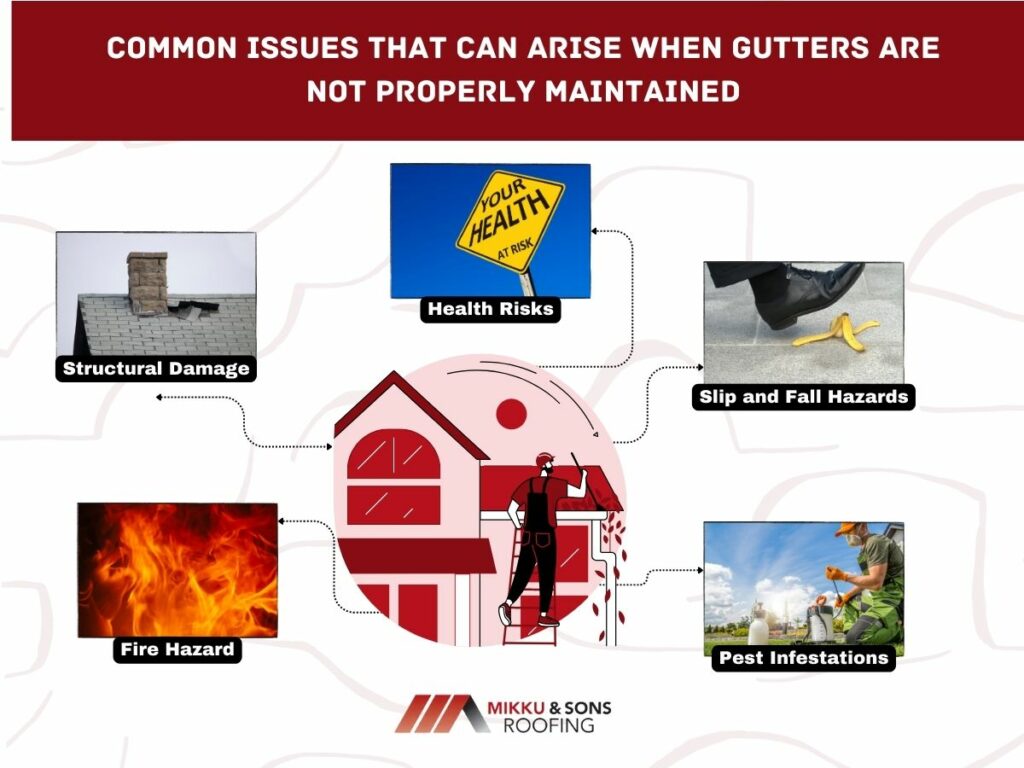
The most immediate safety concern associated with poor roof maintenance is the potential for structural damage to your home. When the roof is neglected, small leaks can turn into more significant issues, leading to extensive water damage.
Over time, water can seep into the support structures of your home, causing the wood to rot and weakening the house's structural integrity. In extreme cases, this could even result in the collapse of parts of the roof, posing a serious risk to the occupants.
Another major concern is the health risks associated with mold and mildew. These thrive in damp environments created by roof leaks. Spores from mold and mildew can circulate in your home's air, leading to a range of health problems.
Exposure to these spores can cause allergic reactions such as sneezing, skin rashes, and eye irritation. In some cases, mold can cause more serious respiratory problems, particularly in individuals with pre-existing conditions like asthma.
While it might seem counterintuitive, a leaking roof can actually increase the risk of fire. Water leaking from the roof can seep into your home’s walls where electrical wiring is located. If the water comes into contact with electrical wires, it can cause short circuits, sparking a fire.
This is especially a concern in older homes, where electrical systems may not have the safety features found in modern setups.
On a more minor yet still important note, a leaking roof can lead to water pooling on your floor, creating slip and fall hazards.
Water trickling down from the ceiling and pooling on the floor turns into a potential accident zone. This can be particularly dangerous for older adults or young children.
These accidents can also have financial implications, from medical bills to potential liability issues, if guests in your home fall and injure themselves. Therefore, addressing roof leaks not only safeguards the physical condition of your home but also helps maintain a safe living environment for your family and visitors.
Neglecting roof maintenance can invite pests into your home. Wear and tear on roofs can create gaps or holes, attracting pests like rats, squirrels, insects, and birds. These pests can cause structural damage, and some also carry diseases, posing health risks.
Pest droppings can also lead to allergic reactions and respiratory issues. Hence, regular roof maintenance is critical not just for the structure but also for maintaining a healthy living environment.
A reactive approach, where issues are addressed only when they become visible or problematic, can lead to high costs and potential hazards. Conversely, a proactive approach to roof maintenance involves regular inspections and preventive measures to catch and resolve problems before they escalate.
Proactive maintenance might involve the cost of periodic inspections by professionals and minor repairs, but these expenses are considerably lower than the potential costs of a major repair or roof replacement.
Furthermore, a well-maintained roof can enhance the energy efficiency of your home, lower your energy bills, and improve your home’s value.
While roof maintenance might be easy to overlook, this article illuminates the long-term perspective of neglecting such an essential component of your home. The potential financial costs and safety concerns underscore the importance of regular roof care.
It's clear that beyond being a financial issue, a poorly maintained roof can pose serious safety and health risks to the home's occupants. Regular roof maintenance is essential to maintaining a safe and healthy living environment.
If you find yourself facing unexpected roof damage, you also have to know The Consequences of Inaction When the Need for Commercial Roof Repair Is Ignored.
Proactive maintenance can save homeowners a significant amount of money and potential headaches in the future. Therefore, for financial, safety, and health reasons, regular roof maintenance isn't just advisable – it's essential.
One of the most traditional and time-tested methods of roof construction is the tar and gravel roof, also known as a built-up roof (BUR). While less common in residential properties, these types of roofs are commonly found in commercial buildings due to their durability, cost-effectiveness, and ease of maintenance.
Whether you're contemplating a new roof, seeking to better understand your existing roof, or simply curious, this tar and gravel roof guide is a foundation for exploring this durable roofing option. This aims to provide a comprehensive overview of this roofing type, its construction, pros and cons, and factors to consider when deciding if it's the right fit for your building.
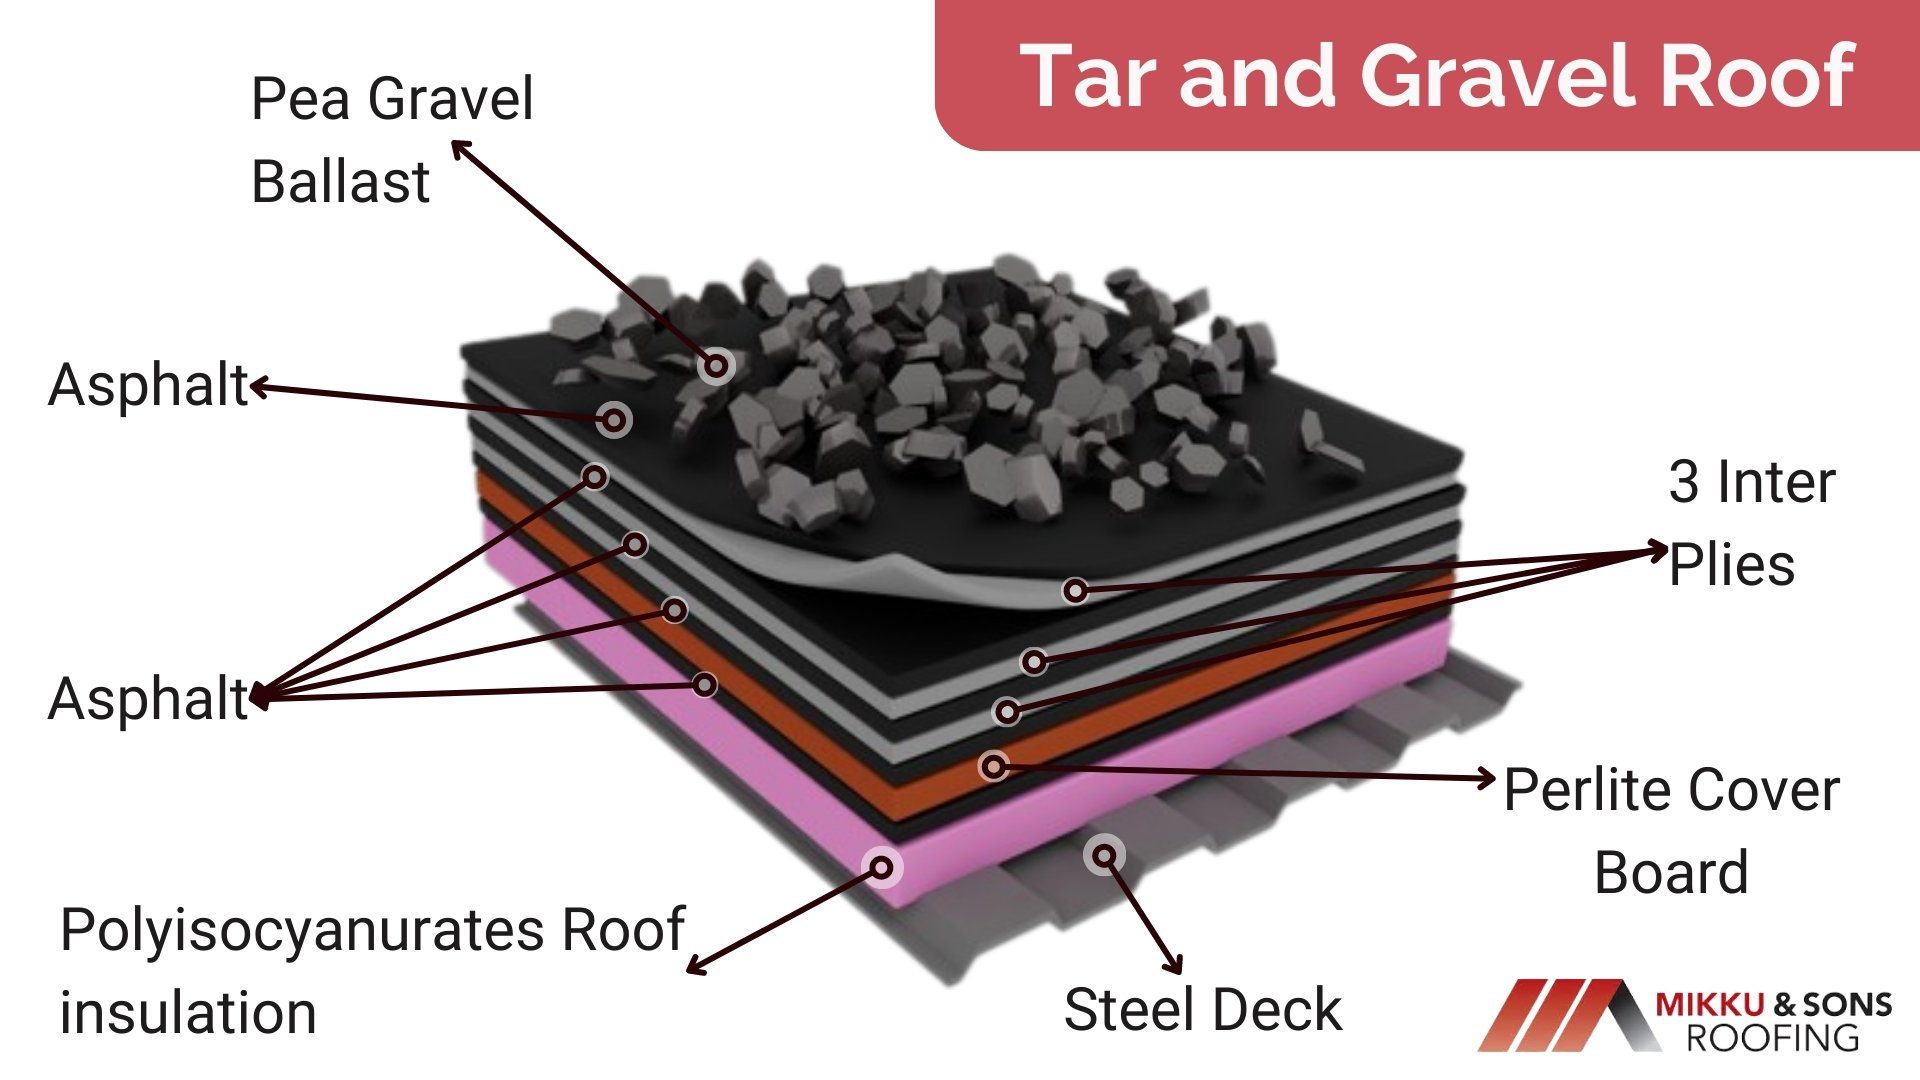
A tar and gravel roof is a type of built-up roof that consists of multiple layers of waterproof materials alternated with hot tar and topped with a layer of gravel. This form of roof construction has been around for over a century, largely due to its proven durability and resilience against harsh weather conditions.
The tar and gravel act as a strong barrier against water penetration, while the gravel protects the layers beneath from sunlight and physical damage. This makes tar and gravel roofs highly resistant to leaks, unlike some other roofing types.
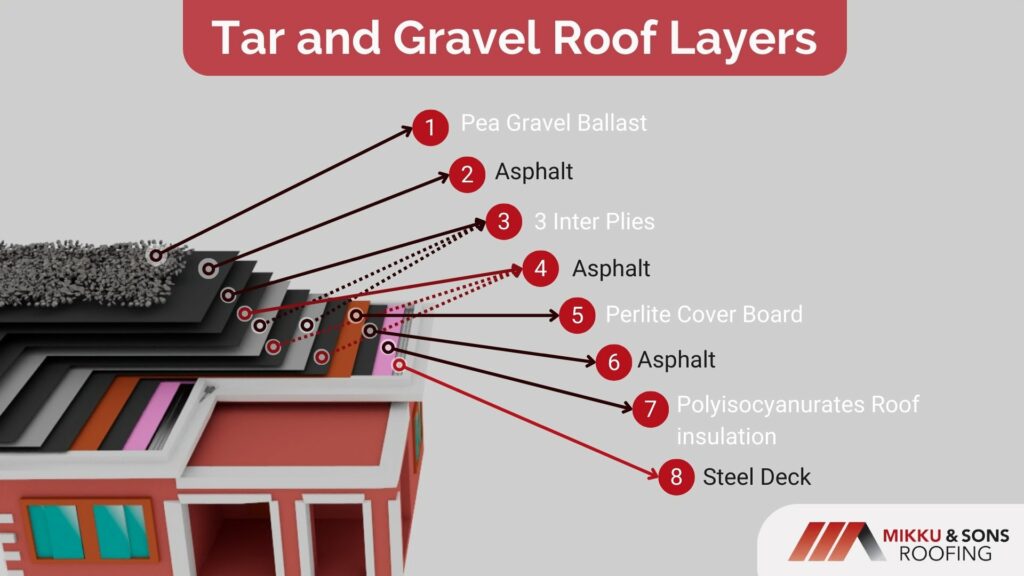
The construction of a tar and gravel roof is a multi-step process that involves the installation of several layers of materials. Here's a step-by-step guide on how a tar and gravel roof is constructed:
While this process is relatively straightforward, it does require the proper equipment and expertise to perform correctly. The installation process is often messy and potentially hazardous due to the hot tar, so it's recommended that it be carried out by a professional roofing contractor. The longevity and performance of a tar and gravel roof are highly dependent on the quality of its installation.
Remember, while tar and gravel roofing has a long lifespan, it still requires regular maintenance and inspection to ensure it stays in good condition. Debris should be removed, and any areas of exposed tar or damaged gravel should be repaired promptly to prevent leaks.
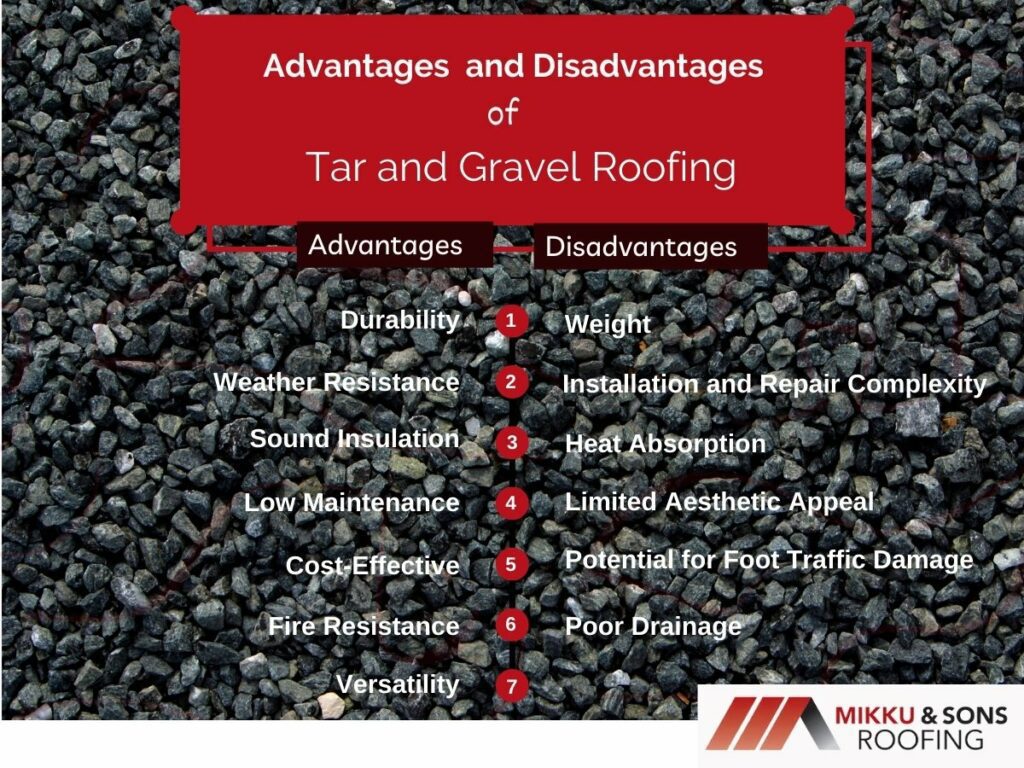
Tar and gravel roofs, also known as built-up roofs, have been used for over a century due to their inherent benefits. Let's delve into some of the advantages of tar and gravel roofing:
Tar and gravel roofs are known for their durability. When correctly installed and maintained, these roofs can last up to 30 years or even longer in some cases. The multiple layers of tar and felt create a resilient barrier against the elements, ensuring a long lifespan.
These roofs stand up exceptionally well to various weather conditions. They are highly resistant to leaks and can handle the rigors of both hot and cold climates. The gravel top layer serves as an excellent protectant against sun damage, heavy rains, and wind.
Tar and gravel roofs require relatively low maintenance compared to other roofing types. Routine inspections and prompt repair of any minor issues are usually sufficient to keep these roofs in good condition. The gravel top layer also protects the lower layers, reducing the frequency of repairs.
These roofs are often more affordable than other commercial roofing options, both in terms of initial installation and long-term maintenance costs. This is especially true when the longevity of tar and gravel roofs is considered.
The gravel layer of a tar and gravel roof provides excellent fire resistance, potentially slowing the spread of flames in case of a fire.
Gravel roofs are excellent at soundproofing. The tar, roofing felt, and gravel layers work together to minimize noise from rain, wind, or hail, making it a quiet option.
Tar and gravel roofs can be installed on various building types and roof designs. They're suitable for both flat roofs and those with a slight slope.
These advantages make tar and gravel roofing a popular choice for many commercial buildings and some residential properties, especially in areas that experience varying weather conditions throughout the year.
While tar and gravel roofs come with many advantages, they also have certain downsides that need to be considered. Here are some potential disadvantages of tar and gravel roofing:
One of the most significant drawbacks of tar and gravel roofs is their weight. The multiple layers of tar, roofing felt, and gravel make this roofing type heavier than others. Buildings must have the structural integrity to support this weight, which may be impossible for some older structures or certain designs without additional reinforcement.
The tar and gravel roof installation process is more complex and time-consuming than some other types of roofing. It involves handling hot tar and multiple layers, which can be messy and require specialized skills. Similarly, locating and repairing leaks can be difficult and require professional intervention.
Tar and gravel roofs can absorb a lot of heat, particularly if the gravel is a darker color. This can make buildings hotter during the summer months and increase cooling costs. They are not as energy-efficient as other roofing types, like cool roofs or green roofs, that reflect more sunlight and provide better insulation.
Compared to other roofing options, tar, and gravel roofs might be seen as less aesthetically pleasing. They don't offer the variety of colors and styles that options like shingles or metal roofing provide.
If the roof is accessed frequently for HVAC maintenance or other reasons, the protective gravel can be inadvertently kicked away, exposing the underlying layers to damage.
In the case of flat or nearly flat roofs, improper installation can lead to poor drainage, pooling, or standing water. This could eventually lead to leaks or shorten the lifespan of the roof.
Considering these factors is crucial when deciding whether a tar and gravel roof is the right choice for your building. Consulting with a professional roofing contractor who can assess your circumstances is always recommended.
Choosing a tar and gravel roof hinges on several factors, including your building's structure, geographical location, purpose, and budgetary constraints. Due to their weight, tar and gravel roofs require a building with adequate structural strength. Weather conditions also matter, as these roofs are durable but can absorb heat, possibly raising indoor temperatures in hot climates.
The use of your building is another factor. If your roof requires regular maintenance access, a tar and gravel roof can be beneficial due to its resilience to foot traffic, although care is needed to avoid gravel displacement.
In terms of cost, tar and gravel roofs can be more economical than other types, both initially and in the long term, and they can last up to 30 years or more if well-maintained. However, if energy efficiency is a priority, other more insulating roofing options might be preferable. A professional roofing contractor can provide tailored advice and ensure proper roof installation.
Tar and gravel roofs are versatile and cost-effective options known for their durability and weather resilience. However, it's important to consider the structure of your building, as these roofs are heavy and require a solid foundation. Their installation and repair can also be complex and requires professional expertise.
While tar and gravel roofs are long-lasting and require low maintenance, they can absorb more heat compared to other roofing types and may not be the most aesthetically appealing option. Care should be taken if your roof requires regular access and, despite their benefits, they might not be as energy-efficient as some modern alternatives.
Professional guidance is crucial when deciding on a tar and gravel roof. With the information provided in this guide, you can decide on the best roofing solution for your building, considering your specific requirements and budget. Remember, your roof is a significant investment, and choosing the right one can contribute to the longevity and value of your property.
Tar and gravel roof replacement
What are the advantages of solar roofing in Arizona? Arizona, one of the sunniest states in the U.S., offers immense potential for harnessing solar power. Solar roofing, an innovative and aesthetic solution, is leading Arizona's transition to green energy. Taking full advantage of the state's abundant sunshine, it promises many benefits beyond environmental sustainability.
With its favorable geographical positioning and climate, solar roofing holds substantial promise for Arizonian homeowners and businesses. This article will delve into the multiple advantages of adopting solar roofing in Arizona, discussing aspects such as cost savings, environmental impact, increasing property value, and more.
Before exploring the benefits, it's essential to understand what solar roofing is. Solar roofs, often referred to as solar shingles or tiles, are roofing materials that incorporate solar photovoltaic (PV) technology. They capture sunlight and convert it into electricity for use in your home.
These innovative products blend the functionality of a traditional roof with the capability to generate renewable energy, thereby serving dual purposes - protecting your home and powering it.
Arizona is often referred to as the "sunniest state" in the U.S. With Phoenix, the state's capital, boasting an impressive 299 sunny days a year, the potential for harnessing solar power is tremendous.
The first and perhaps most significant advantage of solar roofing in Arizona lies in the state's abundant sunshine. Solar panels rely on sunlight to generate electricity, and more sunlight translates to higher energy production. The more energy your solar roof can produce, the less electricity you need to draw from the grid, leading to considerable savings on your utility bills.
A significant advantage of solar roofing is the potential for substantial cost savings. While the upfront costs of solar roofing can be higher than traditional roofing materials, the long-term savings typically more than offset the initial expenditure.
Solar roofs can significantly cut down on electricity bills in Arizona, where air conditioning usage is high due to the hot climate. Since solar panels can last up to 25-30 years, homeowners are looking at decades of reduced electricity costs.
Solar energy is a clean, renewable resource, unlike fossil fuels, which are finite and contribute to climate change. You significantly reduce your home's carbon footprint by installing a solar roof. Over its lifetime, a residential solar power system can offset the carbon dioxide equivalent of driving a car for 100,000 miles or more.
Furthermore, unlike other energy sources, solar energy doesn't require water to process, making it a great option for Arizona, where water resources can be scarce.
Homes equipped with solar power systems have been found to sell at a premium compared to homes without such systems. A study conducted by the Lawrence Berkeley National Laboratory concluded that homes with solar panels sell for more than those without. Given the sunny climate in Arizona, a solar roof can significantly increase the market value of your home.
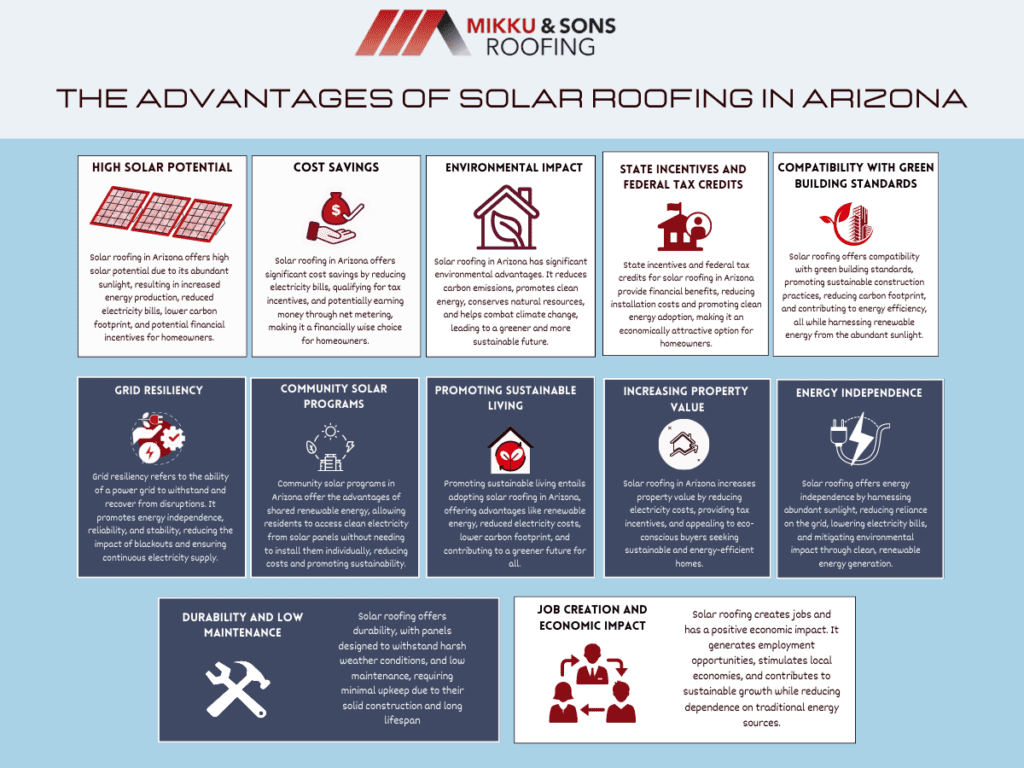
With a solar roofing system, you are less dependent on the grid. This autonomy can be particularly advantageous during power outages or periods of high electricity demand when utility companies often increase rates.
Additionally, Arizona's net metering policies allow homeowners to sell any excess electricity their solar system generates back to the grid. This setup can lead to further savings or even potential income, adding another financial incentive for solar power.
Solar roofs have proven to be incredibly durable and require minimal maintenance. They are designed to withstand harsh weather conditions, including the high temperatures and heavy monsoon rains that Arizona can experience. Most solar roofing systems come with lengthy warranties, often up to 25 years, providing homeowners with peace of mind.
Regular cleaning and an annual inspection are usually all that's needed to keep a solar roof in good condition. This low maintenance adds to the overall cost-effectiveness of the system over its lifespan.
Solar roofs, especially those paired with a battery storage system, contribute to grid resiliency. They can store excess power generated during the day for use during the night or cloudy periods.
In the event of a blackout or grid failure, homes with stored solar power can still have access to electricity. This feature can be especially beneficial in Arizona, where summer storms can sometimes disrupt the power supply.
Community solar programs offer an alternative for homeowners who may not have suitable roofs for solar installation or live in apartments. These programs allow multiple people to benefit from a single, shared solar array, which can be installed on a suitable site within the community. Arizona has several such programs, expanding the accessibility of solar power to more residents.
On a more personal level, installing a solar roof promotes a sustainable lifestyle. It allows homeowners to actively participate in the fight against climate change by reducing reliance on fossil fuels. It's a clear statement of environmental responsibility and commitment to the future of our planet.
Arizona offers several incentives for homeowners to switch to solar energy. These include property and sales tax exemptions, making the upfront cost of solar installation more affordable.
The Arizona Public Service (APS) and Tucson Electric Power (TEP) also provide incentives for customers who install solar power systems. Moreover, the federal government offers a significant solar Investment Tax Credit (ITC), which allows homeowners to deduct a portion of their solar costs from their taxes.
Solar roofs can help a building meet green building standards such as LEED (Leadership in Energy and Environmental Design). These certifications can enhance a property's value and appeal. In Arizona, where sustainable building practices are becoming more popular, a solar roof can significantly contribute to a building's green credentials.
The solar industry has also contributed positively to Arizona's economy. The rise in solar installations has increased job opportunities for solar installers, electricians, and manufacturers. According to the Solar Foundation, the solar industry has created thousands of jobs in Arizona, stimulating the local economy.
The advantages of solar roofing in Arizona are multifaceted, ranging from significant cost savings and environmental benefits to property value enhancement and energy independence.
With abundant sunshine, attractive incentives, and the potential for significant long-term savings, there's no better time than now for homeowners in Arizona to consider solar roofing as a viable, sustainable option for their homes.
Are you wondering what is the proper roof ventilation in the Arizona heat? Maintaining a comfortable home environment presents unique challenges in the breathtaking, arid expanse of Arizona, where temperatures routinely reach triple digits. Among them is a factor that often goes unnoticed: proper roof ventilation. It is a subject often overlooked in the broader discussion of building design and maintenance, yet, it carries immense significance.
By ensuring a properly ventilated roof, homeowners can reduce the strain on their air conditioning units, reduce energy costs, maintain the structural integrity of their houses, and enjoy a healthier living environment.
This article aims to shed light on the importance of proper roof ventilation in Arizona's scorching climate, exploring the science behind roof ventilation, its tangible benefits, and effective ventilation strategies for your home. Let’s start!
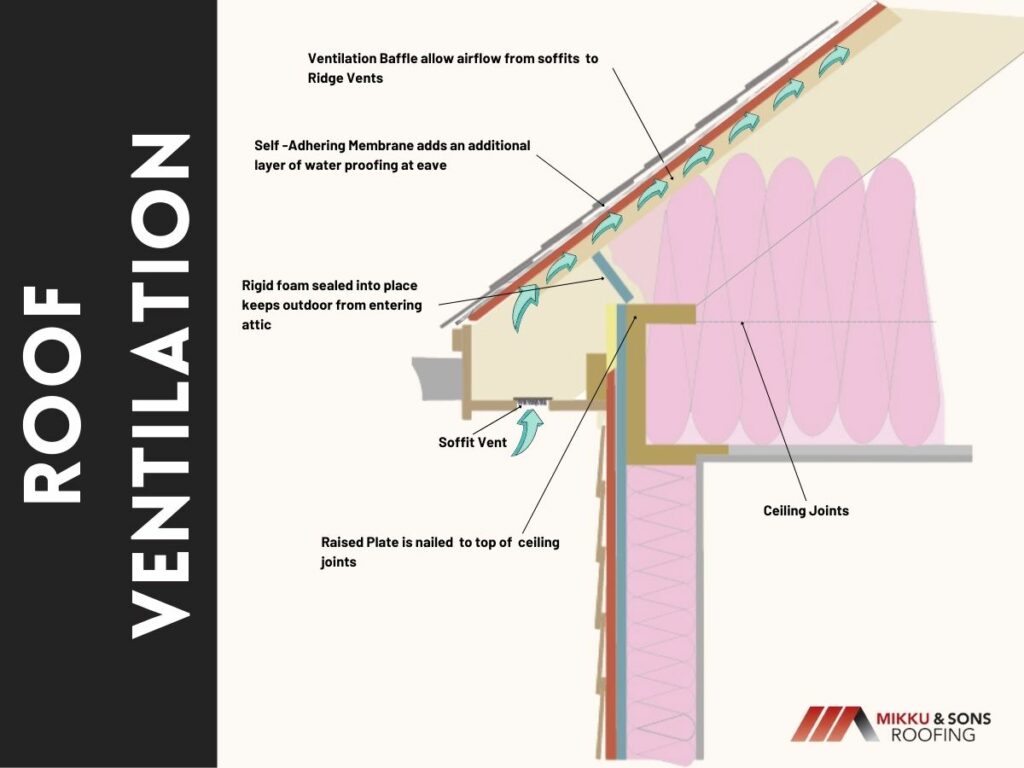
Before delving into the importance of roof ventilation in Arizona heat, it's necessary to understand what roof ventilation is and how it operates. Simply put, roof ventilation is a system that allows air to flow in and out of your attic space, ensuring that the air inside your home is neither too hot nor too cold, regardless of the weather outside.
The science behind roof ventilation is relatively simple. The sun heats up the roof, warming the air in your attic. If this warm air is not allowed to escape, it can radiate downward, raising the temperature of the living spaces below.
At the same time, cool air must be allowed to enter the attic to replace the hot air that has been expelled. This process creates a continual air exchange, keeping the attic's temperature more in line with the outside temperature, which is significantly cooler than the heated roof surface.
In the relentless heat of Arizona, where summer temperatures can soar past 100 degrees Fahrenheit, proper roof ventilation becomes more than just a matter of comfort; it's a necessity for several reasons:
In the scorching Arizona heat, attics can reach temperatures far exceeding the outdoor temperature. This heat buildup can then permeate downward into living areas, causing air conditioning systems to work harder and consume more energy.
By promoting the circulation of cooler air and expulsion of hot air, proper roof ventilation reduces the temperature in the attic, resulting in less strain on the air conditioning system, conservation of energy, and reduction of utility bills.
Prolonged, extreme heat exposure can cause significant damage to your roof. The roofing materials can deteriorate more quickly under these conditions, leading to leaks, damage, and potentially a premature need for roof replacement. The heat can also warp the house's structural elements over time.
A well-ventilated roof helps mitigate these risks by reducing the temperatures to which these components are subjected.
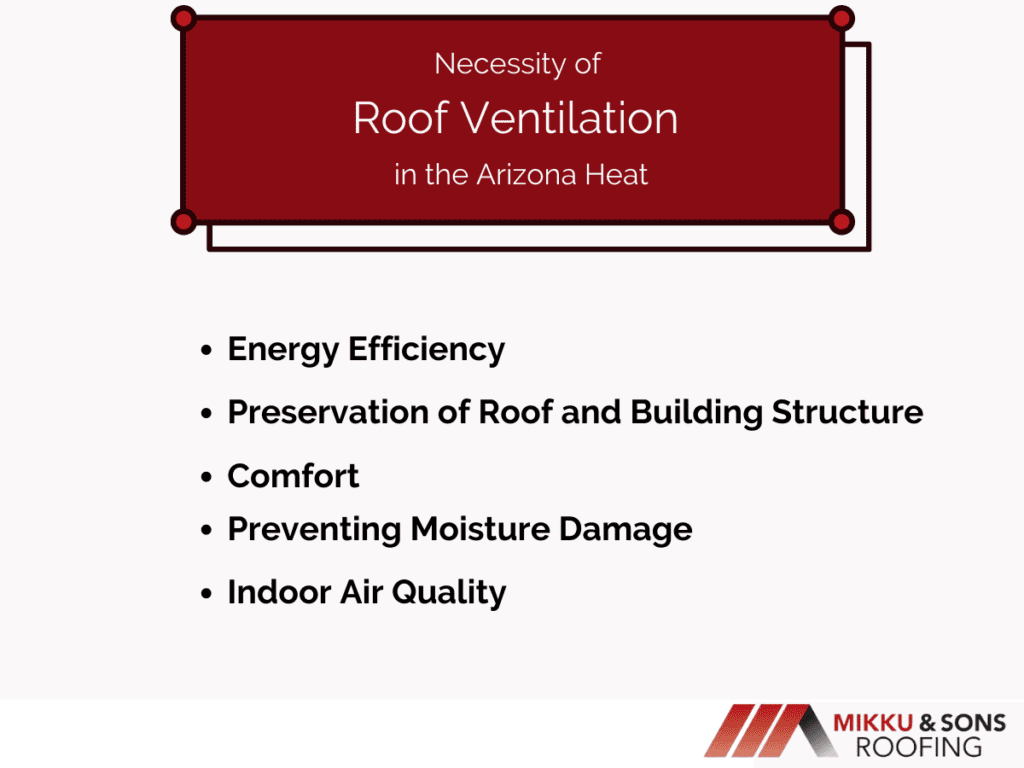
Comfort
Inadequate ventilation can turn your attic into an oven, allowing heat to permeate down into your living space, making your home uncomfortably warm. Good ventilation helps to keep your home cooler and more comfortable during the Arizona summer.
While Arizona is known for its dry heat, it still experiences periods of high humidity, rain, and even snow in some regions. During cooler months, warm air from heating systems can rise into the attic, where it can condense on colder surfaces, leading to moisture accumulation.
Over time, this can lead to mold growth, wood rot, and other moisture-related problems. Proper ventilation helps maintain a more consistent attic temperature, reducing the potential for condensation.
Improperly ventilated attics can become hotspots for mold and mildew growth, particularly if there are leaks or condensation issues. These spores can infiltrate your home's living spaces, triggering allergies, asthma, and other respiratory issues.
Proper roof ventilation can help improve your home's overall air quality by maintaining a cooler, drier attic environment. Thus, proper roof ventilation is essential for maintaining a comfortable, healthy, and energy-efficient home in the Arizona heat. It is a critical aspect of home design and maintenance in hot climates and one that warrants careful consideration.
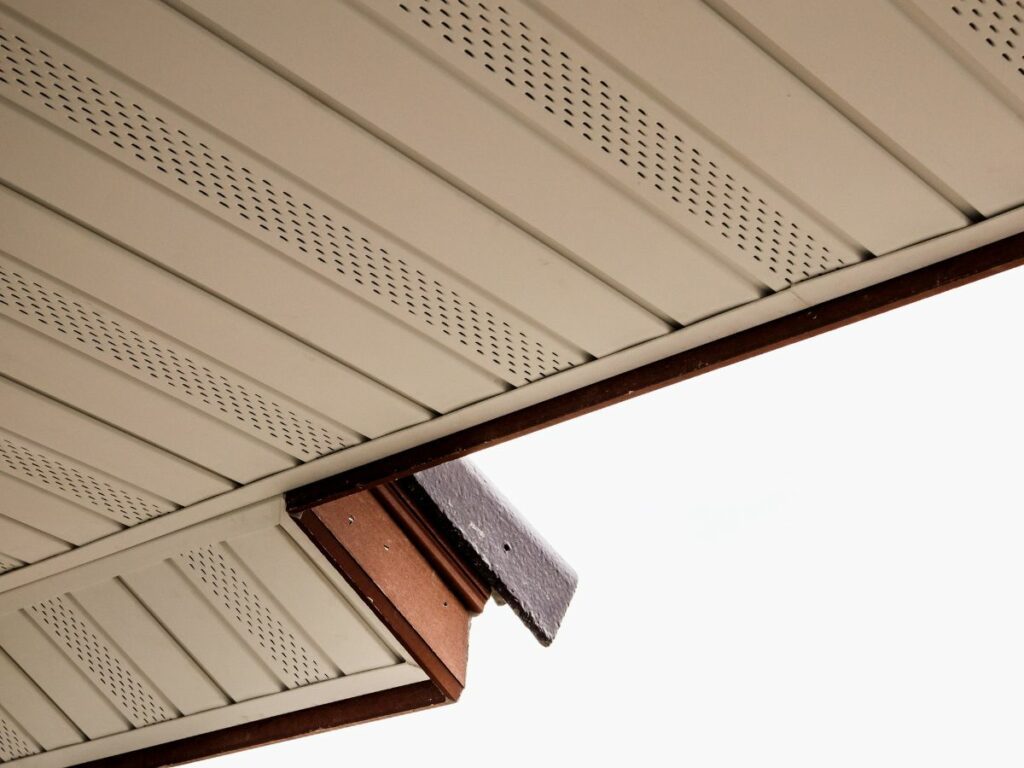
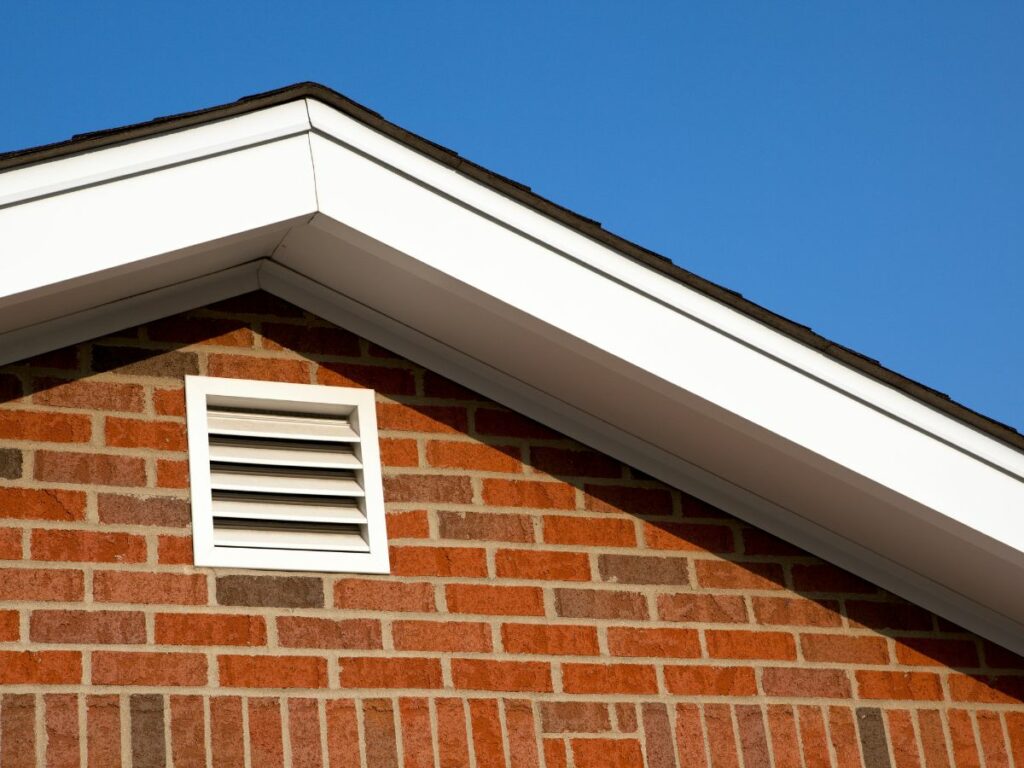
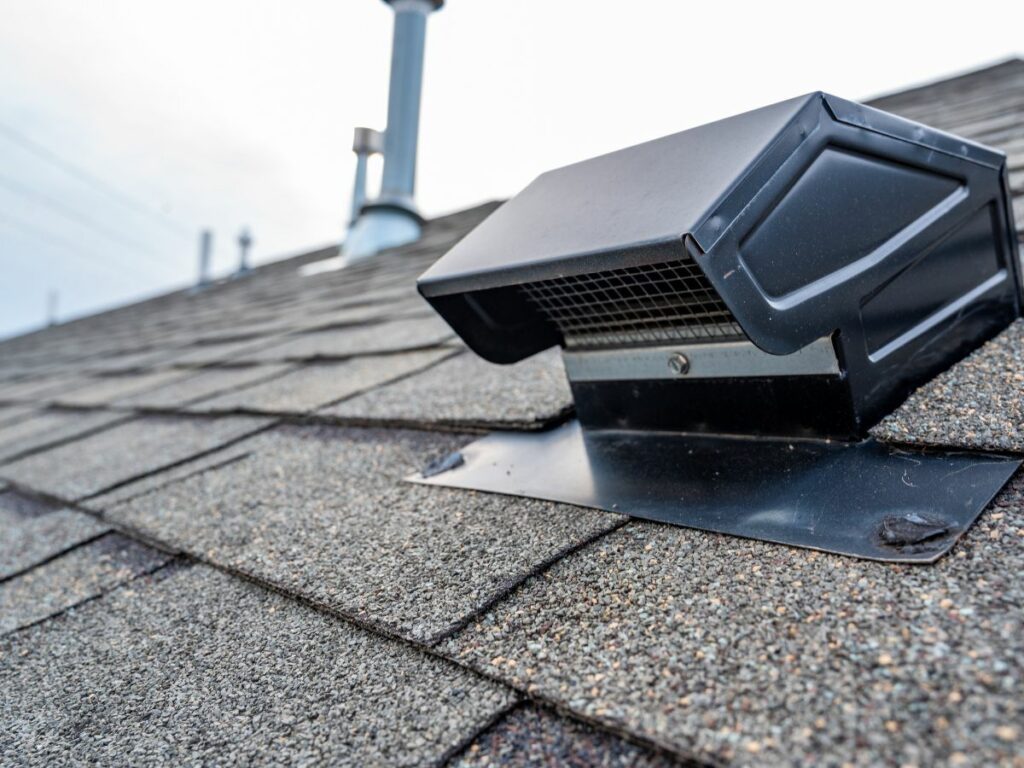
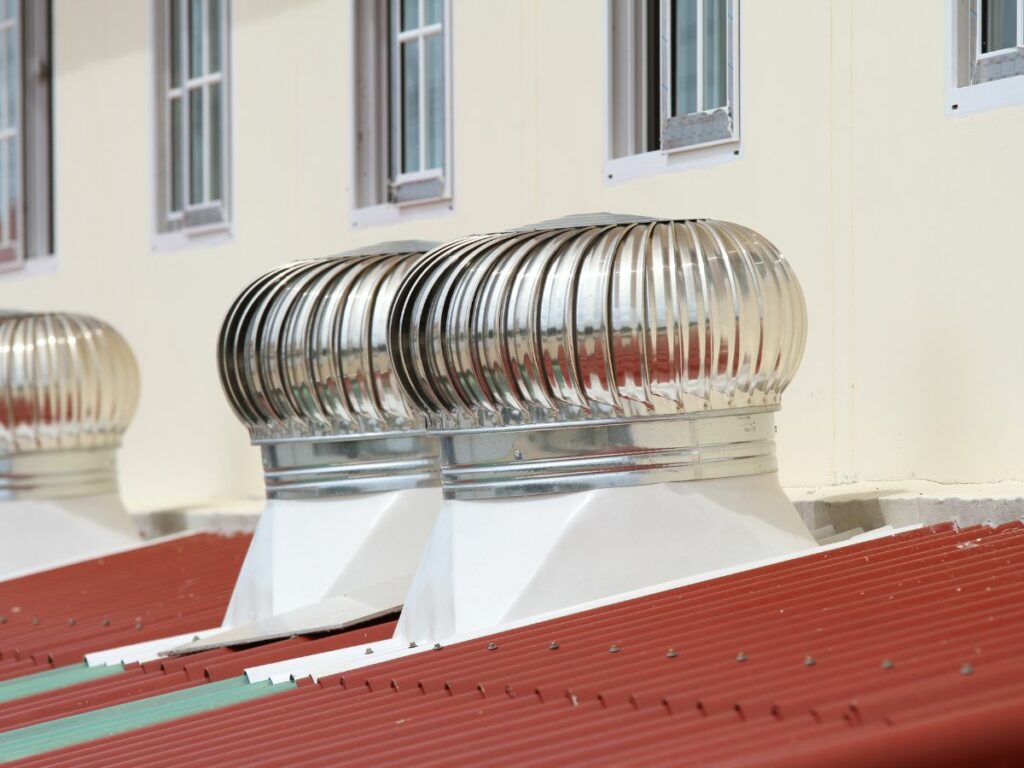
Roof ventilation methods primarily focus on maintaining a continuous flow of air in the attic, removing hot air, and bringing in cooler air. The various methods employed each have their own strengths and specific uses, and often, a combination of methods is used to achieve optimal ventilation.
Here are some common roof ventilation methods:
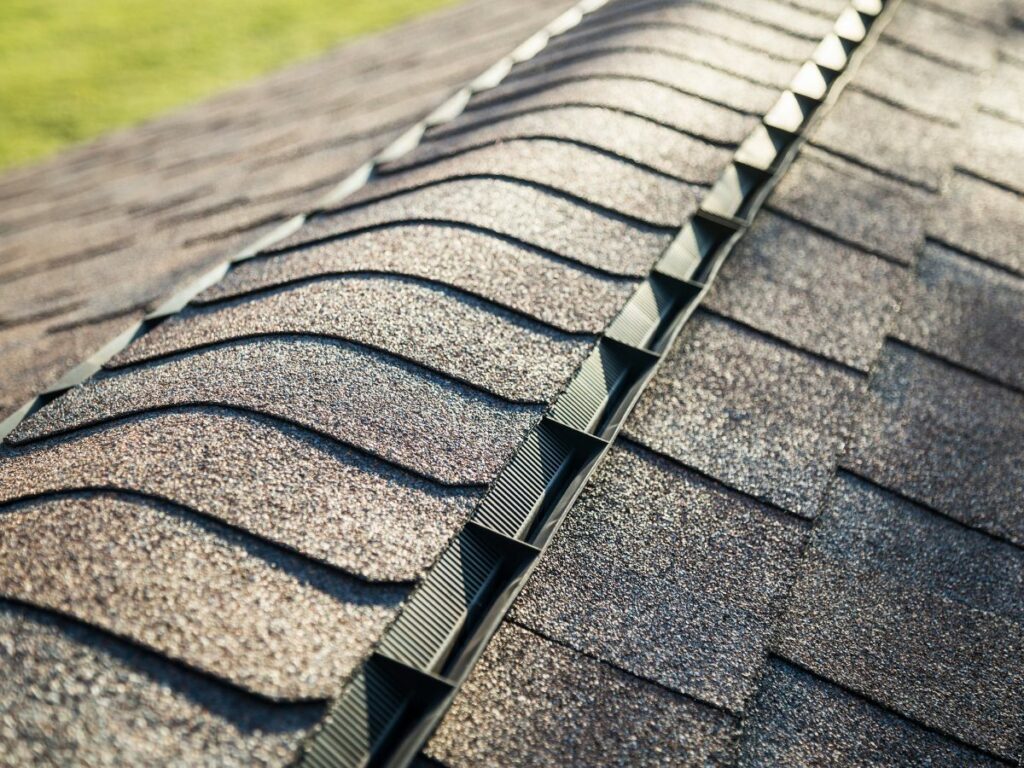
Choosing the best method or combination of methods for ventilating a roof depends on a variety of factors, including your roof's design and structure, local climate, and your specific needs. It is recommended to consult with a roofing or ventilation expert to determine the most effective ventilation system for your home.
While installing or improving your roof's ventilation system may involve an initial investment, the long-term benefits in the form of lower utility bills, reduced maintenance costs, and a healthier living environment make it a wise decision, particularly in the extreme heat of Arizona.
Considering your home's specific needs and characteristics, working with a professional roofer who can evaluate your current ventilation system, identify any issues, and provide the most effective solutions is highly recommended.
Remember, a well-ventilated roof protects the house from the searing Arizona heat, enhances the roof's longevity, and contributes to a healthier, more comfortable indoor living environment. It is a fundamental aspect of home maintenance in Arizona that deserves careful attention and timely action.
The roof is one of the most crucial components of both residential and commercial buildings. It's an essential utility that safeguards your family, possessions, and you from the potentially damaging impacts of the weather. Roofs, however, can also significantly impact your home's aesthetics.
So how important should you consider roof aesthetics in your home? The truth is that it can be crucial, especially if you want to raise the value of your house. An aesthetic roof may increase your home's resale value and attract more potential buyers, but quality and durability always win out.
Read this article to learn more about the significance of taking roof aesthetics into account. We’ll talk about the following topics:
Apart from the fact that your roof protects you against many elemental dangers and environmental hazards, the roof aesthetics also matter because they are prominent and permanent.
The majority of property owners want their buildings to look good and to be presentable at all times. It is important for homeowners to have curb appeal, and it is important for businesses to have a good reputation. If you're the kind of homeowner who takes great care in your house and neighborhood, choosing an aesthetic roof will bring you a lot of satisfaction.
If you choose an aesthetically pleasing roof for your house, you are giving it a facelift by injecting some style into it. On the other hand, a dated or worn-out roof might make your house appear old and neglected, which will result in lesser bids from prospective buyers. Aesthetics are important, and making an investment in your roof's appearance can pay off in the long run by raising the value of your house when you decide to sell it.
Not everything hinges on having fancy roofing materials and elaborate style. There are also other factors to take into mind if you want your roof to be regarded as aesthetic. These are a few roofing aesthetic considerations:
First of all, you have to make sure that the roof of your choice blends in with the surroundings. For instance, the roof of an old-style house should be compatible. Commercial buildings that are really modern should have intricate structures that match their architecture. Keeping the design consistent helps to enhance the property's overall appeal.
For the roof to truly have curb appeal, it must look beautiful from every angle and perspective. If the roof installation is done properly, there won't be any unsightly areas or other problems. The material and style of your roof should complement the architecture and design of your home to create a cohesive and attractive look.
Choose the appropriate hues and patterns for your roof. There are many possibilities available for materials like asphalt, metal, and clay roof tiles, so it's simple to pick something that exactly meets your needs. A beautiful roof that does not complement the color and texture of the house can really be just as bad.
Items above the hood are important, but they are just as important as things underneath. Your roof's underlayment needs to be as sturdy as the protective metal or asphalt shingles. When the roof is functioning properly and can last long-term, you have what you need to increase the value of the property.
As mentioned, aesthetic roofs are wonderful, but they must also be reliable and functional. If the roof is flimsy, it will seriously do more harm than good to your property. In fact, the components above the hood are equally as essential as those underneath. Thus, your roof should resist all kinds of weather like hail, rain, snow, and wind storms.
For instance, the roof should protect both the interior and exterior of the building. It should have adequate drainage without any holes or other weak spots that could let water leak later. A high-quality roof will reliably protect your property for many years.
Additionally, your roof should be strong enough to stop internal and external air leakage. A strong roof will reflect the sun's rays, maintaining a fairly constant temperature beneath its surface. These considerations will ensure that your HVAC system doesn't have to work too hard or use a lot of energy to keep things comfortable.
The material and style of your roof can impact its overall appearance and resale value. For instance, a sleek and modern metal roof can add a contemporary touch to your home, while a classic shingle roof can create a more traditional look. With that, here are some of our recommendations to elevate the aesthetic of your roof without sacrificing its quality.
Clay or concrete roof tiles can elevate the aesthetics of your old-style home. If you have a Mediterranean or Spanish-style house, clay or concrete tiles will look best on your roof. Both materials are solid and suitable for hot temperatures, enduring strong winds, and heavy rains. However, due to the weight of these materials, a structure with stronger support and foundation is needed to install them.
Due to its simple construction, durability, and variety of shapes and colors, metal is a common building material. Modern houses, log cabins, and bungalows look aesthetically pleasing with metal roofs. It can also shield homes from fire as well as torrential rain and intense sunlight. Metal roofs can last for more than ten years if they receive the necessary care. They are economical because of their durability.
Asphalt, fiberglass, and mineral granules comprise asphalt shingles, also known as composite shingles. They are regarded as fashionable and available in various designs and hues. Asphalt shingles complement many different architectural types as well as classic suburban homes.
Because it is simple to install and reasonably priced, asphalt is a common choice for roofing materials. Also, the lifespan of asphalt shingles can range from 12 to 30 years or even longer, depending on their quality and how well you maintain them.
Another popular roofing material that is admired for its beauty and toughness is slate. Slate is an organic material made out of rock, making it last longer than other roofing materials. It is a top option for homeowners who only want the best materials for their roofs. It is fire-resistant, waterproof, and requires minimal maintenance. It can last for up to a century. However, it is indeed one of the most expensive roofing materials and one of the hardest to install.
Insulated Metal Panels complement any modern home or architectural style because they are available in various colors and designs. Homeowners choose this type of roofing material when they want high-end metal roofing that serves both functionality and aesthetics.
While it provides an aesthetically pleasing style to your house, it can also aid in regulating the temperature within your home and result in energy savings. Insulated roofing panels are made of multiple layers, with a polyurethane or polyisocyanurate core sandwiched between two metal sheets, giving them strength, fire resistance, and weather resistance.
If you decide to install an aesthetically pleasing roof, your home will appear better than ever, especially to prospective buyers if you ever plan to sell it.
One of your home's most noticeable characteristics, the roof is important in making a strong first impression. Your home can stand out in a crowded real estate market and attract more potential buyers with a lovely, well-maintained roof.
However, while selecting roofing materials and designs, it's crucial to consider durability, energy efficiency, and maintenance requirements. By investing in high-quality roofing materials, you can improve the appearance and durability of your roof and the value of your home. Ultimately, it is not worthwhile to forgo functionality in favor of aesthetic looks.
If you have an old roof and are considering replacing it, you are not alone. A worn-out roof must be replaced as it is one of the essential components of your house. In addition to giving your house a more excellent and newer appearance, a new roof has real advantages like an increased home value.
This article will discuss how your roof affects your home’s value and whether replacing it is a decent return on investment. We’ll discuss the following:
Most homeowners are worried about their roofs protecting all the expensive items underneath them. Even if the rest of your house needs to be updated and worth a lot, upgrading a new roof can significantly raise the value of your house. For instance, if something goes wrong with your roof, replacing it can be one of the most expensive upgrades you can do. Therefore, ensuring that part of your home looks great and lasts a long time adds much value to your home.
Furthermore, if you are remodeling your home to make it stand out in the market and add to its value for insurance or resale purposes, the roof should be a top priority. It is what the home inspectors immediately check when they visit a house since a roof's condition directly affects a home's value. A new or updated roof provides a great return on investment since it significantly improves a home's overall health.
For starters, a roof nearing the end of its lifespan or leaking will definitely decrease your home value. Even if a house has a lovely structure and a sturdy foundation, nobody will notice these things if the roof is deteriorating and coming off. It could be a significant problem if you're thinking about selling.
As mentioned, one of the most essential elements in evaluating the overall value of your property is the condition of your roof.
Although a roof replacement can be expensive, it might be worthwhile considering the potential harm your old roof could do to your selling. There could be fewer offers, a longer sale process, and a reduced offer price.
A new roof can increase the value of a home, but you would see a partial return on investment. The overall housing market impacts the value of every home improvement.
Additional elements should also be considered, including the state of your roof, the local housing market, and the type of replacement roof you select. Your best choice for understanding the market circumstances you are dealing with is to consult local appraisers and professional real estate brokers.
However, it is essential to note that even if you don't see a total return on your investment, you can increase your likelihood of getting your total asking price, shorten the time your house is on the market, and facilitate smoother negotiations with buyers. According to The National Association of the Remodeling Industry (NARI) report, they have found that new roofs provide a 109 percent return, which means you could still make a profit on your new roof.
A new roof will generally yield a return on investment of 60-68 percent, depending on the state of your previous roof and the quality of the materials used. You won't get a 100 percent ROI, but that doesn't mean you shouldn't consider it.
Generally, your home's outside will look better with a new roof, making it easier to sell. A quicker sale can result in cash gains depending on your goals and objectives.
With that, here are a few of the most critical considerations for considering a new roof before putting your house on the market.
A local roofing contractor can examine the roof's condition and inform you of its precise requirements. In many circumstances, your contractor can repair them instead of completely replacing them while guaranteeing their work.
You may significantly reduce potential concerns prospective purchasers may have by displaying the inspection report and the contractor's warranty.
A new roof can be expensive to purchase, and there is no assurance that you can recoup your costs when you sell the house. Finding a contractor who employs quality installation services, the appropriate materials, and reasonable pricing is the key.
This can result in products of exceptional quality at a low price, thus enhancing the cost-to-value ratio.
You should match the material of your existing roof if you are merely replacing shingles or a portion of the roof. On the other hand, you have more choices if you're rebuilding the roof entirely.
The money you get back for your new roof may depend on your chosen shingles. Generally, a new roof must be constructed with roofing materials that are at least as good as the old ones, if not better.
Whether investing in a new roof is a wise decision largely depends on your unique situation. While it may seem like an expensive renovation up front, the return on investment can be more than you anticipate.
However, investing in new high-quality roofing might not necessarily result in the rise in home value you hope for. It would be best to consider several important factors, such as buying preferences, market conditions, and roof conditions.
Even though you may not predict precisely how much a new roof will increase your home's value, it's crucial to consider the other benefits of upgrading your roof, such as improving its overall health, enhancing its appearance, and safeguarding you from danger.
A roof replacement is a significant investment that not only enhances the appearance of your home but also safeguards its structural integrity. Proper preparation is essential to ensure a smooth and successful project.
This comprehensive guide will walk you through the steps to preparing your home for a roof replacement, from choosing the right contractor and materials to taking care of your home's interior and exterior. We’ll talk about the following topics:
The first step in preparing for a roof replacement is finding a reputable, experienced roofing contractor. A reliable contractor will ensure the job is done professionally, within budget, and on time.
Conduct thorough research by:
By following these steps, you can make an informed decision and choose the right roofing contractor for your roof replacement project. This will ultimately help you achieve a successful outcome and ensure the longevity and durability of your new roof.
Before starting a roof replacement, obtaining the proper permits and documentation is crucial to ensure the project adheres to local building codes and regulations. This process helps to maintain safety and avoid potential legal issues or fines.
Here are some steps to ensure you have the necessary permits and documentation for your roof replacement project:
By ensuring proper permits and documentation are in place before starting a roof replacement, you can protect yourself from potential legal issues and fines and ensure your new roof adheres to local building codes and safety regulations.
Selecting the appropriate roofing material is an important decision when planning a roof replacement. Factors to consider include climate, aesthetics, durability, cost, and energy efficiency.
Here are some common roofing materials and their characteristics to help you make an informed decision:
The most popular roofing material, asphalt shingles, are affordable, easy to install, and come in a variety of colors and styles. They have an average lifespan of 20-30 years and provide adequate protection against various weather conditions. However, they are not the most eco-friendly option and may not be suitable for extreme climates.
Metal roofs are durable, lightweight, and low maintenance. They can last up to 50 years and protect against extreme weather conditions, including wind, hail, and fire. Metal roofing is energy-efficient, reflecting sunlight to reduce cooling costs. However, it can be more expensive than asphalt shingles and may not suit all architectural styles.
Tiles of clay or concrete are heavy, durable, and long-lasting (up to 50-100 years). They provide excellent protection against fire, wind, and hail. These tiles are energy-efficient, help maintain indoor temperature, and come in various colors and styles. However, they are more expensive than other materials and may require additional structural support due to their weight.
Wood roofing materials are natural and attractive, suitable for traditional or rustic homes. They typically last 25-30 years, depending on the type of wood and proper maintenance. However, they are more susceptible to fire, rot, and insects and may require frequent maintenance. Some areas may have restrictions on wood roofing due to fire concerns.
Slate is a premium roofing material with a distinctive appearance, often found in historic or high-end homes. It is extremely durable, with a lifespan of up to 100 years. Slate provides excellent fire and weather resistance but is heavy and expensive. It also requires professional installation and may need additional structural support.
Synthetic materials, such as rubber, plastic, or composite roofing, are designed to mimic the appearance of natural materials like wood or slate. They are lightweight, durable, and low-maintenance, with lifespans ranging from 30 to 50 years. However, they can be more expensive than traditional materials, and their long-term performance may vary.
When selecting a roofing material, consider your home's architectural style, local building codes, and climate. Work with a knowledgeable contractor to discuss the advantages and disadvantages of each material and choose the one that best suits your needs and preferences. Selecting the appropriate roofing material ensures your roof replacement is a long-lasting and valuable investment.
Before starting a roof replacement project, it's essential to prepare the exterior of your home to protect your property and ensure a smooth and efficient process.
Here are some steps to follow:
By taking the time to prepare the exterior of your home before a roof replacement, you can minimize potential damage, make the process more efficient, and ensure a safer environment for the roofing crew.
Preparing the interior of your home before a roof replacement is essential for minimizing disruptions and potential damage caused by the construction process. Here are some steps to follow:
By preparing the interior of your home before a roof replacement, you can minimize disruptions, protect your belongings, and maintain a safe and comfortable environment for your household.
Preparing for potential challenges before a roof replacement is essential to minimize disruptions and ensure a smooth process. Here are some common challenges and how to prepare for them:
Roofing projects can be delayed or interrupted by adverse weather conditions, such as rain, snow, or high winds. Monitor the weather forecast leading up to the project and discuss contingency plans with your contractor. Be prepared for potential delays and have a flexible schedule to accommodate any changes.
Once the old roofing materials are removed, there may be hidden damage to the roof deck, rafters, or other structural elements. This can lead to additional repairs and increased costs. Discuss this possibility with your contractor and ensure you have a contingency budget for unforeseen expenses.
Roofing materials can sometimes be subject to delays or shortages, which can impact the project's timeline. Communicate with your contractor to ensure materials are ordered and delivered on time. Be prepared for possible delays and have a flexible schedule.
Roof replacement can be noisy and disruptive for both you and your neighbors. Prepare for the noise by finding alternative workspaces or quiet areas in your home. Inform your neighbors about the project to minimize potential conflicts.
Roofing crews need space to park their vehicles, store materials and set up equipment. Discuss access and parking requirements with your contractor and make necessary arrangements, such as relocating your vehicles or coordinating with neighbors.
As mentioned above, you must ensure all necessary permits are obtained and inspections scheduled before starting the project. Failure to comply with local building codes and regulations can lead to delays, fines, or legal issues.
Roofing work can be hazardous, both for the crew and your property. Ensure your contractor follows proper safety protocols and takes measures to protect your home and landscaping.
Maintain open lines of communication with your contractor throughout the project. This will help address any issues that arise promptly and minimize potential misunderstandings or conflicts.
Preparing for a roof replacement is crucial in ensuring a smooth and successful project. From selecting the right roofing contractor to protecting your home's interior and exterior, careful planning and preparation can significantly impact the overall experience.
By addressing potential challenges and taking the steps above, you can ensure that your roof replacement project is a positive and stress-free experience. A well-prepared homeowner can enjoy the peace of mind that knowing their home is protected with a durable, high-quality new roof that will last for years.
