When it comes to roof repairs, one of the most overlooked aspects is whether a building permit is required. Many homeowners assume they can fix minor roofing issues without involving the local building department.
While that may be true for small repairs, some projects legally require a permit to ensure compliance with building codes and safety regulations. A permit for a minor roof repair depends on local regulations, the scope of the work, and the materials used.
Generally, small repairs like patching leaks or replacing a few shingles might not require a permit. However, it's essential to check with your local building department to ensure compliance with specific regional regulations. Let's look at whether to look for a Permit for a Minor Repair on your roof.
When planning a roof repair, it’s important to understand the role of building permits. Many homeowners and property owners may overlook this step, assuming that minor repairs don’t require permits. However, depending on your location and the extent of the work, obtaining the proper permits is often necessary to ensure compliance with local building codes.
Failing to secure a permit when required can lead to fines, delays, and even the need to redo the work. Building permits are put in place to regulate construction and ensure safety.
Roof repairs involve structural elements, which can impact the overall integrity of your home or building. Whether you’re replacing shingles, fixing a leak, or making more extensive repairs, knowing when a permit is needed can save you from costly mistakes.
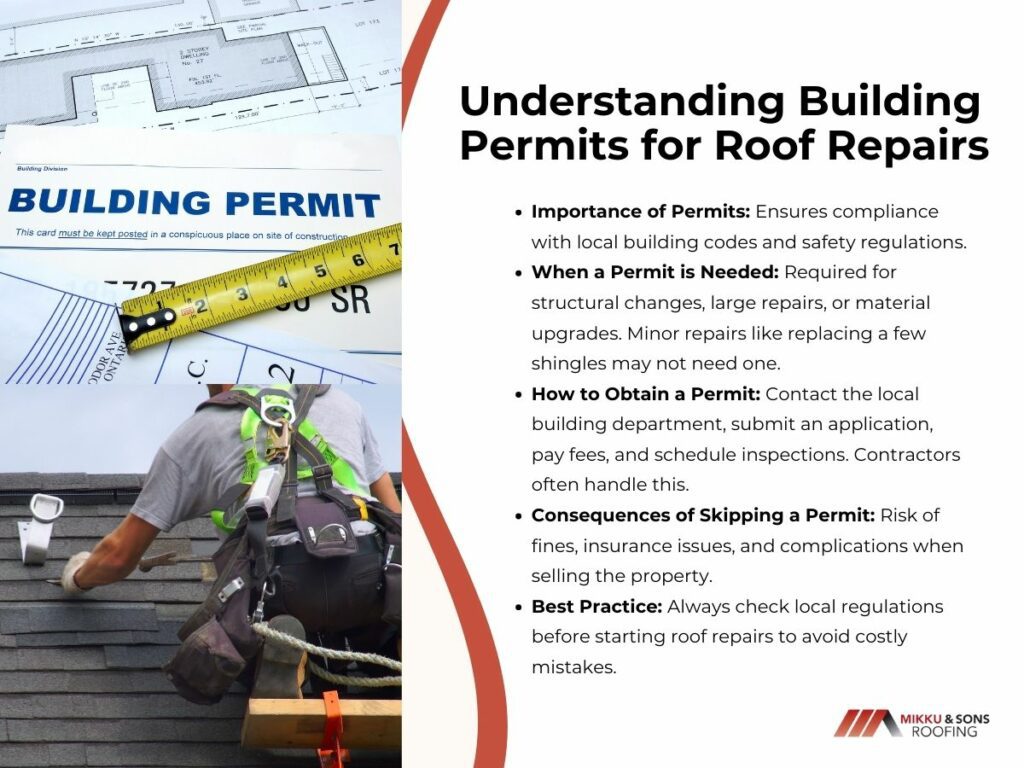
Not all roof repairs require a permit, but there are certain situations where one is necessary. The need for a permit depends on the following:
Before starting any roofing project, it’s best to check with your local building department to determine if a permit is needed.
If a permit is required for your roof repair, the process is relatively straightforward:
If you hire a licensed contractor, they will often handle the permit process for you, ensuring that everything is completed correctly.
Skipping the permit process may seem like a way to save time and money, but it can lead to serious issues:
Not all roof repairs require a permit, especially if they are minor and do not affect the structural integrity of the roof. Generally, the following types of roof repairs can be performed without obtaining a permit:
Repairs that don’t compromise the roof’s overall structure often don’t require permits. These include:
Since these repairs involve minimal work and do not alter the underlying framework, they are often considered routine maintenance.
If a storm or strong winds have removed a handful of shingles, you can typically replace them without a permit. However, if the repair involves a large section of the roof or changing the material, a permit may be required.
Many local building departments allow homeowners to make small repairs—often under 100 to 200 square feet—without a permit. However, the exact square footage varies by location, so it’s always best to check with your municipality.
Cosmetic work, such as painting, cleaning, or applying a protective roof coating, does not require a permit. These tasks do not impact the roof’s integrity or alter the structure, making them exempt from permitting requirements.
General maintenance, such as cleaning gutters, removing moss or debris, and reapplying caulking, typically does not require a permit. These tasks help extend the lifespan of your roof but do not involve structural changes.
Although these repairs generally don’t require a permit, always verify with your local building department to ensure compliance with regional regulations. Different cities and states have varying rules, and what’s permissible in one area may require a permit in another.
While minor fixes may not need a permit, larger repairs or modifications almost always do. You will likely need a permit for:
Failure to obtain a permit when required can result in fines, delays, and even forced removal of completed work.
If your roofing project requires a permit, the process is usually straightforward but requires careful attention to detail.
Each city and county has its own set of building codes that determine when a permit is necessary. Before starting your project, check your local building department’s website or visit in person to understand the requirements.
Once you confirm a permit is needed, the next step is to complete the application process. This typically involves:
Some municipalities require a consultation or pre-approval before issuing a permit. This may involve meeting with an inspector or building official to review your plans and ensure they meet code requirements.
Permit approval times vary, ranging from a few days to several weeks, depending on the complexity of the project. Once approved, the permit must be displayed on-site for inspection purposes.
Most roofing permits require at least one inspection. An inspector may check:
Skipping inspections can result in penalties or requiring work to be redone, leading to increased costs and delays.
Skipping the permit process may seem like an easy way to save time and money, but it often leads to serious consequences.
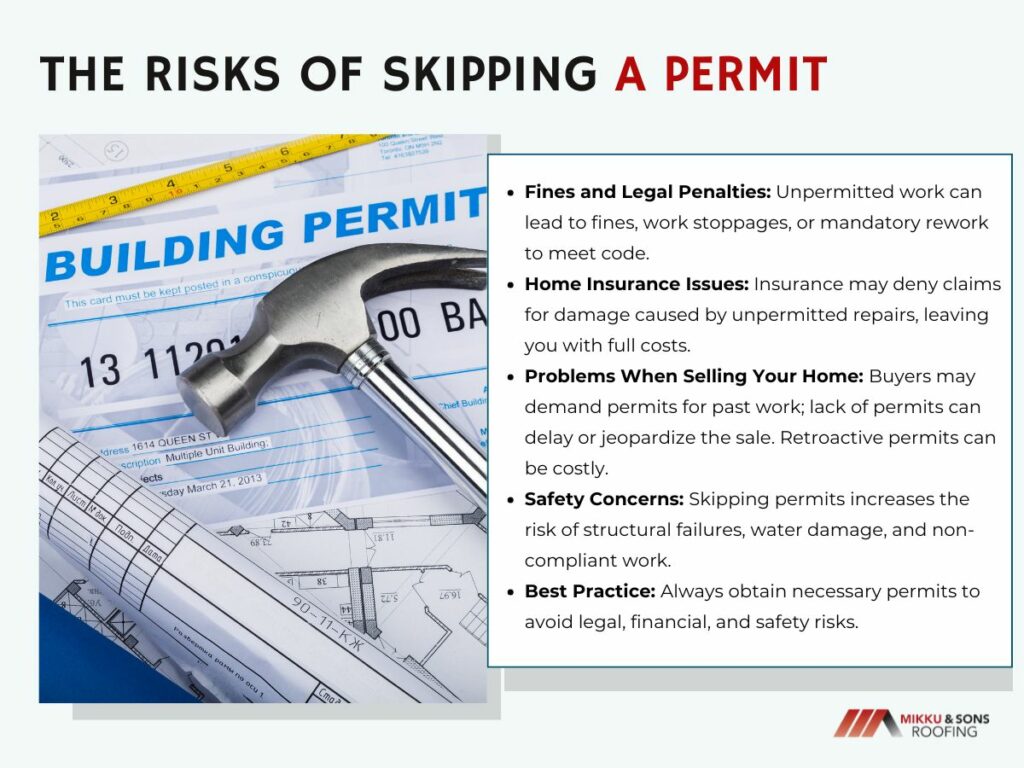
If a building inspector discovers unpermitted work, you could face hefty fines or be forced to stop the project until a permit is obtained. Some municipalities may even require you to remove and redo the work to ensure compliance.
Many insurance companies do not cover damages caused by unpermitted work. If your roof suffers damage due to improper repairs, your claim may be denied, leaving you responsible for the full cost of repairs.
When selling a home, unpermitted work can create major issues during a buyer’s inspection. Buyers may request permits for previous repairs, and if none exist, it can delay or jeopardize the sale. In some cases, homeowners must obtain a retroactive permit, which can be costly and time-consuming.
Permits exist to ensure that roofing work is completed safely and according to code. Skipping this step increases the risk of structural failures, water damage, and other costly issues that could have been avoided with proper inspections.
If you're unsure whether your roof repair requires a permit, it's best to consult a professional. Architects, contractors, and roofing specialists have experience navigating local regulations and can help:
Hiring a licensed professional ensures your roofing project is done legally, safely, and without unnecessary delays.
Navigating Arizona's roofing permit requirements is crucial for any roofing project. Whether it's a full replacement, structural repair, or material change, a permit is often necessary to ensure compliance with local building codes. While minor repairs might not require a permit, consulting with your local building department is always a good idea.
Failing to obtain the necessary permit can lead to financial penalties, liability issues, and project shutdowns. Engaging with an experienced roofing contractor can help you navigate this process, ensuring your project adheres to all regulations and avoids potential pitfalls.
In addition to being inconvenient and frustrating to deal with, roof leaks can also have a negative impact on the structural integrity of your home. A leaking roof can lead to the growth of mold in your home, which can pose a health hazard.
If the weather is too terrible or you don’t have the money to hire a professional residential roofer, you need a quick and easy remedy to stop the leak.
Before you get started, take a look at our article which will help you determine if you need to patch or replace a leaking roof.
Also, did you know that roofing tar is a brilliant way to patch and stop leaks? Check out our article for more guidance!
So, continue reading our simple step-by-step guide on How To Fix a Leaking Roof.
As mentioned, there may be times when you need to fix and stop a leak quickly before you gather the money to hire a professional.
So, what are your options for repairing a leaking roof in a hurry? Below we have listed eight fast fixes that can get you started on learning How to Fix a Leaking Roof:
A tarp is a simple and effective temporary solution for repairing a leaking roof in an emergency. Once you’ve discovered where the leak is coming from, climb up on top of the roof and put a tarp over it.
Cracks in your roof may be repaired with roofing cement. It can also be used to mend holes in your roof. When using this method, make sure your roof is completely dry before applying the roof cement.
Putting roofing cement is a straightforward task as it involves removing any debris from the hole or crack then using roofing cement to fill in the rest of the gap. Overlaying a roofing mesh on top of the cement is a common recommendation from roofers.
Although this isn’t a long-term solution, it can serve as an effective short-term remedy. Fixing a minor shingle, flashing, or soffit hole is simple with this method.
Some roofers apply silicone around chimneys. However, this can become brittle and damaged over time. Using a new program in these trouble spots can help halt a leak.
While many roof leak repair kits are on the market, selecting one that can fix the leak can be a challenge. This isn’t a long-term solution like silicone, but it’s helpful in an emergency.
The product may be used in both wet and dry circumstances. More minor leaks can be fixed by applying them directly to the spot where the leak occurs. A mix of procedures may be required to halt leaks in more prominent regions.
Using a tarp and then sealing the edges with rubber is one option. Keep in mind that the color of the material it’s sprayed on will change due to this.
Don’t overspray or apply it to sections you don’t intend to replace. As a result, large splotches of color might be left on your roof due to my actions.
If your roof leaks, you can use roof flashing as an alternative solution. It allows water to flow over the region without entering the building.
It’s as simple as applying caulk around the leak, tucking the flashing under the shingles, and pressing it against the caulk, which will keep it from leaking.
In areas of the roof where the most water is likely to drain, flashing may be a very efficient method of preventing leaks. Professional contractors typically apply flashing when the roof is first installed to ensure the roof’s long-term viability.
Commonly, roof leaks are caused by buckling, curling, or damaged shingles. If you consider yourself more of a handyman, you might be able to take on the task of changing the shingles on your own.
To begin, you’ll need to remove the shattered shingles from the roof. Slide a flat pry bar into place beneath each of your roof shingles to remove the nails. A new shingle can then be nailed into place after this procedure.
In order to keep a shingle in place, you can apply roofing cement on the shingle’s underside. If your emergency roof repair appears to have been successful, you should still contact a professional roofing contractor to ensure that the roof leak was fixed appropriately.
Even if you don’t have extra roofing materials on hand, a sheet metal shingle may be used to cover your roof while you get new ones temporarily.
To replace an average shingle, just cut a piece of sheet metal to the proper size and form. Then proceed as if you were replacing an ordinary shingle. For best results, use roofing cement to conceal any nails that could protrude from your sheet metal shingle.
The pipe flashing boot may have been damaged if your leak comes from around the pipes. The ancient pipe flashings may be vulnerable to this. You may need to purchase and replace this inexpensively to stop the leak. To ensure a proper fit, measure and select the appropriate pipe size. Sizes and colors range from little to enormous.
Leaking roofs can be a huge hindrance and cause damage to your home's structure. So we've set out some simples steps below to help repair the roof until you can hire a professional!

It’s best to start with a ceiling stain and work your way up to the leak. Using a ladder and flashlight, climb into the attic closely following a vertical line up to the top of the roof.
You could check your roof ridge if the leak is coming from a few feet higher up there. Black or white stains, mold, or mildew might indicate the leak is coming from the underside of the roof deck.
Roof vents commonly cause roof leaks. Roof vents might include attic fans, turbines, plumbing soil stack pipes, and other metal flashing extending over the roofline. Damaged plywood on the roof decking might be the cause of the leak.
Repair any damaged vents if the leak is coming from the roof itself. The housings or boots may have developed cracks. Dislodged vents might be to blame for this.
Ensure that the vents are not loose or missing any nails that secure them to the roof.
Remove the damaged roof vent from the top of the roof. First, remove the shingles from the vent by prying out the nails with the pry bar. Pull back the shingles covering the vent’s base with the pry bar next.
It’s a good idea to have a helper hold the shingles as you work. The shingles should not be removed. Detach any nails that are fastening a roof vent to its deck. After that, remove the exhaust vent.
Fill up any gaps around the vent with a generous layer of roofing cement or outside sealer. Have an assistant gently roll back and separate the shingles as you insert the vent.
Leak prevention calls for the lower piece of the vent flashing to be placed over the shingles on the roof. At every 4 inches, fasten the vent with nails in the four corners. Sealant or cement can be used to cover the nails.
It may be necessary to remove shingles to access the damaged part of the roof deck if the leak results from damage to the roof deck.
Start around two rows of shingles above where you wish to fix the roof. Using a pry bar, work your way from the bottom up, beneath the shingles- toward the roof ridge. Then, work your way down the rows, removing nails and shingles as you go.
Maintain as much of the original structure as possible. The shingles will be separated from the roof deck by a layer of roofing paper or synthetic underlayment. Use a utility knife to cut away the paper or underlayment.
Draw a chalk line from the damaged area of the roof deck to the rafters on the left and right sides. Make sure that the line is snapped in the middle of the rafters. To find the rafter’s center, use the existing nails as a reference.
Afterward, draw a chalk line parallel to the rafters, or at an angle, above and below the damaged area.
Add 1/16-inch to the circular saw blade depth to match the thickness of the roofing deck. To remove the portion of the roof deck that has been damaged, use the chalk lines as a guide. When cutting, be careful to do it outside the marked-off area.
Pull nails out of the cut-out part of the roof deck with a pry bar. Then, use a pry bar to remove the plywood, but don’t throw it away just yet.
Mark out the new roof deck repair proportions using the damaged part as a guide. Make a slit in the earth here for your protection.
Install the roof deck patch and fasten it to the rafters using 8-diameter common nails.
Use roofing nails to secure the roofing paper or underlayment, working your way up from the bottom. A minimum of 4 inches between each row is recommended.
Lay the first row of new shingles from the bottom up. Place the new shingles on top of the existing shingles from left to right to maintain the established rows.
Apply a bead of roofing cement around the shingles’ bottoms. As you work your way up to the shingles, be sure to nail them in place.
Start from the bottom and work your way up. Slide the new shingles beneath the top row of the current tiles to create a seamless transition.
Supply:
Tools:
Materials: Roof cement Exterior sealent Chalk line 7/16-inch exterior-grade plywood or OSB board Roof vent Roofing paper or synthetic underlayment Roofing nails 8d common nails
While leaking roofs can be a nightmare and can cause a wide range of inconveniences, there are some areas that are best left for the experts.
It may seem like a good idea to do DIY repair your roof yourself and save on labor costs, there are too many pitfalls that can result in failure or injury.
So why not hire a professional such as Mikku & Sons to handle it for you? In business and serving the valley for over 20 years, we run a full roof inspection and devise a detailed plan based on the specific needs of your roof. Call us today or fill out our online form!
Wanting to spend time outdoors in front of your house? Have you ever considered adding a porch roof? They have a huge range of advantages such as shielding you from heavy rain, take a look at our article to learn more!
Both the internal and external methods of leak repair provide only temporary relief. It’s just a stall tactic that won’t result in a full roof replacement. Meanwhile, you may use this temporary solution to repair your roof from the inside before calling a professional.
Corrosion on metals- water leaks may be caused by fastener corrosion and metal cracks. The seams of a metal roof may become loose over time due to expansion and contraction. Rain-induced roof leaks may indicate that the shingles are nearing the end of their service life.
Roofing leaks may be prevented with the use of a flexible sealant. Using a sealant on a leaky roof is a good way to fix the issue. Flex Seal comes in a liquid form to simplify the application. It remains flexible and non-cracking. Weather conditions do not affect Flex Seal.
It’s impossible to say just how long a leaky roof may be ignored before it starts to create problems. It’s usually a good idea to have your roof leak addressed as soon as possible since so many implications can arise. Remember the quicker you spot the problem the longer your roof will last!
An old roof, damaged or missing shingles, blocked gutters, and chimney damage are the most prevalent sources of leaks. Your home’s structural integrity might be in jeopardy if these issues are ignored.
The extreme climate in Arizona is brutal. It’s dry for months on end, and then suddenly a ten-minute drizzle puts your roof to the test. A roof is more than just shingles or tiles and wood – it’s a carefully engineered system built to protect you and your home from the elements. If any part of that system fails, it needs to be quickly repaired or replaced to prevent further damage. While most homeowners know a leak needs to be fixed, how to fix it isn’t always clear.
A leak doesn’t automatically mean you need a full replacement. There certainly are times when a leak really is small and easy to patch up with roofing tar. An experienced roofing professional knows what to look for and where, and they know when a patch is the right solution – roof repairs are not a DIY project!
Most of the time, a leak is like the tip of an iceberg – what you see is just a tiny portion of a much larger issue. If the source of the leak involves sagging, pooling water, cracked or damaged shingles, or flashing, the integrity of your roof and home may be at risk. Left unchecked or poorly patched, leaks can cause health and safety issues like mold and structural damage. As disappointing as it might be to hear that a roof replacement is needed, a roofing expert can explain why a patch repair would be inappropriate in these situations.
A comprehensive inspection is the best way to assess the condition of your roof. Mikku & Sons is a family owned and operated company that has been serving the Phoenix Metro area for over 20 years. Call (623) 465-1068 to schedule your FREE ESTIMATE today!
Even if you have a flat roof, all roofs are designed to do one thing in common: properly drain still water from the top. Regardless of the style of roof you have, you want to avoid the problem known as “ponding” to the best of your ability. For those who don’t know, ponding is when water builds up in a singular area and doesn’t go away even after a few days have passed.
Although there are different reasons for ponding to occur, it is most commonly caused by crushed insulation from foot traffic on the roof, or by clogged up drainage. Whichever the case may be, it still stands that if you have pooling water that you should address the issue right away, or else you risk having leaks develop inside our home. This can cause the materials to break down and possibly even cause interior water damage or other drainage problems. According to the AZ Registrar of Contractors, minor amounts of ponding will occur on most flat roofs, but should be addressed if it doesn’t automatically drain within 48 hours.
No matter how small the puddle is, if you have standing water then you are sure to have bugs close behind. One of the more common pests that are drawn to still water are mosquitoes, which spend their time breeding and living by the water – something you want to be sure is cleared off before they make your roof their home!
When bugs and water are gathered in one place, you can be certain that birds will follow soon after. Not only are they interested in the puddles for themselves, but birds will use this as an opportunity to nest and feed on the surrounding insects. Not only are the noisy, but the dangers of contamination from bird droppings increases when you have ponding water attracting them to your roof.
Plant growth may start as small as a spot of algae, but can develop quickly and grow out of control – such as a mold problem developing in your walls. Roofs that trap moisture or have leaks will not only affect the appearance of your home, but also cause it to grow damaged quicker over time and possibly even cause an environmental health hazard.
Any amount of pooled-up water will start to fade into your roof and cause a certain amount of discoloration. This is not only attractive to look at, but also causes deterioration that may cause improper cooling to occur.
Although we don’t experience harsh winter freezes in Phoenix, there is still a chance that the winter nights can freeze sill water on your roof. This will damage the roof membrane, since water expands when frozen – meaning this is a situation that you want to deal with before the weather turns chilly!
Living in Arizona means that once our monsoon season hits, many homeowners will brush off the news of bad weather until it’s too late.
Rather than be left in a panic over a storm with greater impact than anticipated, make sure your roof is prepared for the season now and get your roof ready for storms! No matter what type of roof you have, you want to be sure it’s ready to face heavy rains, wind, and thunderstorms.
Should debris come flying through the air, you want to be sure all openings to your home, including windows and doors, are sealed shut and are securely in place.
If a window breaks, the pressure inside your home will increase, which puts it at greater risk for even bigger damages! The last thing you want is to have to get a house window replacement!
After a monsoon storm, you may find yourself looking at damages around your home. In order to properly prepare for your insurance company to send an adjuster to you, start taking photos and videos of your belongings along with their condition.
Anything that is capable of being lifted by wind has the potential to fly into your home or into a neighbor’s home.
You should properly secure any of these items outdoors, or move them inside if that isn’t possible. Things like patio furniture should be put into a garage or shed, and even your vehicle should be kept safely undercover and away from trees that could topple over.
Tree branches should be a minimum of six feet away from your home. When winds are heavy, the branches can lash out like a whip and cause large amounts of damage.
Even outside of storms, branches that go without being properly maintained offer other critters and pests access to portions of your home that would be otherwise inaccessible.
You should be sure that your payments are made and that you have no gap in coverage. If something like a tree falls and damages your home, be sure to contact your insurance company immediately, followed up by a call to a professional and licensed tree service.
Getting the tree removed and roof tarped is the first step, then a trusted roofing contractor can help to repair damages!
Before any storms, make sure your home has been properly taken care of. You’ll want to “batten down the hatches” since the strong wind will be the top factor that affects your roof. Follow these steps to help ensure your roof will be secured against leaks.
Having a professional roofing contractor inspect your roof for weak areas that can cause issues during a severe storm is an important step to take, and it’s something we offer for free here at Mikku & Sons.
Here are some indicators that roof repair or restoration is required, according to your roofing system material:
All flashing should be sealed, properly aligned, and checked for rust, corrosion or separation. Shingle tabs that are curled or lifted from a poor seal or prior wind damage, or those that have lost their protective granules, need to be replaced or resealed.
Your roofing company should also check any vent turbines for proper seal and functionality.
Fasteners, tiles, flashing, ridges, and risers must be in working order. Chipped, delaminated, slipping, or sliding tiles must be repaired, restored, or replaced. Flying tiles can become dangerous projectiles during high-speed winds.
Metal that buckles, fasteners that are the wrong type or are no longer functional, and unsealed or unseated flashing are signs of problem areas on your metal roofing system.
An emergency roof repair inspection for a flat roof means checking for ponding or pooling water, torn, cracked, or broken surfaces, improper or non-functioning fasteners, buckling, poor seals, and overall flashing problems.
While they do have their perks, flat roofs have design and installation factors that can play into damages and performance issues. In the long run, you may end up with a shorter roof lifespan than you expect – here are a few tips for issues you should consider.
Among all issues a flat roof can experience, this is the most frequent by far. Usually caused by unnoticed ponding water after rainfall, only 48 hours are needed before leaks start becoming apparent. You should check for moisture buildup around seams and flashings around your roof. Clogged drains, chimneys, and skylights are also places where you’ll want to watch for moisture buildup. If any water gets under the membrane and into the sheathing of your roof, there’s a chance rot and mold will quickly start to grow.
A common problem for EPDM membranes is shrinkage – when rubber shrinks, it can pull down other objects like parapet walls or chimneys! This is more likely to occur on a large building or on a building where the membrane was not properly secured and installed. Keep your eyes out for signs of discoloration along with signs of shrinkage to spot problems before they get out of hand.
The last major issue that commonly affects flat roofs and flat roof decking is caused by heavy foot traffic. Often done by HVAC contractors and other visitors who go on the roof, damage can be caused by dropping tools, tripping on fasteners, or otherwise puncturing the membrane and allowing moisture inside. After a company has been on the roof, be sure to inspect for any signs of punctures or other damages.
Finding out your roof is damaged and needs repairs or replacement can be stressful for a homeowner. Handling insurance claims, dealing with adjusters and ensuring you get paid for all covered damage is an intimidating process. Many property owners aren’t confident about filing a claim, process issues and what kinds of documentation they will need.
To an insurance company, your roof is the most critical feature of your property. If its damaged, it can lead to much larger damage claims. The Insurance Institute for Business and Home Safety has stated that more than 90% of hail or high-wind claims result in a payout relative to the quality of the roof cover. Insurance companies check roofing claims with great scrutiny and expect homeowners to provide correct documentation and accurate information in order to process the claim.
To make the claims process experience easier and to help you get the right settlement for your damage, take some photos of your roof and exterior property before they are damaged. Then, when you have some damage from a storm, update the photos when you need maintenance or repairs completed. Once the roof is damaged take another set of photos showing the need for repairs. Document and record the damages and any quotes, estimates or bills you get in relation to the damage. Having this info on file in one place will ensure your claims process is a smooth and easy experience.
Before you file your insurance claim completely, you’ll need an estimate from a professional roofing contractor. Most of the time you can pick the roofing company of your choosing. Your contractor should help you make your way through the sometimes complicated roof insurance claims process. Some roofing companies have adjusters on their staff that can deal with your insurance claim for you. Try to find a contractor that has a lot of experience providing roofing quotes for insurance claims. They should help through the process of getting a roof repair or replacement covered by the insurance company.
Keep in contact with your insurance agent and company. Its the best and most simple way to be aware of what’s covered or not covered in your homeowners policy.
Some policies use the age of the roof and take it into account when it gets damaged. If your roof is under 10 years old, you could be covered for the entire cost of repairing or replacing the damaged section at the time of the claim. If it’s more than 10 years old, you could be paid for the depreciated value of the damaged roof. The depreciated value takes wear and tear and age of your roof into account. This could mean the value has lowered before the damage occurred.
Some insurance policies will offer damage coverage only up to the depreciated value, no matter what the age of your roof is. Others will cover the entire cost of repairing or replacing the damaged section at the time of the claim, no matter the age of your roof. Most of the time, your insurance company will send out an adjuster to your property to inspect and verify the claim. If the damage is found to be from age, normal wear and tear, or the poor condition of your roof, it will probably be classified as normal maintenance, and won’t be covered under your policy.
The most critical thing to remember is if you think your roof has been damaged and needs repair, you shouldn’t wait for the inspection by a roofing contractor. Determine how much damage you have as soon as you can. This will help move along the process expeditiously and help you avoid more damage that might not be covered under your policy.
If you’re a property owner, you can’t predict when and how severe weather will hit you. You’ll need to take steps when your roof is damaged and you’ll need to completely understand the steps to take. Severe rain, high windstorms and monsoons can all cause heavy damage to your roof.
After your roof experiences severe wether, you have to assess the damage you’ve experienced. You can then be able to discuss what happened with your insurance representative and your roof repair contractor to help you avoid hidden costs or issues. (You should do this during daylight hours, which means you might have to skip to step 2 before you inspect the damage.) Use binoculars when you’re checking the damage so you can see the details closely.
Take the area thats been damaged and figure the estimated square footage. Look to see if there are any shingles missing and note how severe the damage is. In some smaller cases, you may just have a few random shingles missing or sheered off. Make a note of the material that’s visible and exposed. Here’s what to look for – the ends of missing shingles, tar paper or exposed plywood. Notice the shade and color of the material thats exposed. If you have some shingles from when the roof was installed or last repaired, you can check the packaging for the right shingle style and color you’ll need.
If you have a little experience with repairs, try to make some temporary fixes to minimize your damage. Personal items inside your home could be damaged by water if your roof is leaking directly above a living area. Put a garbage can or bucket under any leaking water and move any valuable items away from the area so they won’t get damaged more. You may need to use a tarp to cover badly damaged areas to get them waterproofed immediately. If they’re smaller repairs that are needed you can get them shingled right away.
Call your insurance representative and check your insurance policy if it looks like there’s enough damage for a claim. If there isn’t, it may make more sense money wise to hire a roofer yourself and get any needed repairs done. If you’re involved in a large, natural disaster where big swaths of residential properties are hit by severe weather or a big storm, you may want to contact your insurance company ASAP so you can get on a good contractor’s schedule immediately. Good, reputable roofing companies will have their calendars filled up quickly after a severe storm in their area, due to demand.
If you need to hire a roofing contractor, be sure it’s a reliable, professional roofing company. Be careful not to hire any fly-by-nighters that flood these areas after a storm and rip off vulnerable, uneducated property owners. Avoid these type of contractors at all costs. These traveling contractors that chase storms around will give you poor quality workmanship and be gone as fast as they arrived, leaving you with bigger issues than you had from just the storm.
Your business or personal belongings depend on the proper maintenance and repair of your roof. Keep in mind that a little prevention now can prevent catastrophic roof failure in the future. This will save you a lot of inconvenience and expense in the process.
You should bring in a professional roof repair contractor if you have concerns after an inspection. The roofing contractor can also help you determine the remaining estimated lifespan of your roof, the roof’s general existing condition and help you develop a maintenance plan moving forward.
You should bring in a professional commercial roof repair contractor if you think that there could be some concerns after an inspection.
The commercial roofing contractor can also help you determine the remaining estimated lifespan of your roof, the roof’s general existing condition and help you develop a maintenance plan moving forward.
Regular inspections and maintenance is the best way to avoid major roof issues and help your roof sustain extreme weather conditions.
Regular maintenance will also prolong your roof’s lifespan. This may allow you to repair your roof instead of replacing it when issues pop up, saving you a lot of money.
How often you should have your roof inspected depends on several factors like age, recent weather events, foot traffic on your roof, and any type of conditions that may have been uncovered in past inspections.
Your roof should be inspected twice per year, in the spring and fall, to ensure that it’s not being forgotten.
A lot of homeowners take their ceilings for granted and don’t check them often, but we recommend you inspect them regularly for signs of moisture seeping through. Even if you see something that looks minor, you need to get on it and check it out. This article will discuss tips for taking care of water stains quickly and effectively.
When you spot moisture, the first thing you need to do is find out the source of where its coming from. Most of the time, the area directly above the stain is the best place to start. If you can’t see anything on your roof that looks like a problem, you could have a pipe thats leaking. There could also be moisture running along some pipes or trusses that will come from a source somewhere else and drop onto your ceiling.
Are they water stains? There are other causes for stained ceilings including:
If the leak is coming from your roof, it could be that there are other sources of moisture other than obvious leaks. If you need a professional, experienced roofing company to inspect your roof for leaks and determine where any moisture spots may be coming from, give us a call at (623) 465-1068.
You don’t want to repair any moisture stains, no matter how bad they look, until you know the source and have it repaired. If you fix it first then find the source, chances are you’re going to be repairing another moisture stain. If there’s permanent damage, you might have to take out part of your ceiling or wall to fix the issue. So the stain doesn’t seep through, when you’re dealing with a cosmetic stain, you should use a stain covering primer before painting over the spot. Depending on how much damage there is and the stain itself, you may need to contact a professional to help fix the issue.
Make sure you don’t let moisture stains and their source go unchecked. Always take care of the issue as soon as possible, or what could be a minor cosmetic and roof repair could turn into something major and much more expensive. Here at Mikku and Sons Roofing, we can put you in touch with financing options, if the need for it arises.
