Living in Phoenix, where the sun blazes down relentlessly, ensuring proper roof ventilation is not just a matter of comfort, but a necessity. The extreme heat can take a toll on your home, particularly the roof.
In this blog, we will explore the significance of proper roof ventilation in such a scorching climate. From reducing energy costs to prolonging the life of your roof, we'll cover the techniques and benefits of effective ventilation strategies tailored for Phoenix's unique weather challenges.
Get ready to learn how to keep your home cool and protected, even as the mercury soars!
Phoenix, Arizona, known for its scorching summers and arid environment, presents unique challenges for maintaining comfortable indoor temperatures and preserving the integrity of buildings. The extreme temperatures and low humidity levels significantly impact the ventilation requirements for roofs in this desert city.
According to WeatherSpark, Phoenix experiences some of the hottest temperatures in the United States, with summer highs regularly surpassing 100°F (37.8°C) for months on end. These extreme temperatures exert immense heat stress on buildings, including their roofs.
Without proper ventilation, the trapped heat in the attic can radiate downward, increasing the indoor temperature and putting additional strain on air conditioning systems.
The low humidity characteristic of Phoenix exacerbates the effects of high temperatures. With less moisture in the air, sweat evaporates quickly, making it feel even hotter than it actually is.
Additionally, low humidity levels can contribute to the buildup of static electricity and accelerate the drying out of building materials, including roofing materials. Proper ventilation becomes crucial in preventing moisture-related issues and maintaining structural integrity.
Given the extreme temperatures and low humidity levels in Phoenix, effective roof ventilation is essential for dissipating heat buildup and maintaining a comfortable indoor environment. Without adequate ventilation, heat can accumulate in the attic space, leading to various problems such as:
To address these challenges, it's imperative to implement proper roof ventilation systems tailored to Phoenix's climate. This includes a balanced combination of intake and exhaust vents strategically placed to facilitate the flow of air and remove excess heat and moisture from the attic space.
Below are some of the Ventilation Solutions for Phoenix
Living in a hot climate like Phoenix, Arizona, comes with its unique set of challenges, especially when it comes to maintaining comfortable indoor temperatures and preserving the integrity of buildings.
One of the key strategies to combat the heat and ensure the longevity of your home is through proper roof and attic ventilation
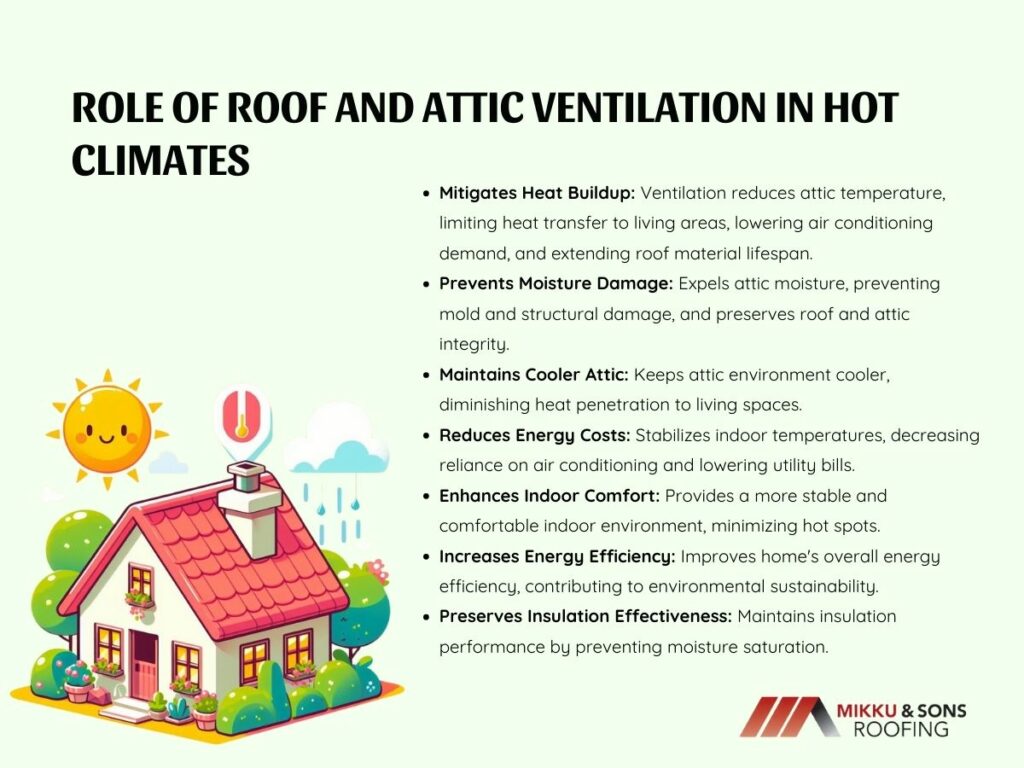
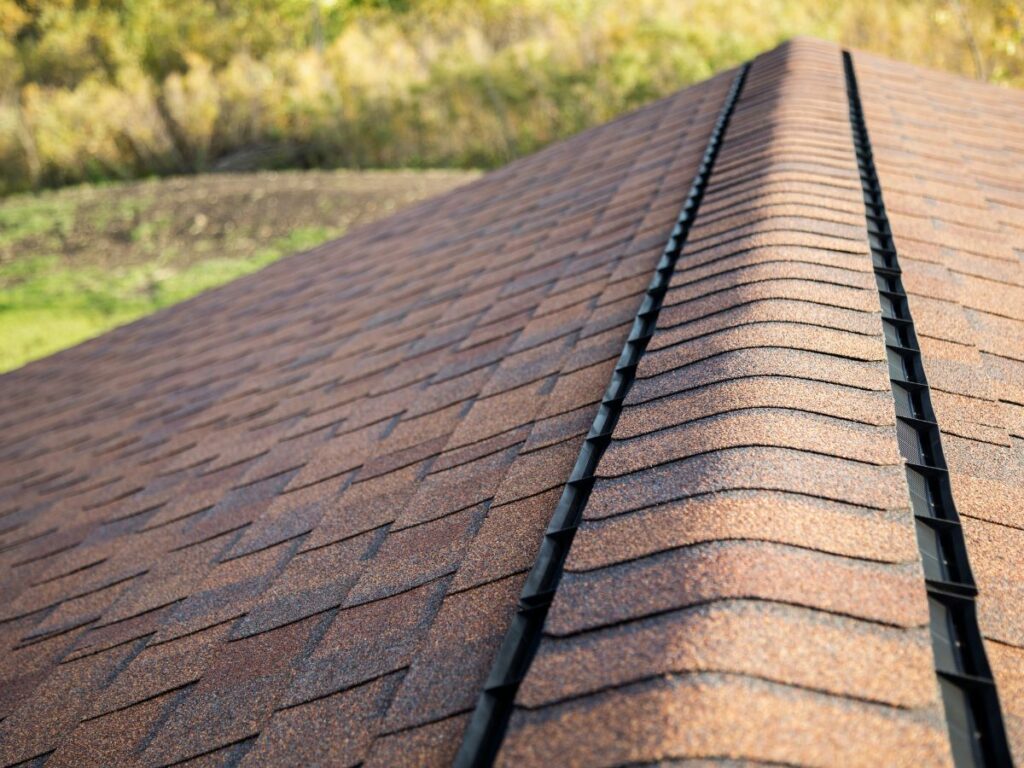
In hot climates, without ventilation, rooftops absorb heat, turning attics into furnaces. Proper ventilation expels hot air, drawing in cooler air, reducing temperature differences between the attic and living areas below.
Here are some benefits:
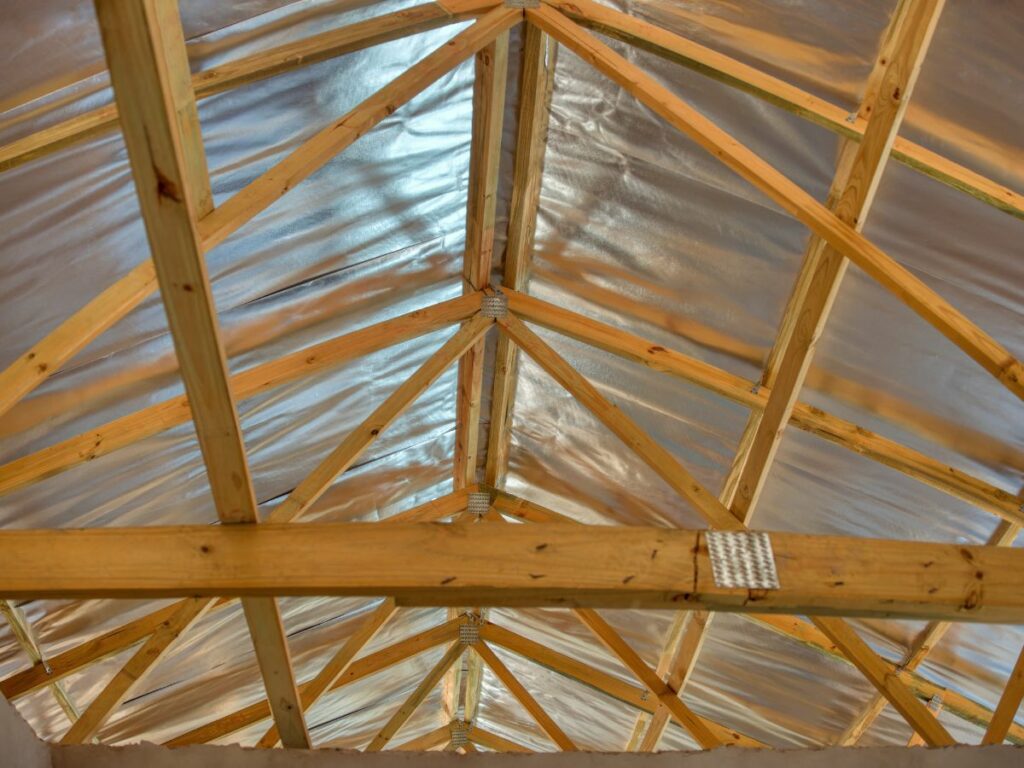
High temperatures and low humidity can cause moisture buildup in attics, leading to mold and structural damage. Proper ventilation expels excess moisture, maintaining optimal humidity levels and preventing issues like mold growth and rot.
Here are some benefits:
Proper roof and attic ventilation help homeowners in hot climates cut air conditioning reliance, leading to significant energy savings. Well-ventilated attics stabilize indoor temperatures, reducing AC usage frequency and extending HVAC lifespan.
Here are some benefits:
When it comes to building codes and regulations, ensuring proper roof ventilation is not just a matter of comfort and efficiency but also a legal requirement. In Phoenix, Arizona, where the scorching desert heat poses unique challenges, understanding and meeting specific ventilation requirements are crucial for homeowners and builders alike.
Phoenix follows the International Residential Code (IRC) and the International Building Code (IBC), which outline the minimum ventilation requirements for residential and commercial buildings, respectively.
According to these codes, the minimum net free ventilating area (NFVA) for attic ventilation is typically calculated based on the size of the attic space. For example, the IRC recommends a minimum of 1 square foot of NFVA for every 150 square feet of attic space.
Example Calculation:
It's important to note that these are general guidelines, and specific requirements may vary based on factors such as roof pitch, insulation levels, and climate zone.
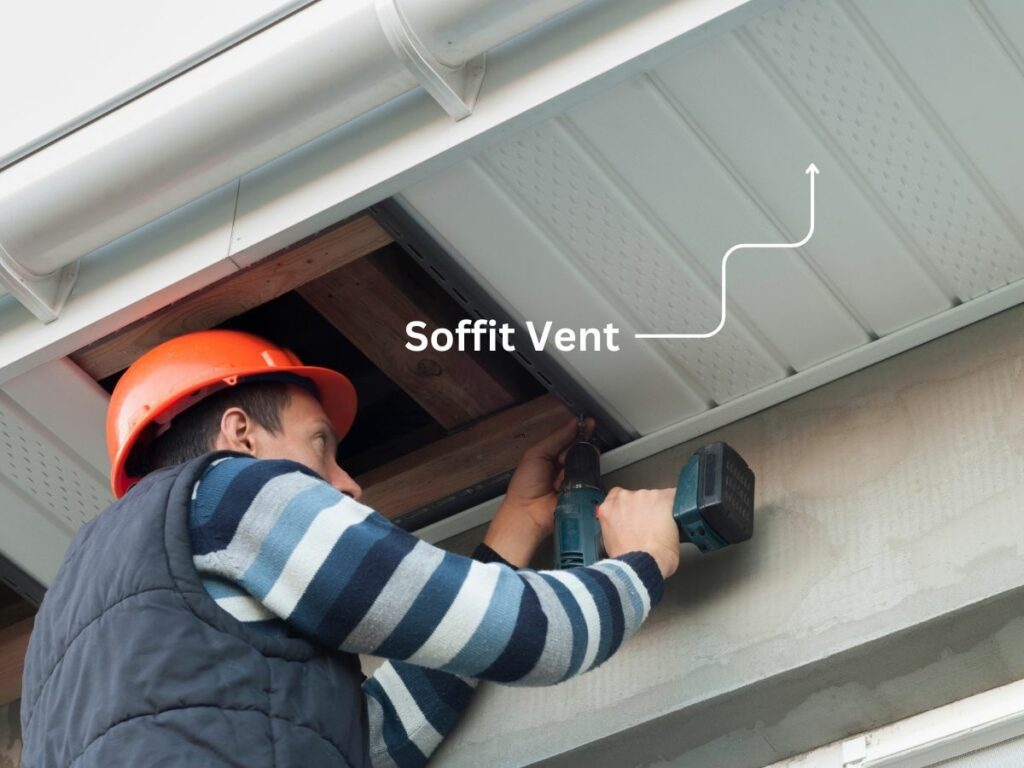
Achieving proper ventilation involves not only meeting the minimum NFVA requirements but also ensuring a balanced distribution of intake and exhaust vents. Intake vents, such as soffit vents or eave vents, allow fresh air to enter the attic, while exhaust vents, like ridge vents or gable vents, facilitate the expulsion of hot air.
For effective ventilation, the total NFVA of intake vents should be approximately equal to the total NFVA of exhaust vents.
Certain property types, such as multifamily dwellings, may have specific ventilation requirements beyond those outlined in the IRC or IBC. For example, townhouses or condominiums with shared attic spaces may necessitate coordination among multiple units to ensure adequate ventilation.
Additionally, commercial buildings, such as warehouses or office complexes, may have larger attic spaces requiring proportionally greater ventilation capacity.
In addition to adhering to building codes and regulations, it's essential to follow the manufacturer's guidelines for the installation and use of ventilation products. Manufacturers often provide specific instructions regarding the placement, spacing, and installation methods for vents to maximize their effectiveness and longevity.
In a city like Phoenix, where the sun beats down relentlessly and temperatures soar, traditional ventilation methods may not always suffice to keep homes cool and comfortable.
Fortunately, advancements in technology have paved the way for innovative ventilation solutions tailored to the unique challenges of this desert environment.
In the harsh desert climate of Phoenix, Arizona, where temperatures soar and the sun beats down relentlessly, proper maintenance and inspection of roof ventilation systems are essential to ensure optimal performance and longevity.
Neglecting these critical components can lead to a host of problems, including heat buildup, moisture-related issues, and reduced energy efficiency. To help homeowners navigate the challenges of maintaining effective roof ventilation systems in Phoenix, here are some guidance on regular maintenance and inspection practices.
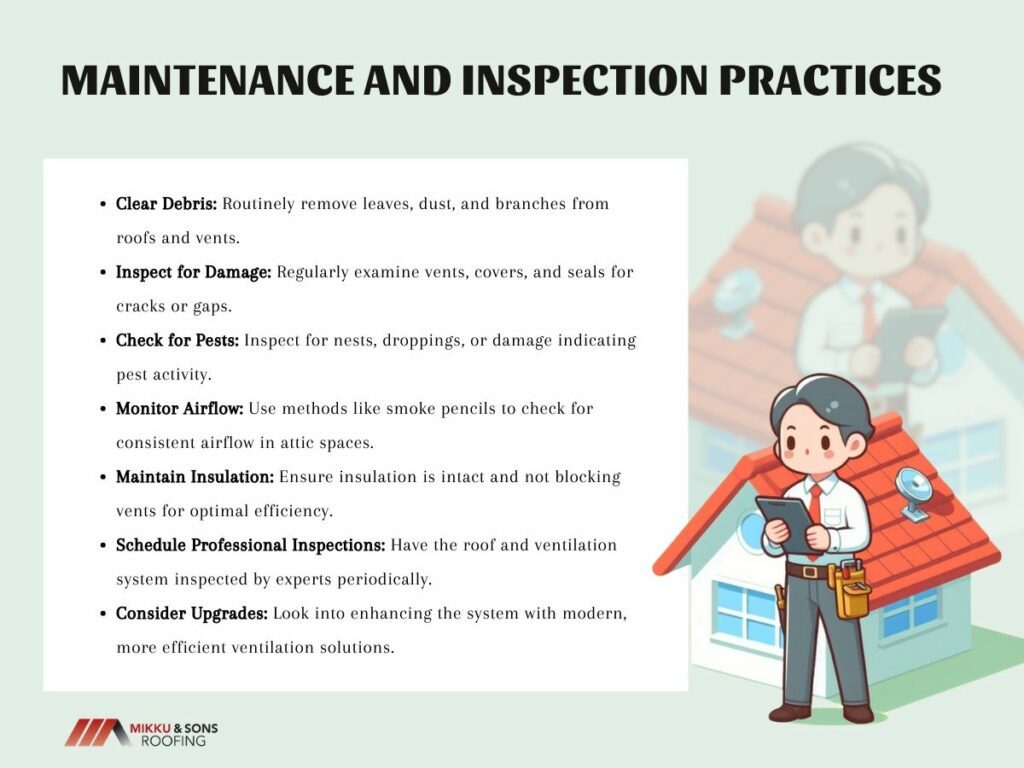
Phoenix's desert environment means that debris such as leaves, dust, and even small branches can accumulate on roofs and block ventilation openings.
Regularly clearing away debris from intake vents, exhaust vents, and the roof surface helps ensure unimpeded airflow and prevents obstructions that can hinder ventilation performance.
ns of the roof and ventilation components to check for signs of damage or deterioration. Look for cracks, gaps, or missing pieces in vent covers, flashing, and seals. Any damage should be promptly repaired to prevent moisture infiltration and maintain the integrity of the ventilation system.
Insects, rodents, and birds can sometimes make their way into attic spaces through ventilation openings, causing damage and compromising ventilation efficiency. Inspect vents for signs of pest activity, such as nests, droppings, or chewed materials, and take appropriate measures to address any infestations promptly.
Periodically assess the airflow in the attic to ensure that ventilation systems are functioning as intended. Place a hand near vents to feel for airflow, or use smoke pencils or thermal imaging cameras to visualize airflow patterns. If airflow seems weak or inconsistent, it may indicate a blockage or malfunction that requires attention.
Proper insulation is essential for optimizing the performance of roof ventilation systems and preventing heat transfer between the attic and living spaces. Inspect insulation for signs of damage, compression, or displacement, and repair or replace as needed to maintain its effectiveness. Ensure that insulation does not block airflow from intake vents or impede the operation of exhaust vents.
While homeowners can perform many maintenance tasks themselves, it's also advisable to schedule periodic inspections by qualified professionals. Professional inspectors can conduct comprehensive assessments of the entire roofing and ventilation system, identify any issues or potential problems, and recommend appropriate solutions or repairs.
Over time, advancements in ventilation technology may offer opportunities to upgrade or enhance existing systems for improved performance and efficiency. Consider options such as installing solar-powered vents, upgrading to high-efficiency exhaust fans, or adding additional ventilation openings to better suit the specific needs of your home and climate conditions.
Proper roof and attic ventilation are indispensable in mitigating the challenges posed by Phoenix's scorching climate. From reducing energy costs and preserving roofing materials to maintaining indoor comfort and preventing moisture-related issues, effective ventilation strategies play a crucial role in ensuring the longevity and efficiency of homes in this arid environment.
By understanding the unique ventilation requirements, implementing suitable solutions, and adhering to maintenance practices, homeowners can optimize their ventilation systems to withstand the relentless heat and safeguard their properties for years to come.
Phoenix, Arizona, is a city that is proud of its rich historical past, and its collection of historic residences is one of its most notable features. These modest homes, which range in architectural style from Spanish Revival to Bungalow and each tell a different tale of Phoenix's growth and development.
A historic home tends to be associated with elaborate woodwork, huge porches, and distinct personalities. But one sometimes disregarded feature that's just as important is the roof. Best roofing practices for Phoenix's historic homes include regular inspections and maintenance to preserve the structural integrity of these valuable properties. This is not only crucial for the safety and comfort of the residents but also for the city's architectural legacy.
There is more to historic home and building preservation than just maintaining the past. In addition to creating a rich culture in the present and providing meaning for the future, it narrates the tale of the past.
Most homeowners are able to strike a compromise between their budgets and aesthetic preferences when it comes to roof replacement, but historic property owners find this to be a more challenging decision. Historical organizations govern certain homes, and the owner of a historic home might not be permitted to add a contemporary roof.
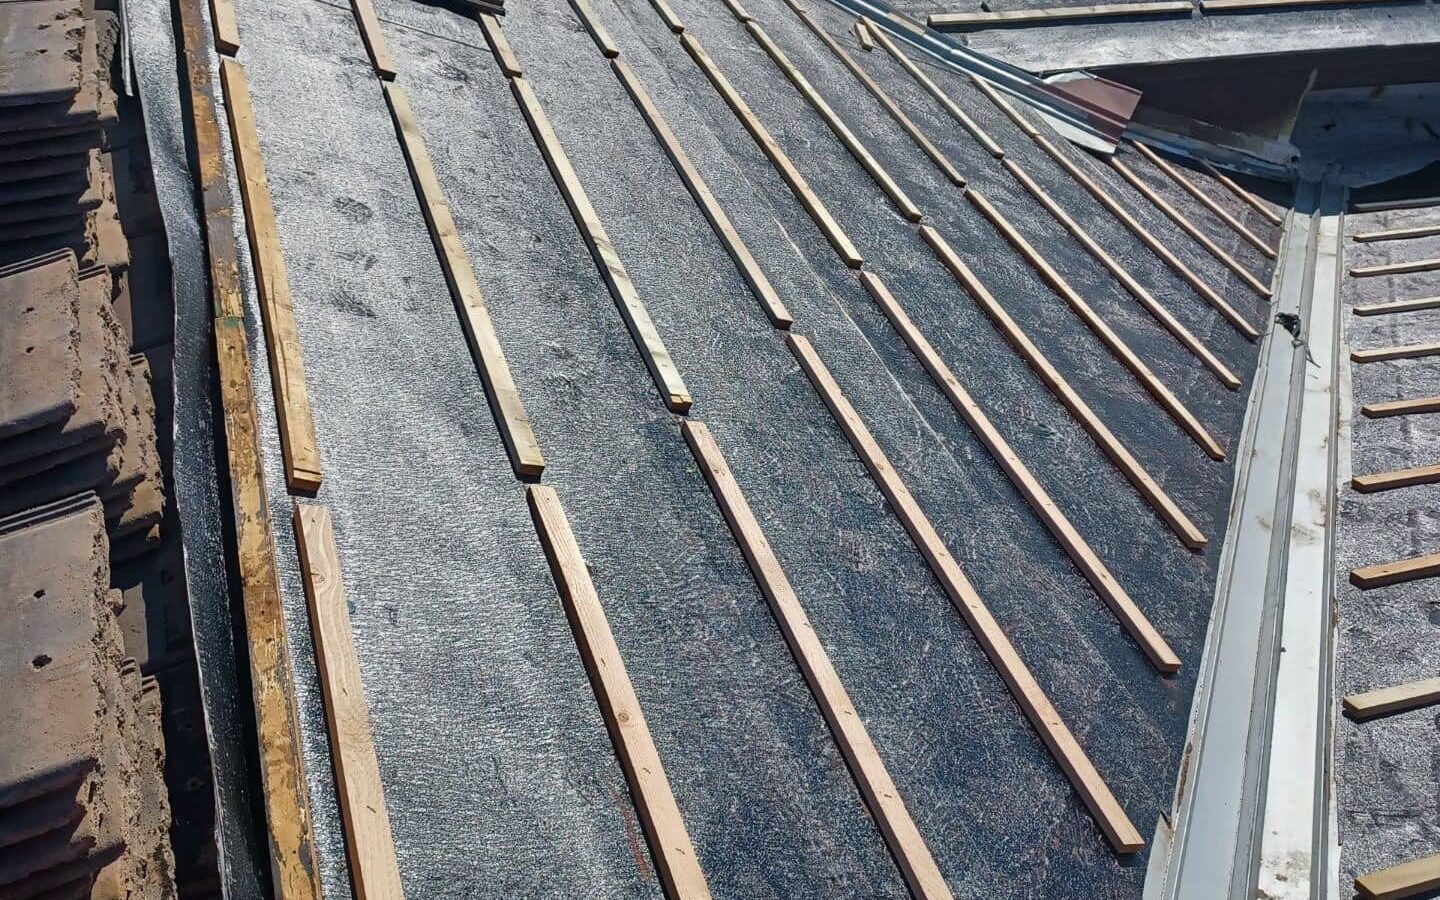
If there are no such limitations, a contemporary roof that mimics the old roof's traditional style is an alternative, albeit it will probably require more upkeep. When the owners wish to maintain their original appearance, using the original roofing materials and procedures on historic homes is often possible.
Homeowners who take this route should be careful to schedule routine inspections, usually more frequently than would be required for a modern home's roof, as old building materials and techniques are not as dependable as modern ones.
Phoenix's historic mansions are more than just relics from the past; they are dynamic representations of a bygone period. Like other structural elements, their roofs need to be meticulously maintained to ensure their lifespan and ongoing historical authenticity.
1. Preservation
2. Rehabilitation
3. Restoration
4. Reconstruction
Anybody buying a historic home has to be aware of the particular obligations that come with being a homeowner in this sort of property. Homeowners in historic areas should first carefully go over all of the property's documents, some of which may be quite old.
You can find out the precise details of your home's original roof by consulting documents such as photographs, original designs, insurance carrier surveys, and even newspaper clippings saved by prior owners. To find out if it has any materials that would be useful in your case, you might also speak with a nearby historical society.
Preserving a historic home requires care, attention to detail, and a commitment to maintaining its unique character. Recognize any previous maintenance or renovations done by the previous owners. They ought to be left alone if they have been built correctly and operate properly.
However, they could need to be replaced if the techniques or materials used (such as hard, impermeable cement mortars) are the reason they are deteriorating or causing harm. Always try to carry out repairs in a way that minimizes the amount of upkeep required.
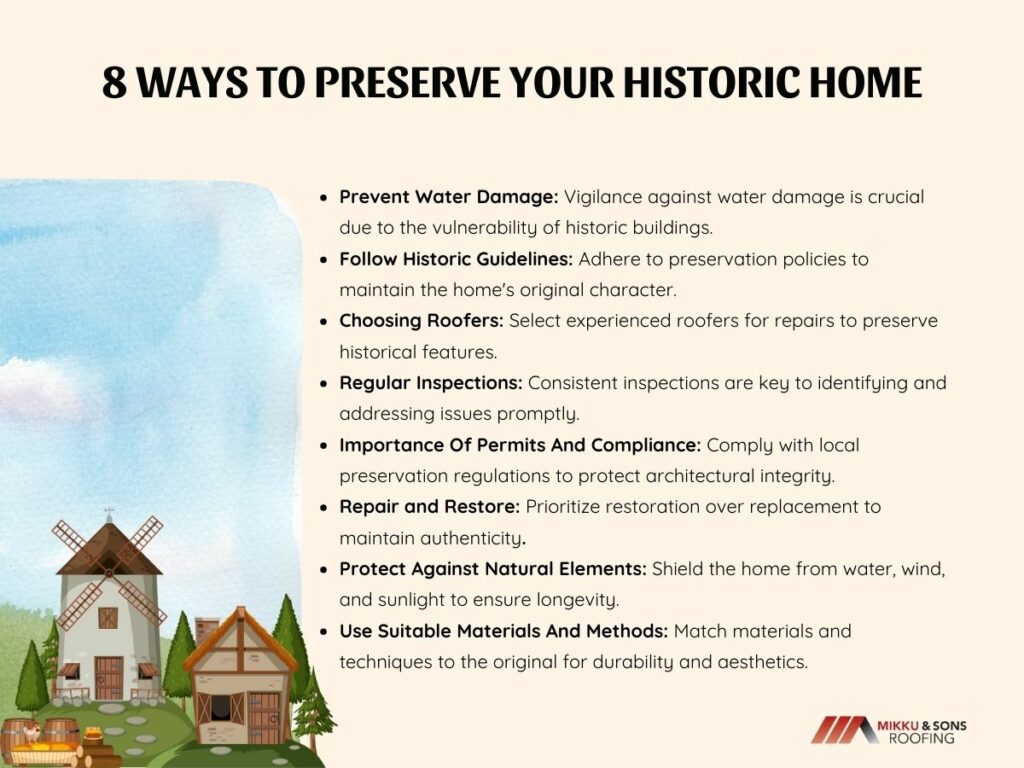
Any homeowner may be impacted greatly from water damage and attic moisture, but historic buildings are particularly vulnerable to these issues. If the roof of a historic property is destroyed, it may be very difficult or perhaps impossible to repair any further water damage.
Historic buildings are more susceptible to rot and mold growth because of their antiquity and the absence of contemporary safeguards against these problems. For the owner of a modern home, a minor leak could be a bothersome issue, but for the homeowner of a historic property, the same minor water damage could be disastrous.
Get to know your home's distinctive characteristics and elements by researching its architectural style and history. Learn about your community's historic preservation policies and follow them when making alterations or additions.
This guarantees the preservation of the home's historic integrity and original character throughout any alterations. In the end, most historic homeowners would rather keep their properties looking the way they did when they first moved in, whether or not that means following rules set down by a local historical authority.
This is a labor of love and is usually far more costly than keeping the roof of a contemporary house in good condition.
It could take months to learn what you need to know about a recently purchased historic home in order to make wise judgments on roof upkeep and care. But problems seldom wait for you to finish your research before arising—that is, extreme weather and unanticipated physical damage.
Sometimes, it's going to be necessary to repair damage to your roof, so make sure the roofer you choose is qualified to conduct the work properly and preserve the historical features of your house. Get in contact with a roofer who specializes in historic home restoration if you need emergency roof repairs.
Local roofers might be acquainted with your building and able to offer you thorough repair method advice. Look for a roofer who can complete your repair project without taking out any significant components or adding anything that could damage the other roof components.
The key to maintaining a historic home is routine inspections. To spot any indications of damage, deterioration, or other hazards, schedule annual inspections with a licensed roofer or historic preservation specialist.
When problems are dealt with early on, they can be prevented from growing larger and more costly later on.
| Inspection Type | Frequency | Description |
| Visual Roof Inspection | Bi-Annually or after severe weather events | Inspect from ground level or using a ladder for any visible damage, such as missing or damaged shingles, flashing, or debris. |
| Roofing Material Condition | Annually | Examine the condition of roofing materials (shingles, tiles, slate, etc.), checking for signs of wear, cracking, or decay. |
| Flashing and Seals Inspection | Annually | Inspect roof flashing and seals around chimneys, vents, and other roof penetrations for any signs of wear, corrosion, or damage. |
| Gutters and Downspouts | Bi-Annually | Clean gutters and downspouts to prevent clogs and ensure proper drainage. Inspect for any damage or loose components. |
| Skylights and Roof Windows | Annually | Check for leaks, ensure seals are intact, and clean any glass or acrylic surfaces. |
| Attic and Roof Deck Inspection | Every 2-5 years | Examine the underside of the roof deck for signs of water damage, mold, or pest infestations. |
| Insulation and Ventilation | Every 5 years | Assess insulation in the attic and ensure proper roof ventilation to prevent moisture buildup. |
| Chimney and Roof Connections | Annually | Inspect the area where the chimney meets the roof for cracks, loose bricks, and flashing issues. |
| Ice Dam Prevention | Seasonally (winter) | Monitor and address ice dams to prevent damage to the roof and leaks. |
| Historical Roof Features | As needed | Carefully inspect and maintain unique historical elements, such as ornate roofing details. |
| Professional Roof Inspection | Every 3-5 years | Hire a roofing professional to perform a comprehensive inspection and make necessary repairs or replacements. |
The primary building materials used in pre-war homes were natural materials like stone, masonry, and wood, all of which are eternally durable with regular upkeep. Making an inspection checklist before starting any maintenance or repairs will help ensure that any faults are quickly found and fixed before they cause problems.
Simple maintenance work, such as fixing a loose roof flashing, should not need any form of consent. But if you want to make repairs to your home you may need permission and should seek advice, especially if your home is listed or in a conservation area.
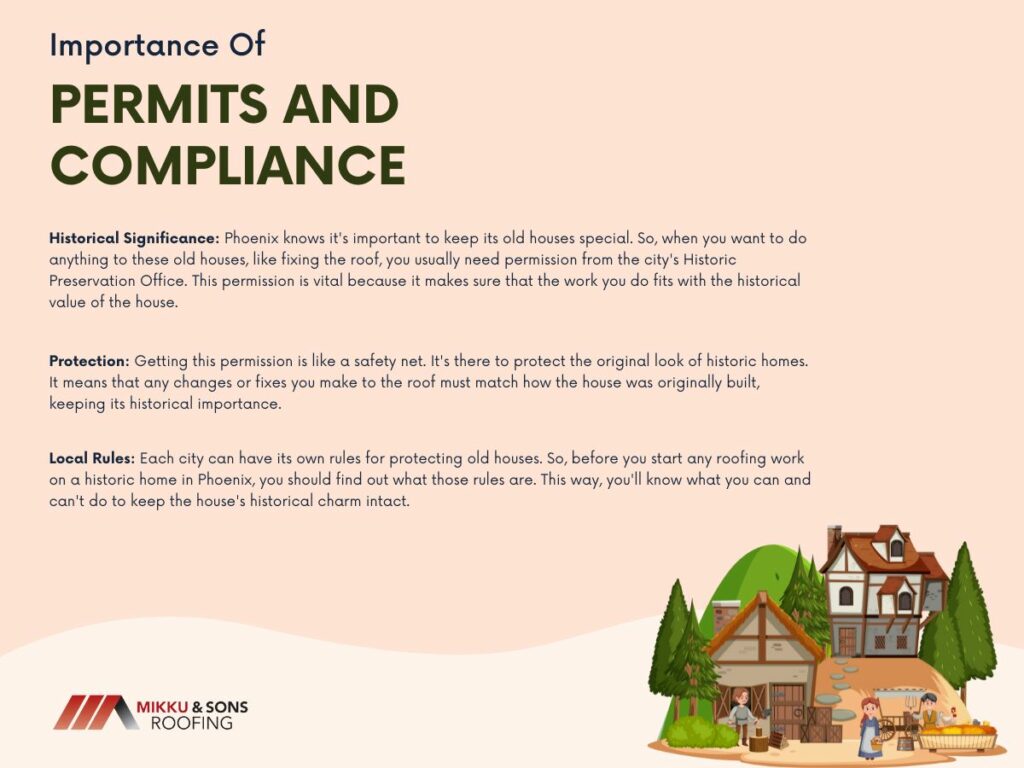
Preserving and maintaining the historical authenticity of Phoenix's historic homes involves more than just choosing the right roofing materials and conducting proper maintenance. It also requires navigating the complex landscape of permits and regulations, ensuring that any roofing work complies with local preservation guidelines.
Permits and regulations might seem like bureaucratic hurdles, but they are essential for preserving the historical value of Phoenix's historic homes. Complying with these regulations not only protects the architectural heritage but also contributes to the city's unique character and charm.
Whenever possible, choose restoration over replacement when making necessary repairs. The home's authenticity and character is preserved by salvaging the original materials and architectural aspects.
Aim for restoration efforts that align with the original craftsmanship by collaborating with professionals with historic preservation experience. Some believe that replacing a portion of a building is superior to repairs since they last longer.
However, there are valid arguments for why repairs are preferable to replacements. Removing too much of what makes the building unique can harm its meaning and style.
In most cases, repairs are more durable than replacements. Older buildings typically have original materials of a greater grade than their contemporary counterparts.
For your historic home to last a long time, it is important that you shield it from the elements, including water, wind, and sunlight. To avoid water damage, make sure the roof, gutters, plumbing, and drainage systems are in top shape.
A historic home's first line of defense against degradation is its roof. To prevent fading and weathering, clean and restore the roof on a regular basis.
When doing repairs, try to match the materials and building techniques used in your property. By doing this, you can protect your home's original charm and guarantee that repairs will withstand weathering just like the rest of the structure.
| Roof Component | Suitable Materials and Methods | Description |
| Roofing Material | - Slate or clay tiles for historical accuracy | - Slate and clay are durable and can match the historic aesthetic. |
| - Cedar or redwood shingles for a traditional look | - These materials add character and can be appropriate for many styles. | |
| Roof Underlayment | Synthetic underlayment with historical mimicry | Use modern underlayment that mimics the appearance of traditional materials, such as felt paper. |
| Flashing and Seals | Copper or lead-coated copper flashing | - These materials are durable and age gracefully, blending with historic features. |
| Historically-accurate sealants | Use sealants that match the appearance and texture of original materials. | |
| Gutters and Downspouts | Copper, zinc, or galvanized steel | - These materials can match the historical look and are long-lasting. |
| Box gutters or half-round gutters | Choose gutter styles that were common in the era when the house was built. |
The only times this wouldn't apply are when the current material has a weakness or a design defect. If you were just to match it, it might fail or cause greater harm (if a gutter is inadequate, for example).
Only use modern materials and methods where their efficacy in older structures has been demonstrated.
Preserving the architectural heritage of historic homes in Phoenix is a noble endeavor, and maintaining their roofs is a vital component of this mission. The unique charm and historical significance of these homes make them timeless treasures, and our responsibility is to ensure they endure for future generations.
Now that we know how to preserve historic roofs, what about other homeowners? Do these tips still apply to modern homes in Phoenix? The answer is a resounding yes. Whether your home is a vintage gem or a contemporary build, the principles of proper roof maintenance remain remarkably consistent, particularly in Arizona's challenging climate.
On a house, a roof valley is an area where two sloped roofs meet. Stormwater will begin to flow into your custom gutter and downspout system at this point. When installing a shingle roof, the manner the valley is built is quite important.
Incorrectly placed and flashed valleys may lead to substantial leakage issues. In spite of being a roofing penetration, valleys must be flashed and watertight.
This article will explain why a valley has to have flashing placed by a roofing contractor over the whole length of its sloping roof line. To answer the question, 'what is a roof valley?' we'll go into more detail about this issue below so that you can see why roof valleys leak and become such a nuisance.
Open Valleys
The roof-covering material terminates a few inches short of the roof valley's midline. Water cannot get into the roof valley because of the metal coating.
If the roll-roofing valley liners fail, or if there is a cross wash, where water flowing down a roof slope rushes across the valley and up under the shingles on the next slope, you may have faulty valley lined shingles installed. Prevent valley issues by having your roofing system installed properly.
Closed Valleys
When shingles on one or both sides of the roof reach over the valley on the neighboring roof slope, your roofing system has a closed valley. Shingles shield the inside linings of a closed valley from exposure to the elements and damage.
A cut valley is a form of a closed valley in which the shingles from the surrounding slope are cut parallel and just short of the valley's center. Roof replacement is unnecessary if you don't observe any leaks in the valleys because of poor installation quality; not a problem.
Woven Valleys
In a closed valley, shingles from both sides of the roof are alternately routed through the next slope. It should be installed by your roofers in such a way that runoff cannot penetrate the shingles.
Flashing a valley on a roof is the same regardless of the material:
The occurrence of roof leaks in a variety of locations is not uncommon. When it comes to water seeping into homes, we get a lot of calls from people living in valleys. In most cases, the leak is the result of badly fitted or nonexistent flashing in the valley region.
Inexperienced roofers or general contractors are frequently the culprits of this subpar job. A professional roofing contractor should be hired to prevent any leaks from occurring in the first place. Valley flashing is the most efficient method of repairing a leaky valley.
Because these roof repair businesses don't know the basics, a large number of valleys are not flashed or are flashed incorrectly. Even if the contractor knows what he's doing, he may have chosen to take shortcuts at the expense of the homeowner. It doesn't matter what went wrong; if a valley is left exposed, your house is in danger of harm.
It's not difficult to get proper valley flashing. Professional roofers will have little trouble installing a dependable valley flashing system. This type of flashing is easy to grasp. Before the final roofing material is laid, this piece of metal is put in place.
For the full length of the valley, it follows the contours exactly. Stormwater will have a clear course to follow as it flows from your roof to your gutters and downspouts. In most cases, a GC will use a valley to weave the shingles together.
This is just the opposite of what the shingle industry advises against doing. It's time for a change of scenery, perhaps on a steeper slope. However, with a gradual slope, water will have more time to soak into the roof, allowing it to penetrate further.
Roofers and general contractors who are untrained are the first things to go wrong. They have a bad reputation among contractors for cutting corners and not finishing the task to the highest standard. An important part of keeping a home dry is installing roof flashings.
To ensure the integrity of their job, a skilled roofing contractor will properly flash any vulnerable spots around the property. Particularly when it comes to the long term, Valleys account for the vast majority of all roof leaks because of faulty or nonexistent flashing.
A typical error is to weave the tiles in the valley together. An easy-to-use approach that can save money and time for general contractors is available. Creating a finished product that looks nice to the untrained eye of a homeowner.
Woven Valley Shingle Installation
Installing braided valleys involves laying shingles in the valley and tying them together.
A braided valley gives a constant aesthetic to certain homes. There may be lumps and imperfections in the finished roof as a result of improperly put down shingle placement in the valley, resulting in an unflattering appearance.
Rather than using roofing cement, the woven valley shingle installation method relies on the weaving pattern to keep water out. This means that you should not nail any closer than six inches from the valley's center while placing shingles in a woven valley. Under the shingles, a hollow area can form if this step is not performed correctly.
This "bridging" is a severe issue for the roof's longevity. As a result of the open area, the shingles are more susceptible to damage from things like footfall, hail, or other flying debris. Because of this, certain manufacturers' warranties may be voided if their shingles are installed in a weaving valley.
Other disadvantages of a braided valley shingle installation are their delayed installation, especially in cold weather, and their more complex maintenance. Because this type of roof valley can only be shingled by simultaneously installing both roof faces, the process takes a long time.
The contractor must remove and reweave numerous shingles to replace a single one if repairs are required. While the initial installation costs of a woven valley may be lower because of the use of fewer materials, they may be more expensive in the long run.
Because of their single-layer design, woven valleys are ideal for use with three-tab shingles. To properly shingle a valley, you'll want to consider the increased thickness and decreased flexibility of architectural shingles.
In braided valleys, laminated shingles are more likely to cause bumps. Because of their bulkiness, they may not even be able to be weaved. As a result, we do not advocate the use of laminated shingles in a weaving valley.
Closed-Cut Shingle Valley Installation
Installing closed valleys, also known as closed valleys, is faster and cleaner than installing braided valleys. It appears as if the tiles meet neatly in the valley's middle when viewed from the ground. Underneath the uppermost shingle, a valley is formed.
A closed-cut valley is created when the initial roof plan's shingles are installed into the valley. This phase requires the use of just entire (not chopped) shingles.
Roofing shingles are installed on the second roof plane, and they are allowed to lap over the valleys of the previous roof. After that, the shingles on the second layer are chopped to create a straight line through the valley's middle. When cutting the shingles, use a chalk line as a guide.
A closed valley, in contrast to a braided valley, lacks hollows. Closed valleys, on the other hand, must rely on shingles to keep the valley protected, which has disadvantages.
As the roof ages, the valley shingles are more likely to lose their granules, and with them, their color and protective properties, than the rest of the roof is. Any type of shingle in a valley, as opposed to metal flashing in an open valley, might ultimately impede appropriate water and debris movement.
California Valley
The California valley, also known as the Long Island valley and New Jersey valley, is a variation of the closed-cut valley. When using this technique, it is necessary to put the last shingles on the "cut" side of a cut valley horizontally, causing them to flow up and down the valley.
This reduces time and is the fastest technique to shingle a roof valley, but in most regions, it does not give appropriate protection. Indeed, valleys in California are restricted in some places. Always check your local codes to determine if a certain type of valley installation is required.
Open Valley Shingle Installation
Metal flashing is the only defense an exposed valley has against the elements. Flashing is exposed on this roof, so the valleys are clearly evident. With copper or painted flashing, exposed valleys can enhance the roof's design, although some homeowners find them unappealing.
When it comes to snow, metal sheds it faster and more efficiently than shingles, making it less susceptible to ice dam and debris accumulation. The galvanized nature of the valley flashing metal ensures that it won't corrode or deteriorate in the presence of water.
Both an ice barrier and wind-driven rain will not be able to open the door. Open valleys may also be utilized to connect roofs with dramatically varied pitches, which is a boon to the roofing industry.
You'll need to decide on a flashing material if you're building an open valley. Flashing is usually made of metal. Among the possibilities:
As a minimum, we propose a 28-gauge galvanized metal in accordance with local building requirements. Corrosion resistance and non-staining are still required if a metal is not used. It must also be at least 24 inches (610 mm) broad to use valley flashing.
The thickness standards for flashing are commonly misunderstood, so be sure to check with your local building code. Valley flashing should be installed such that it matches or exceeds the life expectancy of the shingles.
You should also take into account the valley flashing profile when making a decision. Some flashing has a "W" curve in the middle, whereas another flashing is straight. Water cannot flow from one side to the other of the flashing because of a crimp in the middle of it. Using this method, you may connect two asymmetrically sized roof planes.
To sum everything up, a roof valley is the meeting point of two slopes of a roof at the lowest points. Two slopes of a roof can meet at the roof corners to make the roof hip.
A roof valley can either be open or closed depending on the design but proper flashing should be done at these points to ensure that there are no leaks.
Take a look at the flashing's aesthetics. To complement the shingle color, some homeowners like to paint the flashing. Others choose to keep the copper or steel face unchanged for a more dramatic effect. A home's exterior may be dramatically improved by the color and style of its shingles and flashing.
If you happen to notice leaks and you have these types of roof valleys, Mikku and Sons Roofing can work with you to correct the problem. Get in touch with us in Phoenix and in surrounding areas. Call us at (623) 465-1068.
Is it time to replace the roof on your house or commercial building? If you are, there’s some do’s and don’t’s that you’ll want to remember. Having an intact roof that your property can rely on is critical, as it’s the first defense against severe storms. The following roof replacement tips are essential when making this decision.
If you don’t know your the condition your roof is in, you can look for several different warning signs. Look to see if there are any signs of water damage or spots that are leaking. Are there any spots where it looks like its sagging? Can you detect any outside light shining through in the attic? Are there any dark spots or water trails that show?
If you’re thinking about putting a new roof on your home, your choice of roofing materials has a direct relationship with how long you can expect your new roof to last.
The longest-lasting products, such as concrete, clay, or slate tiles are extremely durable. These tiles outperform other manufactured roofing materials, such as asphalt shingles and metal roofing, by a significant margin.
These have a good lifespan but aren’t quite as durable.
Other factors to take into account are regional weather conditions, the design of your home, and the amount of routine maintenance the materials will need.
In short, the quality of the roofing materials you invest in plays a critical role in determining the life expectancy of your new roof.
According to the National Association of Home Builders, most roofing products are designed to last at least several decades under normal weather conditions. Let’s take a closer look at how the longevity of different materials is rated.
Usually, asphalt shingles last about 20 years; but, higher-quality asphalt shingles can be warrantied for up to 50 years. However, you can expect to pay more for a premium, long-life product.
These are asphalt shingles that are thicker, which can create an appearance similar to slate, or clay tiles at a lower cost. Architectural asphalt shingles last about 30 years on average.
Wood roofing has an expected lifetime of about 30 years, but it can last much longer under moderate weather conditions. Not really used much anymore in our extreme summer heat.
The International Association of Certified Home Inspectors projects metal roofing to last between 40 to 80 years. The Metal Roofing Alliance gives a life expectancy of at least 40 to 60 years.
Each of these products is rated for a life expectancy of 100 years or more by both the NAHB and NACHI. The underlayment beneath the tiles usually needs to be addressed every 15-20 years, however.
How long your roof lasts is directly related to the cost of the materials you choose.
Asphalt shingles are among the least expensive residential roofing products. But, the difficulty of installation will greatly increase the cost per square foot.
Architectural shingles, which are twice as thick (and heavy) as asphalt costs almost twice as much as regular asphalt shingles.
Metal roofing materials are a premium home product, and costs run about two to three times that of asphalt shingles. It’s comparable to tile or cedar shakes, but less expensive than slate.
Expect to pay between $5.00 to as much as $15 per square foot. Adding a breathable underlayment is recommended and can increase these figures also.
Simple roofing designs with tile or slate cost about $15-20 per square foot, but more complicated architectural designs and premium slate or tile roofing materials can cost as much as $40-50 per square foot.
Asphalt shingles are the most extensively used roofing product in the United States says the National Roofing Contractors Association. They are relatively inexpensive, and there is a wide choice of colors, patterns, and styles to choose from.
Architectural asphalt shingles are a recently developed product. It's a material made from engineered polymer composites that look like cedar wood shakes or slate tiles.
The good news is that they’re much less expensive than natural products; the bad news is that they don’t have a long history of performance benchmarks to analyze.
Metal roofing materials, including metal shingles, slates, tiles, and vertical panels, weigh up to 50% less than asphalt shingles and 75 percent lighter than tiles.
The problems they have are the same as the other materials: leaks, punctures or tears, and pooling water.
Wood shakes typically get warped from a lifetime of wetting and drying with the seasons. This can jeopardize the integrity of the roof.
But, they’re still a popular choice in many parts of the country. Pressure-treated shakes will hold up better, and thick-cut cedar shakes generally last longer than thinner cedar shingles.
The main drawback with slate or tile roofing is its weight. 3/8-inch thick slate or tile can weigh as much as 1,500 pounds per square (a 10-foot by 10-foot area), and each additional 1/8-inch thickness increases the weight by 500 pounds per square.
Before choosing a type of new roof, consider how much you want to invest, what types of roofing products are used in your neighborhood, and how long you expect to be living in your property.
It would also be a good idea to consult with an experienced, professional roofing contractor about which materials are the best fit for your property and area.
There are many things to consider when making the decision to do a shingle roof installation on your home. Your property in the interior of your home depends on having a quality roof overhead.
Anytime the roof’s structure is in trouble, you need to take action right away to fix the issue.
This article will discuss 10 steps you can take to ensure your shingle roofing system is up to par for your peace of mind.
Like many home improvement projects, installing a new roof is expensive.
One way you may think you can save money is with a “roof over” or by re-roofing- this entails placing the brand-new shingles immediately over the age-old ones.
While it might seem advisable and allow you to save money in lower disposal and labor expenditures, the problems will probably outweigh the benefits.
Roof overs may actually reduce the life of brand-new shingles due to heat buildup and issues with moisture.
There are also possible problems with the underlying decking that are not seen and restored. Check your shingle warranty to avoid loss of coverage due to an ill-advised roof over.
For a shingle roof installation, contractors will measure your roof and offer you an estimate based on the number of squares of shingles needed. A square is a material needed to cover 100 square feet, so a roof with 20 squares has 2,000 square feet of surface area that needs to be covered.
One element that contributes to the long life of your roof is the right amount of ventilation. Ascertaining your roof system has the necessary ventilation can modulate the attic temperatures in the summer and reduce moisture being developed in winter.
Request your contractor supply you with the kind of venting that is included with the roofing project to make sure your roof lasts through its warranty period.
Part of professional roof repair is not only removing all the old shingles but making any needed repairs to the underlying wood substructure.
Your contractor should address this and allow for these kinds of repairs if needed in your agreement.
Placing brand-new shingles over faulty wood is never advisable and will reduce the life of the brand-new roofing materials.
Shingles should never be affixed directly to raw lumber on the roof. Protective coverings made of felt or other materials offer additional heat and water shields needed to fully protect your dwelling. This is especially important in areas with heavy rains or icy temperatures.
Likewise ensure the contractor includes all the additional substances needed for a proper roof replacement like fasteners, flashing, and drip boundaries are a part of the estimate.
A properly functioning roof system will protect your home and possessions for many years. Be sure you discuss what this assessment consists of and how your contractor will ensure that your brand-new roof is finished to your satisfaction.
Some roofing contractors will provide independent inspections and certifications for your complete peace of mind.
In evaluating the quality of the roofing materials and their installation, the warranty and performance relevant to the wind is a major factor in evaluating which product to purchase.
This is especially important in areas where monsoon storms, microbursts, or other severe weather patterns can cause severe wind damage.
Wind speed warranties can be as low as 60 miles per hour and can cover up to 130 miles per hour. Properly installed, acquiring shingles with higher wind warranties can be the difference between a brand-new roof and complete protection should you experience severe weather.
Is your contractor licensed and bonded? Does your contractor have proper insurance? What warranties do they offer for materials and labor?
Do they secure the proper permits and follow all local, regional codes and regulations? How reliable are they? What work have they performed previously in your geographic area?
One of the most important parts of any residence improvement project is the service you get after the project is complete.
Does your contractor offer a standard warranty? What does that include for products, labor, and parts? For what length of the period does the warranty have?
Is there an extended warranty available? What does that include and for how long? What does it cost? How do you request service calls? Is there a cost for service calls? Will the company be there over the next 10 years if you need them?
The natural inclination is to find the lowest cost. While cost should always be a factor, the most important part of the decision should be appreciable value and your return on investment.
Will the contractor give you a fair estimate and one that handles the cost of quality products and professional installation?
Does the estimate encompass all facets of your roof replacement including ventilation, protective coverings, fasteners, permits, and inspections, flashing as well as removal and dumping of the old roofing substance and delivery of brand-new materials?
Does the estimate encompass all labor, project management, and coordination? Are there allowances for unforeseen expenditures such as repair or replacing the underlying wood structures? Peace of mind, quality substances, and complete project specs are as important and will provide you with a roof that lasts a lifetime.
A new roof is a big investment that typically can cost thousands of dollars. The materials you use will be a small portion of your investment.
Most of it will go toward the skilled labor involved. That means choosing an experienced roof installation contractor is the best route to protect your investment and ensure a proper job.
Sounds simple, right? Unfortunately, roofing is a business that requires little more than a pickup, a ladder, and some basic tools start, so you have to be careful and diligent in choosing the right roofer for your project.
If you can get recommendations from a neighbor, friend, or someone you are familiar with, it's probably the best route to proceed.
Gather the names of at least two potential companies. Make sure each one has been in business for a minimum of five years. Roofing corporations who do bad work generally won’t be in a business that long and are usually unlicensed.
Check the availability of your roofer. There’s no reason to waste time if they’re booked up for months. Make sure to get calls and addresses of past customers, and eliminate any contractor that is hesitant to provide them.
Do a drive-by inspection of a few of their recent projects. If it's a shingle roof, visually make sure that the spaces between individual shingle tabs, known as water gaps, line up laser-straight as they alternate shingle rows.
Make sure the shingles are trimmed in a clean path along the valleys where they overlap the flashing. On the ends of the roof, shingles should also be neatly trimmed so they align with the leading edge of the roof. Ragged paths mean poor work.
Likewise look for neat, tar-free flashing at the roof valleys and at the eaves.
If the roofs look like they stand up to scrutiny, call their past customers and ask them these questions:
When a roofing company comes by to estimate your job and work up a price quote, notice their look. If they aren’t clean enough to sit at your dinner table, do you really want them working on your property?
Make sure to detail the entire assortment of your expectations. Know who will be doing the work and who the main foreman will be. Always get everything in writing.
If you like them, then it’s time to ask if they carry workman’s compensation coverage and at the least$ 1 million of liability insurance.
Get the name and contact information of the roofer’s insurance agent and ask the agent for their proof-of-insurance certifications.
After you’ve seen these documents, then it's time to talk about an estimate, which they should be doing for free.
Make sure you get a warranty that takes care of leaks, flashing loss or failure, and any other labor-related issues.
A one-year warranty is a minimum you should get, but two or three years is what you should really demand. These same specifications need to be in the contract, which should also include what type of quality materials they will be using.
Make sure you ask for the highest-rated, longest-lasting shingles or tiles you can afford to pay for.
Manufacturers generally warrant their products for 20 to 30 years.
Some can be voided if shingles are put on over existing ones, so tearing off the existing layer of shingles might be required, which would be an additional expense. Asphalt shingle roofs should last 13 to 15 years on average, so a 20-year warranty is what you would want.
Tiles should last 30 to 40 years. Make sure to get the proper paperwork and proof of purchase required, in case you have to pursue any problems that arise in the future.
A tile roof adds a rich and elegant look to any residence, while giving it a durable, fire-safe protective layer that is also resistant to bugs and rot. It won’t grow mold, stain or lose any of its color as years go by. For these reasons, a tile roof installation is a great choice for your roof.
Tiles are generally made of concrete or ceramic clay, and come in a broad range of traditional and modern designs. Concrete tile is generally warranted for at least 50 years, while ceramic clay can be warranted for 75 years or more.
Like most other homeowners, you may not worry much about roofing. However, you need to know that your roof is there to protect you and your home as well.
This article is not going to teach you all that there is to know about getting a roof repaired, but these roofing contractor tips are very important.
If you can afford to, you should always hire a professional roofing contractor, but if you have to work on the roof yourself, make sure that the weather conditions are clear for your own safety.
A wet roof can be slippery. Your roof will also need an ample amount of time to dry. A rain shower the following morning can end up setting you back.
Hose off the shingles, so you can have a clean workplace without a mess of leaves or other debris.
You can also use the hose to find a leak in your roof. One of the best ways to find a source of a roof leak is to use water itself.
It can be tricky to see where a leak is coming from in the middle of a storm, but a garden hose will allow you to test your roof until the leak has been found.
Your best bet, however, is to always hire a professional roofing contractor to inspect and repair your roof.
Do not choose the first roofing contractor you find in the phone book or online. By choosing the first roofing contractor you read about, you may end up spending more money than you need to.
Call numerous roofing contractors and go with the most reliable one at the best price you can find. It's not easy to choose a roofing contractor, but asking for a list of references can be a huge help.
Any roofing contractor which refuses to provide such a list is not one that you want to hire. Don’t just ask for the list, though, be sure to call a few people on it to double-check their experiences.
When inspecting your roof for leaks, it is important that you inspect the whole roof, not just one section. If you find a troublesome area of your roof, you should still check all areas, as there could be more problems elsewhere.
It will be cheaper for you to have all fixes done at the same time, when you hire your roofing contractor, rather than waiting.
If you have a general handyman that does work in and around your home, do not allow him to do anything to your roof.
Fixing a roof requires a high level of experience and know-how. This is why you would be better off hiring a roofing contractor that specializes in this type of work.
The age of your roof is a good indication of whether it needs replacing or not. Most roofs have a lifespan of fifteen to twenty years before replacement is needed. If you have a roof that was put on top of another roof, if 20 years have gone by, you likely must replace it.
Take the roofing contractor’s credentials into consideration during the hiring process. Although credentials do not give you a guarantee that you will get quality work, they do show you how involved the person is with your local community.
It also says a little something about their character as well, which is valuable information.
Any roofing contractor you hire needs to have proper licensing and insurance. If they don’t have this available, then it's best not even to consider hiring this particular roofing contractor.
If your roofing contractor does not have insurance and causes a large amount of damage, then you will be the one to pay.
As was mentioned at the beginning of this article, most homeowners don’t really know too much or concern themselves with roofing.
However, it is an important topic since you will want to protect your family and the items that are contained in your home. Knowing this information will help to keep your family and valuables safe.
When it comes to determining if you need a new roof, there is a lot to think about and consider. Often homeowners are unsure if a new roof is necessary or if the existing roof just needs some minor repairs.
The best way to know is to have a local roofing contractor come to the house for a free consultation. They will evaluate the home’s roofing materials as well as the structural soundness.
Replacing a roof with a new roof can be an expensive investment. A roofing contractor will advise you about the roof's condition and the best steps to take going forward.
When determining if you need a new roof, the most obvious factor is that a new roof will be expensive. When a new roof is needed it’s important to make sure everyone in the household knows what is going on. It will alter your life while the work is being done, which is typically about a week.
A new roof is best installed when life is not chaotic and nothing pertinent for the family is happening. The stress that comes along with paying for a new roof and living in the home while the roof is installed is exhausting.
Having a baby, starting a new job, kids studying are all good reasons to delay a new roof install. Installing a new roof will be loud, and you should be prepared for early mornings.
The best time for roofers to remove shingling and old roofing is in the morning when temperatures have not peeked.
Another thing to think about when beginning a new roof installation is the material that you will use for your roof. Shingles and tiles are the most common choice for homes here in the Southwest however; depending on your home’s style, flat or foam roofing can be considered.
When considering materials to use it is best to do a benefits analysis to decide if the extra money for a tile roof is worth it in the long run over shingling. If you plan on staying in your home for a long time a tile roof will stand the test of time, and you will not need to worry about the hassle of a new roof in twenty years.
When choosing a contractor for your new roof, the best way to find reliable roofers is to check their reviews online as well as ask neighbors, friends, and family for referrals.
If you find a roofer online it is important that you are able to contact their referrals to ensure they are satisfied with the job that was done on their home. It is the appropriate time to ask about the time frame of the job as well as the cost in comparison to the original quote.
Homeowners should also consider asking about the mess, the cleanup, and the professional nature of the crew. These are important things to inquire about before you hire a roofing contractor to install your new roof.
A roofing contractor can seem incredibly professional when selling you on a new roof but finding out what they are like in the heat of a roof replacement is what you need to know.
Asking their referrals and checking their reviews and testimonials is a sure-fire way to know ahead of time what you are getting into.
The last thing to do before any work is done replacing or repairing a roof is to have a signed contract. A contract between the roofer and the homeowner should include labor and material costs, an estimate on competition time, and a copy of the roofer's insurance.
It is important that the roofer covers insurance coverage for the employees. This responsibility is not that of the homeowners and is not theirs to be liable for should an accident occur.
All reputable roofing companies will have no problem supplying you with proof that they are fully insured.
When determining if you need a new roof, trusting the people working on your home is a number one priority. Hiring a company for a big job such as a new roof is not something to consider lightly.
The home’s roof is structurally important to the house and therefore care should be taken when work is done on it.
