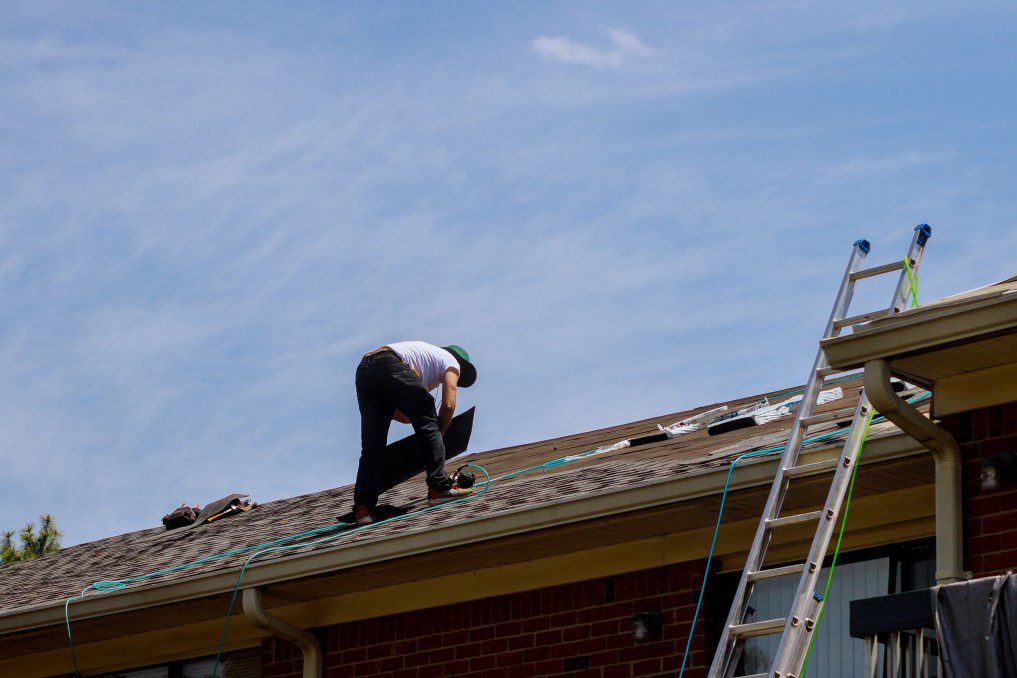
When it comes to re-roofing your home, numerous considerations must be taken into account to guarantee that you have a solid and sturdy new roof. It is a delicate technique that has the potential to result in costly and time-consuming mistakes.
Roofs with solar panels, on the other hand, take into consideration these variables and other crucial factors that must be adhered to for both to be effective. This shouldn't be a source of concern for you because, in this post, we will walk you through four essential considerations before beginning the project.
When a roof is damaged or expires, it is common to be replaced. The manufacturer's recommended replacement date may be approaching, and it is advised to replace the roof when it has reached 80% to 85% of its life.
As a result, you should take advantage of this opportunity to perform repairs, replacements, and preventative maintenance.
Some of them are as follows:

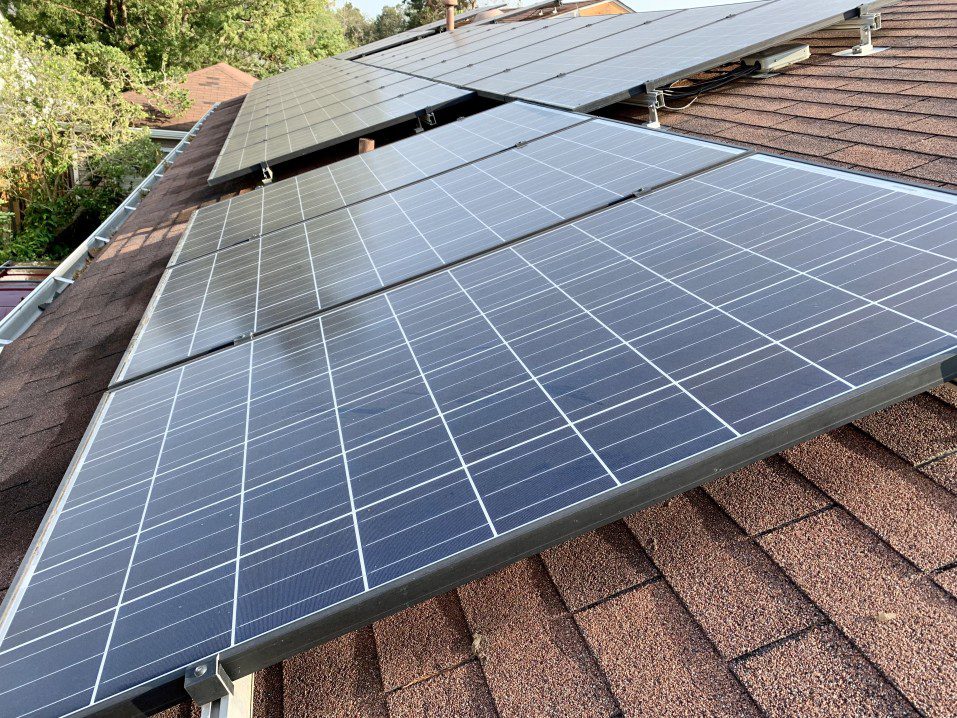
There are several distinct types of solar panels, each of which has its advantages. Because of personal preference and other considerations, it is possible to switch to a different model at any moment.
Changing your solar panels at the same time as replacing your roof provides several advantages:
Convenience
They may be time-intensive, but it is more convenient to cover two related projects simultaneously. Compared to executing each task individually, this enables a one-time financial plan and expenditure.
Double inspection
The roofers and solar installation crews will ensure that the roof is robust and well-fixed before they leave. The two-fold inspection reveals any errors that may have occurred from either party's perspective.
The roofing business repairs and replaces any damage to the roof frame and ensures that the deck is sturdy enough to support the roof covering. This is critical since the solar panels will be installed on the roof.
The strength of the roof and the state of the roof deck, where the brackets will be affixed, will be examined by the solar panel experts before they can install the panels.
The roof has some sections that you cannot replace whenever you wish. When you re-roof your home, you have the opportunity to check and repair any damaged areas of the roof.
Some examples of repairs and maintenance are as follows:
Re-roofing adds a fresh layer of shingles to an existing roof structure. There are some advantages as well as disadvantages to doing so.
Re-roofing is a one-time investment, and if the roof is damaged or has reached the end of its useful life, you will have to replace it entirely. As a result, before re-roofing your home, you should consider the following factors:
The age of your roof
Your roof will require replacement after it has surpassed 80 percent to 85 percent of the manufacturer's recommended life span.
There are a few concerns associated with re-roofing your home under an old covering of shingles:
The extent of the damage
When you believe it is time to re-roof your home, you should inspect your roof yourself or have a professional do so for you first. The amount of damage determines whether you'll need to replace or re-roof your home when it comes to roofing.
If the damage has spread to the roof's frame due to water damage, there is a reasonable risk that your roof will not be able to support the weight of the solar panels and the extra layer of shingles on top of them.
Missing, cracked, or curled-up shingles may necessitate replacement rather than re-roofing. This is because an excellent first layer of shingles provides an extra layer of protection for the house if the top layer is compromised.
Building codes
Local building codes are subject to change over time. Contact your local construction business to determine what you can and cannot do with your property.
One of the examples includes;
The use of 3-tab asphalt shingles was once widespread, but several building codes no longer permit their use because of their low wind resistance. As a result, architectural shingles are the asphalt shingles of choice in some places since they have a greater wind rating.
If you had previously used 3-tab shingles, you would have to transition to architectural shingles to comply with building regulations.

If you have solar panels attached, you may experience a power outage for a period of time that lasts the entire replacement period.
When it comes to solar panel mounting, you have two choices:
Off-grid
These solar panels store energy in batteries while also supplying solar power to the home's electrical system. They operate independently of the electricity grid and are not connected to it.
This implies that if you have an off-grid solar panel, you will not be charged any utility fees for electricity, and you will not be affected by a power outage in your neighborhood.
On-grid
While the on-grid solar panels are connected to the main power line, the house draws its electricity from the power line rather than the solar panels. It functions indirectly to give electricity to the owner.
The power grid absorbs solar energy, and the owner gets compensated by the utility company for the energy that they have provided to them through their solar panels. If you do this, you will save money on your electricity bills, but you will lose power if there is a power outage.
Several grid systems can provide power during power outages by installing batteries that serve as backup power sources.
If you have an off-grid solar installation system, you will have a power outage during the period of re-roofing work. Make sure that the re-roofing takes place at a time convenient for you to be prepared.
Connecting your home to the primary power grid allows you to use your solar electricity as a backup in case of a blackout while saving money on utility charges.
As an alternative to re-roofing your home with a new covering of shingles, you should consider adding solar shingles. You will choose to have shingles and solar panels in a single package.
This is recommended if your roof does not qualify for re-roofing and requires a complete replacement. Consult with a roofing professional to discover whether your roof is suited for solar shingles.
It is advantageous to use solar shingles to replace your roof since you will not have to replace your roof for the entire life of the solar shingles. They also have a longer life span and provide protection and solar energy in one package.
Additionally, combining them will save you money on maintaining and repairing both the solar panels and the roof individually. Solar shingles have one replacement and maintenance period, whereas shingle roofs and solar panels, which are of different durability, have many replacement and maintenance periods.
Most of the time, different businesses compete with one another to provide their services. This is true unless the company is a partnership or a fully integrated corporation.
This distinction between solar panel installers and roof replacement contractors is critical to grasp. Before you begin the job, ensure the team members are capable of working together to provide you with a functional solar installation and a sound roof.
Solar panels are equipped with various mounting hardware that can be utilized in multiple situations. In the case of re-roofing with different solar panels or when intending to install solar panels on your roof, check with the solar panel providers to see if they can be installed on your roof.
If you are re-roofing your home with solar panels and intend to use a different roofing material, you need to make provisions for this in advance. Have the mounting hardware and other items supplied to your home before the re-roofing process begins.
Solar panels can be fitted at any time, but given that the roof has a limited lifespan, installing them simultaneously as your roof or installing a new roof may be preferable.
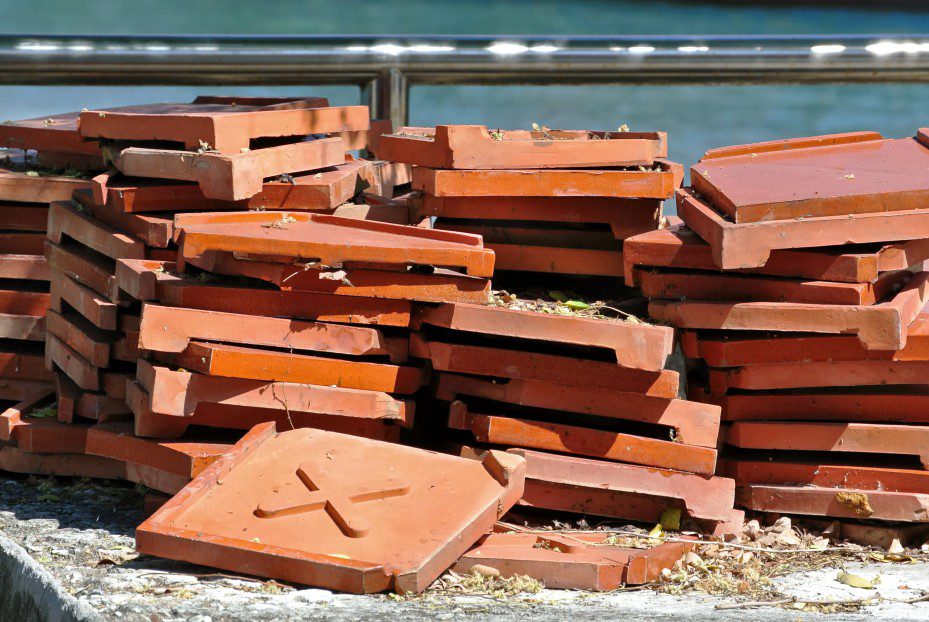
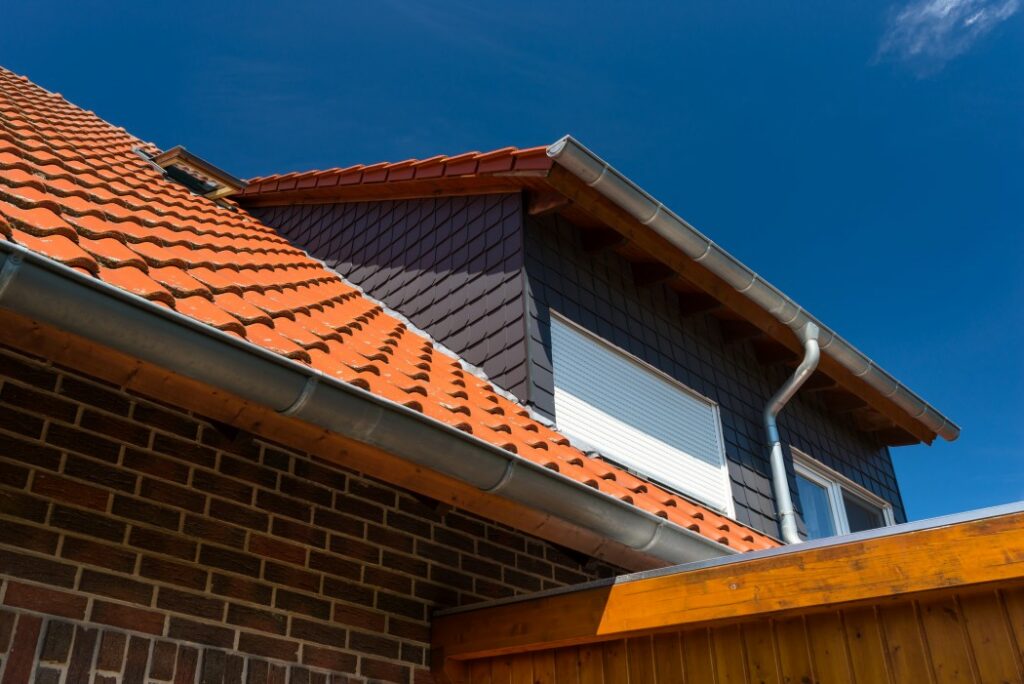
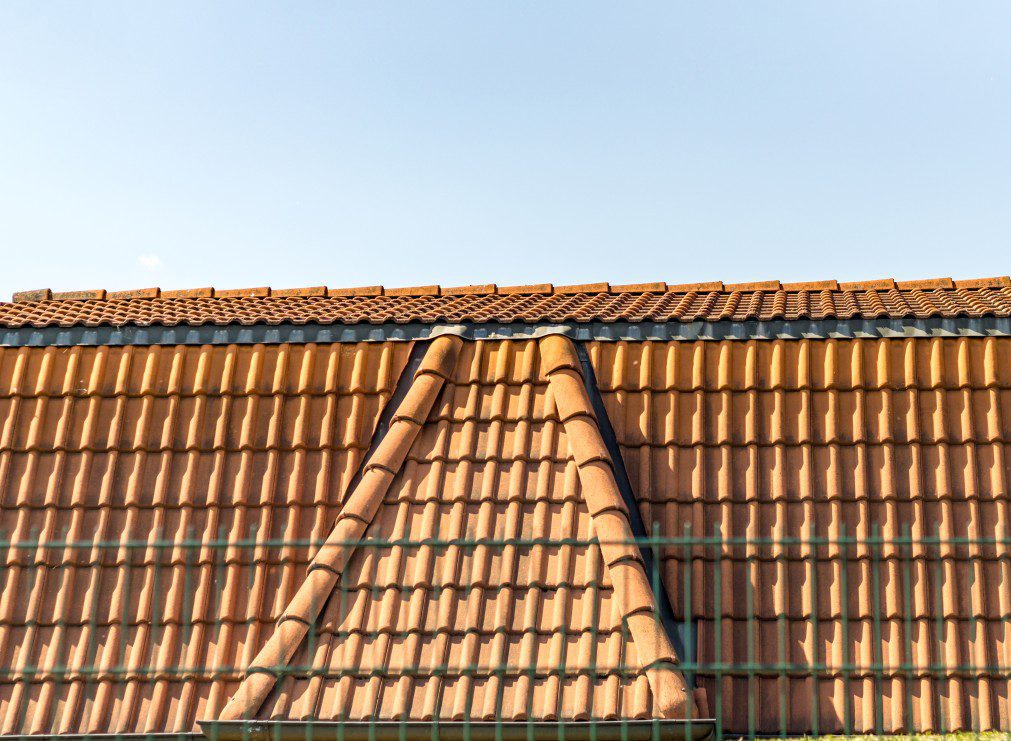
Flat Roof Tiles refer to a wide range of profiles that do not include barrels or rolls. Traditional and contemporary architecture alike may benefit from flat roof tiles, gaining popularity among designers, architects, and homebuyers.
We've created an exclusive guide on where you can purchase the best flat roof tiles!
Burlingame Industries, a privately held family business in California, is the parent company of Eagle Roofing Products. The company's corporate strategy and vision have grown out of these familial origins.
Eagle Roofing Products has made high-quality flat roof tile products for over 30 years. With a wide variety of flat profiles, colors, and textures, Eagle's concrete flat roof tile collection will fit any home or business design aesthetic.
With only one high-pressure concrete tile extrusion machine, Eagle commenced operations in Rialto, California, in the autumn of 1989.
Over ten years, more than 83,000 dwellings a year were served by the Rialto plant's ability to create concrete flat roof tiles. Eagle's Rialto plant is still the biggest in North America today.
To address the demand for concrete roof tile in the United States and Canada and their Rialto facility, we also operate operations in Phoenix, Arizona, Stockton, California, and Sumterville, Florida.
We recommend Brava composite tile to replace genuine slate and cedar shakes. Asphalt shingles, concrete tiles, slate, shake, and clay flat roof tiles are pale compared to Brava's composite roofing solutions' long-term durability and aesthetic appeal.
This implies that Brava's products may be put on any roof without the need for expensive structural adjustments or specific equipment.
There is a 50-year limited guarantee on all Brava products that have been thoroughly tested and certified by third parties for the greatest wind, fire, and hail levels.
The MCA brand is renowned across the globe for its high-quality roofing tiles, thanks to over a century of expertise. It is important to us at MCA that every tile we sell is of the highest quality, and as such, we have made a significant investment in research and development.
Every step of their manufacturing process is designed to ensure that we produce a clay tile of consistently excellent quality.
MCA also has a wide variety of bespoke and unusual goods. Straight Barrel, Corona Tapered, Classic Tapered, and Turret Tile styles are included in the MCA standard styles. The Improved "S" style is the only one not included in the standard types.
With MCA's automated manufacturing lines, contemporary technology and centuries-old ceramics expertise may be combined to produce a broad range of flashing colors. There is no need to be afraid that rain run-off from your MCA tile may damage the soil or water table since MCA colors are "environmentally safe."
Established in 1960, Terracotagres is a family-owned business. Their goal is to amaze you with their latest advancements, whether in the production process or the tile models.
Terracotagres' dedication to creating goods that go above and beyond in terms of aesthetics and quality has resulted in pieces protecting construction sites in Brazil and the United States.
Because ceramic tiles are made entirely from natural gas, environmental concerns lead them to consider environmentally friendly methods of making them.
With the biggest ceramic tile on the market, they have many duties. It's essential to keep in mind that innovation is necessary for the market, but we also need to keep in mind that delivering the new is dangerous since it's unknown.
New hand-finished clay roof tiles and recovered historic/vintage concrete and clay roof tiles and fittings are available from Tile Roofs, Inc. In addition to new construction, landmark tile roof restorations, and repair/replacement work, they also provide flat roof tiles.
Reclaimed antique and vintage clay roofing tile, tile fittings, and slate are among the biggest in the United States.
There are things from the late 1800s, such as ceramic tiles, that are no longer manufactured. Tile Roofs also has salvaged mineral fiber cement shingles with fittings and various concrete tile designs to rehabilitate historic roofs, which are widespread in the Midwest.
Whether you're looking for concrete roof tiles or concrete shingles, Vande Hey Raleigh is the company to turn to. Vande Hey Raleigh is a Wisconsin-based company that distributes concrete roof tiles throughout the United States and Canada.
Their goal is to guarantee that their flat roof tiles complement the entire structure design, working closely with homeowners, architects, and builders.
Extreme conditions are no problem for their concrete, clay, and slate roof tiles. They also defend against fire. Roof tiles are also resistant to wind-driven rain, absorb less moisture, and are impervious to termites, rats, and decay, making them ideal for homes.
Since its inception in 1977, Vande Hey Raleigh has built a reputation as a specialty flat roof tile manufacturing leader. Offering various shapes and colors, they continue to produce roofs of distinction.
Above all, Vande Hey Raleigh flat roof tiles are manufactured with time, a precious commodity.
Even in a world of mass manufacturing, we take the time to give each of their tiles the attention it deserves, the time it takes to create new products and methods, and the time it takes to build long-lasting relationships with their customers.
If you can imagine it, we can make it a reality. With the help of design teams, we are able to provide you with the unique style you are searching for. Their custom-made roof tiles are meticulously hand-tooled to offer a perfect fit and a unique look for your roof.
Vande Hey Raleigh roof tiles have graced historic buildings, elegant houses, and office projects throughout the United States, Canada, and the rest of the globe because of their perfection.
Each concrete shingle or tile that we produce is customized specifically for your roof. The flat roof tiles may be made in various colors and fashioned with deep shadows for an even more striking appearance.
Auburn Tile is credited for producing the flat kind of concrete roofing tile smaller in size and has a natural "broken leading edge" in Southern California.
There is no substitute for this style when it comes to quality and craftsmanship. To keep the old-world elegance of its concrete roof tiles, Auburn Tile does not mass-manufacture them.
It is essential to Auburn Tile that its ownership and manufacturing remain in the United States. It has the greatest color options of any concrete tile on the market, allowing you to create a one-of-a-kind look for your home.
In addition to an extensive list of roofing products, Crown Roof Tiles is a global construction-materials firm. It is its mission to provide innovative roofing materials, exceptional customer service, total customer satisfaction
And the ability to serve customers throughout the world while maintaining a high level of integrity and reliability.
In recent years, Crown Roof Tiles – located in the United States, Great Britain, and Mexico – has grown and acquired other businesses.
In November 2011, the business purchased Russell Roof Tiles. Russell Roof Tiles was established in Great Britain in 1892 and began producing concrete roof tiles and fittings for commercial and residential structures in 1965. Russell Roof Tiles offers a proven portfolio of innovative technologies and products.
The Monterrey, Mexico, and Arcadia, Florida, facilities run by Crown Roof Tiles and its affiliates are also cutting-edge. To address the ever-changing demands of their clients all around the globe, they are dedicated to producing new goods and services all the time.
Founded in 1981 by Vince Hobson, Custom Tile Roofing is a Colorado roofing company that collects, salvages, and categorizes antique roofing tiles. More than a million pieces of roof tiles going back to the early 19th century are now in his collection.
Regarding tile roofing consulting, installation, and repair, Hobson and Custom Tile Roofing have acquired a reputation as one of the most competent and reliable options.
Co-authored by Hobson and Melvin Mann, "Historic and Obsolete Roofing Tile" (2001) is a comprehensive reference to the wide variety of roof tiles now in use by contractors across the globe.
The Front Range of Colorado continues to benefit from Custom Tile Roofing's tile installation, repair, and identification expertise.
With Formula and Custom Tile Roofing merger in 2012, Custom Tile Roofing now offers a larger range of services to its customers. Formula Roofing has a proven track record of excellence in storm damage insurance claims.
Impact-resistant and designer shingles, rolling and flat roofing, and wood shake repairs, are all available via Formula. Formula Roofing and Remodeling also offers siding, window painting, gutter cleaning, and painting services.
Custom Tile Roofing and Formula Roofing and Remodeling are a fantastic match for a wide range of home remodeling and roofing-related requirements because of their combined expertise, knowledge, and inventory.
For over 70 years, Daltile has been making tiles for homes and businesses worldwide. They appreciate the importance of long-term value, luxury, and durability.
Using this experience, Daltile has created roofing materials of the highest quality and design. Aside from that, their 7+ decades of expertise have shown that the materials we employ can withstand the harshest conditions.
Perennial Porcelain Roofing Tile is manufactured in the United States using recycled materials and certified porcelain. With Reveal Imaging® technology, Daltile can replicate the appearance and feel of real wood, clay, and slate roof tiles.
The 11 × 22-inch Daltile roof tile has an 8 x 8-inch ridge trim. Thicknesses of up to 12" (12-13 mm) are available in both standard and high-definition (HD) versions to suit various climates and applications.
Clay, feldspar, and sand are the only three natural elements in their porcelain. The tile on their roof is impervious to stains, chemicals, and the formation of algae. It will last a long time and function at a high level.
Gladding, McBean has been a pioneer in Terra Cotta, Clay Pipe, and Tile goods for more than 140 years, thanks to its inventiveness and extensive clay deposits. Today, Gladding employs cutting-edge technology to provide unique design components and valuable new goods.
Gladding, McBean, re-creates significant architectural components from the past by combining old-world craftsmanship with current technologies.
They made clay roof tiles such as Cordova, Lincoln interlocking, and Italian roof tiles.
Stone, roofing, siding, windows, shutters, and trim producers are all part of Westlake North America's building materials family.
Boral USA is the leading premium supplier of comprehensive roofing and re-roofing solutions for architects, commercial and residential building contractors, and homeowners.
Boral Roofing owns and manages 14 clay and concrete tile production factories in the United States and Canada, which employ more than 5,000 people.
Boral USA has its headquarters in Roswell, Georgia, and employs over 1,500 people in more than 140 locations in the United States. Operations in the United States include the country's biggest maker of clay roof tiles, concrete roof tiles, and bricks.
Modern innovation and old-world craftsmanship are combined in a seamless production of the finest roofing tiles from Spain. The firm is a go-to supplier for environmentally friendly clay roof tile production.
It is impossible to compare Verea Clay Roof Tiles to other GRADE 1 tiles on the market in terms of appearance, finish, or pricing. The North American market is now served by tiles, barrel tiles, and flat profiles.
Flat tiles are also particularly resistant to fire, wind, and hail, and this makes them a wonderful option as a safe material for your roof, provided they are built correctly.
Although they don't have the natural air pocket that barrel tiles may supply, they can be combined with flat roof insulation for a nice warm interior.
In contrast to the many forms of slanted roofs, a flat roof is almost level. There are flat roofs with up to 10° of pitch, the formal name for the slope of a roof.
Flat roofs have been utilized for centuries in dry regions and may be used as living spaces or living roofs.
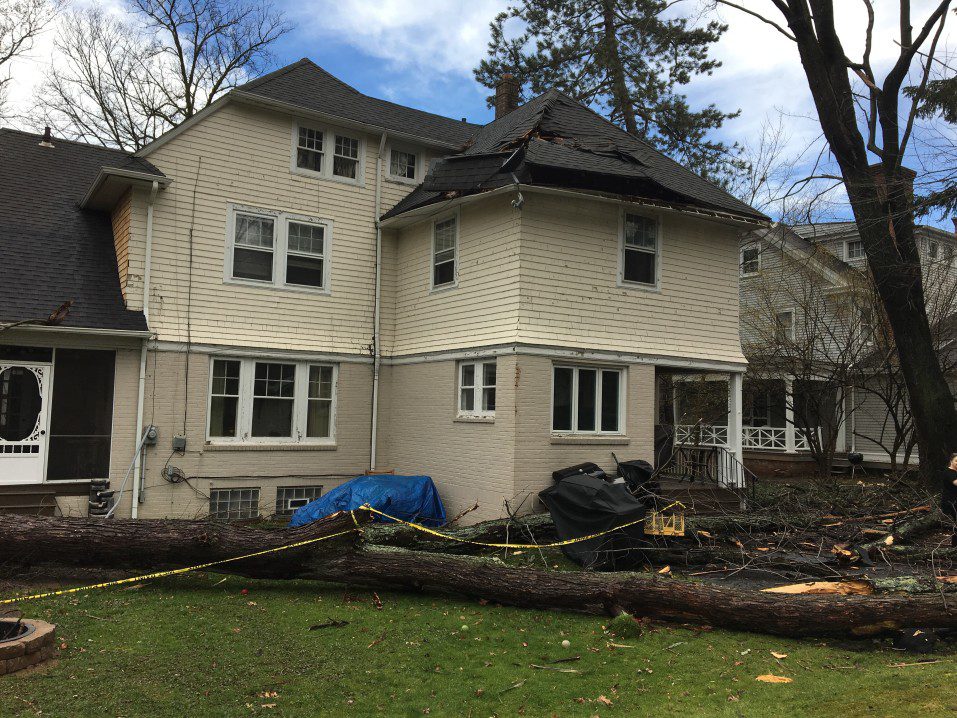
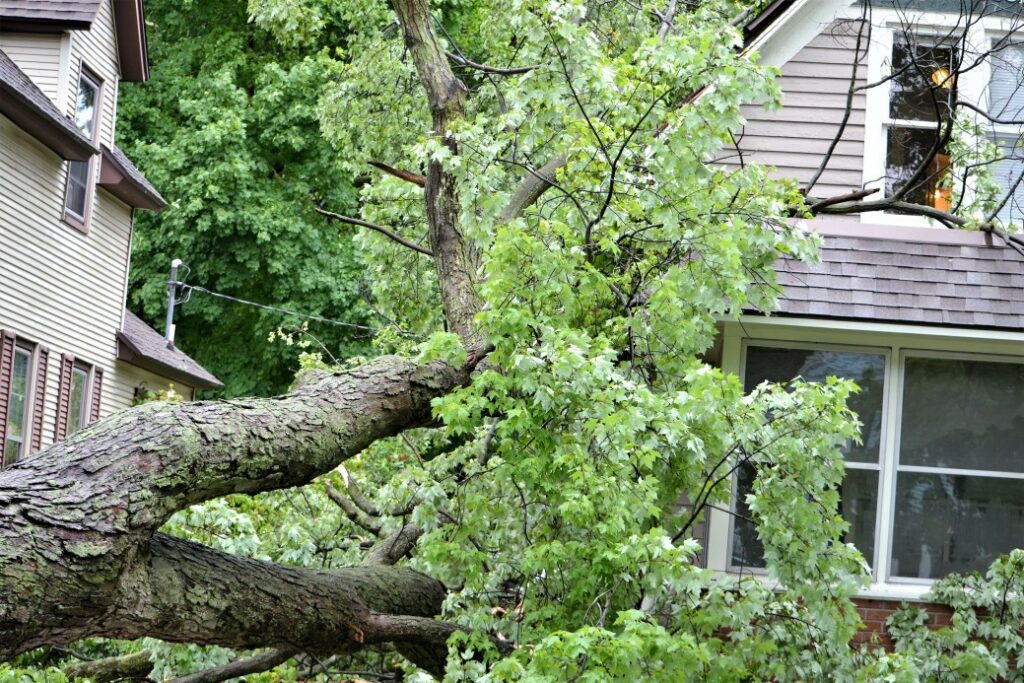
A roof plays a vital role in a house. Any damage or shortcomings should be fixed as soon as possible to avoid any inconveniences and further damage to the home.
However, roofing jobs can be costly, especially when problems crop up from nowhere!
This shouldn’t be the case; you could get your insurance company to pay for roof replacement with the right steps.
Dwelling coverage is a part of the home insurance that covers a home damaged by a hazard. Remember dwelling policy only cover the physical structure of the home.
A home owner’s insurance typically covers the entire home. Dwelling insurance is part of the home owner’s insurance most of the time.
An insurance company typically covers damage from sudden circumstances like weather or fire damage. The overall damage covered depends on the insurance policy and the causes of the damage.
To avoid the ‘administrative errors’ that insurance companies use to get out of covering your damages, it is necessary that you follow the correct steps. The key thing is not to let your provider’s agents boss you around or dismiss your statements.
Before anything, you should get a copy, or if you have one, read through the policy and understand it. This is to give you an understanding of the situation and prevent any situations that may make you miss out on the compensation.
Age
A roof has a lifespan determined by the type of roof cladding and the weather conditions of the place. Other factors such as moss and plant damage also cause deterioration of the roof.
Some insurers offer a 10-year warranty or window for complete coverage beyond which the depreciated value is considered. The company will use the depreciated value of the roof’s cost before the damage occurs.
Types of coverage
Most insurance companies cover roof damage in one of two ways:
| Coverage Type | Definition of Cover |
| Repair Coverage | The repair coverage considers the roof’s depreciated value and the material used. The replacement cost may be low in this case. |
| Replacement Coverage | The insurance company may cover roof damage caused by the factors stated in the agreement. It covers partial and complete roof damage from the events stated in the policy and returns the roof to a brand new condition. |
Having the official documentation when filing for claims is essential. This is also why the causal family pictures on weekends may be more important than you think.
Like all other companies, an insurance company is about business and profit. They will send an agent to access the damage and find reasons why your claim shouldn’t go through.
The agent scrutinizes the roof’s before and after conditions, and presenting the documented damage is proof to get a step ahead.
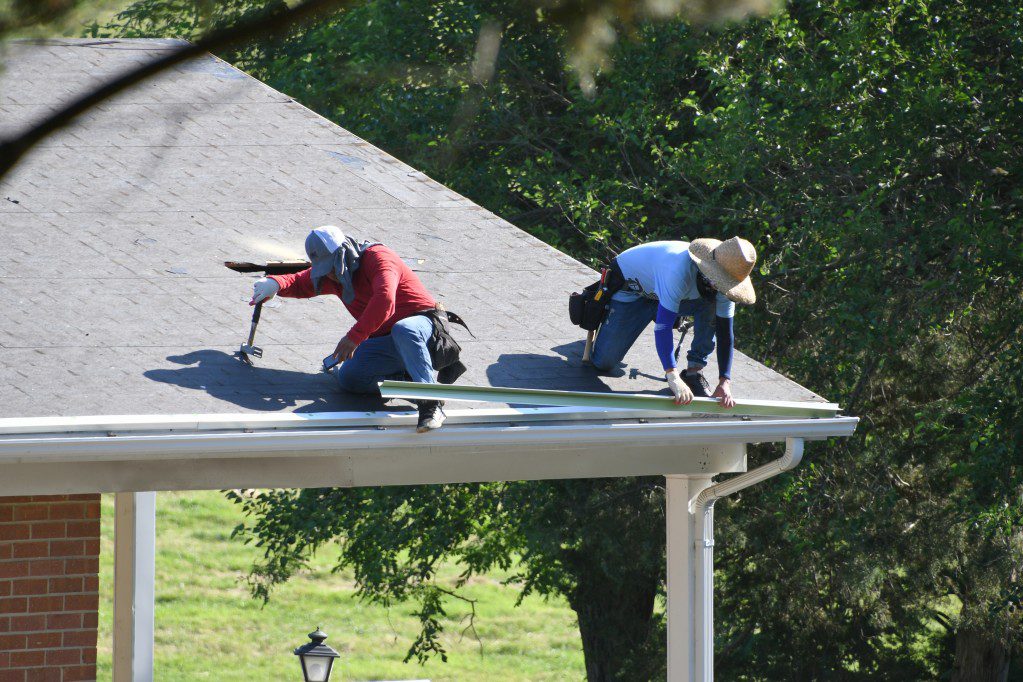
Find an agent from the roofing company who has expertise in dealing with claims. They should also be reputable to have a good working roof and not let the compensation go to waste.
There may be some parts of the roof that you may not know need replacement. The roof’s framing may have been damaged, like the ridge board and rafters, and the right step should be a total replacement.
The damage report also highlights parts of the roof, which should be stated in the claim to get it fixed. This should be written declaring the cause and extent of damage on the rest of the roof.
Before you file for your insurance claim, you need to prevent your damaged roof from further damage. Doing this comes in handy in the case of storm damage whereby the roof and house are susceptible to more damage from being exposed.
You may be waiting for a claim to go through, and your roof gets damaged. Most insurance companies would not cover double repairs if the owner didn’t take steps to protect it.
Roof repairs may take a while, together with the filing process. The roofing company will cover or drape the roof while waiting to fix it.
A claim is completed when the insurer offers the owner the money to fix the roof. It may be a considerable sum of money, but a huge sum doesn’t mean that you’ll get a quality roof.
Having your roofing agent draft you the cost of fixing the damage will give you an insight into how much you may need from the claim.
Contingency clauses are requirements by either the insurance company or the roofing company for their services. There may be conditions on the contract that work to their advantage, and you need to check to see that they won’t be an inconvenience to you.
By the roofing contractor:
Before going to your insurance company with a quote on how much it will cost to fix the roof, you need to consult with multiple roofing contractors to find the best deal.
The best deal may sound price-based but getting a high-quality finish on your roof is always best.
For flat roofs, roofing tar is the material of choice. Tar and gravel roofing might utilize it as the initial layer, or it can be used to patch up gaps and fractures in the roof. Learn the fundamentals of this roofing material and how to apply it by reading the information below correctly.
To repair leaks or to put on new tar and gravel roofs, roofing tar is a common choice. Roof tar is a solid and waterproof substance. These materials are often a black and smooth blend of coal tar and petroleum compounds.
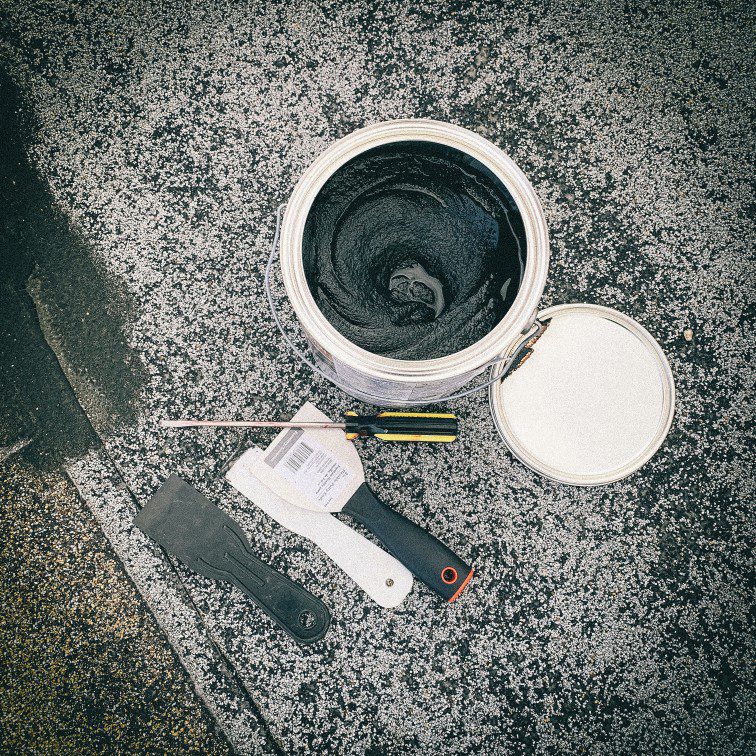
Roofing tar is a flexible, long-lasting, water-resistant compound. It can withstand rain, snow, sunshine, and extreme cold.
Repairing a leaky roof is one of the riskiest home improvement chores a person can undertake. Incorrect application of roofing tar or improper walking on the roof might further damage the roof.
The best approach to deal with any significant or small roofing issues is to seek the advice of a roofing specialist.
Flat roof leaks may be fixed using a black, oily substance known as roofing tar. Oil and other petroleum products are used to make it.
The coal production process produces coal tar, a dark brown or black residue. For roofing applications, coal tar must be purified and treated.
A form of roofing tar known as coal tar roof cement is used to seal, bond or repair damaged or failing roof regions.
There is no asbestos in newer roofing tar formulas, although they may include solvents, surface adhesion agents, polymers, and minerals. Trowel-applied coal tar roof cement differs from paint- or caulk-applied tars in that it is applied using a trowel.
Black is the most common color for roofing tar compounds. However, some producers have produced lighter shades like silver and white.
It is possible to paint some roofing tar to match the roof's original color once it has dried. A tar remover may be used to get rid of the tar on your roof, but this might harm certain types of roofs.
Bitumen, tar paper, gravel, and other flat roof materials may all be repaired using roofing tar, which can also be used as an adhesive in some instances. As roofing tar compositions vary by brand and kind, choosing the right product for your needs and application is critical.
Temperatures lower than 70F will cause the product to take a long time to harden. On the other hand, Roofing tar will convert into a liquid at very high temperatures.
Tar roofing is excellent for flat and low slope roofs because of its ability to self-heal and repair leaks. It is not recommended to use roofing tar on steeply sloped roofs since it will become liquid at high temperatures and leak.
In addition, roofing tars should not be used on asphalt goods or diluted with water or other solvents since they might damage the asphalt.
Flat roofs benefit from roofing tar's excellent UV resistance, making it an ideal material option. In addition to providing wind and water resistance, roofing tar is a perfect choice for flat roofs because of the water-holding capacity of the material.
In contrast, tar is a non-renewable resource. During the application and cure processes, it might emit toxic fumes that should be avoided.
When working on a tar roof, everyone doing the installation must wear protective masks. Installing the tar on the roof while the occupants are gone is an option for contractors.
The average house owner may make the application of roofing tar, but it is recommended that they hire a professional to perform the dirty job.
Protective membranes of thick, weather-resistant hot tar are applied to a roof to withstand storms and the elements. The smooth surface enables water to flow down the roof for low and flat roofs.
To get an idea of how much tar you'll need, measure the roof and do some math. If you're buying tar, make sure you ask the right questions at the hardware shop.
Asphalt roofing tar is the most common tar for roofing. However, coal tar bitumen may be advised if the roof is steeply inclined.
Apply a foundation coat of paint to the roof. Based on the weather and the roof's form, choose the coating. Asphalt, aluminized asphalt, and elastomeric coatings are all options.
For an additional fee, the coating may be infused with gravel, which will thicken and reinforce the layer of hot tar as it is applied. Because of the coating's role as a heat-insulator, the roof will be spared damage due to the tar's extreme heat.
Tar must be transported in some manner. Tar may be poured straight from a tar truck's pipes onto a big job's roof. A steel bucket is used to transport tar to and from the roof if the area is smaller.
To prevent tar from leaking, fill the bucket 3/4 full and have a helper carry it up the ladder. If you think the bucket is too heavy, don't transport tar.
When the bucket is being carried, its fluidity causes it to fluctuate, placing you and any onlookers in danger if the bucket tilts or falls.
Pour hot tar from a corner onto the roof. Using a fiberglass mop, spread the tar over the roof in long, even strokes. Keep the layers thin and cover everything.
Tar should be rolled straight across the room, from one corner to the other. Keep hot tar from clumping or building up in any part of the building.
Tar paper should be carefully laid on the hot tar and mopped into the asphalt. To create a strong seal, pile tar paper and hot tar together and overlap them.
A ladder should be set up in the corner opposite your starting place so that you may climb down after you're done.
Use caution while handling hot tar. Keep the tar kettle at least 25 degrees below its flash point to avoid fire and explosion.
Keep combustible items like rags and wooden tools out of the kettle's path to avoid fires. Also, never set the kettle down on or near greenery.
Wear heat-resistant gloves and loose-fitting, long-sleeved shirts to avoid being burned when working with tar. Like hiking boots, shoes should have non-slip soles.
Pull your hair back and use goggles to protect your eyes.
Training in first aid may help you be prepared in case of an emergency. In the event of a burn, have a supply of cold water on hand.
Tar will harden and become sticky when it comes into touch with the skin. Removing it from the skin will exacerbate the injury and increase its severity.
To properly remove tar, keep it submerged in water and dial 911.
Supply:
Tools:
Materials: Roofing tar Foundation coat
If you're going to use roofing tar, wait until there have been many days of clear skies and no precipitation before applying it. Seventy degrees Fahrenheit is the best temperature for working.
The roofing tar may be applied as long as the temperature is above 70 degrees. If the temperature rises, the tar on your roof may begin to seep, resulting in an ugly and troublesome mess.
This is when removable tile roofing tar repairs come in handy. Internal leaks may be discovered by removing the tiles, and the leak in the interior ceiling can be sealed with roofing tar. Material like plywood or a shingle may enhance the performance of roofing tar.
Once put, the rubber is resistant to blisters, splits, and any decay because of its natural qualities. In addition to the numerous benefits already mentioned, EPDM rubber roofing has fewer drawbacks than other flat roofing options.
Gravel and pea shingle serve two key functions on a flat roof: as a "loading coat" and as a means of protection against ultraviolet radiation. To assist anchor the material underneath and reduce the likelihood of it being blown away in severe winds, use gravel as ballast.
Many commercial roofing contractors solely installing PVC flat roofs should not come as a surprise to anybody. The longest-lasting material is PVC Single-Ply Membrane. Designed to endure 15 to 30 years, it is the longest-lasting flat roof material available.
Flat roofs benefit from roofing tar's great UV resistance, making it an excellent material option. In addition to providing wind and water resistance, roofing tar is an excellent choice for flat roofs because of the water-holding capacity of the material.
Using a thin coat of bitumen primer and bitumen-based waterproofing paint on a clean concrete roof is the best technique to fix a leaky roof. A tiny piece of torch-on felt may be used to cover the crack if this isn't enough to stop the leak.
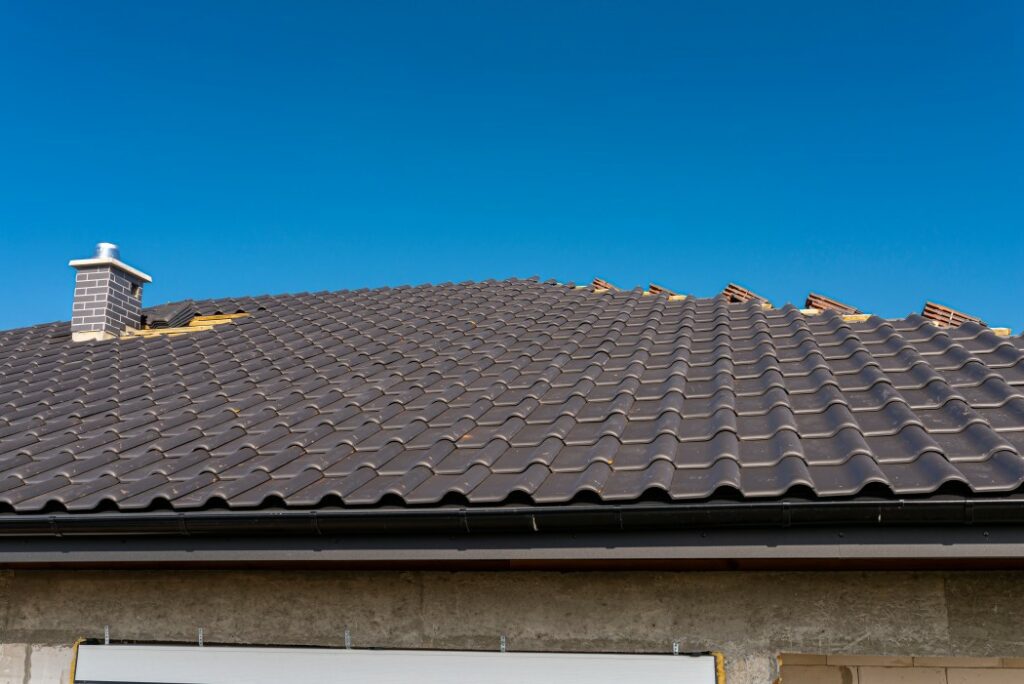
Clay and concrete, the most common materials used to make roof tiles these days, offer several advantageous properties. They’re long-lasting, beneficial to the environment, and very hardy when it comes to storms and fire.
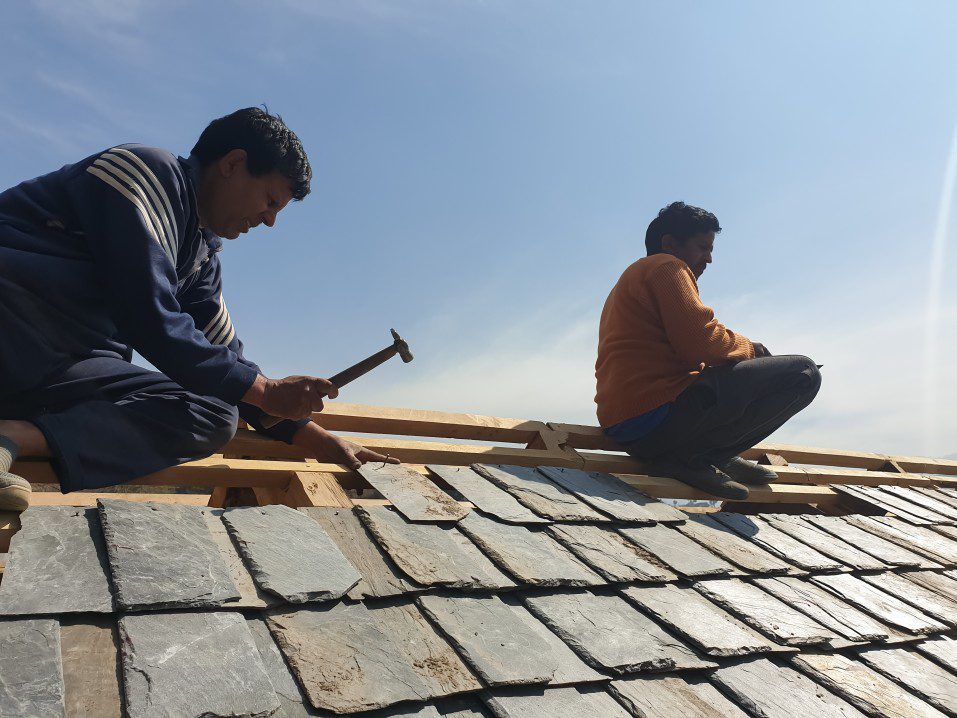
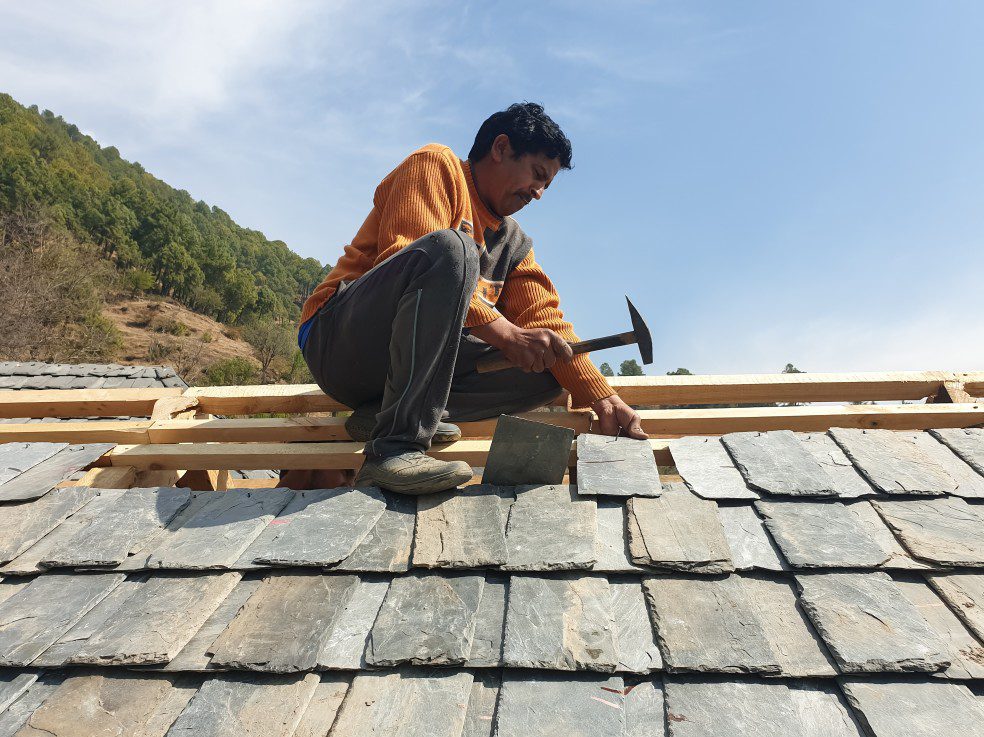
If you need to repair your roof, walking on a roof will help you to analyze the problem but may put you in danger- if done incorrectly. To get the most out of your clay and concrete tiles, it’s important not to put too much weight on them when walking on a roof.
The top ends of concrete and other roof tiles are fastened to the structure using nails. The lower ends of the tiles below them lie on the higher ends of the lower tiles. As a result, a tiled roof is neither static nor dynamic. As a result, we must use extreme caution while walking on a roof.
Because of the tiny gravel chip used and the lack of steel reinforcement, concrete tiles have the potential to be fragile. It is thus possible for them to shatter or even break when subjected to excessive stress. Hairline cracks may be difficult to detect, yet they can allow moisture to enter.
Although the tiles are robust, they are not intended to be walked on. However, there may be instances where walking on a roof is an unavoidable circumstance. Essentially when walking on a roof, clay, or concrete tiles, knowing how to do so securely and without damaging the tiles is paramount.
Safety should always come first. Ensure you have everything you need, including non-slip footwear, gloves, and a safety harness.
Disconnect the gutter system from the water tank if you used it during the cleaning procedure since several chemicals may have been utilized. Check the water tank.
It’s essential to get rid of moss and algae since they may pile up and eventually cover most roof tiles.
It is best to use mild brushes and water hoses to wash the roof rather than high-pressure water, which might damage the tiles. Before climbing on your roof, make sure the tiles are completely dry.
It’s challenging to get a good hold on tiles because of their flat, smooth surface. It’s dangerous to walk on wet tiles because they become considerably slicker and more dangerous when wet.
Do not stand on wet tiles for at least two days if you have just had rain or your roof is damp for any other reason.
To avoid damaging the tiles, use shoes with soft soles. Consider sneakers or light work boots with soft rubber bottoms with grips for improved traction on the tiles when walking on them. Avoid wearing heavy shoes or boots with a firm base because they’re more prone to shatter tiles and make it difficult to walk about.
Shoes with exposed toes, such as sandals and flip-flops, provide little protection if you should slip or fall.
The roofers in our company use shoes spcifically designed for roofing called Cougar Paws. These are amazing as they have an extremely slip proof sole. This is essential for the roofs in Pennsylvania because the pitch is usually 7/12 and higher.
TJ Hoffman | Owns Roofing Company in Bloomsburg, PA
To ensure a safe ascent, use a ladder that rises at least three feet (0.91 m) over the rim of your roof. Make sure the ladder is on level ground and at least one-fourth of its height away from your house.
Keep three points of contact with the ladder to avoid slipping and falling. Ask a friend or family member to keep the ladder steady for you as you climb it.
If your roof is very steep, a safety harness is a must. Safety harnesses save you from falling to the ground if you slip on your roof. Tighten the safety harness around your thighs by putting your legs through the loops.
Secure the harness’s top by wrapping it around your waist and pulling it snugly. Roofs with chimneys and vents can be used as an anchor to stop you from falling; use a rope and tie it around your chimney.
Safety harnesses are available for purchase online or at a home improvement shop. Ropes may be used to build your custom harness. You don’t need a safety harness on a flat roof, but it’s still a good idea to wear one if you’re concerned about falling.
To reach the rafters, move a few tiles on your roof up to see the rafters below.
To secure the rope, attach a harness anchor to the rafters. Follow the tile’s bottom three inches (7.6 cm) to the end. If you put too much pressure on the center and top of the tiles, they can easily shatter if there are no supports below them.
Expert Tip: Here's a well-known tip in the roofing industry. Grab an old couch cushion and take the external cover off it. The key is to expose it to the foam portion. You can go on extremely steep asphalt roofs with an old foam cushion. Roofers will use the foam cushion to stand on because it grips the granulated surface well. If you have two of them, then you just throw one in front of you and step on it and then repeat for the next step. Tip provided by: Chris Stevenson | Owner of Roofing Company in Parker, CO.
There are specific rules you must follow when walking on a roof.
Your feet should be parallel to the top ridge of your roof and the bottom edge of the tile when you take your initial step onto your roof. You may shatter the tiles if you leap or move too rapidly between them.
Reduce the stress on the tiles by walking on the balls of your feet. As the thickest section of your shoe, your heels are more likely to break your tiles if you tread on them.
Reduce tile damage by pressing down with your foot’s ball instead of the heel. Make sure you raise your foot off the floor as you take a step.
The balls and heels should be placed on the peaks if the roof tiles are curved or waved and close together.
To avoid exerting too much pressure on a single tile, try to distribute your weight evenly between your feet.
Verify that the tiles you want to tread on are free of harm by visually inspecting them. To minimalize the pressure put on a tile, don’t put both of your feet on a single tile. Tiles that are cracked or contain water channels should not be stepped on.
Identifying your roof’s kind and the condition is the first step in learning “how to protect the roof while walking on it.” If you don’t know how fragile your roof tiles are, you can’t understand how to walk on them safely.
Get a few spare tiles that are in excellent shape before you begin. Even the greatest roofers have cracked some tiles at some point. You’ll be pleased you followed our advice if this occurs to you and inclement weather is on the way.
Before climbing onto any roof, secure the ladder’s top to a truss with a strap. Remember that you may have to use your feet to get down. It’s not fun to unintentionally dislodge a ladder from a roof while working.
Assuming you have a safety harness and are well-versed in your craft, never attempt to climb onto a roof yourself. When the tiles are completely dry, go up in the sun. Keep your feet safe by wearing good-fitting, non-slip shoes.
Before walking on a roof, make sure your shoes have a good hold.
Take considerable caution while planning your path over a roof. In order to avoid stepping on individual tiles, aim to step on the ones that overlap.
Concrete tiles, particularly new ones, may break in places where they are otherwise unsupported. Take baby steps toward your goal. If you’re walking on concrete roof tiles, take extra care.
Ensure to avoid ridges and cut tiles around parapet walls and chimneys, valleys, and flashings to prevent water damage. Even if the smaller parts are tucked away, they are still exposed and ready to fall out.
Using these guidelines on walking on a roof with clay tiles might help you avoid causing any harm to your clay tile roof. Even if you take all the proper precautions, one slip-up might shatter or damage your roof’s tile.
If you didn’t already know, clay roof tiles are vulnerable to damage. If the roof tiles haven’t been backfilled, they’re more prone to breaking than other tiles.
If you’re in a situation where you have no option but to employ these resources, you can:
Since the row below them spans the bottom 3 inches of the tiles, this region provides further support. When walking onto the roof for the first time, make sure your feet are aligned with the top ridge and the tile’s bottom border.
Balance your weight on both feet to avoid putting too much strain on a single tile. Slowly apply pressure to one foot to reduce the stress on the grounded foot while shifting your weight.
Shoes with soft rubber soles, such as sneakers, are less likely to break and provide greater grip on slick surfaces than heavier shoes or boats.
When wet, tiles are hazardous because of their flat, smooth surface. To prevent a severe fall, avoid walking on wet tiles at all costs.’ Use a safety harness on steep rooftops to keep you anchored to the surface if you fall.
Keep your feet away from broken or cracked tiles.
Otherwise, it is still recommended to seek the assistance of a professional who has the necessary training and equipment to walk on roof tiles safely.
Refined and old-world, clay tiles provide value and curb appeal to a building or residence. Clay tile roofs are expensive, and walking on them may easily break the delicate tiles.
The roof’s integrity may be readily compromised by broken tiles, resulting in damage to the structure and the roof and the need for expensive repairs.
Generally, you should not walk on your clay roof to maintain your pricey investment and leave the maintenance and repairs to roofing specialists.
With a 50-year guarantee, Brava’s synthetic tile roofing has all the aesthetic qualities of clay tiles but with improved impact resistance and flexibility. You may walk on the roof tiles during and after installation without worrying about them breaking.
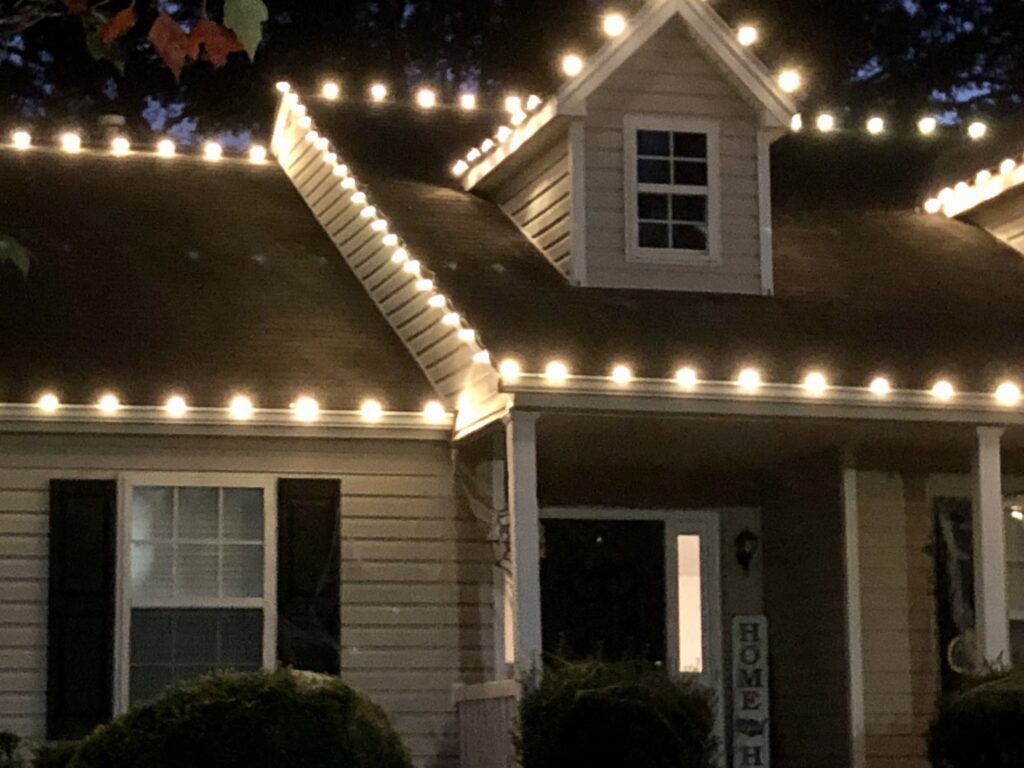
Before hanging your Christmas lights up on the outside of your house to celebrate the holiday season, check whether your roof and the areas around it are ready to handle the extra weight.
Once you’ve made sure your roof is ready to support the weight, you can begin hanging Christmas lights.
Using nails, staples, or screws to attach Christmas lights to a roof will cause damage to the shingles and other roof components.
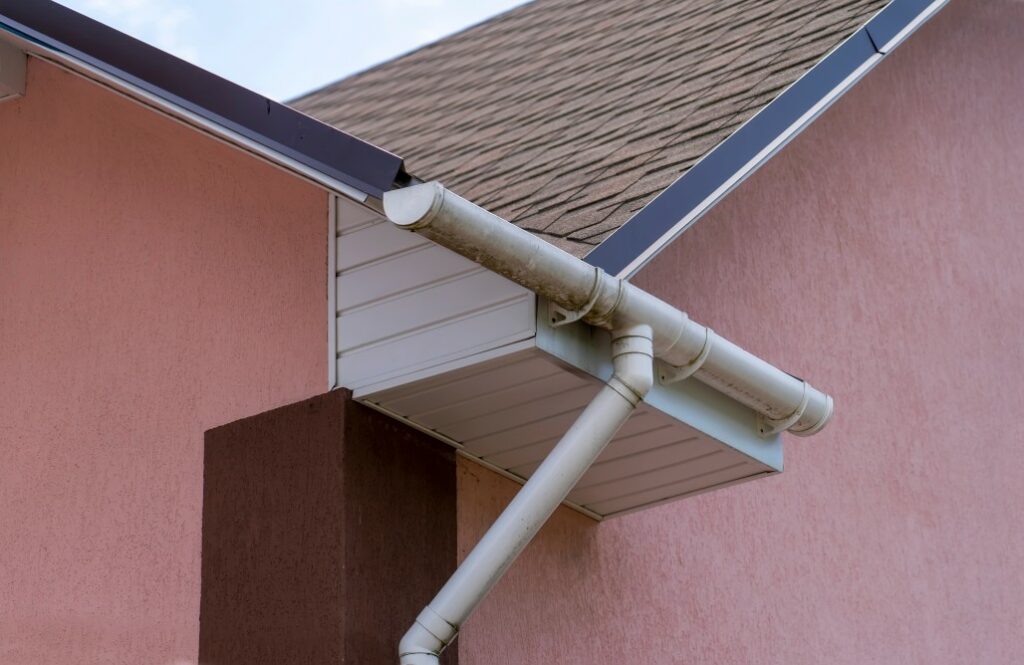
Leaks can be caused by even the tiniest holes in the shingles. Small holes in gutters and decay in the fascia board might let water get into places it shouldn’t. Before hanging your Christmas lights, brush up on your knowledge of the various components of a
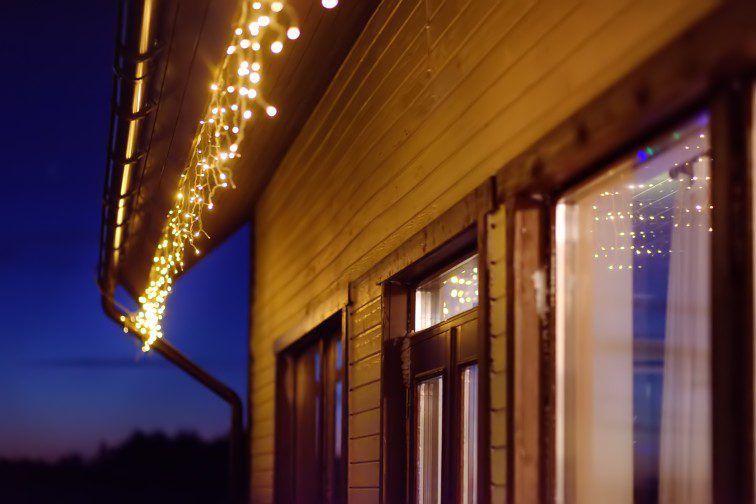
The solution lies in using non-marking plastic clips that attach to the gutter with ease yet leave no trace behind.
Using clips, you won’t have to worry about puncturing your roof to fit a massive display with as many fasteners as possible.
The drip edge or shingle should be fastened with clips to avoid puncturing the sealant binding to the shingle below. Be careful not to raise your shingles and break the sealant bond with the shingle below.
Adhesive strips can be used to attach the clips to your house’s vertical face. Please don’t go through the skin.

First and foremost, you should check that you have enough light strands to illuminate the area you want to light up adequately and that they are in good operating order. Of course, before you purchase anything, check to see whether it’s rated for outdoor use.
Calculate how many feet of Christmas lights you have using a scaled-down design. Find any fraying by using a magnifying lens. It’s a great time to repair any broken or missing strands or bulbs. Throw away any strands that don’t meet your standards.
Ensure you have enough plastic clips or hooks to connect the lights to the eaves or gutters before placing your lights on the roof. Plastic is far less likely to harm the roof than nails or metal hooks are.
Place outside extension cables where they’ll be needed. Shingles, eaves, and gutters are good places to put the light strands. Do not hang anything too heavy next to the lights to protect your roof.
If you locate gutters or fixtures that are excessively loose, get them fixed before putting lights on them. Otherwise, they may become much looser during the severe winter weather or tumble down, causing all of your holiday decorations to be lost.
Don’t use nails that will pierce your roof with their sharp edges. The integrity of the roof’s structure is critical since even small cracks may grow into larger ones, allowing rainwater to flow in. Plastic lighting clips are easy to find and cheap to buy.
These clips may be seen in most hardware shops’ lighting and tree displays. Plastic zip ties are another option that won’t damage your roof fittings.
These hooks are all you need to attach to your fishing line. The clip is attached to your gutters using a hook.
These clips similarly connect to the line of the lights but acquire a firm grip. They are great for icicle or rope lights that don’t have bulbs you need to orient. You install them by looping them over the edge of the gutters.
To ensure absolute accuracy, these clips are secured to the bulb itself. Because they compel all lights to aim in the same direction, they provide a cleaner appearance
Determine if your lights should be pointed up, down, or out before purchasing. As a bonus, some of these clips don’t let you remove the light unless you remove the bulb, which is a lot of effort and does make the light more secure in windy places.
You may attach these clips to your gutters or your drip edge by hooking them.
For the most part, professional Christmas light installers prefer to utilize these clips since they demand them to work towards the roof’s peak.
These clips are installed perched on the roof’s apex and hold on to the shingle’s edge.
Other kinds of Christmas light roof clips should be avoided if you want to keep your roof in good condition.
Lifting your shingles to hang lights isn’t worth the danger. Deck clamps, designed for railings, should also be avoided since they won’t hold a roof securely.
Tread cautiously if you’re walking on your roof. This shouldn’t take more than a few short steps.
Weakly walking may lead to gutter damage and make gutter cleaning more difficult. It may also lead to leaks in other parts of the home, allowing water to seep into the furnishings and flooring underneath.
While using a staple gun to hang your Christmas lights may seem like the most convenient option, it’s important to avoid puncturing your shingles with staples, nails, or screws. When you remove them, you’ll leave holes in your roof decking, increasing the likelihood of rot.
Lights may be stapled to your roof’s perimeter (the eaves), but make sure you don’t fasten straight through the lighting strands or electrical cables to avoid faulty lights and, even worse, the possibility of an on-the-job fire.
2. Try using plastic clips when hanging Christmas lights.
Many plastic clips may be attached to your roof’s gutters, shingles, or eaves without hurting them. Depending on the roof and the lights, different clips may be used.
Christmas lights should not be attached to the roof’s shingles. Connecting them to your gutters or eaves is preferable.
There is a flat roof and a wall that protrudes over the top of it. In addition, there are little holes for attaching the Christmas lights to the ceilings. If your property has a flat roof, we recommend Parrot Clips.
3. Avoid walking on your roof.
It’s preferable to avoid going up on the roof and decorate the areas that are easily accessible by ladder. Nonetheless, if you must go onto the rooftop, be sure to heed these precautions to keep it in good condition:
Wear shoes with soft soles, such as sneakers, and take your time walking. Under bright sunlight, avoid walking on roof shingles.
On a tile roof, wear soft shoes and place your feet on two peaks (the bump) rather than in the valleys between the tiles.
When removing the lights from their clips, it may be simpler to pull them down or yank them, but this may cause harm to both your property and the pricey Christmas lights if you’re not careful. Make the additional effort to remove each clip to avoid future injury properly.
It’s done! You don’t have to worry about damaging your house this Christmas season if you take a few additional precautions.
Instead of nails or staples, use plastic clips. Plastic clips are the most convenient method to suspend Christmas lights from roof rafters. Even if you can staple them down, it will take longer to remove them after the holidays if you do so.
When stringing Christmas lights, utilize plastic clips wherever feasible. Plastic clips that attach to your house’s gutters, shingles, or eaves without hurting them are available. Specific roof systems and Christmas lights have special clips.
Lights may be attached to your shingles using clips if you don’t have gutters. Both applications may benefit from clips. Some light-clip kits include a pole for hanging the lights.
There are a few methods to hang Christmas lights without a ladder. The first is a basic solution, a light-hung pole. Connect the clip to the lights to utilize these poles, then insert the clip in the pole’s grip. Then, you extend the arm and hook the clip over the gutter.
There are relatively few birds that will nest in the roof area or beneath your eaves. As all wild birds are protected by law, proper identification is crucial if the right action is taken.
Wherever you reside in the United States of America or Canada, you'll witness many birds every day. They serve a crucial function in just about every ecosystem globally and exist in hundreds of thousands of forms and sizes.
However, various concerns may emerge when birds come into touch with people.
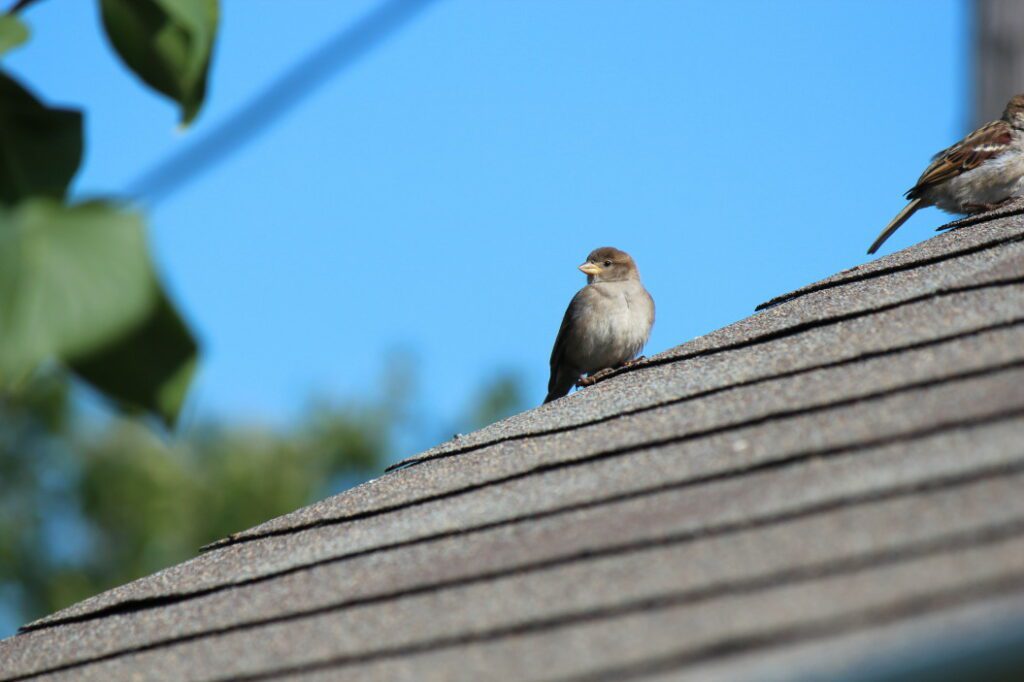
Many homeowners may confront one difficulty- birds nesting on their roof, especially beneath their roof tiles. This may ruin your property's looks and structure and even threaten your health.
The two most common birds to live in your attic are sparrows and starlings. A house sparrow is a little brown bird that makes a lot of cheeping noises as it enters the roof area via a gap between the roof tiles and the gutter.
The male's appearance is red-brown on the back, grey on top of the head with a black chin. Unlike the male, the female is lighter in color and has no visible markings.
The adult starling is black, green, and purple-glossed, with a pointed yellow beak. Brown with black beak and mask, juveniles are dull. So, if you find yourself noticing several squeaks, crackles, or footsteps, then there may be a few birds nesting in your roof!
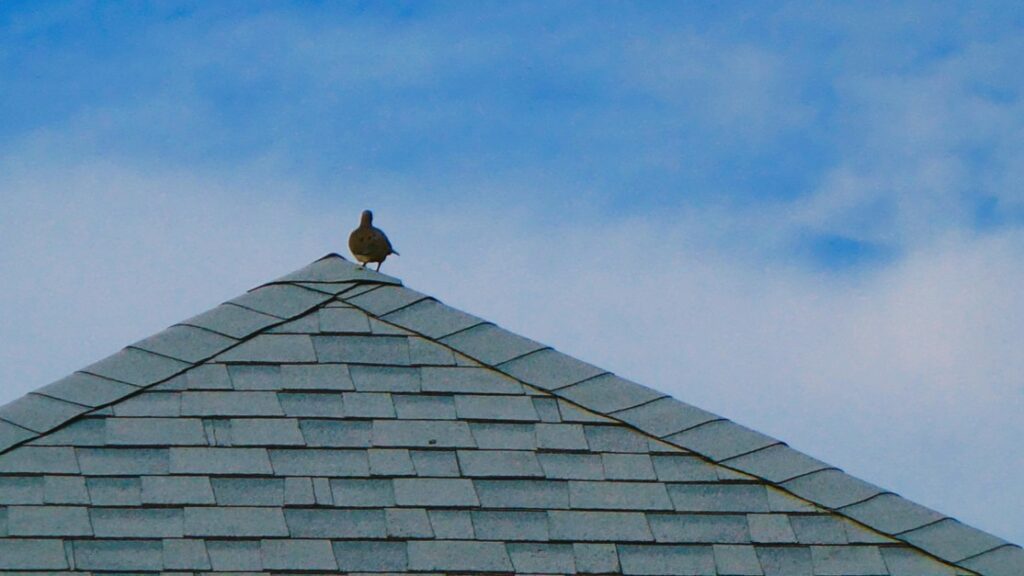
Bird of prey is the well-known "town square pigeon, " an out-of-control domestic pigeon. Black, white, grey, or brown are all acceptable colors. The eaves of the structure, on the outside of the building. If there are significant gaps in the roof, they may be able to get in.
When the overhanging roofing felt is ripped, or the soffit boards have begun to deteriorate, swifts are likely to find a dry, secure place inside the roof. They have long, sickle-shaped wings and a sooty brown forked tail.
You won't be able to get them to wander about within your roof since their legs are so short. Constantly kept safe and secure, the nest should not be disturbed.
Old houses with extremely broad chimneys may be a good place for jackdaws and swallows to build their nests, but newer buildings do not have the room. Owls often use the rooftops of rural homes in search of a haven.
Some birds will utilize drain pipes, and if they get stuck in very small or deep tubes, they may perish. In addition to downpipes, bathroom ventilation pipes, and damaged ventilation grilles, sparrows and starlings may also utilize them to build their nests.
It's not uncommon for birds to cause damage to a roof in various ways, including traveling through or nesting beneath your roof tiles. In addition to causing immediate harm to the property, this might have long-term consequences.
When it comes to where they go to the bathroom, birds may be a bit of a nuisance. Put another way; you may rapidly find yourself with a significant issue if birds are nesting beneath your roof tiles or anyplace else in your roof area.
In addition to being unattractive, bird feces includes a high concentration of uric acid, which may eat away at roofing materials over time.
Birds may inflict a variety of damage on your roof tiles. Birds may worsen an existing issue with loose or broken tiles on your roof, especially if they make a nest below them. The nests of birds attract insects, which might swiftly set up shop in your attic and cause structural damage if left unchecked.
You might have a big issue if you don't dissuade birds from using the same nesting site year after year.
After just a few years, a homeowner may find a slew of old, decaying nests with feces, dead chicks, and rotten eggs throughout the yard. These items are not only unpleasant, but they may also pose a health risk.
Birds commonly start nesting in gutters and beneath loose roof tiles or in the hole caused by missing tiles. A lovely clean, high-up area like your rooftop becomes the next best thing when there aren't any trees around.
Guttering also serves as a water source for birds. To prevent your drainage system from overflowing, leaking or water infiltrating your roof area, you should remove any bird nests from your property.
Birds nesting on your roof poses the risk of a fire. Birds' nests are flammable because they're made of grass, dried leaves, twigs, and easily ignited materials.
In addition, birds often build their nests in or near electrical equipment, chimneys, or other ventilation systems because of their warmth. In the case of a fire, smoke would not be able to escape from a residence if the airflow was blocked in this manner.
There are a variety of techniques to protect your roof against nesting birds, each with its own set of advantages and disadvantages.
It's essential to keep in mind that no strategy for keeping birds off your roof is perfect, and each of these alternatives has disadvantages. Ultimately, it's up to you to choose the choice that has the best qualities and the fewest drawbacks.
Birds often build their nests in your roof's eaves. They're an excellent place to perch because of the protection from the weather and the protection from predators.
Protectors for the eaves, eaves closures, and eave guards are used for various items meant to keep birds away. To keep birds out of your attic, you may use them to close any openings in your roofline.
Noise deterrents are a common method of keeping birds away from your property. To prevent birds from nesting, you may place tiny devices on or around your roof, which generate a high-pitched noise that birds find very bothersome.
It's straightforward to install and has long-lasting batteries that enable it to run for an extended period. Sound deterrents are inexpensive and easy to use.
There are several sets available to purchase in a range of sizes. These can be positioned in multiple locations around your house to generate a more extensive range without having to make the noise they produce excessively loud.
| Advantages | Disadvantages |
| A practical method of deterring birds | The sound generated by the noise deterrent can be annoying for neighbors |
| Inexpensive to purchase the devices | If you like birds in your garden, these noises may deter them from entering your backyard. |
| Available in various sizes | |
| Long-lasting batteries and accessible to install |

Many people find decoy birds a bit amusing at first sight, but most bird species will not approach these decoys, even if they seem convincing to humans. Peregrine falcon, red kite, and a variety of owls, among other British birds of prey, are frequent visitors to our countryside. Many bird species
Place the decoy birds on or around your roof - make sure they are as visible from the air as possible by positioning them in open locations, so birds are more likely to spot them. These decoy birds are typically relatively cheap.
Several different decoy birds are available; some are shaped like birds of prey, such as a hawk or a vulture, while others look like kites that may be tethered to a pole and let fly in the wind, providing the appearance of a kite searching for prey.
These decoy birds have a few downsides that you should consider. For example, if they are of a lower quality, they may be unattractive. If bumped or dropped from a height, these specific models may break quickly and appear exceedingly delicate.
Bird spikes are among the most efficient and long-lasting bird deterrents. Instead of making it impossible for birds to land and stand on the surface, they're put on, these accessories, despite their scary-sounding names, make landing and standing more difficult.
This explains why you may see pigeons perched on top of spikes at train stations and the roofs of office buildings throughout major cities. The spikes provide a resting place for the birds, but they are too difficult for them to use for nesting.
Spikes for birds may be bought for various locations on and around your home. Bird spikes can be placed on any surface, including roof verges, ridges, gutters, and porches, and they'll start working right away.
Nesting birds are well-protected by bird guards installed on your chimney.
Although bird spikes pose no harm to birds, they can be unsightly when spread across your roof, as you can imagine. People should avoid areas where these spikes are present since it is dangerous to walk around them.
Filler for the Eaves Comb (Bird Comb) blocks birds and big insects. They cannot get into the gap between Profiled Tiles and the underlay on pitched roofs.
Before the tiles are placed, fix the fascia ventilator with clout nails. There must be an angle in the comb that diverges from the ceiling. The comb should be used to bed the bottom row of tiles.
If you've seen an unusual lot of pigeons on your roof, they probably have a nearby food and water supply. If you're aware of these sources, remove them - it's crucial not to feed pigeons and birds if you intend to get rid of them.
To keep out pesky birds, use shiny, reflecting materials. Birds are deterred from returning to these regions because of the items' reflections in the light.
Using the roof as a nutcracker is a possibility. If they're chasing insects, you're in for an even worse situation than just crows on your roof. A termite examination or searching for other wood-eating insects may be in order.
A roof is the most crucial part of a house. It protects the home from outdoor elements such as heavy rain and storms and provides insulation depending on the season and more.
There are several types of roofs, each with different materials and functions. Choose a simple design that is cost-effective but suitable for you.
Continue reading our guide on How to Build a Roof, to get you started. However bear in mind that to build a roof, you need to be trained!
The two most common types of roofs are flat roofs and pitches roofs.
Flat roofs are slightly sloping roofs used primarily in places with top living spaces or outdoor living spaces.
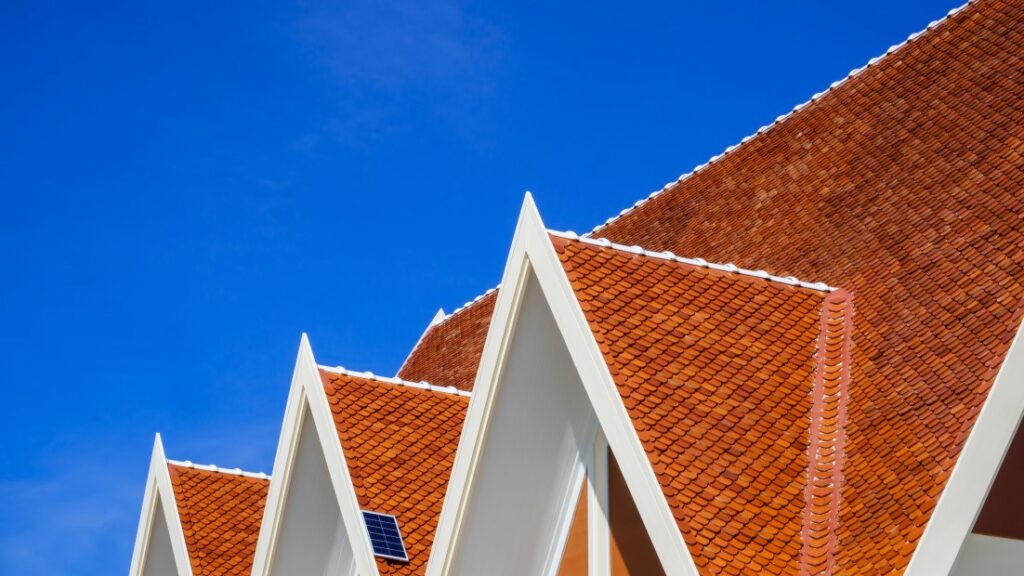
Gable roof
Gable roofs are the most common type of pitched roof and look like an inverted V. They have different variations and can accommodate most building shapes.
Hipped roof
This type of roof looks like a gable roof with the top triangular points pinched inwards. It has four slopes and an even roof-to-wall junction for the eaves and houses on all sides.
The hip and valley roof
This type of roof has an L or U shape due to the building design. The valley is formed at the meeting point of the two different angled roofs.
Hipped roof with Dutch gable
This roof looks like a hipped roof with a gable roof on top of it.
Skillion roof
This is a roof with only one pitch and only one rise of rafters from the top end to the bottom end. It's a sloped roof with no ridge or valley.
A simple roof, depending on the type, has
Before you consider building your roof, it is vital to obtain accurate measurements. There is a step-by-step checklist to get the structure up when building your roof. This starts with the framework and progresses to the finished top.
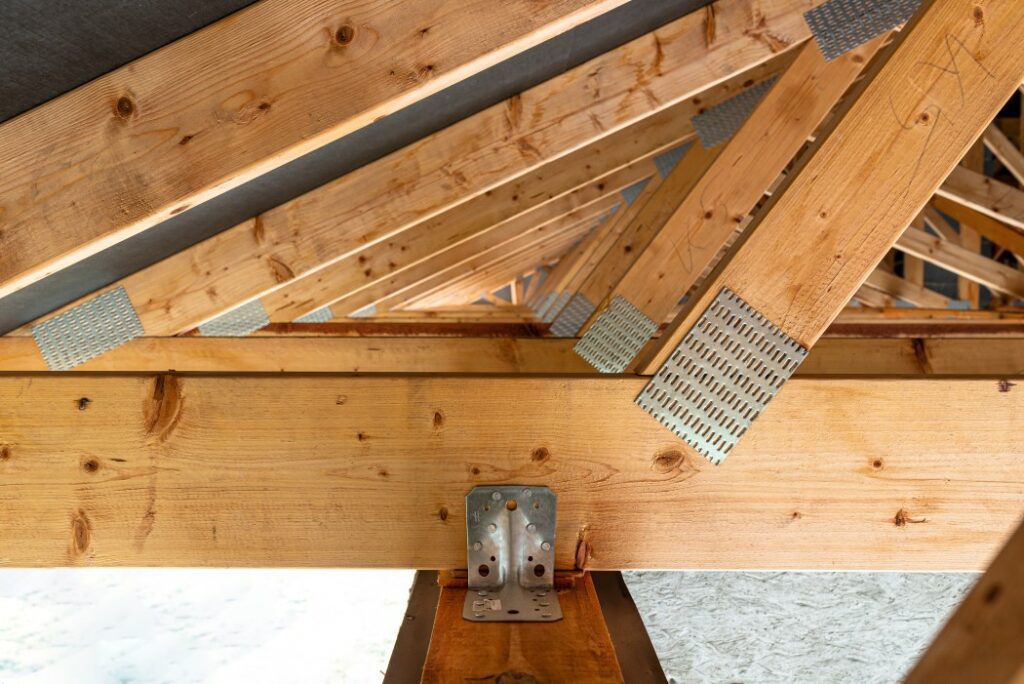
The truss is the support frame of the roof where the sheathing and the rest of the roof will be held. It is important to have a good support framework for your roof to prevent collapsing, especially during extreme weather conditions.
The roofing frame comprises different parts that work together to hold it up. Each one of them plays an essential role in the roof structure.
These are wooden structures that define the shape of the roof and hold the roof deck for installation of the roof cladding. They are fixed on the slope of a roof and run in the same direction as the slope.
The rafters' overhang is the length of the rafter that extends past the roof edge, while the rafter spacing is the length between two adjacent rafters.
Hip rafters run upwards and meet at the hip of a roof.
This horizontal piece runs along the roof to provide a base for support for a continuous rafter span.
Underpurlins are fixed under the rafters horizontally and perpendicular to the direction of the slope. It prevents the roof from sagging due to over-loading, which may collapse the roof.
Purlins are fixed above the rafters and may be used when fixing tiles onto a roof. They offer base support as well as distribute some weight evenly on the roof truss.
Battens are installed along the roof and used when installing tiles on a roof. They are used as spacers and secondary support on the roof framework.
Purlins are attached directly to rafters, and they offer support for the roof and extra attachment points for the roof sheathing.
The truss is the part of the roof that produces its shapes. It is attached to the house frame with the help of the other roof frame parts.
This load is transferred via roof struts from the underpurlins and other structural components.
Depending on the application, they can either be mounted laterally or horizontally.
The ridge board usually referred to as the roof's spine connects the end trusses of a roof while providing attachment points for rafters.
The roof hip runs vertically from intersections or corners of a roof to the ridge.
The roof flashing is made of metal and is installed over the open roof valleys. It directs water down the roof and may also be installed around roof accessories like skylights and chimneys.
In addition to complementing joists in the ceiling, collar ties bind rafters on opposing slopes of a roof by tying them together horizontally.
They form a triangle with opposite rafter pairs.
On the rafters or roof cladding, the valley board serves as a surface where the framework of another roof can be fixed.
Some porch roofs frequently use them, such as those with a gable design.
These run the length of the roof's vacant space. They provide structural support for the roof and serve as ceiling mounting surfaces.
As you have learned, the roof frame is the most important part since it keeps the roof together. Building it the right way is the first step toward having a robust and long-lasting roof, but let's get further into How to Build a Roof.
1. Measure the roof
To get the pitch (height) and the roof slope, you need to make a plan with the necessary measurements.
This includes determining the pitch or the height of your roof. This will give you the roof slope because you already have the horizontal measurements to which the truss will connect.
Your pitch depends on how steep you want it to be. A low-pitched roof has less height than a high-pitched roof, which may have a truss creating a maximum of 45 degrees.
You could use a roofing calculator to determine needed material quantities.
2. Make a plan
Once you have the roof measurements, draw out a plan with the roof style, shape, and spacing. Rafter spacing is the space between two successive trusses, comprised of a pair of rafters and a collar tie.
The rafter span is the length of the rafter from the ridge board to the edge of the roof. If your roof has a long rafter span, it is advisable to use struts and underpurlins to support the middle sections or to join two rafters.
3. Purchase the roofing materials
The type of materials you buy depends on the roof you want to build. This is greatly influenced by the type of roof cladding and the roof's slope.
Flat roofs require different materials compared to pitched roofs. There are various types of roof cladding to choose from, each with its pros and cons.
The type of roof cladding you choose is dependent on your location, environment, and local regulations. Talk to a roofing contractor or get local guidelines on selecting the best type.
4. Get ready to build
This includes on-site safety precautions and understanding the layers of the roof. The frame goes up first, followed by the roof deck, underlayment installation, and the roof covering.
Any insulation is placed in the attic after the ceiling is attached to the ceiling joists. This can be done before putting the roof deck or sheathing.
Secondary insulation includes ice and water dam protection in areas vulnerable to water damming. This could lead to roof collapse as a result of the extra load.
5. Install the truss
The truss may be hoisted with the help of a crane or by a trained workforce, whereby it is laid out flat and then put in an upright position once up. The truss spacing depends on a few things.
Support the weight of the truss or hold it in place by using temporary braces. This will hold the trusses in place till the roof frame is complete and can regulate itself.
Nail a plank of wood spanning the width of the roof to the wall and, at successive thirds, install three vertical planks that will hold the truss at three points.
Attach the two end trusses to the support braces.
6. Install the ridge board
The ridge board will connect the trusses at the ends to support the other roof framing. If the ridge board is not continuous from one end to another, and if local building codes allow it, you could use the bracing techniques to attach the two together.
You can use braces to hold the roof frames in place as you go about your project to make everything simpler. The ridge board might be heavy for a long span, and bracing it at points to the joists may be helpful.
7. Attach the rafters
Connect them with collar ties to make a firm secondary truss in pairs. Do this successively according to the rafter spacing chosen.
If the rafters span a long length, connect their underside to the ceiling joists using struts. Putting in underpurlins and securing them the right way makes it possible for these attachment points to be made.
8. Nail the roof sheathing
Nail your roof sheathing to the rafters; ensure it is attached at the base and the nails aren't hanging. Start from one corner of the base and move across and upwards for a good finish.
9. Install the drip edge
Connect the drip edge to the roof. This directs water to the gutter or off the roof, preventing water from seeping up the sheathing into the roof base.
10. Install the underlayment.
This protects the roof from water penetration if it seeps through a nail hole or damaged roof.
The underlayment is installed from the edge upwards to the ridge. Overlap the layers by 4"–6" and 8" over the other side of the roof to ensure a watertight cover.
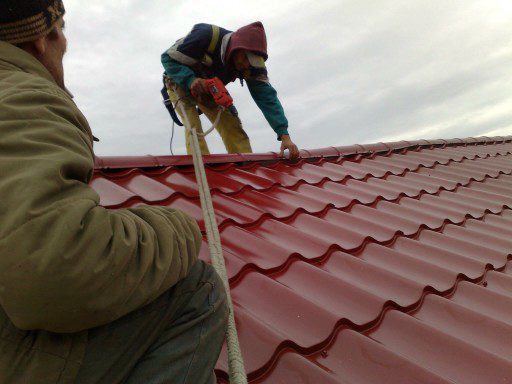
11. Install the roof cladding
Install the appropriate roof cladding as per the manufacturer's instructions.
A flat roof can be either level or angled. For angled flat roofs, the truss is shaped like a right square, with the hypotenuse being the roof's slope.
Building a flat roof requires some unique materials. Flat roofs tend to let off run-down water slowly and therefore are subject to prolonged water contact compared to sloped roofs.
For this reason, materials developed to serve the purpose of protecting the roof are used. Flat roofs, in general, usually have a 1–10-degree slope so that water can run down efficiently.
To construct a flat roof, you will need;
Installation follows the standard roof method but is different in terms of the frame type due to the slope. The most significant difference is in the roofing materials used.
The iso-board is put over the roof sheathing or deck for insulation.
An EPDM rubber membrane is used after the insulation. It is a light but tough material that offers protection from water.
The rubber primer is used when connecting rubber membranes at different parts of the roof, for example, when installing a porch roof or extending the roof. A seam tape is used after the two layers of rubber are primed to provide a good seal.
If you don’t have the building blueprints and are working on a roof renovation, you can estimate certain expenses by taking preliminary measures from the ground. Measurement of hip roofs, dormers, or hillside residences needs skill and specialized equipment from the ground level.
Let me reveal one of the best-kept secrets anyone should know when learning to measure a roof without getting off the ground. If you aren’t a home roofing company owner, you probably haven’t heard of this. It’s a fast and safe technique to calculate the size of just about any kind of roof.
So please continue to read our article to learn more about how to measure a roof, and then you'll be able to move on to How to Build a Roof!
As long as the old roof shingles haven’t been removed, or if you’ll be covering them up with new shingles, this approach is ideal for sizing up most roofs.
Measure the length of your roof plane’s eaves, directly or from the ground, and multiple by the length of the house. The length of the eaves may also be determined by counting the number of tabs along the ridges and eaves of conventional three-tab shingles (one tab is equal to 1 ft.). Bear in mind the rake overhangs when you measure a roof.
Once you’ve determined how long your rakes are, count the shingles from the eaves to the ridge to obtain the total length. You can figure out the length of the rakes by multiplying the number of shingles by the exposure, which is 5 inches.
Check whether the present shingles are conventional 12-inch by 36-inch shingles and not metric-sized ones. The area in square feet may be calculated by multiplying the eaves’ length by the rake’s length.
A different method must be used when measuring “hip” roofs, which have four sides and are shaped like a pyramid. It’s challenging to count shingles on these roofs, so you’ll have to rely on trial and error.
If you use the second method, you may have greater total square footage than what is there. Instead of underestimating the scope of a roofing project, it is better to overestimate it slightly.
Make sure you know how much space you have in your home before you begin measuring for Hip Roofs. Once you’ve multiplied the two values, add 1.35 to the result.
A Canon digital camera with a 10x “optical” and a 40x “digital” zoom will enable you to get up and personal while photographing the flashing and the present state of the roof’s covering.
Whatever camera you select, the “size of the zoom” is the most crucial feature since it lets you capture impressive shots of almost any roof from the ground.
The second most critical feature to look for in a digital camera for your property preservation business is that the camera’s flash gives enough light to allow you to shoot “above average” quality photos in complete darkness.
Using these strategies set to measure a roof without first trying them out is not a good idea. Compare the total square footage you obtain from measuring a roof with this amount after employing these two little calculations on your next roofing estimate.
You may then confidently determine whether or not to retire your ladder after observing how close the final result numbers are to each other.
In most cases multiplying the square footage by 10% to account for potential waste is how professionals measure a roof. Estimating a roof may be enough in a highly competitive market, such as Florida, after a storm. However, in a more limited market, you may require better estimating abilities to compete with your rivals and make a profit.
Here, we’ll guide you through how to quickly and accurately estimate the cost of a new roof on any structure style.
Before submitting a proposal for any roofing project, you must know the cost of the materials.
You need to know the roof’s dimensions to determine how much material you’ll need. To begin, you’ll need to figure out the roof’s overall area. To complete this task, you’ll need to determine the dimensions of the roof’s eave, hips, valleys, and rakes.
It is possible to receive the measures from the designs for a new construction roof installation, but you will need to measure it yourself if the roof is being replaced or repaired.
The eaves are often used as a starting point for determining the size of a roof. There is just one way to measure a gable roof. You’ll need to take measurements in two places if you have a hip roof.
When it comes to discovering how to measure a roof, there is only one way to get started on your Gable Roof.
Measure the width of the roof once you’ve taken the eave measurements. Gable roofs may be measured in width by hooking your measuring tape on one eave and running it across to the other eave. A hip roof’s breadth may be calculated using the same way.
You’ll need to measure the length of the roof once you’ve measured its breadth. Hooking up your measuring tape to either the eave or the ridge rafter will allow you to get an accurate measurement. However, you’ll have to repeat the process for the opposite ridge rafter to get a precise reading.
While determining how to measure a roof’s length, you must look at the ridge. The ridge and the length of a gable roof are the same. If you measure the ridge of a gable roof, you may calculate the total length of the roof.
After you’ve measured the length of the roof, you’ll need to measure the valleys and hips, too. Take these measurements to determine how much ridge cap (hip-covering) and valley metal you’ll need.
Some roof measures require more precision than others. For instance, it wouldn’t make much of a difference if your ridge, hip, or valley measurements were slightly incorrect.
A roof’s width or length might cost you extra money in materials if you don’t have correct measurements of its width or length. Alternatively, if you overestimate and consequently bid an overbid price, the work may not be done.
A discrepancy of 221 square feet of roofing materials might be worth several hundred dollars if a roof’s dimensions were misread as 101 square feet by 121 square feet.
The roof plan must always be drawn before you measure a roof. Any uncommon conditions, such as sections of soft patches or rotting wood or any other difficulties that may be present in the roof, must be included in your roof plan drawing.
Once you have all your measurements, you’ll be able to determine everything from the size of the area to its slopes to its angles. Let’s start with a basic roof and see how far we can go.
For any roofing job, it is essential to take exact measurements to prevent overbuying supplies.
A mistake like this might lead to over or underbuying, which is not a good thing for roofing.
As a result, it is imperative that you take exact measures of your flat roof, and even if you think you’ve got the dimensions correct, double-check them!
It’s good to have someone else take the measurements to be on the safe side.
Now that you know how to measure a roof precisely, what’s next?
It’s best to use a long measuring tape and thoroughly measure every inch of this structure’s length while it’s outdoors.
Please note that you don’t need to be on the flat roof to get an accurate measurement.
To have an accurate portrayal, take measurements from the street. You may get an incorrect measurement if you measure from the inside of your walls.
With your two measurements in hand, it’s time to calculate the membrane size you need for your project.
Calculating the area of a flat roof
It is possible to approach this computation of surface area and membrane size in several ways.
Calculation
Multiply the length (in feet) by the breadth (in feet) using a calculator or ready reckoner (in feet).
Example: 4m long by 3m wide is 12 square feet.
You’ll be able to order your membrane if you know the complete square footage of your flat roof.
Single-ply flat roof membranes are typically marketed in square meters.
Purchasing a conventional shed roof kit is simple; all you need are the dimensions you took during the installation.
If you don’t have the construction plans for a new roof, you may get a rough idea of the size and cost of the project by obtaining ground-level measurements. However, if you have an assistant, you may measure a gable or flat roof from the ground.
There is an app that can help measure a roof, mainly flat roofs. Permaroof offers a simple way to calculate what materials you need from accurate measurements.
A porch can be viewed as an outdoor gallery positioned in front of a house. Providing enough room for entry and exit from the house and a relaxing place is the goal of this design feature.
You can't always have a good time on your porch, especially when the weather is unfavorable, such as when the sun is scorching hot in the summer, snowing, when it is raining, or when there are strong winds gusts.
As a result, connecting a porch roof is more advantageous than you might imagine, and to get you started, here's how to create your ultimate outdoor living space.
First, it allows you to comfortably enjoy your outdoor living space by creating a friendly environment.
It allows you to leave non-weather-resistant items such as your shoes outside even when it's raining or snowing without worrying about them being damaged.
When it comes to connecting a porch roof to a house, it helps to be familiar with the essential components of roof construction. We will begin with the structure and work our way up to the roof cladding, which is the final covering.
The roof frame is a framework that holds the roof cladding and other sub-parts. It is composed of a few parts that each play an important role.
The truss is the part that defines the shape of the roof and is installed directly on the house frame. There are a few types of trusses that all serve to hold the weight of the roof components.
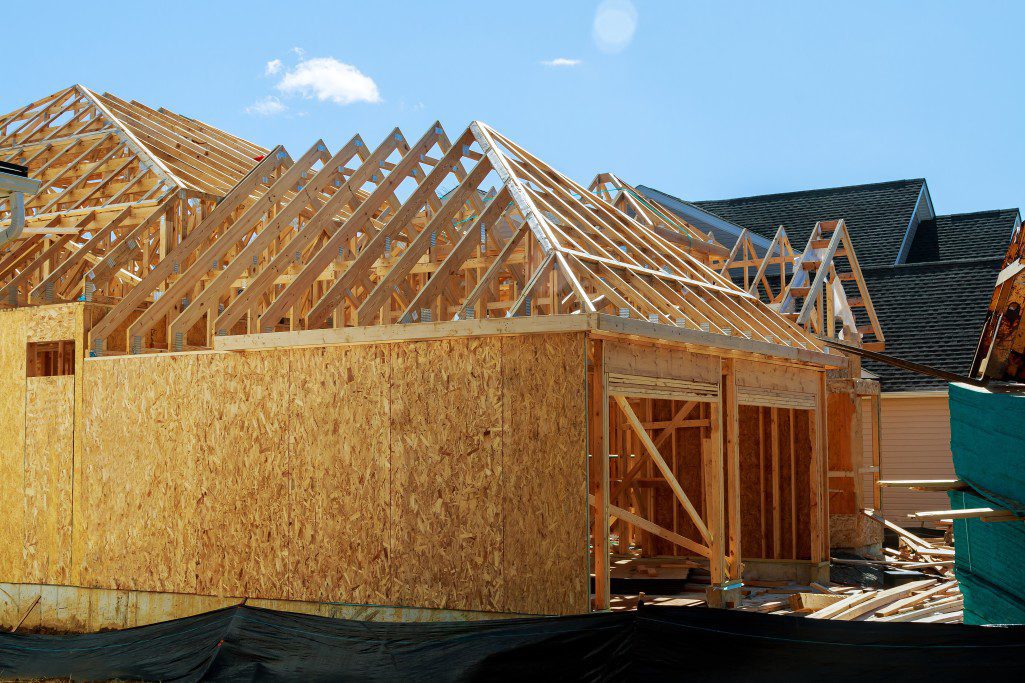
The rafters are horizontally placed on the truss to distribute the roof components' weight further and provide an attachment base. They define the slope of the roof, and the underpurlins connect them in the case of roofs with a great pitch or steep-sloped roofs to support further.
The roof struts transfer the load from the under purlins and other support frames. They are installed perpendicularly or vertically at an angle to serve their purpose.
The ridge board is the horizontal connection that ensures rafters(link) meet at a consistent point and stabilize these ends. It is the backbone, or spine, of the roof.
The roof hip is the corner end of two roof sections and can be defined as a vertical ridge board. The roof valley connects two roof parts with different angles or pitches and is often fixed with metal flashing for waterproofing.
The roof flashing is the metal that goes over the roof valleys and helps water flow away from the joint. It is also installed around air vents or chimneys.
Roof ties, or collar ties, complement ceiling joists and horizontally join rafters from two opposite roof slopes. They are fitted with opposite rafter pairs and form a basic "A" or triangle shape.
The valley board is installed over an existing roof slope on the rafters or roof cladding to provide a surface where the framework of another roof is attached. It is commonly used when building intricate roofs or roof extensions, like some types of porch roofs.
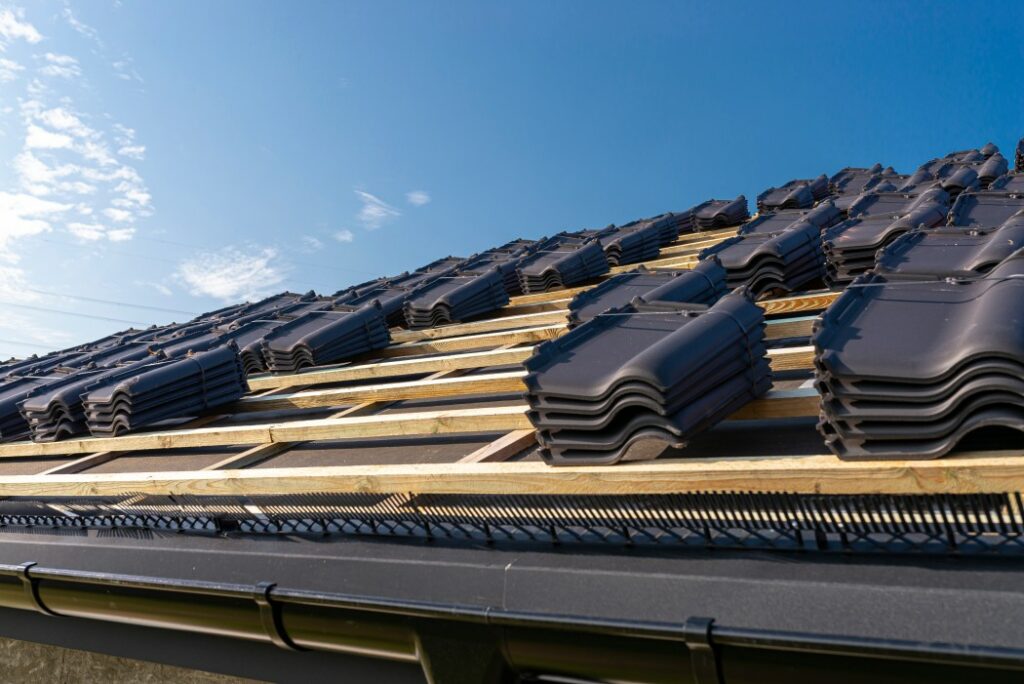
This is the part of the roof that offers the protective covering of the building.
Roof cladding is the material covering on a roof that protects the building. There are a few types, including roof shingles, metal sheeting, and roof tiles.
The roof deck, or roof sheathing, is the surface on which the secondary roof protection is installed. It is attached to the rafters and is commonly made of plywood for sheet decking or wooden boards for plank decking.
The roof underlayment is the protective sheet of plastic that offers a waterproof layer onto which the roof cladding is installed. Roof underlayment is vital as rain or ice can cause damming, weakening the roof frame due to excess weight.
Depending on how your porch is attached to the house and the length of the wall it's attached to, there are three ways you can connect porches.
This method is used when roofing a porch next to a 2-story house or a larger wall where attaching it to the roof wouldn't be possible. A two-story-tall porch wouldn't exactly be practical in this case.
This is also used when building regulations require the height of the porch to be at a specific level. The porch is attached to the wall using secure anchors or screw methods.
Fascia connections are the most popular method, where the patio roof complements the house. It provides a water-tight connection without modification to the roof gutters.
The vertical edge of the fascia connects the rafters, trusses, and gutter attachments and conceals the unsightly protruding boards.
This method connects a raised patio roof to a relatively low roof. The brackets are of different sizes that allow you to attach the porch to the house at your desired level.
When connecting a porch roof to your house, the method you choose will depend on your porch structure. Porches are generally classified into three categories, each with different attachment choices.
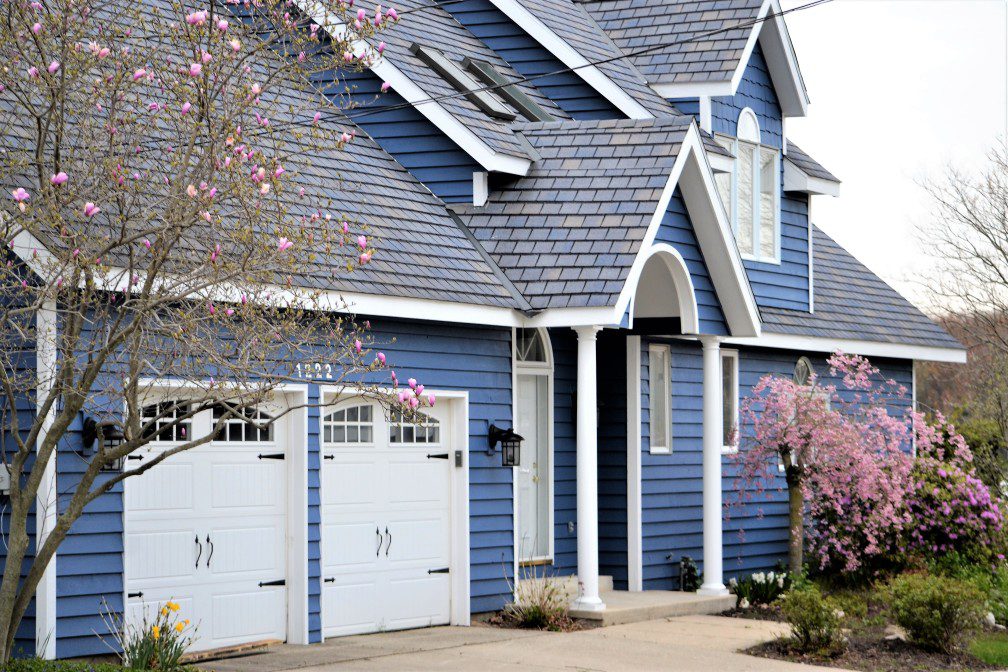
They are built over the house roof and have a more complex attachment method that requires flashing.
Gable roofs are commonly used and go well with gable porches. For aesthetic reasons, they are rarely attached to flat-roofed houses.
They feature sloped triangular shapes with a rise along the center. Therefore, installing them is a task, but their maintenance is low compared to other roof types.
The raised roof gives a sense of spaciousness. To achieve this, there are a few steps to follow:
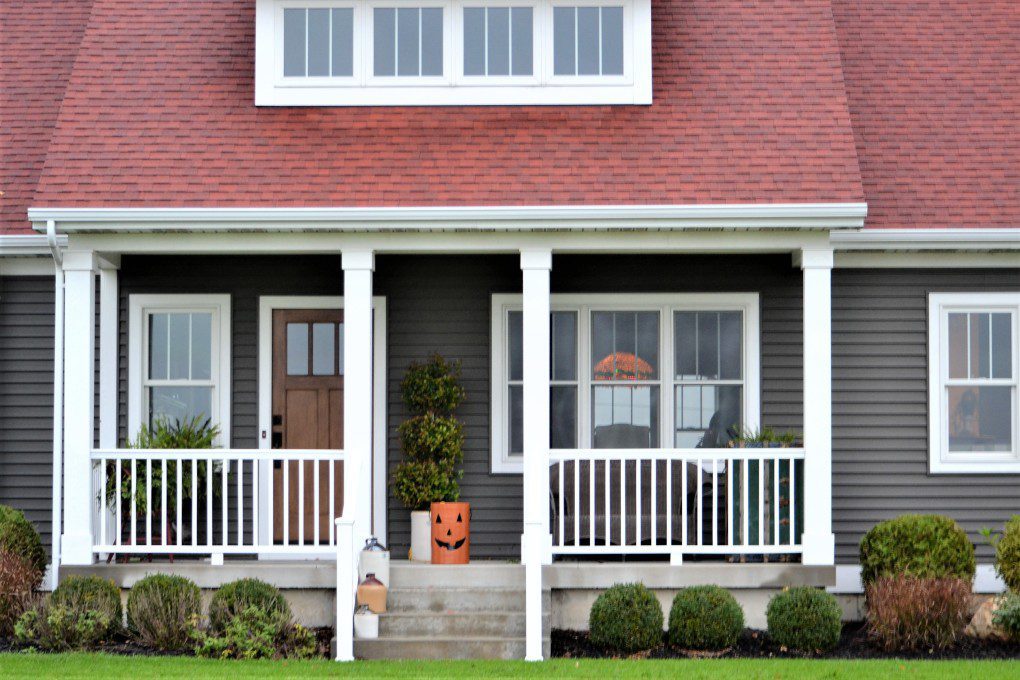
Generally, a shed porch has a flat-plane design, so building a shed porch roof is reasonably straightforward. Flat roofs and inclined roofs can both be covered with this system.
Quick note
Laying the metal flashing can be done before or after installing the underlayment, but it is best done after installing the roof deck. Following the roof underlayment installation, it will be used to create a water-tight connection between the two roofs and at the roof valleys.
The other alternative is to install the metal flashing after the roof underlayment and secure it with a caulk gun or roofing cement. After that, the shingles are installed and fastened to the flashing, resulting in a clean, attractive, flashed valley structure.
In addition, the two roofs may be joined using closed valleys. On the other side of the roof, the shingles are stretched with a 3–4-foot overlap.
These are then connected to the rest of the shingles to create a continuous expansion of the roof structure. Closed valleys give an impression of a continuous roof and an aesthetic look.
Flat porch roofs employ a rubber membrane instead of the common synthetic or felt underlayment. They need to run off rainwater as soon as possible, which leads to the adaptation of different materials.
An insulation layer called the iso-board is installed on the roof sheathing. The aim of connecting two flat roofs or a flat porch roof to a sloped roof is to maintain this water-tight setup.
Flat to flat roofs connect the rubber membranes using rubber primer at the connection and seam tape. The seam tape is double-sided to hold two rubber membranes, while the rubber primer serves to clean the surface to hold the seam tape.
Have you ever tried sticking tape to a rubber surface? It can be easily removed, and if it sticks, it has a poor attachment period. This necessitates using a rubber primer when connecting two EPDM rubber layers.
As mentioned, adding a porch roof to a house is can be very advantageous in several different areas, particularly unpredictable weather conditions such as heavy rain or snow!
However, working with roofs is not easy, so please reach out to a professional here at Mikku and Sons, and we'd be happy to help!
